










DIY Paper Doily Snowflakes: A Complete Guide to Creating Stunning Winter Decorations
The Magic of Paper Doily Snowflakes
There is something undeniably enchanting about transforming ordinary paper doilies into delicate, intricate snowflakes that capture the beauty of a winter wonderland. Paper doily snowflakes have become one of the most beloved DIY holiday crafts, celebrated for their elegance, simplicity, and the way they seem to hold a kind of delicate magic that store-bought decorations simply cannot replicate. Whether you are decorating your home for the holiday season or looking for a creative activity to share with children, these handmade snowflakes bring warmth and personality to any space.
What makes paper doily snowflakes so special is the inherent beauty of doilies themselves. Already featuring intricate lace-like patterns pressed into their design, doilies provide a natural head start for anyone hoping to create something that looks professionally crafted. The circular, symmetrical structure of a standard doily mirrors the six-fold symmetry found in real snowflakes, making them a surprisingly accurate artistic representation of nature’s own ice crystals. When light passes through the layered, folded paper, the effect is nothing short of breathtaking.
The craft itself has roots in a long tradition of paper cutting and folding that spans many cultures worldwide. From the Japanese art of kirigami to German Scherenschnitte, decorative paper cutting has been practiced for centuries as a way of creating beauty from humble materials. Paper doily snowflakes sit comfortably within this tradition, offering a modern and accessible take on an ancient skill. Even complete beginners can produce stunning results with minimal tools and just a little patience, making this one of the most rewarding crafts you can undertake during the winter months.
Why Doilies Work So Well for Snowflake Crafts
The structural characteristics of paper doilies make them uniquely suited to snowflake crafting. Their pre-punched, lacy borders create intricate edges that, when folded and cut, produce complex patterns without requiring any additional cutting along the outer rim. This means that even without advanced paper-cutting skills, crafters can achieve results that look detailed and professional. The thin, slightly translucent nature of most doily paper also lends the finished snowflakes a luminous quality, particularly when hung near a light source or window.
Doilies are available in a wide range of sizes, from tiny three-inch rounds perfect for gift tags and card decorations, to large twelve-inch varieties that make dramatic statement pieces when hung from the ceiling or displayed in a window. This range of sizes gives crafters tremendous flexibility in designing their holiday displays. Mixing different sizes creates a visually dynamic arrangement that mimics the natural variety found in real snowfall, where no two flakes are ever exactly the same size or shape.
Another practical advantage of using doilies is their affordability and wide availability. You can find paper doilies at most craft stores, dollar stores, and even many grocery stores, particularly during the holiday season. A single package typically contains enough doilies to create a whole collection of snowflakes, making this an extremely budget-friendly decorating option. For families looking to deck their halls without breaking the bank, paper doily snowflakes offer an ideal combination of beauty and economy that few other crafts can match.
Materials and Tools You Will Need
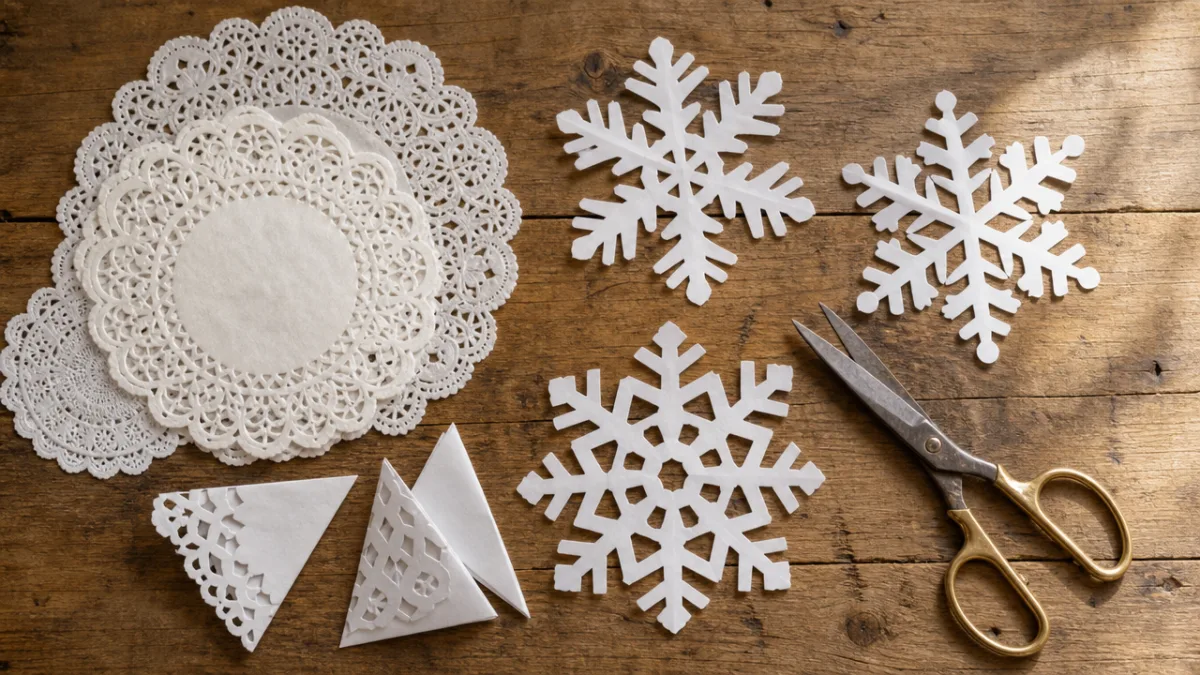
One of the greatest pleasures of making paper doily snowflakes is the minimal investment required in terms of supplies. The basic materials are few and easy to source, meaning you can often begin this project with items already found around the house. At its most essential, all you truly need are paper doilies, a pair of scissors, and something to hang your finished snowflakes with, such as thread, twine, or ribbon. However, gathering a few additional tools can expand your creative possibilities significantly and allow you to produce a broader range of designs.
For more elaborate snowflakes, a craft knife or precision cutting tool can help you achieve finer interior cuts with greater control than scissors alone. A self-healing cutting mat is a worthwhile investment if you plan to use a craft knife, as it protects your work surface and ensures clean, accurate cuts. Bone folders or similar creasing tools help produce sharp, crisp folds, which are essential for achieving the tight symmetry that makes these snowflakes so attractive. Some crafters also like to use a ruler for guiding straight cuts, though many prefer the organic variation that comes from freehand cutting.
Beyond the basics, there are several optional materials that can take your paper doily snowflakes from lovely to truly spectacular. Glitter, applied with a fine brush and craft glue along the edges or surface of the doily, adds a sparkling shimmer that is particularly effective in candlelight or near a Christmas tree. Metallic spray paint, available in silver, gold, and copper, can transform white doilies into gleaming ornaments with an almost otherworldly quality. Watercolor washes applied before folding and cutting create beautiful, subtle color effects that give each snowflake a unique tonal character.
Choosing the Right Doilies for Different Effects
Not all paper doilies are created equal, and the type you choose will significantly influence the final character of your snowflakes. Standard white paper doilies, which are the most common and widely available variety, produce classic, clean snowflakes with excellent contrast against most backgrounds. Their bright whiteness stands out beautifully against dark walls or colored backgrounds, and they photograph particularly well for sharing on social media or in handmade card designs.
For a more vintage or rustic aesthetic, consider seeking out doilies with a cream or ivory tone, or simply allowing white doilies to age slightly by leaving them in mild sunlight for a few days before use. This gives the paper a warm, antique quality reminiscent of delicate lacework from another era. Paired with natural twine and dried botanical elements like cinnamon sticks or eucalyptus, cream-toned doily snowflakes can form the centerpiece of a beautifully rustic, farmhouse-style holiday display.
Metallic doilies, which come pre-printed in gold and silver, offer yet another aesthetic direction. These ready-made glamorous options require no additional painting or glittering and produce snowflakes with immediate visual impact. They work particularly well as gift embellishments, table decorations, or elements within a more formal, elegant holiday tablescape. Regardless of which type of doily you select, the folding and cutting techniques remain essentially the same, so experimenting with different varieties is a wonderful way to discover which style best suits your decorating vision.
Step-by-Step Instructions for Basic Doily Snowflakes
Creating your first paper doily snowflake is a process that rewards patience and a light touch. Begin by selecting a doily of your preferred size and laying it flat on your work surface. Smooth out any wrinkles or creases gently with your fingers, taking care not to tear the delicate punched border. Starting with a clean, flat doily ensures that your folds will be even and precise, which is the foundation of a well-formed snowflake. Take a moment to study the pattern of the doily before you begin folding, as this will help you anticipate how the design will transform through the folding process.
The basic folding sequence for a six-pointed snowflake begins with folding the circular doily in half to form a semicircle. Press the fold firmly along the entire edge to create a sharp crease. Next, fold the semicircle into thirds by bringing one outer edge to meet the center point, then folding the remaining third over the top, as you would fold a letter to fit into an envelope. This creates a narrow wedge shape that represents one sixth of the total circle. Finally, fold this wedge in half once more, producing a small, thickly layered triangle that is ready for cutting.
Once your doily is folded into this small triangle, the cutting can begin. This is where your personal creativity truly enters the process, as there is no single correct pattern to follow. Simple snips along the folded edges create open diamond or oval shapes when the snowflake is unfolded, while more elaborate cuts produce complex, interlocking patterns. Cut slowly and thoughtfully, remembering that the design will be mirrored six times when the doily is fully opened. Avoid cutting completely across any single fold line, as this will cause the snowflake to fall apart into separate pieces rather than remaining intact as one unified form.

Unfolding and Finishing Your Snowflake
The moment of unfolding your cut doily is one of the most delightful surprises in all of crafting. Carefully open each fold in reverse order, smoothing each layer gently as you go. Do not rush this process, as the paper can tear along the cut edges if pulled apart too quickly. As the full design reveals itself, you may need to gently flatten any areas that have curled or lifted, which can be done by placing the opened snowflake under a heavy book for a few minutes. The result should be a symmetrical, beautifully patterned snowflake that showcases the unique combination of the doily’s original lace design and your own custom cuts.
To display your snowflake, thread a length of fine monofilament fishing line, white thread, or delicate ribbon through one of the open spaces near the edge of the doily. A small dab of clear craft glue can help secure the thread if the holes in the doily are too large to hold it in place on their own. For window displays, transparent suction cup hooks allow you to hang snowflakes without any damage to glass or walls. For ceiling displays, consider hanging snowflakes at varying lengths on a single piece of twine stretched between two points, creating a garland-style arrangement of cascading winter beauty.
If you wish to add embellishments to your finished snowflake, this is the ideal stage to do so. Apply a thin, even layer of craft glue around the outer edges or along specific design elements, then dust with fine white or iridescent glitter while the glue is still wet. Shake off any excess glitter over a sheet of paper and allow the snowflake to dry completely in a flat position before hanging. Alternatively, a light misting of silver or pearl spray paint applied from a distance of about twelve inches can add a subtle, frosted sheen that enhances the snowflake’s wintry character without obscuring its delicate detail.
Creative Variations and Advanced Techniques
Once you have mastered the basic paper doily snowflake, a whole world of creative variations opens up before you. One of the most popular advanced techniques involves layering multiple doilies of different sizes together before folding and cutting them as a single unit. When unfolded, these multi-layered snowflakes reveal a more complex, dimensional pattern with subtle variations in the depth and density of different areas. This technique works particularly well when combining a small, plain doily with a larger, more decoratively bordered one, allowing the contrasting patterns to complement each other in unexpected ways.
Another striking variation involves combining folded and cut doily snowflakes with three-dimensional sculptural elements. By leaving some sections uncut and gently curling them upward or downward using a pencil or the barrel of a pen, you can introduce a sense of movement and dimension that transforms a flat snowflake into something approaching sculpture. These three-dimensional snowflakes are particularly effective as table centerpieces, where their sculptural quality can be appreciated from multiple angles, catching the light differently as viewers move around them.
For those interested in creating truly one-of-a-kind pieces, the technique of wet folding offers fascinating possibilities. By lightly dampening the doily with water using a fine mist spray before folding, the paper becomes more pliable and can be coaxed into gentle curves and flowing shapes that would be impossible with dry paper. The dampened paper holds creases more softly, resulting in snowflakes with a more organic, fluid quality that contrasts beautifully with the rigidly geometric designs produced by conventional dry folding. Allow these wet-folded snowflakes to dry completely while pinned flat to a foam board, which will prevent warping as the moisture evaporates.
Incorporating Doily Snowflakes Into Broader Decor Projects
Paper doily snowflakes need not be limited to standalone hanging decorations. Their versatility makes them valuable elements in a wide range of broader craft and decorating projects. Framed behind glass with a dark background, a single large snowflake becomes an elegant piece of seasonal wall art. Group several frames of different sizes together in a gallery wall arrangement for a coordinated display that can be easily updated from year to year by simply replacing the snowflake inside each frame with a new design.
Doily snowflakes also make beautiful elements in handmade holiday cards and gift wrapping. Glue a small snowflake to the front of a blank card, add a simple greeting in silver or gold ink, and you have a handmade card with a professional, boutique quality that recipients will want to keep long after the season is over. As gift wrapping embellishments, they add an artisanal touch that elevates even the most simply wrapped package into something special. Secure the snowflake with a small loop of ribbon or thread so that the recipient can remove it easily and use it as a decoration in their own home.
On the table, paper doily snowflakes serve beautifully as placemats, charger underlays, or napkin decorations for a winter dinner party. Large doilies spread flat make surprisingly elegant placemats that can be discarded after use, eliminating laundry concerns while still providing a festive, dressed-up table setting. Smaller snowflakes can be lightly adhered to pillar candles using a thin layer of decoupage medium for a stunning, personalized candleholder that glows beautifully when lit from within. Always exercise appropriate safety precautions and never leave decorated candles burning unattended.

Tips for Displaying and Preserving Your Snowflakes
The careful display of your finished paper doily snowflakes can make the difference between a charming seasonal touch and a truly breathtaking decorative installation. Grouping snowflakes in clusters of varying sizes creates a visually compelling arrangement that draws the eye and rewards closer inspection. When planning a window display, consider the view from both inside and outside the home, as snowflakes backlit by interior lighting can create a magical effect visible from the street that adds warmth and welcome to your home’s exterior appearance during the dark winter months.
Color and contrast play important roles in how effectively your snowflakes read against their background. Pure white snowflakes appear most dramatic against deep, saturated colors such as navy blue, forest green, or charcoal gray. Against lighter walls, consider adding a light wash of pale blue watercolor to your doilies before crafting, which will give them just enough tonal definition to stand out clearly. Alternatively, hanging snowflakes in front of a window allows natural light to illuminate them from behind, creating a glowing, almost ethereal effect that requires no background contrast at all.
Proper storage is essential if you wish to preserve your paper doily snowflakes for use in future seasons. Because of their delicate structure and the many small cuts that compromise the paper’s integrity, doily snowflakes are fragile and require careful handling. Store them flat between sheets of tissue paper inside a rigid lidded box or a shallow storage container. Label the container clearly and stack boxes no more than two or three deep to avoid crushing the snowflakes under excessive weight. Stored in this way and kept in a cool, dry location away from direct sunlight, well-made paper doily snowflakes can last for many years and become cherished seasonal traditions in their own right.
Sharing the Craft With Others
One of the most wonderful aspects of paper doily snowflake making is how naturally it lends itself to being shared. Hosting a snowflake-making session with friends or family members is a lovely way to spend a winter afternoon, combining creativity, conversation, and the satisfaction of making something beautiful together. Set up a dedicated workspace with all materials laid out in advance, provide a selection of different doily sizes and scissors of varying types, and allow participants to experiment freely with their own designs. The process of comparing and admiring each other’s different snowflakes is a joy in itself.
With children, paper doily snowflake making offers an engaging introduction to concepts of symmetry, geometry, and pattern that connect meaningfully to school curriculum topics while feeling nothing like schoolwork at all. Younger children can participate in simpler versions of the activity by making freeform cuts with blunt-tipped scissors, while older children can be guided through the more precise folding sequences and introduced to the challenge of planning their cut patterns in advance. The surprise and delight on a child’s face when they unfold their first snowflake and see the pattern revealed is an experience that creates lasting memories.
Consider sharing your finished snowflakes as gifts in their own right. A carefully crafted large doily snowflake, mounted on a piece of dark card stock and slipped into a clear cellophane bag tied with a ribbon, makes a thoughtful and deeply personal handmade gift that carries the warmth of the time and care invested in creating it. In an era of mass-produced, disposable goods, a handmade gift of any kind communicates something genuine about the relationship between giver and recipient. A paper doily snowflake, humble in its materials yet refined in its appearance, does this beautifully, embodying the spirit of creative generosity that lies at the heart of the very best holiday traditions.








What do you think?
It is nice to know your opinion. Leave a comment.