










How to Use Old World Charm A1 Decoupage Fiber Paper: A Complete Guide
Decoupage has been a beloved craft for centuries, transforming ordinary objects into works of art through the careful layering of paper and adhesive. Among the many materials available to modern crafters, Old World Charm A1 Decoupage Fiber Paper stands out as an exceptional choice for anyone seeking to create pieces with authentic texture, depth, and a timeworn aesthetic. Whether you are a seasoned crafter or just beginning your decoupage journey, understanding how to work with this particular fiber paper will open up a world of creative possibilities that standard tissue or rice papers simply cannot match.
Old World Charm A1 Decoupage Fiber Paper is crafted with a unique fibrous texture that gives finished projects a distinctly organic, aged quality. Unlike smooth papers that can look flat or overly polished, fiber paper introduces subtle irregularities and a softness that mimics the look of aged linen, weathered maps, or antique manuscripts. This makes it especially popular for furniture upcycling, home décor accents, and mixed-media artwork where character and depth are the goals rather than pristine uniformity.
Before diving into your first project, it is worth taking a moment to familiarize yourself with the paper’s properties. Fiber paper is more delicate when wet than standard cardstock but remarkably durable once sealed. It tears beautifully rather than cutting cleanly, which is actually an advantage in decoupage because torn edges blend invisibly into surfaces when properly applied. Understanding these characteristics from the outset will help you handle the material with confidence and avoid the frustration that comes from treating it like ordinary craft paper.
Gathering Your Materials and Preparing Your Workspace
Success in any craft begins long before you pick up a brush, and decoupage with fiber paper is no exception. Before you begin, you will need to assemble a core set of supplies that work harmoniously with the Old World Charm A1 paper. At minimum, you should have a quality decoupage medium such as Mod Podge or a dedicated decoupage glue, a flat soft-bristled brush in a medium size, a brayer or bone folder for smoothing, a clean damp cloth for wiping away excess medium, and your chosen surface or base object. Having everything within arm’s reach before you begin prevents the paper from drying out mid-application.
Your workspace should be clean, flat, and protected with a silicone mat or wax paper to prevent accidental adhesion to your table. Good lighting is essential when working with fiber paper because the subtle textures and grain directions are much easier to see and appreciate under natural or bright artificial light. Many experienced crafters prefer to work near a window for this reason, and it also helps you spot air bubbles or lifted edges before they dry in place. Keep a spray bottle of clean water nearby as well, since lightly misting the paper before application can make it more pliable on curved or uneven surfaces.
Surface preparation is arguably the most important step in the entire process and one that beginners frequently underestimate. Whatever you are applying your fiber paper to — whether it is a wooden tray, a ceramic pot, a cardboard box, or a piece of furniture — the surface must be clean, dry, and free from dust, grease, or flaking paint. Sand any rough wooden surfaces lightly and wipe away the dust before applying a base coat of paint if desired. A primed or painted surface in a complementary color will prevent the base showing through the fiber paper in an undesirable way, and it ensures the decoupage medium bonds properly for a lasting finish.
Cutting and Tearing Techniques for Fiber Paper
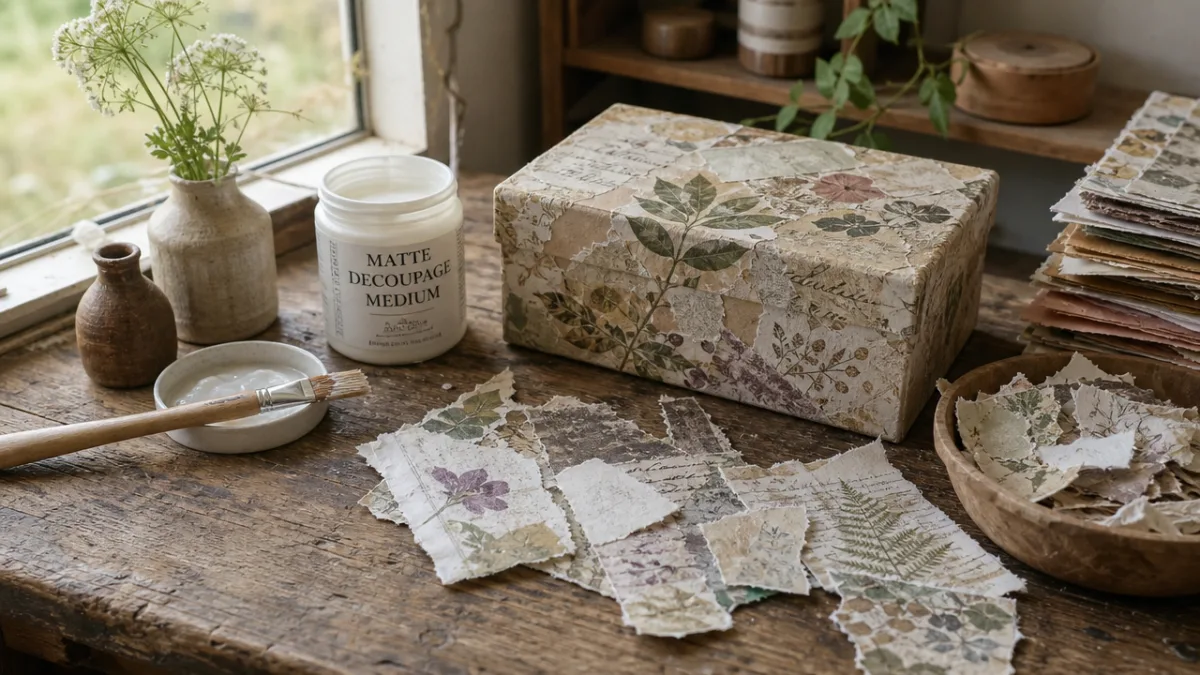
One of the most satisfying aspects of working with Old World Charm A1 Decoupage Fiber Paper is the way it tears. Unlike machine-cut edges, which are sharp and obvious, torn fiber paper edges feather out beautifully, blending almost seamlessly into the surface beneath. To tear the paper intentionally and cleanly, hold it firmly with both hands and pull slowly and steadily in the direction you want the tear to travel. You can guide the tear by scoring lightly with a dry fingernail or a bone folder first, though many crafters prefer the spontaneous quality of a completely freehand tear.
When you do need to cut the paper with scissors — for precise geometric shapes, templates, or when working on a project that calls for clean lines — use sharp, fine-pointed scissors and cut slowly. Avoid tearing through the fibers in a direction perpendicular to the paper’s grain if precision is important, as the fibers can pull and distort the edge unexpectedly. Some crafters find that lightly dampening the paper before cutting helps it behave more predictably, particularly along curves. A craft knife and cutting mat can also be useful for intricate designs, though it requires a confident, steady hand to avoid dragging the fibrous surface.
Layering torn pieces is one of the signature techniques that gives fiber paper decoupage its beautiful, dimensional quality. Rather than covering a surface with a single large sheet, consider tearing your paper into irregular pieces of varying sizes and overlapping them as you work. This approach mirrors the look of antique papier-mâché and creates a rich, layered surface that catches light differently across its terrain. Varying the orientation of the fibers in adjacent pieces adds even more visual interest and reinforces the organic, handmade character that makes this medium so appealing to designers and decorators alike.
Applying the Fiber Paper to Your Surface
Application is the heart of the decoupage process, and with fiber paper it requires a gentle touch and a methodical approach. Begin by applying a thin, even layer of decoupage medium directly to the surface you are working on, covering an area slightly larger than your piece of paper. Work in sections rather than attempting to coat the entire surface at once, especially on larger projects, because the medium can begin to dry before you have positioned all of your pieces. Use smooth, even strokes with your brush and avoid overworking the medium, which can cause it to become gummy or stringy.
Lay your piece of fiber paper gently onto the wet medium, starting from one edge and lowering it gradually to avoid trapping large air bubbles underneath. Once the paper is in place, use your fingers or a brayer to smooth it outward from the center, working toward the edges to release any trapped air. Be very gentle during this step — wet fiber paper is fragile, and pressing too hard or moving too quickly can cause it to tear or pill. If a small bubble remains stubbornly in place, you can prick it carefully with a pin and smooth it flat once the medium has partially dried.
Once the paper is smoothed down, apply another thin coat of decoupage medium over the top, brushing gently in one direction to avoid disturbing the fibers. This top coat seals the paper in place and begins building the protective layers that will ultimately give your finished piece its durability and finish. Allow each coat to dry fully before adding the next — this typically takes between fifteen and thirty minutes depending on humidity and the thickness of the medium applied. Rushing this step is the single most common mistake in decoupage work and leads to cloudy, uneven finishes that are difficult to correct once dry.
Working with Curves, Corners, and Three-Dimensional Surfaces
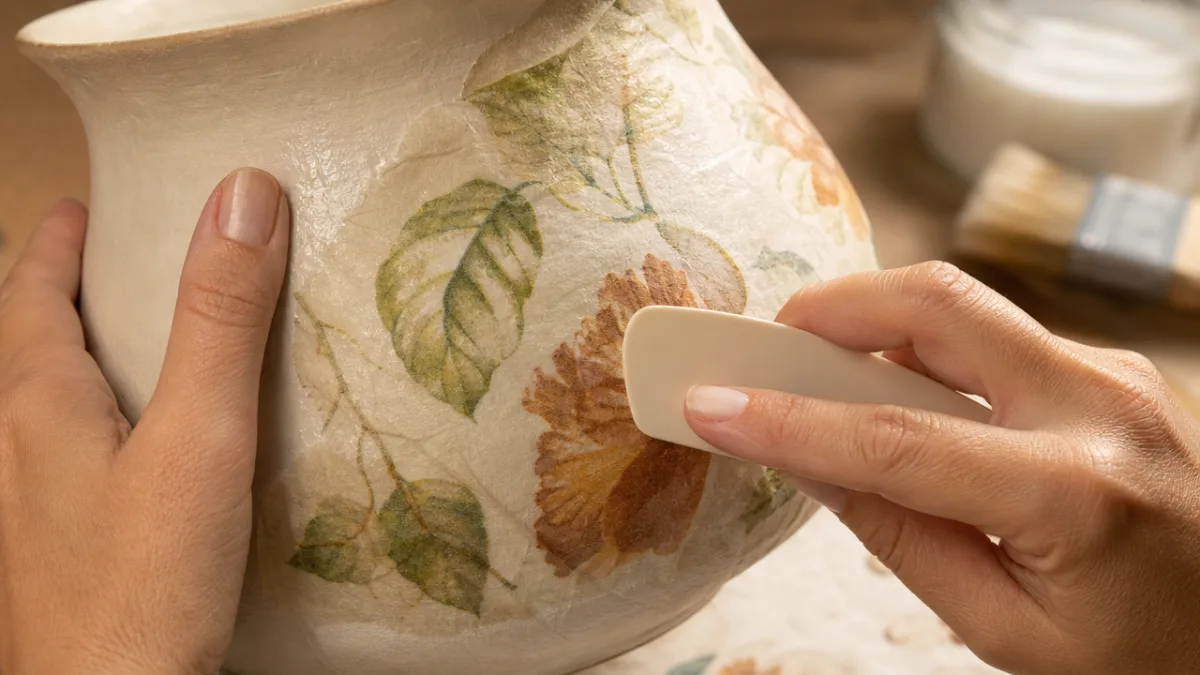
Flat surfaces are the easiest starting point for any decoupage project, but the real artistry of working with Old World Charm A1 Fiber Paper emerges when you tackle curved vases, rounded furniture legs, or three-dimensional objects with complex contours. The fibrous nature of this paper actually lends itself beautifully to curved surfaces because the fibers have a slight natural stretch and flexibility that smoother papers lack. The key is to work with smaller pieces rather than attempting to wrap large sections of paper around curves, which almost inevitably leads to bunching, tearing, or lifting edges.
For convex surfaces like the outside of a bowl or a rounded box lid, tear your paper into smaller, roughly triangular or irregular pieces and apply them one at a time, slightly overlapping the edges as you go. Think of the technique like applying mosaic tiles, building up the surface piece by piece in a way that accommodates the shape naturally. On concave surfaces, such as the inside of a bowl or a recessed panel, a light misting of water on the paper before application will help it conform to the shape without resisting the curve. Always smooth from the center outward and allow gravity to assist you by turning the object as you work.
Corners and edges on boxes, frames, and furniture pieces require special attention because they are the most vulnerable areas and the most visually scrutinized. Fold the paper neatly around edges wherever possible, mitering the corners much as you would wrap a gift, and trim any excess with fine scissors before the medium dries. Alternatively, many crafters prefer to treat the edges as an intentional design element, allowing the frayed fibers to extend slightly beyond the edge for a deliberately rustic, handcrafted effect. This approach is especially fitting given the Old World Charm branding of the paper and can look stunning on farmhouse-style furniture or vintage-inspired décor pieces.
Adding Color, Texture, and Distressing Effects
One of the most exciting aspects of working with Old World Charm A1 Decoupage Fiber Paper is how beautifully it accepts additional layers of color and texture. Because the paper has an inherently organic surface, paint applied over sealed fiber paper takes on a wonderfully uneven, aged quality that is very difficult to replicate on smooth surfaces. Dry-brushing a contrasting or complementary color over a sealed fiber paper surface is a particularly effective technique — load a stiff brush with a small amount of paint, wipe most of it off on a paper towel, and then drag the nearly dry brush lightly across the textured surface to highlight the raised fibers and create a subtle shimmer of color.
Antiquing washes are another technique that pairs exceptionally well with fiber paper’s texture. Mix a small amount of raw umber, burnt sienna, or black craft paint with water to create a thin wash, then brush it liberally over a sealed surface and immediately wipe back the excess with a damp cloth or dry brush. The wash will settle into the recesses of the fiber texture, emphasizing the depth and dimension of the surface while the raised areas remain lighter. This technique instantly transforms a newly crafted piece into something that looks as though it has spent decades in a Provençal farmhouse or a European antique shop.
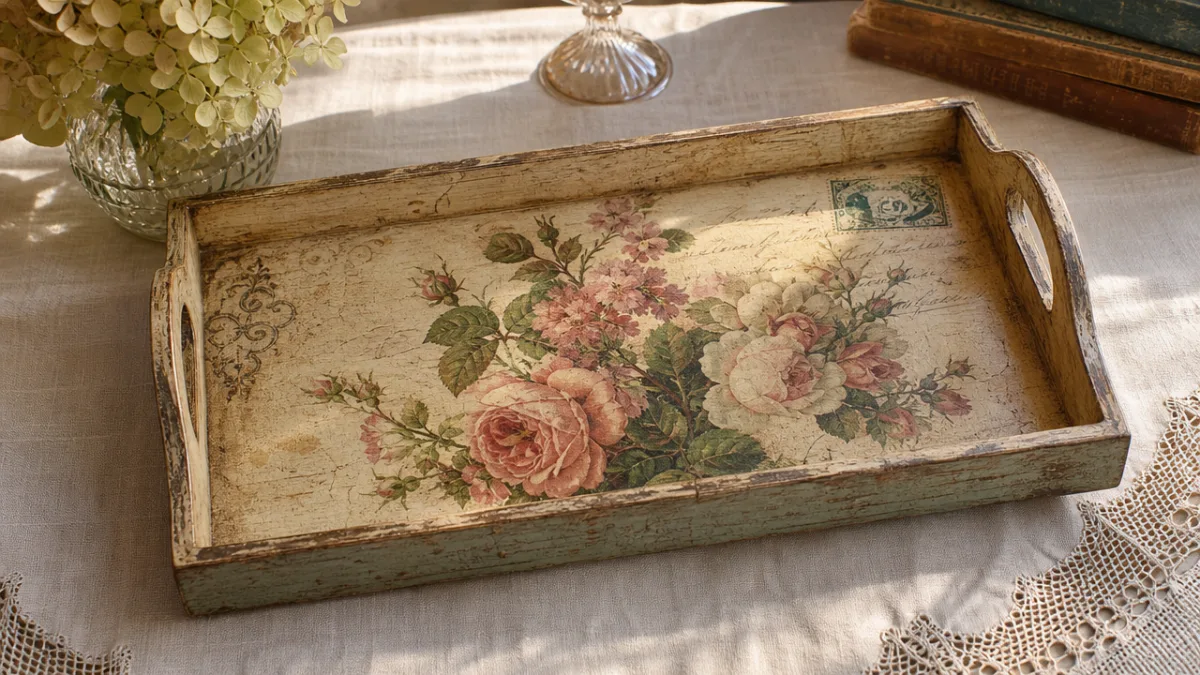
Distressing is a natural companion to the Old World Charm aesthetic and can be achieved through several methods once your decoupage is fully cured. Lightly sanding the surface with fine-grit sandpaper after sealing will soften edges and wear through the uppermost layers of paint and medium to reveal glimpses of the base coat or wood beneath, creating authentic-looking wear patterns. Concentrating your sanding on corners, edges, and raised details mimics the way genuine antiques age through use. You can also add crackle medium beneath a top coat of paint to create the illusion of genuinely aged, cracked paint over the fiber-textured surface, a combination that is particularly dramatic on furniture pieces and mirrors.
Sealing, Finishing, and Long-Term Care
A properly sealed finish is what transforms a lovely but fragile decoupage project into a durable, lasting piece you can actually use and enjoy. After completing all of your paper application and any additional paint or distressing effects, allow the piece to cure fully for at least twenty-four hours before applying your final protective coats. For items that will see regular handling or use — tabletops, trays, boxes — a minimum of three to four coats of a good quality sealer is recommended. Decoupage medium itself can serve as a sealer, but many crafters prefer to finish with a dedicated varnish or polyurethane for maximum durability, particularly on functional pieces.
The choice of finish — matte, satin, or gloss — significantly affects the final look of your piece and should be considered carefully in relation to the aesthetic you are trying to achieve. A matte finish is most consistent with the Old World Charm aesthetic, preserving the natural, unpretentious quality of the fiber texture without adding any artificial sheen. Satin finishes strike a pleasing middle ground that works well for decorative pieces that benefit from a little luminosity. Gloss finishes, while highly protective and dramatic on some projects, can look at odds with the organic, antique character of fiber paper decoupage and are best reserved for contemporary or pop-art inspired applications.
Long-term care of your finished pieces is straightforward but worth understanding to preserve the beauty of your work. Fiber paper decoupage that is properly sealed is surprisingly resilient and can be wiped clean with a barely damp cloth. Avoid soaking or prolonged water exposure, harsh chemical cleaners, and abrasive scrubbing, all of which can eventually lift the paper or cloud the finish. If you display finished pieces outdoors or in very humid environments, consider applying an outdoor-rated varnish as your final protective layer. With reasonable care, a well-executed piece of fiber paper decoupage will remain beautiful and intact for many years, a genuine testament to both the quality of the Old World Charm paper and the craft of decoupage itself.
Project Ideas and Creative Inspiration
Now that you understand the techniques involved, it is worth considering the wide range of projects that lend themselves beautifully to Old World Charm A1 Decoupage Fiber Paper. Furniture upcycling is one of the most rewarding applications — a tired side table, a thrift-store dresser, or a plain wooden headboard can be completely transformed with fiber paper decoupage, especially when combined with distressing techniques and antiquing washes. The large A1 format of the paper makes it particularly practical for furniture scale projects, reducing the need for extensive piecing and allowing for expansive, sweeping applications of texture.
Smaller decorative objects offer a wonderful starting point for those new to the medium. Wooden frames, terracotta pots, glass vases, papier-mâché boxes, and ceramic dishes all accept fiber paper beautifully and can be completed in a single crafting session. These smaller projects are ideal for experimenting with different torn-edge effects, layering techniques, and color combinations before committing them to a larger, more ambitious piece. They also make wonderfully personal handmade gifts, especially when combined with thoughtful paint colors or personalized design elements that reflect the recipient’s taste.
Mixed-media artists will find that Old World Charm A1 Fiber Paper integrates seamlessly into collage, journal art, and canvas work. The paper can be layered directly onto canvas with gel medium, combined with oil pastels, stamped with ink, stenciled, or used as a textural background for acrylic painting. Its fibrous surface holds ink and paint in ways that create spontaneous, unpredictable effects that are endlessly fascinating to explore. Whether you are creating an art journal spread, a mixed-media canvas for your wall, or an elaborate shadow box, this fiber paper brings an irreplaceable warmth and tactility that elevates any project from merely decorative to genuinely artistic.
- Furniture upcycling: Dressers, side tables, headboards, and chairs all benefit enormously from fiber paper decoupage combined with distressing and antiquing techniques for a truly bespoke vintage look.
- Home décor accents: Frames, trays, vases, lamp bases, candle holders, and decorative boxes are quick and satisfying projects perfect for beginners and experienced crafters alike.
- Wall art and canvas work: Use fiber paper as a textured background layer for acrylic or mixed-media paintings, or create standalone fiber paper collage art in frames or on gallery-wrapped canvases.
- Gift and stationery items: Decoupage notebooks, gift boxes, and keepsake tins make beautifully personal handmade gifts that show real thought and creative investment.
- Garden and outdoor décor: With appropriate outdoor sealing, fiber paper can be used on terracotta pots, wooden planters, and garden signs for a charming, weathered garden aesthetic.
The versatility of Old World Charm A1 Decoupage Fiber Paper is genuinely difficult to overstate. As you grow more comfortable with the material’s properties and behavior, you will find yourself seeing potential projects everywhere — in thrift-store furniture, in plain garden pots, in the blank canvas of a new journal. The craft rewards patience, gentle handling, and a willingness to let the inherent beauty of the fiber paper guide your creative decisions rather than forcing it into rigid, overly controlled applications. Trust the texture, embrace the organic quality of torn edges and layered depth, and you will consistently achieve results that feel authentically handcrafted and full of the timeless charm that inspired the paper’s very name.








What do you think?
It is nice to know your opinion. Leave a comment.