










DIY Fabric Bracelet Tutorial: Beautiful Jewelry from Fabric Scraps
There is something deeply satisfying about transforming leftover fabric scraps into wearable art. Fabric bracelets have been a beloved craft tradition across many cultures, offering a creative outlet that requires minimal investment but yields genuinely beautiful results. Whether you are a seasoned crafter or someone who has never picked up a needle and thread, this comprehensive guide will walk you through everything you need to know to create stunning fabric bracelets from materials you likely already have at home.
The beauty of fabric bracelet making lies in its accessibility and versatility. Unlike many jewelry-making crafts that require expensive tools, specialized materials, or years of skill development, fabric bracelets can be made by anyone with a pair of scissors and some fabric remnants. This craft is wonderfully eco-conscious as well, giving new life to scraps that might otherwise end up in a landfill and transforming them into something genuinely lovely and wearable.
Throughout this tutorial, we will explore multiple techniques ranging from simple braided styles to more intricate wrapped and knotted designs. By the end, you will have a thorough understanding of the craft and enough confidence to experiment with your own designs, color combinations, and embellishments. Let us begin this creative journey together and discover just how much potential is hiding in your fabric scrap bin.
Materials and Tools You Will Need
Before diving into the actual bracelet-making process, it is essential to gather all the materials and tools you will need. Having everything organized and within reach before you begin will make the crafting process much smoother and more enjoyable. The good news is that most of the supplies are either already in your home or can be purchased very inexpensively at any craft or fabric store, keeping this project budget-friendly from start to finish.
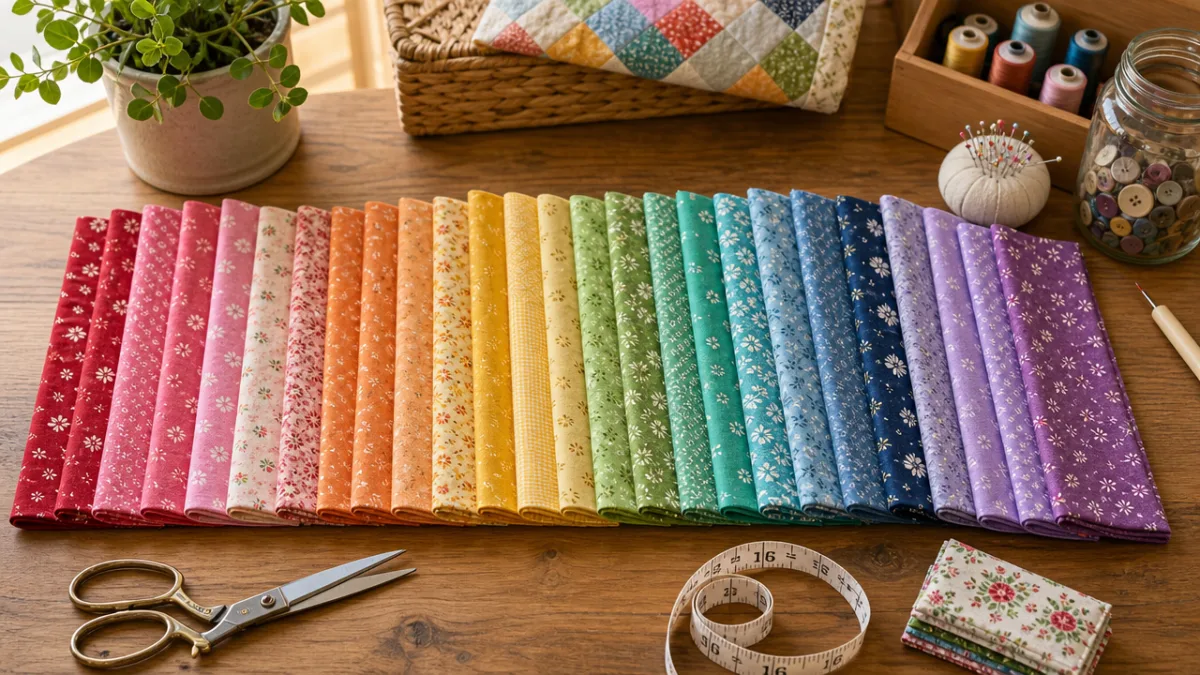
For fabric selection, you will want to look through your scrap bin for pieces that are at least half an inch wide and long enough to wrap around your wrist two or three times with some extra length for braiding or knotting. Cotton fabrics work beautifully for beginners because they are easy to handle and do not fray excessively. However, silk scraps create an elegant finished product, denim strips make for a rugged and stylish look, and jersey knit fabric offers a stretchy, comfortable fit. The key is choosing fabrics that complement each other in color and texture.
In addition to fabric, you will need a few basic tools to complete your bracelets. A sharp pair of fabric scissors is essential for cutting clean, even strips. A ruler or measuring tape will help ensure consistency in strip width. Fabric glue or a needle and thread will be needed for securing ends. Optional embellishments such as buttons, beads, charms, or ribbon can be gathered as well. Some crafters also find that a clipboard or a piece of cardboard with a binder clip is helpful for holding one end of the bracelet steady while braiding or wrapping.
- Fabric scraps in complementary colors and patterns, each strip cut to approximately half an inch wide and twelve to fifteen inches long
- Sharp fabric scissors for clean, precise cuts
- Measuring tape or ruler to maintain consistent strip widths
- Fabric glue, needle, and thread, or both for securing knots and ends
- Optional: buttons, beads, charms, snaps, or Velcro for closures and decoration
- A clipboard or clamp to hold your work steady during braiding
- An iron for pressing fabric strips flat before you begin, which makes handling much easier
Preparing Your Fabric Strips
Proper preparation of your fabric strips is arguably one of the most important steps in creating a polished, professional-looking bracelet. Many beginners skip or rush through this stage, and it shows in the finished product. Taking the time to cut, press, and organize your strips before you begin braiding or wrapping will make the entire process easier and result in a bracelet you will be truly proud to wear or give as a gift.
Start by washing and drying any fabric scraps that have not already been laundered. This pre-washing step is particularly important if you plan to give the bracelet as a gift, since it removes any residual chemicals from the fabric and pre-shrinks it so your finished bracelet will not become misshapen after its first washing. Once your fabrics are clean and dry, press them flat with an iron set to the appropriate temperature for the fabric type. Wrinkle-free fabric is significantly easier to cut into even strips and to work with during the braiding or wrapping process.
When cutting your strips, decide on a consistent width based on the style of bracelet you are making. For a delicate, fine bracelet, strips of about a quarter to half an inch wide work well. For a bolder, chunkier look, strips of three-quarters of an inch to a full inch are more appropriate. Use a ruler and fabric marker or chalk to draw light cutting lines before you cut, especially if you are working with a patterned fabric where eyeballing the width is difficult. Cut your strips on the straight grain of the fabric whenever possible, as this will minimize fraying and help your strips lie flat as you work.
For a cleaner appearance, consider folding the raw edges of each strip toward the center lengthwise and then folding the strip in half again before ironing it flat. This technique essentially creates a bias tape-style strip that hides all raw edges and gives your bracelet a much more refined, finished look. While this step requires a bit more time and patience, the difference in the final appearance is remarkable, especially when working with fabrics that fray easily or have a right and wrong side that you want to control carefully.
The Classic Three-Strand Braid Bracelet
The three-strand braid is the most fundamental fabric bracelet technique and the perfect starting point for anyone new to this craft. Even if you have never braided anything more complex than hair, you will find this method intuitive and quick to learn. The finished bracelet has a timeless, casual elegance that works for all ages and personal styles, making it a perfect project for crafters of any experience level and an ideal handmade gift for friends and family members of all tastes.
To begin, cut three strips of fabric, each approximately fifteen to eighteen inches long and half an inch wide. These can be three different colors or patterns for a vibrant, mixed look, or three versions of the same color in different prints for a more subtle, tonal effect. Tie the three strips together in a simple overhand knot approximately two inches from one end, leaving those short tails free as they will become part of your closure mechanism. Secure the knotted end to your work surface using a clipboard, a piece of tape, or by having a helper hold it steady.
Begin braiding by bringing the right strip over the center strip, then the left strip over the new center strip, continuing this alternating pattern all the way down the length of your strips. Maintain consistent tension as you braid, pulling each strip firmly but not so tightly that the braid puckers or twists. The braid should lie flat and even, with each strand clearly visible and contributing equally to the overall pattern. Continue braiding until you have approximately two inches of strip length remaining, then tie another overhand knot to secure the braid in place.
For the closure, you have several attractive options. The simplest is to tie the two knotted ends together around your wrist, using the short tails like ties on a friendship bracelet. For a more polished look, you can sew or glue a small button to one end and create a small loop with the fabric tails on the other end to serve as a buttonhole closure. Snap fasteners, small hook-and-eye closures, or even a short length of Velcro can also be used to create a bracelet that is easy to put on and take off without assistance.
The Wrapped and Knotted Bracelet
The wrapped and knotted style takes fabric bracelet making to a more sophisticated level, creating a piece that looks more like purchased jewelry than a craft project. This technique involves wrapping fabric strips tightly around a base cord or around each other in a controlled pattern, creating a smooth, colorful surface that can be embellished in countless ways. While it requires a bit more patience than simple braiding, the wrapped bracelet rewards that patience with a genuinely stunning result that is sure to attract compliments.
To create a basic wrapped bracelet, you will need a base made of either a thick cord, a length of braided fabric, or even a stack of three or four fabric strips held together. This base should be cut to your wrist measurement plus about two inches for the closure. Then cut a long, thin wrapping strip in a contrasting or complementary color, aiming for a strip that is about a quarter inch wide and at least three times the length of your base, since wrapping uses fabric much faster than braiding does.
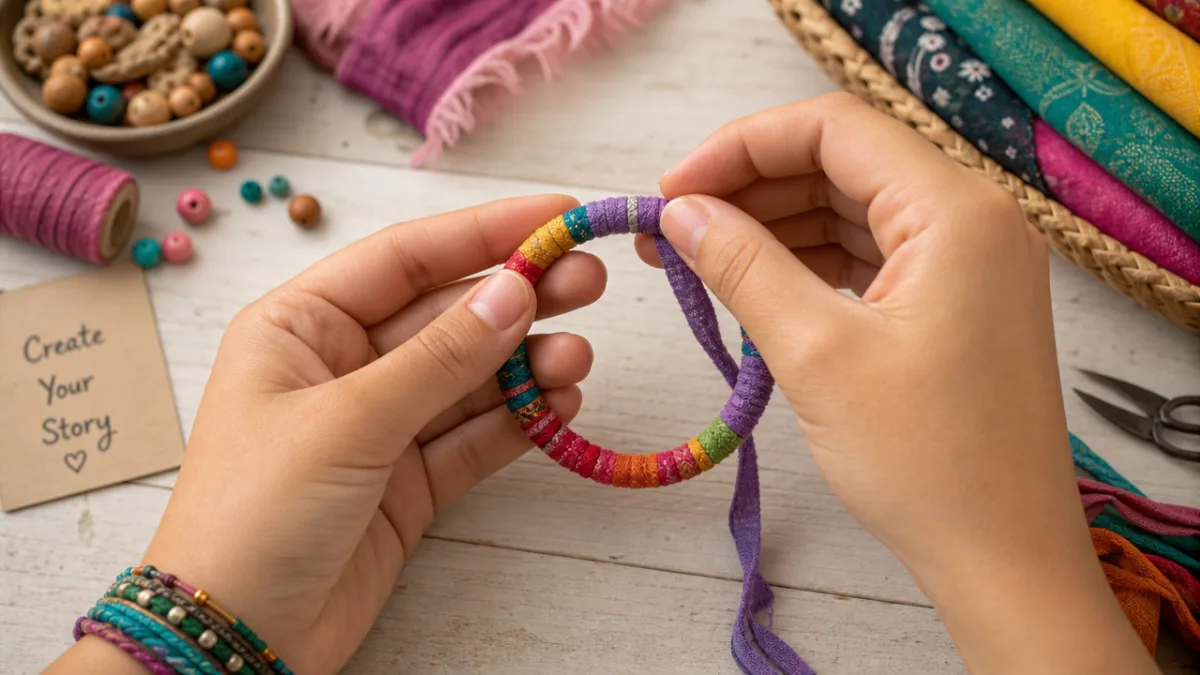
Secure one end of your wrapping strip to one end of the base with a small dab of fabric glue or a few tight stitches, then begin wrapping the strip tightly and evenly around the base, angling it slightly with each wrap so that it spirals smoothly along the length. Keep the wraps as close together as possible to avoid gaps, and maintain consistent tension so the wrapping stays smooth and does not bunch or pucker. When you reach the end of your wrapping strip, tuck the tail underneath the last few wraps and secure it with glue or a stitch before continuing with a new strip if needed.
The true magic of the wrapped bracelet lies in the opportunities for color play and pattern making. You can switch wrapping colors partway through to create bold color-block sections, alternate between two colors to create a striped effect, or use a variegated fabric to create a naturally shifting gradient of color. Knotting the wrapping strip at intervals rather than wrapping continuously creates a textured, macramé-inspired look. Small beads threaded onto the wrapping strip before each wrap will add sparkle and dimension to your finished bracelet, making it even more eye-catching and unique.
Adding Embellishments and Personal Touches
One of the greatest joys of making fabric bracelets is the nearly limitless opportunity for personalization and creative embellishment. Once you have mastered one or two basic techniques, you will find that the real fun begins when you start adding decorative elements that make each piece truly one of a kind. Embellishments can range from found objects and vintage treasures to new craft store supplies, and the process of selecting and incorporating them is a genuinely enjoyable creative exercise in itself.
Buttons are among the most versatile and charming embellishments for fabric bracelets. A single large, decorative button can serve both as a focal point and as a functional closure. A series of smaller buttons sewn along the length of a braided bracelet creates a whimsical, playful look that appeals particularly to children but is charming on adults as well. Vintage buttons collected from thrift stores or salvaged from old clothing add a sense of history and uniqueness to each piece. When sewing buttons onto fabric bracelets, use a doubled thread and secure the stitches very firmly, since buttons on bracelets receive considerable stress during daily wear.
Beads and charms offer another wonderful avenue for embellishment. Small wooden beads can be threaded directly onto fabric strips before braiding, so they become incorporated into the braid itself rather than sitting on the surface. Glass seed beads can be strung onto the wrapping strip in a wrapped bracelet to add shimmer and texture. Metal charms, available in endless shapes and themes from craft stores, can be attached to the finished bracelet using small jump rings. Consider personalizing bracelets with letter beads, birthstone-colored glass beads, or charms that reference the recipient’s hobbies or interests for a truly thoughtful handmade gift.
- Choose your base embellishment theme before you begin the bracelet so that your fabric color choices will coordinate beautifully with your decorative elements.
- Secure all beads and charms very firmly using strong thread, fabric glue, or small jump rings, testing each attachment before considering the piece complete.
- Consider the weight of your embellishments relative to the fabric base, since very heavy charms can cause a lightweight fabric bracelet to sit unevenly on the wrist.
- Mix different types of embellishments for a layered, eclectic look, combining buttons, beads, and fabric roses on a single statement bracelet.
- Remember that sometimes restraint is the most elegant choice, allowing a particularly beautiful fabric or braid pattern to speak for itself without additional decoration.
Caring for Your Fabric Bracelets and Styling Tips
Fabric bracelets, like all handmade items, require a certain amount of care to maintain their beauty over time. Understanding how to properly care for your creations will help them last much longer and continue looking their best through regular wear. The good news is that most fabric bracelets are quite durable and easy to care for, especially if they were made from pre-washed fabrics and finished with secure knots and stitching from the very beginning of the construction process.
For washing, the safest approach is always to hand wash your fabric bracelets gently in cool water with a small amount of mild detergent, then rinse thoroughly and allow to air dry flat. Avoid wringing or twisting the bracelet, as this can distort the shape of the braid or wrapping. If your bracelet includes metal embellishments such as charms or buttons with metal shanks, pat it dry quickly and allow it to dry in a well-ventilated spot to prevent any rust or tarnish from developing on the metal components. For bracelets that include delicate embellishments or were made with specialty fabrics such as silk or velvet, spot cleaning rather than full immersion washing is the safest option.
When it comes to storing your fabric bracelet collection, a shallow dish, a small decorative box, or a dedicated jewelry organizer all work well. Avoid storing fabric bracelets in direct sunlight for extended periods, as prolonged UV exposure can cause some fabric dyes to fade over time. If a bracelet becomes slightly misshapen from wear, a light steaming with a garment steamer or a quick press with a cool iron and a pressing cloth can often restore its original neat appearance. Taking a few moments to store your bracelets properly after each wearing will significantly extend their lifespan and keep them looking as lovely as the day they were made.
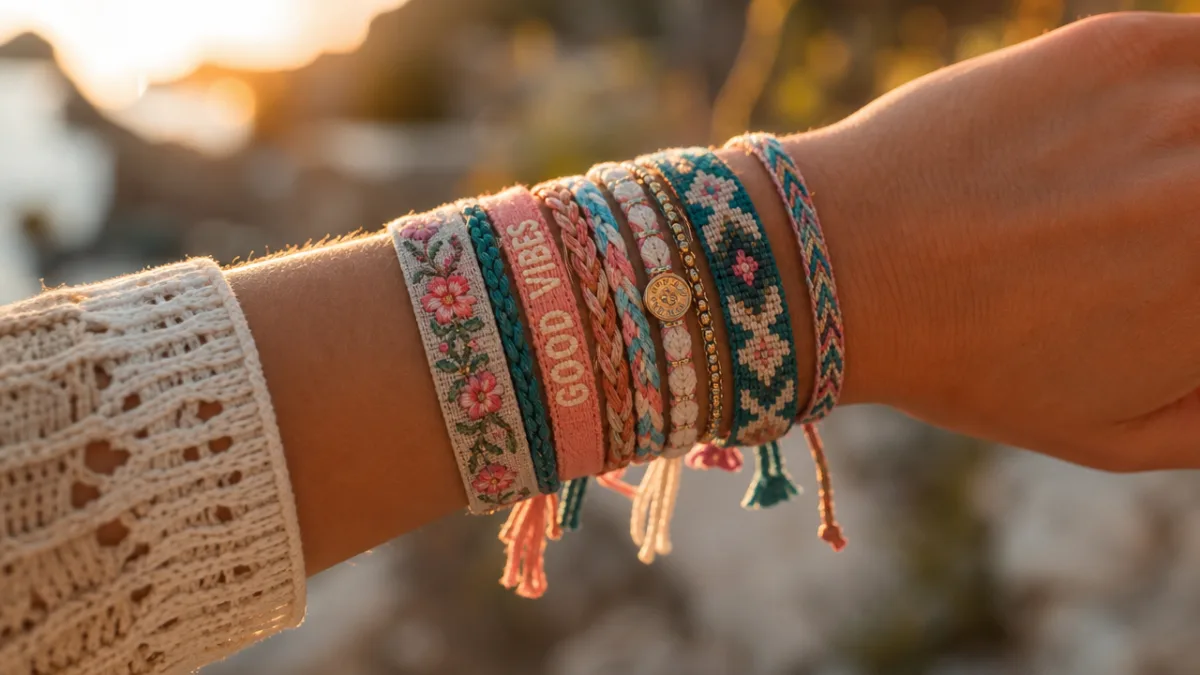
Styling fabric bracelets is one of the most enjoyable aspects of this craft. The stacking trend, in which multiple bracelets of varying widths, textures, and colors are worn together on the same wrist, is a perfect showcase for handmade fabric pieces. Try combining a thin braided bracelet with a wider wrapped one and a simple knotted style for a layered look that is both bohemian and polished. Fabric bracelets pair particularly well with casual and resort wear, but a single refined wrapped bracelet in a sophisticated color palette can be elegant enough for more dressed-up occasions as well. Do not be afraid to mix your handmade pieces with purchased jewelry, since the contrast between handcrafted texture and polished metal or stone creates a genuinely interesting and personal style statement.
Gifting and Selling Your Fabric Bracelets
Once you have developed some skill and built up a collection of beautiful fabric bracelets, you may find yourself wanting to share them with others, whether as heartfelt handmade gifts or as items in a small creative business. Handmade fabric bracelets make exceptionally thoughtful gifts for friends and family members of all ages, carrying with them the warmth and intention that purchased gifts simply cannot match. The fact that they are made from carefully chosen fabrics and assembled by hand communicates a level of care and personal investment that recipients genuinely appreciate.
For gift-giving, consider packaging your fabric bracelets in a way that complements their handmade nature. A small piece of kraft paper wrapped around the bracelet and tied with a strip of the same fabric used in the bracelet itself makes an elegant, zero-waste presentation. A small handwritten card explaining the materials used and the technique employed adds a personal touch that many recipients treasure as much as the bracelet itself. If you are giving a bracelet to someone whose style you know well, consider incorporating one of their favorite colors or a fabric that holds some significance to your relationship for an especially meaningful gift.
For those interested in turning this hobby into a small business, fabric bracelets are a wonderful product for craft fairs, farmers markets, and online marketplaces such as Etsy. The materials are inexpensive, particularly if you are using fabric scraps from other sewing projects, which means that profit margins can be healthy even when pricing your pieces competitively. Photographing your bracelets well is essential for online selling, since buyers cannot touch or examine the pieces in person. Natural light, clean backgrounds, and both flat lay shots and wrist shots styled on a model or a mannequin will help your listings stand out in a crowded marketplace. As your skills grow, you can expand your offerings to include matching earrings made from the same fabrics, fabric hair ties, or coordinated sets, building a cohesive collection that encourages customers to buy multiple pieces at once.
Whether you keep every bracelet you make for yourself, give them all away to loved ones, or build a thriving small business around your craft, the most important thing is to enjoy the process. Fabric bracelet making is a genuinely meditative and joyful activity that connects you to a long tradition of textile craftsmanship while also allowing you to express your own unique creative vision. Each bracelet you make will teach you something new, and the skills you develop with every project will open doors to more complex and ambitious textile crafts over time. So gather your fabric scraps, sharpen your scissors, and enjoy the deeply satisfying experience of making something beautiful with your own hands.








What do you think?
It is nice to know your opinion. Leave a comment.