










DIY Pallet Patio Loveseat With Table: Build Your Own Outdoor Furniture
Introduction: Why Build a Pallet Patio Loveseat?
There is something deeply satisfying about sitting on a piece of furniture you built with your own hands, especially when it costs a fraction of what you would pay at a retail store. Pallet wood furniture has surged in popularity over the past decade, and for very good reason. Shipping pallets are often available for free or at minimal cost from local businesses, hardware stores, and warehouses, making them one of the most budget-friendly raw materials imaginable for a weekend DIY project.
A pallet patio loveseat with an integrated side table is one of the most practical and visually rewarding projects you can tackle as a beginner or intermediate woodworker. The modular nature of pallets means you are essentially working with pre-built wooden platforms that already have structural integrity. You are assembling, refining, and finishing rather than cutting and joining raw lumber from scratch, which significantly lowers the skill barrier and reduces the likelihood of costly mistakes.
Beyond the economics and the accessible skill level, pallet furniture carries an undeniable aesthetic charm. The weathered grain, the slight imperfections, and the rustic character of reclaimed pallet wood give outdoor seating a warmth and personality that mass-produced resin furniture simply cannot replicate. Whether your patio style leans toward bohemian, farmhouse, or modern industrial, a well-finished pallet loveseat fits naturally into the visual story of an outdoor living space.
Materials and Tools You Will Need
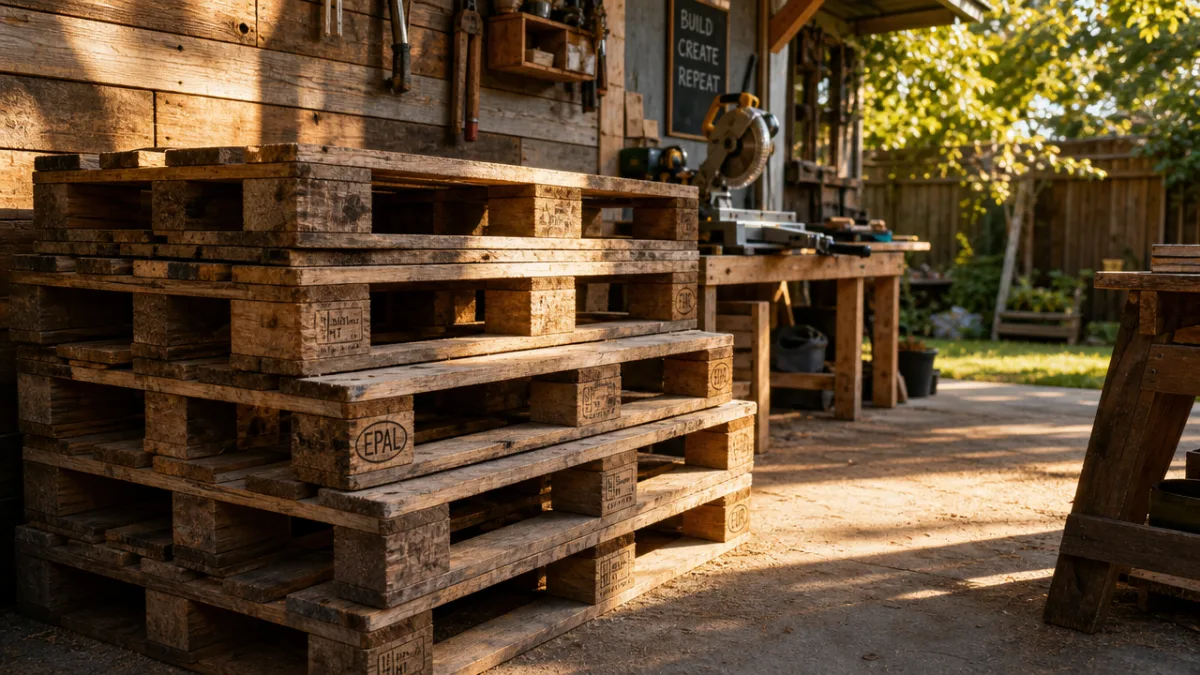
Before you drive a single nail or make a single cut, gathering your materials thoughtfully will save you hours of frustration mid-project. For a standard two-seat loveseat with a small integrated side table, you will need approximately four to six standard pallets. Look for heat-treated pallets marked with the letters HT, which indicates they have been safely treated without harmful chemicals. Avoid pallets stamped MB, which indicates methyl bromide treatment and makes them unsuitable for furniture or any prolonged human contact.
In addition to the pallets themselves, you will need a collection of supporting materials to complete the build cleanly and safely. Gather the following supplies before you begin your project:
- Exterior-grade wood screws in 2-inch and 3-inch lengths for structural assembly
- Sandpaper in 80-grit, 120-grit, and 220-grit for progressive smoothing
- Exterior wood stain or paint in your chosen color or finish
- Weatherproof sealant or outdoor polyurethane to protect the finish
- Outdoor foam cushions or cushion inserts sized to your seat dimensions
- Heavy-duty outdoor fabric or pre-made cushion covers in a complementary pattern
- Corner brackets and L-brackets for reinforcing joints
- Caster wheels or furniture feet to protect decking surfaces and allow easy repositioning
As for tools, you do not need an elaborate woodworking shop to complete this project successfully. A circular saw or jigsaw will handle any necessary cuts, and a power drill with screwdriver bits is essential for assembly. A pry bar or reciprocating saw can be invaluable if you need to disassemble individual pallets to harvest planks for the tabletop or armrests. A measuring tape, carpenter’s square, and pencil will keep your work precise, while safety glasses and work gloves should always be on hand when working with rough reclaimed wood.
Preparing Your Pallets: Sanding, Cleaning, and Treating the Wood
Preparation is arguably the most important phase of the entire project, and it is also the one that most beginners are tempted to rush through. Pallet wood arrives from warehouses, shipping yards, and loading docks carrying dirt, splinters, debris, and sometimes staining from whatever goods they transported. Thorough preparation ensures your finished piece is safe to touch, attractive to look at, and durable enough to survive multiple seasons of outdoor exposure without deteriorating prematurely.
Start by inspecting every pallet carefully under good lighting. Run your hand carefully across the surface boards and look for protruding nails or staples, which should be hammered flat or removed entirely with a pry bar. Check for any boards that are cracked along the grain, excessively warped, or showing signs of rot or mold. A slightly discolored board can often be sanded clean, but any wood showing soft spots, black mold, or structural compromise should be replaced or discarded. The goal is to begin construction with solid, structurally sound material on every surface.
Once you have inspected and cleaned the raw pallets with a stiff brush and a mild soap-and-water solution, allow them to dry completely before sanding. Begin with 80-grit sandpaper to knock down major roughness, splinters, and uneven surfaces. Progress to 120-grit to smooth the grain further, and finish with 220-grit for a silky surface that will accept stain or paint evenly and beautifully. Pay special attention to the seat surface and the armrests, since these are the areas that will be in constant contact with skin and clothing. After sanding, wipe every surface down with a tack cloth to remove fine sawdust before applying any finish.
Step-by-Step Assembly: Building the Loveseat Frame and Integrated Table
With your pallets prepared and your materials assembled, you are ready to move into construction. The basic structure of a pallet loveseat consists of a base layer for elevation and stability, a seat layer that forms the sitting surface, and a back section angled slightly for comfortable reclining. The integrated side table extends from one end of the loveseat at seat height or slightly higher, providing a convenient surface for drinks, plants, or decorative items without requiring additional furniture.
Begin by positioning two pallets side by side to form the base of the seat. These base pallets create elevation from the ground and provide a stable foundation for everything stacked above. Secure them together using 3-inch exterior screws driven through the side boards at multiple points, and reinforce the connection with L-brackets on the interior where they will not be visible. On top of this base, position your seat pallets, aligning the edges carefully. Use a carpenter’s square to confirm everything is level and true before driving any screws, since misalignment at this stage compounds through every subsequent layer.
For the back section, you have two practical options. The simplest approach is to stand one or two pallets vertically behind the seat and attach them securely to the seat frame using heavy-duty corner brackets. A slightly more refined approach involves cutting a pallet to create a back panel that is angled at approximately 15 degrees from vertical, which mimics the ergonomic rake of a proper sofa back. This angled approach requires slightly more skill but dramatically improves seating comfort over long periods. The integrated side table is built by positioning a half-pallet or a custom-cut plank section at one end of the loveseat, secured at the same height as the top of the armrests for a clean, cohesive look.
Follow this sequence for clean, efficient assembly:
- Position and level your two base pallets on a flat surface and secure them together
- Attach seat pallets on top of the base layer, checking alignment with a square
- Build and attach the back panel section, ensuring it is firmly anchored
- Construct and attach both armrests from harvested pallet planks cut to uniform length
- Build the integrated side table surface and attach it flush with the armrest height
- Attach caster wheels or rubber furniture feet to the underside of the base
- Do a final inspection, tighten all screws, and add any additional corner brackets needed

Finishing Touches: Staining, Sealing, and Styling Your Loveseat
The finishing phase transforms your construction project into a piece of furniture you will actually be proud to display in your outdoor living space. At this stage, you are making decisions about color, texture, and weather protection that will define both the aesthetic and the longevity of your piece. Take your time here, because a beautifully finished piece of pallet furniture is genuinely indistinguishable from store-bought outdoor furniture in photographs and will impress everyone who sees it in person.
For the stain or paint, choose a product specifically formulated for exterior wood use. If you want to preserve and celebrate the natural grain and character of the pallet wood, a semi-transparent exterior stain in a warm tone like cedar, walnut, or ebony will let the wood’s personality show through while providing UV and moisture protection. If you prefer a more polished or contemporary look, a solid exterior paint in navy, charcoal, forest green, or classic white can give the piece a clean, intentional finish that reads as sophisticated rather than rustic. Apply at least two coats, allowing full drying time between coats as specified by the manufacturer.
Once your color coat is dry, apply a layer of exterior-grade clear sealant or weatherproof polyurethane to lock everything in and provide a barrier against rain, humidity, morning dew, and UV fading. This step is non-negotiable for furniture that will live outdoors year-round. Without a proper sealant layer, even the best exterior stain will begin to grey, peel, and degrade within a single season. Two coats of sealant, lightly sanded between applications, will give you a durable, attractive finish that can last several years before needing renewal.
Cushions, Accessories, and Styling Your Outdoor Space
No loveseat is truly complete without comfortable cushions, and the cushion choices you make will have an outsized effect on both the comfort and the visual appeal of your finished piece. Outdoor cushion foam comes in standard thicknesses, with four inches being the most popular choice for seat cushions and three inches working well for back cushions. Measure your seat and back dimensions precisely and order foam cut to those specifications, or purchase pre-made outdoor cushion sets and adjust your dimensions during construction to match standard available sizes.
For the cushion covers, look for fabrics rated for outdoor use, such as solution-dyed acrylic, polyester canvas, or Sunbrella-brand fabric, all of which resist fading, moisture, and mildew far better than standard indoor upholstery fabrics. The pattern and color of your cushions provide an opportunity to inject personality and coordinate with your broader outdoor design scheme. Stripes, botanicals, geometric prints, and solid bold colors all work beautifully against the natural wood tones of a pallet loveseat. Many people find that a neutral wood finish with vibrant patterned cushions strikes the most visually satisfying balance.
Beyond the loveseat itself, think carefully about the accessories and surrounding elements that will complete your patio vignette. The integrated side table is a perfect surface for a small potted succulent, a lantern, or a tray holding drinks and snacks. A coordinating pallet coffee table positioned in front of the loveseat extends the seating area’s functionality significantly. String lights draped overhead, an outdoor rug in a complementary pattern underfoot, and a few potted plants at varying heights will transform even a modest patio into an inviting outdoor room that you and your guests will want to spend hours enjoying together.
Consider these styling additions to elevate your finished pallet loveseat:
- Outdoor throw pillows in complementary accent colors to layer visual interest on the back cushions
- A small succulent arrangement or herb pot placed on the integrated side table
- A weatherproof lantern or solar-powered light fixture on the table surface for evening ambience
- A lightweight outdoor blanket or throw draped over one armrest for cool evenings
- A coordinating pallet tray to corral drinks and prevent condensation rings on the table surface

Maintenance, Durability, and Long-Term Care
One of the most common misconceptions about pallet furniture is that it is inherently fragile or short-lived. In reality, pallet wood is typically made from hardwoods like oak, maple, and poplar precisely because pallets need to withstand heavy loads and rough handling in industrial environments. When properly finished and cared for, a well-built pallet loveseat can serve you reliably for five to ten years or more, requiring only occasional maintenance to keep it looking its best through changing seasons and weather conditions.
At the start of each spring, take an hour to inspect your loveseat thoroughly for any signs of wear, weathering, or damage from the winter months. Look for areas where the sealant has thinned or peeled, for any screws that have worked loose through seasonal expansion and contraction of the wood, and for any surface areas that have become rough or splintered from exposure. Lightly sanding affected areas and reapplying a coat of sealant is usually all that is needed to refresh the piece and extend its life for another full year of use.
During winter months or extended periods of rain and cold, storing your cushions indoors in a dry location will dramatically extend their lifespan and keep them looking fresh season after season. The wood frame itself can typically remain outdoors year-round if it has been properly sealed, though covering the frame with a breathable outdoor furniture cover during winter provides an additional layer of protection and is highly recommended in climates that experience heavy snow, ice, or prolonged wet weather. Small investments in protective storage and seasonal maintenance pay enormous dividends in the longevity and appearance of your handbuilt furniture over time.
Cost Breakdown and Environmental Benefits
One of the most compelling arguments for building a pallet patio loveseat is the dramatic cost savings compared to purchasing equivalent retail outdoor furniture. A comparable two-seat outdoor loveseat with an integrated table from a mainstream furniture retailer typically costs between three hundred and eight hundred dollars, with premium versions from brands known for weather resistance climbing even higher. A DIY pallet version, by contrast, can be completed for as little as thirty to seventy-five dollars when pallets are sourced for free and basic finishing materials are purchased strategically.
Here is a realistic cost breakdown for a complete pallet loveseat project using commonly available materials:
- Pallets: Free to fifteen dollars if sourced from local businesses willing to give them away
- Exterior screws and hardware: Ten to twenty dollars from a hardware store
- Sandpaper in multiple grits: Five to ten dollars for a multipack
- Exterior wood stain or paint: Fifteen to thirty dollars depending on brand and quantity
- Weatherproof sealant: Ten to twenty dollars for a quart-sized container
- Outdoor foam cushions or pre-made cushion set: Twenty-five to sixty dollars depending on size and quality
- Total estimated cost: Sixty-five to one hundred fifty-five dollars for the complete project
Beyond the financial savings, there is a genuine and meaningful environmental benefit to building furniture from reclaimed pallet wood. Every pallet loveseat you build is one set of pallets diverted from a landfill and one set of retail furniture that does not need to be manufactured, packaged, and shipped across thousands of miles. The carbon footprint of a DIY pallet furniture project is a small fraction of that associated with purchasing new manufactured outdoor furniture, making this not only a budget-friendly choice but also a meaningfully sustainable one that aligns with growing consumer awareness about waste and consumption.








What do you think?
It is nice to know your opinion. Leave a comment.