










Change Your Cabinet Hardware From Pulls To Handles: A Complete Guide
Why Upgrading Cabinet Hardware Makes Such a Big Difference
Few home improvement projects deliver as much visual impact for as little cost and effort as swapping out your cabinet hardware. Cabinet pulls and handles are essentially the jewelry of your kitchen or bathroom — small details that frame the entire aesthetic of the room and communicate your personal style to anyone who walks in. When you change your cabinet hardware from pulls to handles, you are not simply replacing a functional element; you are making a deliberate design statement that can transform the entire mood of a space from dated to fresh, from generic to intentional.
The difference between pulls and handles is more than cosmetic. Pulls are typically single-point fixtures — a bar or decorative knob mounted with one screw — while handles (also called bar handles or cup handles) are mounted at two points, creating a more substantial, architectural feel. This shift from a single anchor point to a double anchor point changes how the cabinetry reads visually, adding a sense of structure and permanence that pulls often lack. Many interior designers specifically recommend handles for kitchen cabinetry because they offer a more ergonomic grip and a cleaner, more modern silhouette.
Beyond aesthetics and ergonomics, upgrading your hardware is one of the most budget-friendly renovations available to homeowners. A full kitchen hardware swap can often be completed for a few hundred dollars and an afternoon of work, yet the resulting transformation can make a kitchen feel like it has undergone a full remodel. Real estate professionals frequently cite updated hardware as one of the quickest ways to increase perceived home value and attract buyers who are looking for move-in-ready spaces with modern finishes.
Understanding the Visual Language of Cabinet Hardware
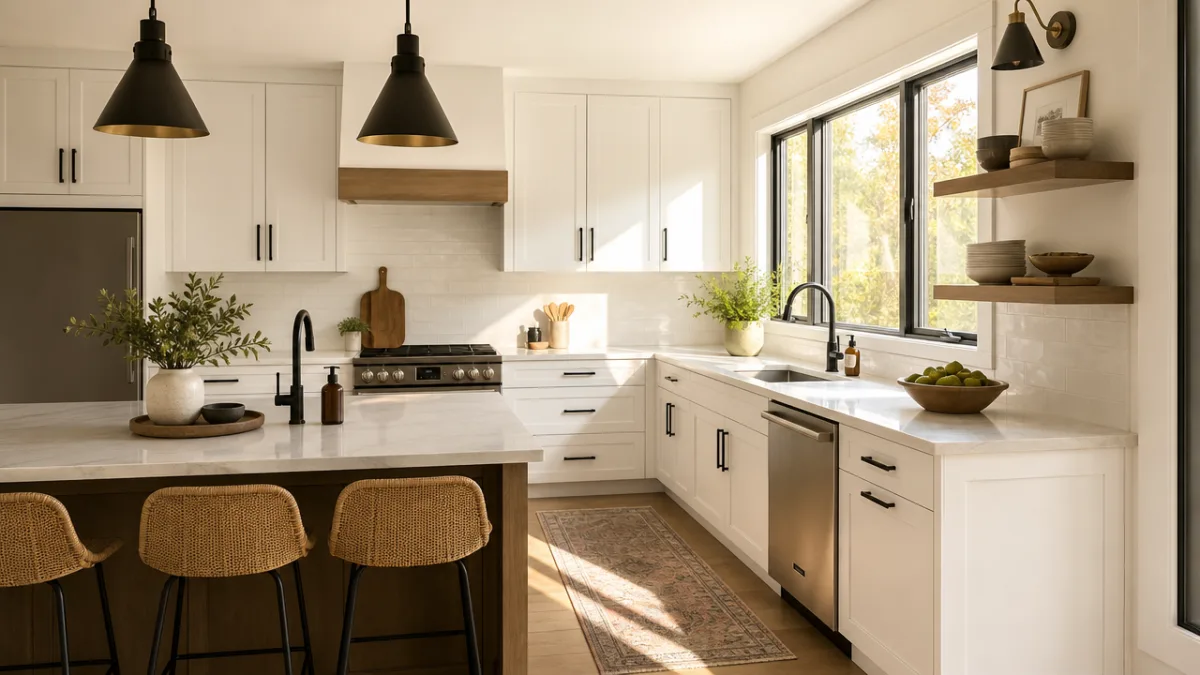
Every hardware choice communicates something about the design language of your home. Long, sleek bar handles in brushed brass or matte black signal a contemporary or transitional aesthetic, while cup pulls in oil-rubbed bronze lean more farmhouse or industrial. Understanding this visual language before you begin shopping is essential to making a choice you will be happy with for years to come. Consider pulling inspiration from other metal finishes already present in the room — faucets, light fixtures, appliances — because cohesion across these elements is what separates a polished interior from one that feels disconnected.
Handle length is another critical part of the visual equation. A four-inch handle on a wide drawer can look proportionally undersized, while an eight-inch handle on a small cabinet door might overwhelm the panel. As a general rule of thumb, drawer handles should span at least one-third to one-half the width of the drawer front. For cabinet doors, handles are typically positioned vertically on the door stile and are chosen for their length based on the height of the door panel. Getting these proportions right before you purchase your hardware can save you significant time and money.
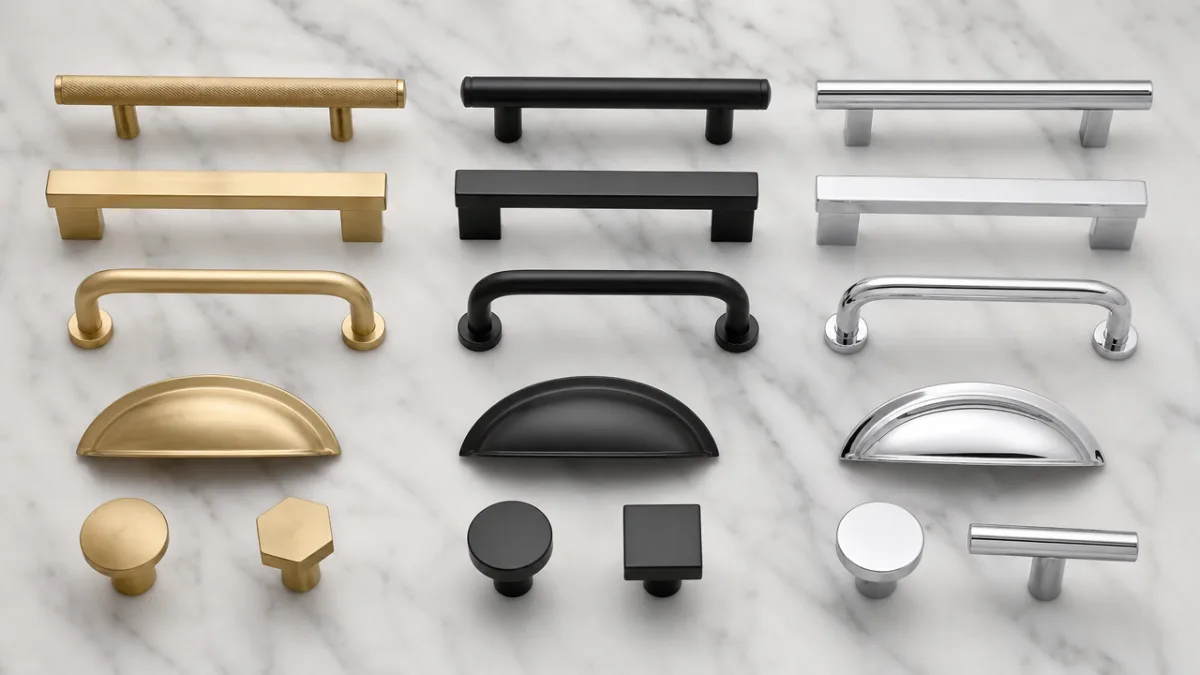
Color and finish play equally significant roles. The current market trend strongly favors matte black, brushed gold, satin brass, and unlacquered brass for handles, as these finishes add warmth and contrast without the cold, sterile feeling that polished chrome can sometimes produce. Matte finishes are also practical — they show fewer fingerprints and smudges than their high-gloss counterparts, making them ideal for high-traffic kitchen environments where cabinets are touched dozens of times each day.
Tools and Materials You Will Need for the Job
One of the most appealing aspects of this project is that it requires very little in the way of specialized tools. Most homeowners will already have everything they need sitting in their garage or toolbox. At minimum, you will need a cordless drill or driver, a set of drill bits in multiple sizes, a tape measure, a pencil for marking, and a level or combination square to ensure your hardware is installed straight. You may also want to have a template jig on hand — a small plastic tool designed specifically for consistent hardware placement — which can save considerable time when working with multiple cabinets.
In terms of materials, the hardware itself is obviously the central purchase. When shopping, pay close attention to the hole center measurement, which refers to the distance between the two mounting holes on a handle. Common hole center measurements are 3 inches, 3.75 inches, 5 inches, and 6.25 inches, though many handles are available in multiple sizes within the same style. If you are replacing existing hardware, measuring the hole centers of your current pulls will tell you whether you can use the existing holes or will need to drill new ones. Using the existing holes is always the simpler option when possible.
You should also pick up a package of longer machine screws in the appropriate thread size, typically 8-32 machine screws, in varying lengths. Because handles have two mounting points, the screws must pass through the cabinet door or drawer front from inside the cabinet. The thickness of your cabinet door will determine what screw length you need — most standard cabinet doors are between three-quarters of an inch and one inch thick, so screws ranging from one inch to one and a half inches in length usually cover most situations. Having a few different lengths on hand before you begin is always a smart strategy.
Measuring and Marking for Precise Placement
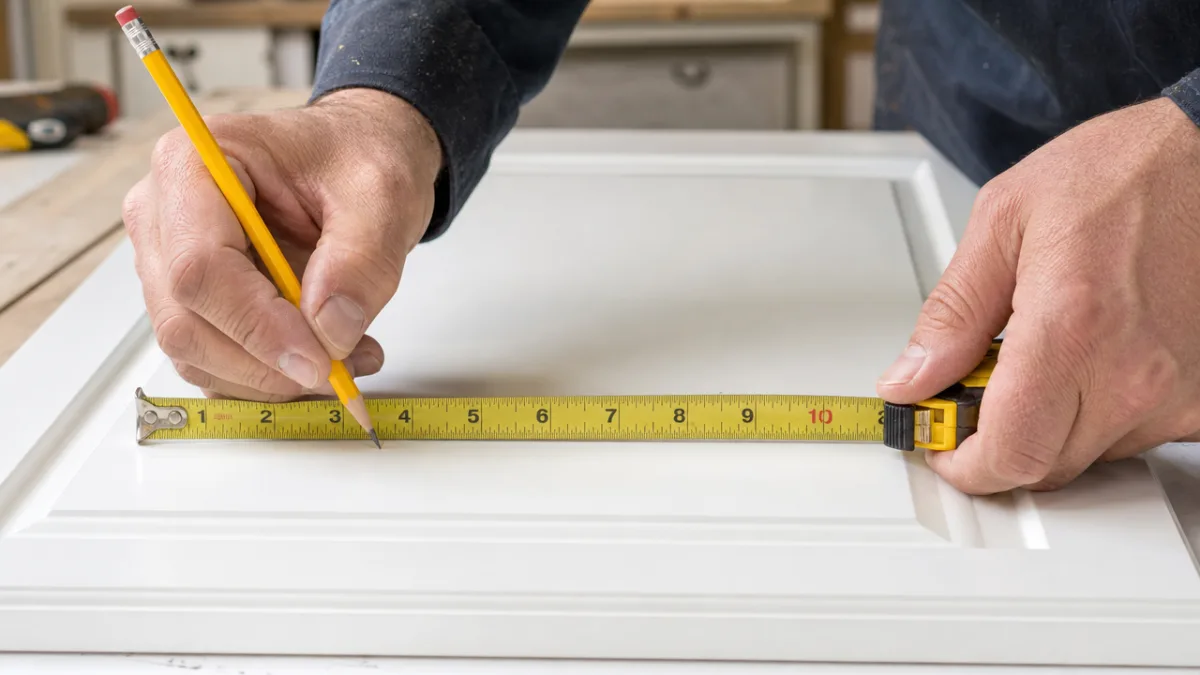
Consistency is everything when installing cabinet handles. A single handle that is even slightly crooked or off-center will catch the eye every time you enter the room, undermining the polished look you are working toward. Before you drill a single hole, take time to develop a placement plan that you will apply uniformly across all your cabinets and drawers. Write down your measurements and mark them on a piece of cardboard or tape so you have a reference guide you can carry with you from cabinet to cabinet throughout the installation process.
For cabinet doors, handles are almost universally installed vertically on the door stile — the vertical edge of the door frame — rather than on the panel itself. On upper cabinets, the handle is placed near the bottom of the door, where it is most comfortable to reach when pulling downward to open. On lower cabinets, the handle is placed near the top of the door, allowing you to pull upward or outward naturally. The standard recommendation is to position the handle so that its center falls about two to three inches from the edge of the door, though personal preference and door width can adjust this figure slightly.
For drawer fronts, handles are typically centered both horizontally and vertically on the drawer face. Centering horizontally is straightforward — simply divide the drawer width in half. Centering vertically is equally simple for standard drawers, but on very tall drawers or multi-height drawer stacks, you may want to position the handle slightly above the true vertical center, as this placement tends to feel more natural and proportional to the eye. Take extra care with your measurements here, as a misplaced handle on a large drawer front is one of the more visible mistakes in the finished product.
Step-by-Step Installation Process
Once your measurements are marked and your materials are assembled, the actual installation moves quickly. Begin by removing all of your existing hardware. Using your drill or a screwdriver, back out the screws holding your current pulls in place and set the old hardware aside. If you are keeping the existing holes and your new handles happen to share the same hole centers, you are in excellent shape — simply thread your new hardware screws through the existing holes from the inside of the cabinet and tighten them to the handle from the outside. Use a screwdriver or drill with a suitable bit to snug everything down firmly, but avoid overtightening, which can crack wood or damage the finish around the mounting hole.
If your new handles require fresh holes — because the hole center measurement differs from your existing hardware — this is where your drill and template jig become essential. Position your template jig at the marks you made during the planning phase and clamp or hold it firmly in place. Drill your pilot holes carefully, keeping the drill perpendicular to the cabinet face at all times. A drill press would give you perfect perpendicularity, but most homeowners manage perfectly well freehand with a bit of care and patience. Once your pilot holes are drilled, widen them if necessary to accommodate the diameter of your mounting screws, then install the handle as described above.
Work your way systematically through the kitchen or bathroom, completing one cabinet at a time rather than jumping around. This approach helps maintain your focus on consistency and prevents measurement errors that can arise when you are switching contexts frequently. As you finish each piece, stand back and visually check the placement from a few feet away before moving on — it is much easier to correct a minor placement error before you have moved on to the next cabinet. By the time you work through the last drawer, you will have developed a comfortable rhythm and the project will feel almost effortless.
Dealing With Common Challenges
One of the most frequently encountered challenges in this project is the discovery that your cabinet doors are thicker or thinner than standard, requiring screws of a different length than what you initially purchased. Before you make a single cut or drill a single hole, take a moment to measure the actual thickness of a sample cabinet door or drawer front with a caliper or careful tape measure reading. This simple precaution can save a trip back to the hardware store mid-project and prevents the frustration of discovering that your screws are too short to thread into the handle properly.
Another common issue arises when old screw holes are left exposed after the swap — either because the new hardware does not cover them or because you are switching from a two-hole pull to a handle with a different hole center spacing. In these cases, you have a few options. Small wooden plugs can be tapped into the holes and sanded flush, then painted or stained to match the cabinet finish. Alternatively, wood filler can be applied, allowed to cure, sanded smooth, and touched up with paint. For cabinets with a painted finish, a small dab of cabinet paint over a filled hole is usually virtually invisible once dry.
Stripped screw holes are another obstacle that sometimes appears during old hardware removal or new hardware installation. If a screw hole has been stripped and will no longer hold a screw securely, the simplest fix is to fill the hole with a mixture of wood glue and toothpicks or a dedicated wood screw anchor, allow it to cure fully, and then re-drill your pilot hole in the same location. This process restores the gripping power of the wood and allows you to install the new handle with full confidence that it will hold firmly under regular use. Do not attempt to install hardware into a stripped hole without repairing it first, as the handle will eventually pull loose and may damage the cabinet face.
Choosing the Right Handle Style for Your Home’s Aesthetic
The market for cabinet handles has never been more diverse or more exciting than it is today. From sleek, minimalist bar pulls in stainless steel to ornate cast-iron handles with antique finishes, the options span virtually every design style imaginable. Narrowing down the choices requires a clear sense of the aesthetic you are working toward and a willingness to hold potential samples against your actual cabinetry before committing to a full purchase. Many hardware retailers offer return policies that make it easy to order a sample handle, test it against your cabinets in your own lighting, and return it if the fit is not right.
For contemporary and modern kitchens, long, thin bar handles in matte black or brushed nickel are perennially popular and unlikely to feel dated in the near future. These handles complement flat-front and slab-door cabinets particularly well, reinforcing the clean, geometric character of the cabinetry. For transitional kitchens that blend traditional and modern elements — shaker cabinets, for example — cup pulls or bin pulls in unlacquered brass or antique brass create warmth and a sense of history without feeling overly ornate. For fully traditional or farmhouse kitchens, wrought-iron or oil-rubbed bronze handles with slightly rustic profiles add character and authenticity.
It is also worth considering handle profiles from an ergonomic standpoint, particularly if anyone in your household has arthritis, limited grip strength, or other conditions that affect manual dexterity. Larger, more substantial handles with a comfortable grip circumference are significantly easier to use than slim, decorative bar handles for people with these challenges. Some manufacturers specifically produce accessible-design hardware that meets the grip and leverage requirements of universal design guidelines while still looking stylish and intentional. Considering the full range of users in your household when selecting hardware is a thoughtful touch that pays dividends in daily comfort.
- Contemporary style: matte black, brushed nickel, or chrome bar handles with thin profiles and long lengths
- Transitional style: satin brass or unlacquered brass cup pulls and bin pulls with moderate detailing
- Farmhouse or rustic style: oil-rubbed bronze, wrought iron, or antique brass with textured or hammered surfaces
- Traditional or classic style: polished brass, antique gold, or pewter handles with decorative backplates
- Industrial style: pipe-style handles, hex bolt accents, or raw steel finishes with minimal surface treatment
Finishing Touches and Long-Term Care
Once all of your new handles are installed, take a few minutes to walk through the space with fresh eyes and assess the overall result. Check every handle for level alignment, and gently tug each one to confirm it is seated firmly with no wobble or play. If any handles feel loose, tighten the mounting screws incrementally — a quarter turn at a time — until the handle is snug without risk of over-compression. Avoid using power tools at this final stage; hand tightening gives you much more tactile feedback and reduces the risk of stripping a newly drilled hole.
Clean your new handles immediately after installation to remove any fingerprints, oils from handling, or construction dust that may have accumulated during the project. The appropriate cleaning method depends on the finish of your hardware. Most matte and brushed finishes respond well to a soft cloth dampened with warm water and a tiny drop of dish soap, followed by a thorough dry wipe to prevent water spots. Avoid abrasive cleaners, steel wool, or anything containing bleach or ammonia on metal hardware, as these can permanently damage protective coatings and cause discoloration or pitting in the finish over time.
For ongoing care, a light wipe-down of your cabinet handles as part of your regular kitchen cleaning routine is all that is required to keep them looking their best. High-traffic handles — particularly those near the stove or sink — may accumulate grease and cooking residue more quickly than others, so a slightly more frequent cleaning schedule for these specific pieces is worthwhile. With appropriate care, quality cabinet handles in brass, stainless steel, or zinc alloy should maintain their appearance and function for well over a decade, making this small investment in your home one of the highest-value upgrades per dollar that a homeowner can make.
Inspiring Others and Documenting Your Project
A completed cabinet hardware transformation is a genuinely photogenic project, and documenting your before-and-after results is a rewarding way to celebrate the work you have done. Natural light photographs taken during the day will show off the new handles far better than artificial light, particularly if your kitchen has a window that floods the space with warm morning or afternoon sun. Shooting both close-up detail shots of individual handles and wide-angle shots of the full kitchen will give you a complete record of the transformation that captures both the nuance of the material finishes and the overall spatial impact of the change.
Sharing your results on platforms like Pinterest, Instagram, or home improvement communities is a wonderful way to inspire other homeowners who may be sitting on the fence about attempting the same project. Many people underestimate their own ability to tackle hardware installation because they assume it requires professional skill or specialized knowledge, when in reality it is one of the most accessible DIY projects available to someone with basic tools and an afternoon of free time. Your documented experience — including any challenges you encountered and how you solved them — can be genuinely valuable guidance to someone attempting the project for the first time.
Finally, consider keeping a small record of your hardware specifications — the brand, the finish name, the hole center measurement, and the screw size — stored somewhere accessible, such as a notes app on your phone or a document saved to cloud storage. This record will prove invaluable if a handle is ever damaged and needs to be replaced, if you decide to add hardware to a new piece of cabinetry in the future, or if you eventually sell your home and want to pass the information along to the new owners. Small acts of documentation like this reflect the kind of thoughtful, organized homeownership that keeps a home looking and functioning at its best for years to come.








What do you think?
It is nice to know your opinion. Leave a comment.