










17 DIY Garden Projects to Spruce Up Your Outdoor Space (Even Beginners Can Do #6!)
Why DIY Garden Projects Are Worth Your Time and Effort
There is something deeply satisfying about stepping outside and seeing a garden that reflects your own creativity and hard work. DIY garden projects give you the power to transform even the most neglected outdoor space into a beautiful, functional retreat without spending a fortune at a landscaping company. Whether you have a sprawling backyard or a compact balcony, the right projects can make every square foot feel intentional and inviting.
Beyond the aesthetic rewards, working on your garden offers genuine mental health benefits. Studies consistently show that time spent gardening reduces cortisol levels, eases anxiety, and promotes a sense of accomplishment. When you build something with your own hands — a raised bed, a stone path, a trellis — that satisfaction compounds every single time you walk past it. It becomes a permanent reminder that you are capable of creating beauty from raw materials.
Cost savings are another compelling reason to embrace the DIY approach. Professional landscaping can cost thousands of dollars for projects that, with a free weekend and some basic tools, you could complete yourself for a fraction of the price. Many of the projects in this guide use reclaimed wood, repurposed containers, or inexpensive materials from your local hardware store, making them accessible to gardeners at every budget level.
Planning Your Garden Transformation: Where to Begin
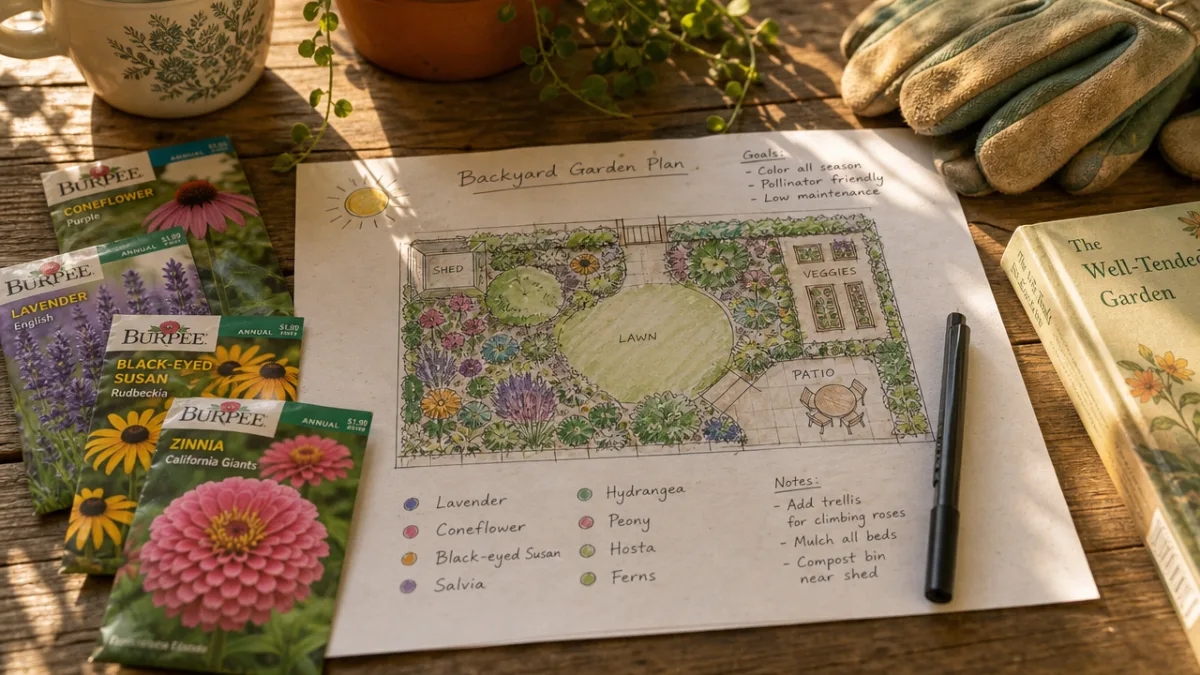
Before you pick up a shovel or buy a single bag of soil, the most important step is thoughtful planning. Walk through your outdoor space at different times of day and take note of where the sun falls, where drainage is poor, and which areas feel underused or visually cluttered. A simple hand-drawn sketch or a photo taken from an upstairs window can give you a bird’s-eye perspective that reveals patterns you might miss at ground level.
Consider your lifestyle and how you actually want to use the space. A family with young children will prioritize open lawn and safe, sturdy structures, while a gardening enthusiast might want maximum planting beds and a dedicated composting area. A person who loves entertaining outdoors will think first about seating, lighting, and ambiance. There is no single right answer — the best garden is the one that fits the way you live, not a design copied wholesale from a magazine.
Make a project list ranked by impact and difficulty, and start with the items that will deliver the most visible change for the least effort. This approach keeps momentum high and prevents the discouragement that comes from beginning with an overly ambitious project. Early wins build confidence, sharpen your skills, and give you a clearer vision of what the finished space should look like as each new element comes together.
Raised Garden Beds: The Cornerstone of a Productive Outdoor Space
Choosing the Right Materials for Your Raised Bed
Raised garden beds are one of the most rewarding DIY projects a gardener can undertake, and for good reason. They improve drainage, warm up faster in spring, reduce weed pressure, and allow you to control soil quality entirely. Cedar and redwood are the gold-standard lumber choices because they are naturally rot-resistant and can last a decade or more without treatment. If budget is a concern, pine treated with a food-safe sealant is a perfectly serviceable alternative that many gardeners use successfully for years.
Reclaimed materials offer another attractive path. Old railway sleepers, wine barrels cut in half, galvanized metal stock tanks, and even stacked cinder blocks can all be transformed into productive growing beds with minimal cost. Each material brings its own character and aesthetic, so the choice also becomes part of your garden’s overall design story. Whatever you select, make sure the material has not been treated with chemicals that could leach into your soil and ultimately into the food you grow.
The ideal dimensions for a raised bed balance productivity with accessibility. Most gardeners find that a width of four feet allows them to reach the center from either side without stepping into the bed and compacting the soil. Length is flexible, but keeping individual beds to eight or twelve feet makes them manageable and easier to cover with frost cloth or netting when needed. Height matters too — a depth of at least twelve inches gives most vegetables the root space they need to thrive.
Filling and Planting Your Raised Bed
The magic of a raised bed lies largely in the soil you fill it with. A classic and highly effective mix combines one-third aged compost, one-third coarse vermiculite or perlite, and one-third blended topsoil. This combination drains well, retains enough moisture to sustain plants through dry spells, and provides a rich base of organic nutrients. Avoid filling your bed with straight topsoil from the ground, which tends to compact heavily and often contains weed seeds that will make your life considerably more difficult.
Once your bed is filled, succession planting will help you get the most out of the space across the entire growing season. Start with cool-season crops like lettuce, spinach, and radishes in early spring. As temperatures climb, transition to warm-season favorites such as tomatoes, peppers, cucumbers, and zucchini. In late summer, clear spent plants and sow a fall crop of kale, arugula, and carrots, which actually taste better after a light frost concentrates their sugars. With thoughtful sequencing, a single raised bed can produce food for eight or nine months of the year.
Companion planting adds another layer of strategy and beauty to your raised bed. Growing basil alongside tomatoes is said to improve flavor while repelling aphids. Marigolds planted at the corners deter nematodes and attract pollinators. Tall crops like pole beans can shade heat-sensitive lettuces in midsummer. These relationships turn your raised bed into a small, self-supporting ecosystem where each plant contributes something beyond its own harvest, reducing pest pressure and improving overall yields without chemical intervention.
Creative Pathways and Edging to Define Your Garden Space
Stepping Stone Paths for Charm and Function
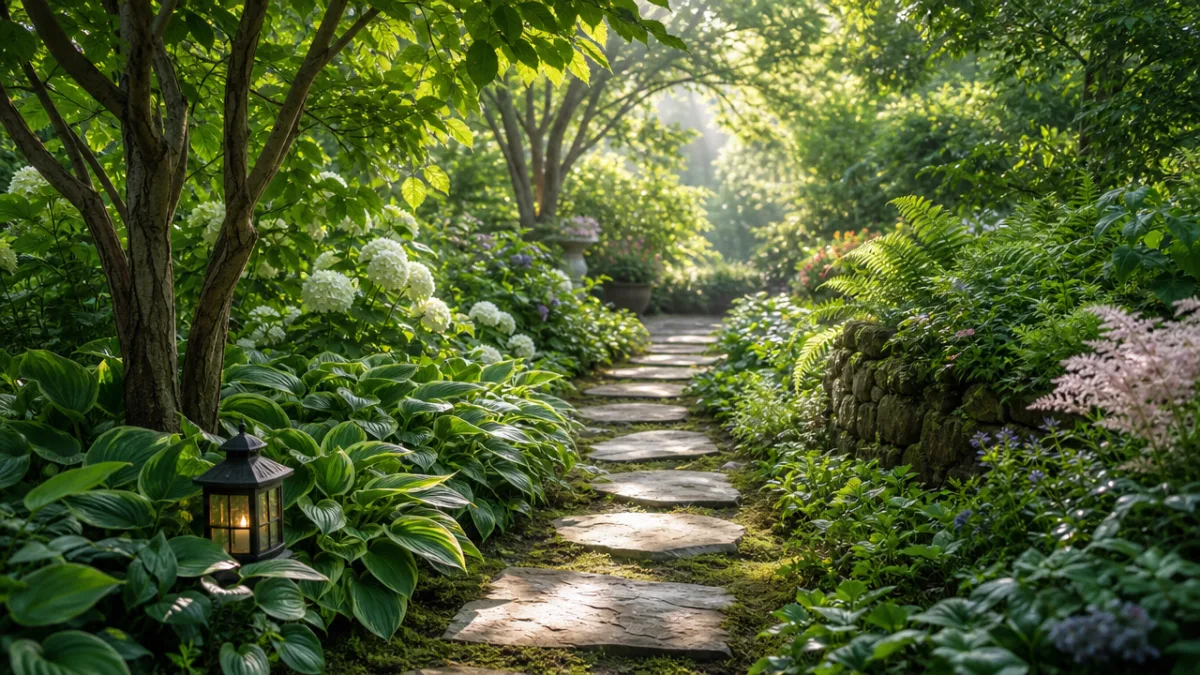
A well-designed garden path does far more than give you somewhere to walk — it creates structure, guides the eye, and prevents the soil compaction that happens when foot traffic wanders without direction. Stepping stone paths are one of the most beginner-friendly DIY projects available, requiring no special skills beyond a willingness to dig shallow holes and set stones at a comfortable stride length. Natural flagstone, irregular slate, and smooth river rocks each bring a different character to the path, from rustic to refined.
For a more polished look, consider casting your own concrete stepping stones using simple molds you can find at any craft or garden center. These molds allow you to press leaves, glass beads, mosaic tiles, or handprints into the surface before the concrete sets, creating stepping stones with genuine personal meaning. Children especially love this project, and the resulting stones serve as a permanent, beautiful record of small hands and a specific moment in time that the whole family can cherish for decades.
Proper installation is essential for paths that stay level and attractive through freeze-thaw cycles and heavy rain. Excavate each stone position to a depth of about two to three inches, add a thin layer of sand or fine gravel, set the stone, and check for wobble before moving on. Gaps between stones can be filled with creeping thyme, moss, or fine gravel depending on your preferred aesthetic. Each option has its own maintenance profile, but all of them are far easier to manage than a path that was never properly planned or installed.
Garden Edging That Makes a Difference
Nothing makes a garden look more cared-for than crisp, clean edging between lawn and planting beds. Metal edging — particularly the low-profile, powder-coated steel varieties now widely available — gives a modern, sleek boundary that lasts for years and requires almost no maintenance once installed. It bends easily to follow curves, holds soil in place during heavy rain, and creates a definitive line that a lawn mower can follow without trimming by hand afterward.
Natural alternatives have their own appeal. Salvaged bricks laid on their sides in a soldier course create a charming, classic edge with a cottage garden feeling. Sections of log, stone collected from a local field, or lengths of bamboo can all serve the same edging purpose while adding texture and natural color that manufactured products cannot replicate. The key with any edging material is consistent depth and a stable base so the edge stays in place through seasonal ground movement.
Edging is one of those projects where the effort-to-reward ratio is exceptionally high. A single afternoon spent installing clean edges around your beds can make the entire garden look twice as intentional and well-maintained as it did before. Combined with a fresh layer of mulch applied right up to the new edge, this simple project creates a transformation so dramatic that neighbors and visitors will often assume you hired a professional — which is exactly the kind of result that makes DIY so deeply satisfying.
Vertical Gardening Solutions for Small Spaces
Trellises, Arbors, and Living Walls
Vertical gardening is the strategy that unlocks the full potential of a small outdoor space. By growing upward rather than outward, you can dramatically increase your planting capacity without expanding your footprint, add architectural interest that flat beds simply cannot provide, and create natural privacy screens that are far more beautiful than a wooden fence. A simple trellis built from wooden stakes and twine costs almost nothing and can support a surprising weight of climbing beans, cucumbers, or flowering vines within a single season.
Pallet gardens are the DIY vertical project that has earned its enormous popularity on social media — and deservedly so. A single wooden pallet, stood upright and filled with a suitable soil mix, can hold dozens of small plants in its horizontal slats. Herbs, strawberries, succulents, and trailing flowers are all excellent pallet candidates. The key to a long-lasting pallet garden is choosing pallets marked with the HT stamp, indicating heat-treated rather than chemically treated wood, and lining the back with landscape fabric before filling to prevent soil from falling out.
For a more permanent structure, consider building a simple arbor over a gate or seating area. An arbor defines a transition point in the garden, creates a sense of enclosure and destination, and provides a support for climbing roses, wisteria, clematis, or grapevines that will eventually engulf the structure in extraordinary seasonal beauty. Basic arbors require only four posts, some crossbeams, and lattice panels — all materials available pre-cut at any home improvement store, making construction accessible even for those with limited carpentry experience.
Container Towers and Hanging Planters
Container towers take vertical growing to an even more compact level, stacking individual pots or purpose-built tower planters in a column that can hold an astonishing variety of plants in a two-square-foot footprint. Strawberry towers are the classic example, but the same concept works beautifully for herbs, lettuce, pansies, and trailing nasturtiums. Many gardeners keep a tower on a wheeled base so it can follow the sun across a patio throughout the day, maximizing light exposure and therefore yield.
Hanging planters are another underused tool for vertical density and visual interest. A series of macramé hangers or simple wire baskets suspended at staggered heights from a pergola or fence post creates a lush, layered look that draws the eye upward and makes even a small patio feel like a verdant garden room. Trailing petunias, ivy geraniums, and sweet potato vine are particularly stunning in hanging baskets, spilling downward in generous cascades of color and texture through the entire summer season.
Irrigation is the one challenge that vertical and container gardens present more acutely than in-ground planting. Containers dry out quickly, especially during hot summer spells, and plants in vertical arrangements can be difficult to water evenly. A simple drip irrigation system threaded through a tower or connected to a row of containers solves this problem elegantly and can be set on a timer to ensure consistent moisture without daily attention. The initial investment in drip components pays back quickly in healthier plants and saved time over the course of a growing season.
The Beginner-Friendly Project Everyone Can Do: Project #6
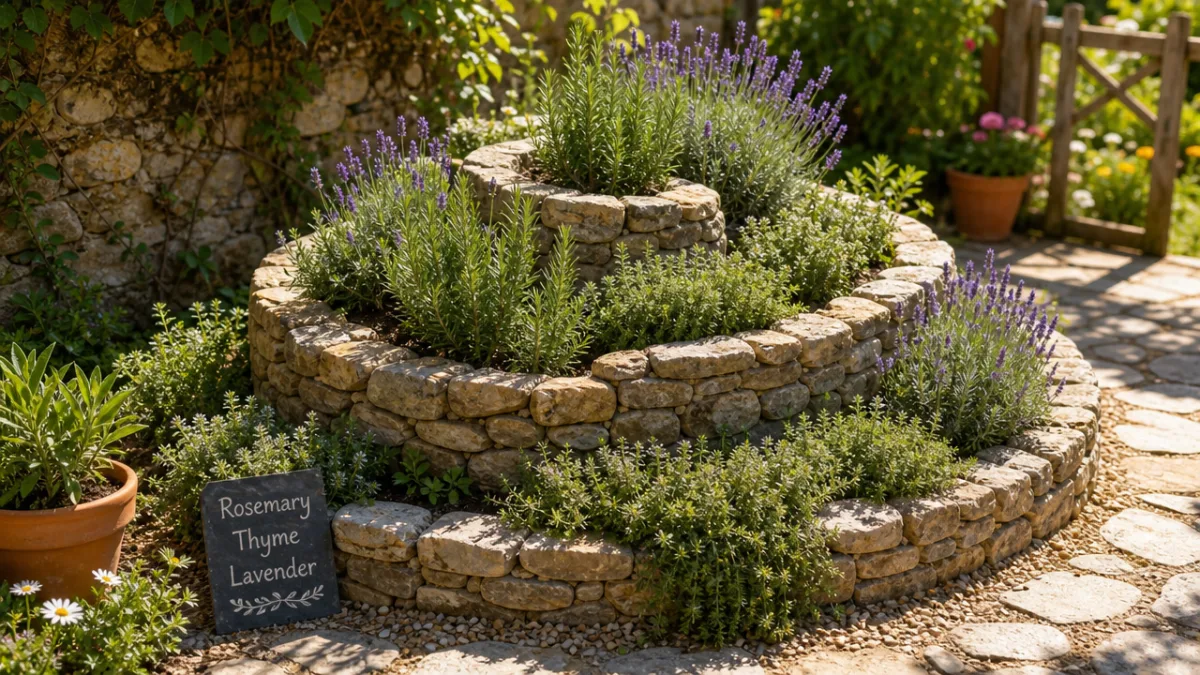
Project number six on this list is the one that earns its special callout — and that project is the humble, transformative herb spiral. An herb spiral is a raised planting structure built in a spiral or snail-shell shape that creates multiple distinct microclimates within a very small area. The top of the spiral is drier and receives the most sun, making it perfect for Mediterranean herbs like rosemary, thyme, and lavender. The lower sections retain more moisture and offer partial shade, creating ideal conditions for herbs like mint, parsley, and chives. One structure, perhaps four feet in diameter, gives you the growing conditions of a much larger and more diverse garden.
Building an herb spiral requires no carpentry skills, no power tools, and no special expertise. You simply mark a spiral shape on the ground, gather stones, bricks, or landscape blocks, and stack them in an ascending spiral from ground level to a height of about two to three feet at the center. Fill the interior with a well-draining soil mix as you build, packing it firmly against the stone walls. The whole project can realistically be completed in a single morning, and by that same afternoon you can be planting your first herbs in their new home.
The payoff from an herb spiral is immediate and ongoing. Fresh herbs improve every meal they touch, and having them steps from your kitchen door is a luxury that costs almost nothing once the spiral is built. Beyond culinary usefulness, herb spirals are genuinely beautiful garden features — the geometric spiral shape is visually compelling, the mixed textures and heights of different herbs create a living tapestry, and the structure itself becomes a focal point that elevates the overall design of the garden. It is the rare project that delivers maximum impact for minimum effort, which is exactly why beginners should start here.
Lighting, Seating, and Finishing Touches That Complete the Space
DIY Garden Lighting for Ambiance and Safety
Outdoor lighting extends the usable hours of your garden and transforms it from a daytime space into an evening destination. Solar-powered stake lights along a path require no wiring and virtually no installation effort — push them into the ground and they charge by day and glow softly at night, guiding footsteps and outlining the shape of beds and borders. String lights draped through a tree canopy or along a pergola create an instantly magical atmosphere that can make even the most ordinary backyard feel like a destination worth lingering in.
For a more polished DIY approach, consider making your own lanterns from mason jars, tin cans punched with patterns, or even repurposed wine bottles. Mason jar lanterns can hold candles or battery-powered LED fairy lights, hung from shepherd’s hooks or tree branches at varying heights to create depth and visual interest. Punched tin lanterns cast beautiful patterned shadows when lit from within, and the process of punching the design is an enjoyable craft project in itself, requiring nothing more than a hammer, a nail, and a can filled with water and frozen solid to prevent denting.
Uplighting is a technique borrowed from professional landscape designers that any DIYer can apply to dramatic effect. Placing a solar spotlight at the base of a tree and angling it upward through the canopy creates a theatrical silhouette that transforms the garden after dark. The same approach works beautifully on large ornamental grasses, sculptural agave plants, or interesting architectural features. A handful of inexpensive solar uplights positioned thoughtfully through the garden can make the space look completely different at night — like a second garden that only exists after sunset.
Simple Seating and Gathering Spaces
Every garden needs at least one place to sit and absorb what you have created. Even the simplest seating — a single bench built from two concrete blocks and a weathered board, or a pair of Adirondack chairs assembled from a flat-pack kit — gives the garden a human scale and a clear invitation to stop, rest, and look around. Seating anchors a space and makes it feel inhabited rather than merely decorative, which is a subtle but powerful distinction in how a garden feels to the people who spend time in it.
Building your own garden bench is a satisfying weekend project well within the reach of most beginners. Basic designs require only a few lengths of two-by-six lumber, exterior screws, and a coat of outdoor-rated paint or stain. A bench built to a standard eighteen-inch seat height and customized to whatever length fits your space will serve for many years with minimal maintenance. Pair it with a side table built from the same materials and you have a complete outdoor seating area created entirely with your own hands for a cost that would represent a fraction of any comparable retail purchase.
Finishing touches are what separate a good garden from a great one. A birdbath placed at the center of a bed draws wildlife and adds a classical focal point. A collection of painted terracotta pots grouped in odd numbers creates visual rhythm. A simple wooden sign with the name of the garden — or just a word that captures its spirit — adds personality and makes the space feel owned and loved. None of these elements requires significant skill or investment, but together they signal that someone cares deeply about this space, and that care is what makes a garden truly come alive for everyone who enters it.
- Solar string lights draped along a fence or pergola create instant ambiance with zero wiring required and minimal installation effort.
- A fire pit built from a simple metal ring and surrounded by gravel extends the season well into autumn and becomes an instant gathering point for family and friends.
- A painted accent wall on a garden fence using exterior paint in a bold color makes the entire space feel designed and energized rather than accidental.
- Wind chimes and garden art add movement, sound, and personality to spaces between plants, filling visual gaps with something beautiful and kinetic.
- A small water feature — even a simple fountain bubbling in a large container — introduces the sound of moving water, which is one of the most universally calming sensory experiences a garden can offer.
The most important thing to remember as you work through any list of garden projects is that there is no finish line. A garden is always becoming, always changing with the seasons, always offering new possibilities. Each project you complete teaches you something that makes the next one easier and more ambitious. Start small, build confidence, and let the space evolve gradually into something that truly reflects who you are — because the best garden in the world is the one you made yourself, with your own imagination and your own hands.








What do you think?
It is nice to know your opinion. Leave a comment.