










Evergreen Pressed Rosemary Candles: A Complete Guide to Making Beautiful Herbal Candles
The Art of Herbal Candle Making: An Introduction
There is something deeply satisfying about creating candles that combine the warm, flickering glow of candlelight with the natural beauty and fragrance of fresh herbs. Pressed rosemary candles sit at the intersection of botanical artistry and traditional craft, producing finished pieces that look like they belong in a high-end apothecary rather than a home workshop. Whether you are a seasoned candle maker or a complete beginner, this style of herbal candle is both approachable and deeply rewarding to create.
Rosemary has been treasured for centuries not just as a culinary herb, but as a symbol of remembrance, clarity, and evergreen resilience. Its needle-like leaves hold their shape and color remarkably well when pressed, making them ideal candidates for embedding into or applying onto the surface of candles. When you light a rosemary candle, the gentle warmth releases traces of the herb’s essential oils into the air, filling your space with a clean, piney, slightly resinous scent that many people find both invigorating and calming at the same time.
This guide will walk you through every stage of the process, from gathering and pressing your rosemary to pouring, decorating, and finishing your candles. Along the way, you will also find tips on choosing the right wax and wicks, troubleshooting common problems, and presenting your finished candles as gifts or home décor pieces. By the end, you will have all the knowledge and confidence you need to fill your home with these gorgeous, fragrant creations.
Gathering and Pressing Rosemary: Preparing Your Botanicals
The quality of your finished candle depends heavily on the quality of your botanicals, so it is worth taking time to gather and press your rosemary properly. The best time to harvest rosemary is in the morning, after any dew has dried but before the midday heat causes the essential oils to dissipate. Look for sprigs that are vibrant green, free of discoloration or pest damage, and flexible enough to lay relatively flat. Woody, stiff stems from very old growth can be harder to press and may curl awkwardly, so favor younger, more supple growth from the tips of the branches.
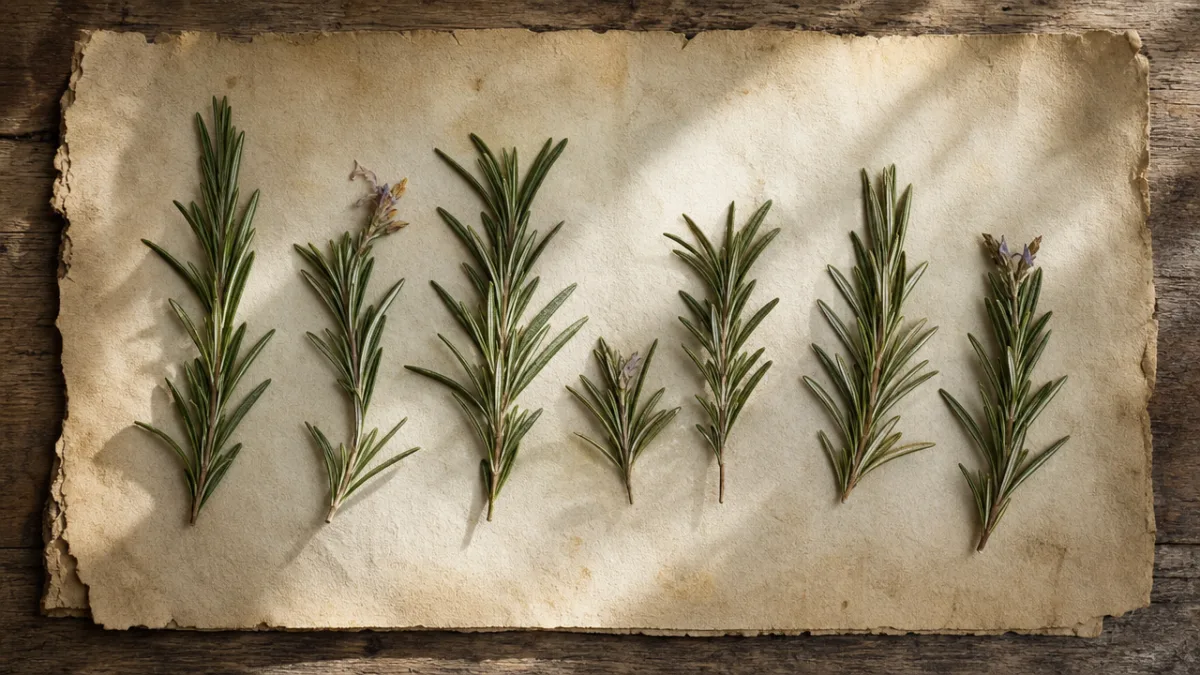
To press rosemary, arrange the sprigs in a single layer between sheets of absorbent paper such as blotting paper, parchment paper, or even plain newsprint. Avoid overlapping the sprigs, as this will cause them to stick together or press unevenly. Place the paper between the pages of a heavy book or in a dedicated flower press, then stack additional weight on top. Encyclopedias, art books, or a stack of hardback novels all work wonderfully for this purpose. Leave the rosemary to press for a minimum of two to three weeks, checking occasionally to see whether the paper needs to be replaced if it has absorbed significant moisture.
Once your rosemary is fully pressed and dried, it should be flat, slightly darkened in color but still recognizably green, and completely dry to the touch with no trace of limpness or moisture. Store your pressed sprigs carefully between sheets of tissue paper in a flat container until you are ready to use them. Pressed botanicals can be fragile, so handle them gently to avoid breaking the delicate needle clusters from the stems. If you are working with a large batch, label your storage sheets with the pressing date so you can rotate through your supply and always use the freshest pressed herbs first.
Choosing Your Materials: Wax, Wicks, and Vessels
Selecting the right materials is one of the most important decisions you will make in the candle-making process, and it is well worth doing your research before purchasing supplies. For pressed herbal candles, many crafters prefer to work with pillar wax or a blended wax that has a slightly higher melting point, as these tend to hold embedded botanicals more securely and produce a cleaner outer surface. Soy wax is a popular choice for its natural origins and clean burn, though it can sometimes have a softer finish that makes surface decoration slightly trickier. Beeswax is another excellent option that pairs beautifully with the herbal aesthetic and has a naturally sweet, warm scent of its own.
The vessel you choose will shape the entire look of your finished candle. For pressed rosemary candles, you have a few different approaches available to you. Some makers pour their candles into glass containers and press the botanicals onto the inner surface of the glass before pouring, so the herbs show beautifully through the sides. Others create freestanding pillar candles and apply the pressed herbs to the outer surface using a heat tool or a thin layer of additional wax. Mold-based pillars give you the most flexibility for surface decoration and are often the most striking visually. Mason jars, apothecary jars, and vintage glass vessels all lend themselves particularly well to the herbal aesthetic.
When it comes to wicks, the most important factor is choosing the correct size for your vessel diameter. A wick that is too small will result in tunneling, where the candle burns straight down the center without melting the wax to the edges. A wick that is too large will produce excessive soot, a large flame, and rapid, uneven burning. Most candle supply retailers provide sizing guides based on vessel diameter, and it is always a good idea to conduct a test burn before committing to a large batch. For candles that include embedded botanicals near the wick, be especially mindful of fire safety, keeping dried herbs well away from the flame zone.
The Candle-Making Process: Step by Step
Before you begin pouring, gather all of your materials and set up your workspace carefully. Candle making involves hot wax, which can cause burns and create a mess if you are not organized. Cover your work surface with newspaper or a silicone mat, have a thermometer ready to monitor wax temperature, and keep a dedicated pouring pitcher or double boiler on hand for melting your wax. Never melt wax directly in a saucepan over a naked flame, as it is flammable and can overheat quickly. A double boiler arrangement, where your wax melts in a container set over simmering water, gives you much better temperature control and significantly reduces the risk of accidents.
Melt your wax slowly until it reaches the manufacturer’s recommended pouring temperature, which typically falls somewhere between 140 and 160 degrees Fahrenheit for most soy and paraffin blends, though beeswax may require slightly higher temperatures. If you are adding fragrance oil or rosemary essential oil to your candles, stir it in thoroughly once the wax has reached the correct temperature and then allowed to cool slightly, as adding fragrance at too high a temperature can cause it to flash off and lose its potency. Stir gently and consistently to ensure even distribution without introducing too many air bubbles into your wax.
Secure your wick in the center of your vessel using a wick sticker or a small dab of hot glue, then use a wick bar, pencil, or two chopsticks laid across the top of the vessel to hold the wick upright and centered as you pour. Pour your wax slowly and steadily, leaving about half an inch of space at the top of your vessel. As the wax cools, it will contract and may create a small sinkhole around the wick, which you can fill with a second pour of slightly hotter wax. Allow your candles to cool completely at room temperature, away from drafts, for at least 24 hours before attempting to decorate or trim the wick.
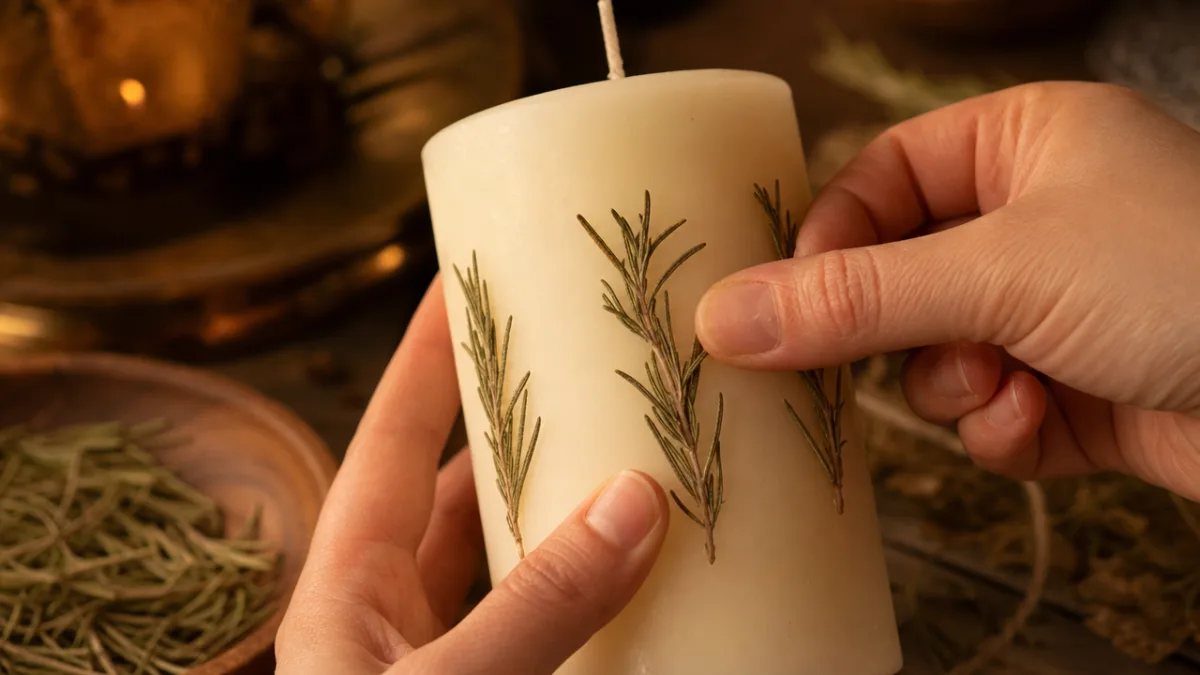
Once your candle is fully set, you are ready to apply your pressed rosemary. For container candles where you want the herbs visible through glass, you will need to plan ahead and apply the botanicals before pouring. Working quickly, press the rosemary sprigs flat against the inner wall of the glass using a long skewer or chopstick, then pour a thin layer of wax just sufficient to hold them in place before completing your full pour. For pillar candles, use a heat gun or hair dryer set to low to gently warm the outer surface of the candle, then press the dried rosemary firmly against it. You can seal the design by brushing a very thin layer of melted wax over the surface using a soft pastry brush, which locks the botanicals in place and gives the candle a beautiful, cohesive look.
Fragrance and Customization: Making Your Candles Unique
One of the great joys of making your own herbal candles is the almost unlimited scope for personalization. While rosemary is the star botanical in this style of candle, it pairs beautifully with a wide range of other pressed herbs and natural elements. Consider adding sprigs of dried thyme, flat-pressed eucalyptus leaves, or small dried flowers such as chamomile, lavender buds, or tiny star-shaped dried citrus slices. Each combination creates a different visual texture and color palette, and you can tailor your designs to match different seasons, occasions, or décor schemes.
For fragrance, rosemary essential oil is the obvious choice if you want your candle’s scent to echo its visual botanical theme. However, rosemary can also be blended with complementary essential oils to create more complex fragrance profiles. Some particularly lovely combinations include:
- Rosemary and lemon: bright, clean, and uplifting, perfect for kitchens and workspaces where focus and clarity are valued.
- Rosemary and lavender: a classic pairing that balances the herb’s sharpness with lavender’s soft, floral sweetness, ideal for bedrooms and relaxation spaces.
- Rosemary and cedarwood: a warm, woody, forest-inspired blend that feels deeply grounding and is wonderful for living rooms and studies.
- Rosemary and eucalyptus: a fresh, almost medicinal combination that is especially popular in bathrooms and during cold and flu season for its clarifying properties.
- Rosemary and orange: a cheerful, energizing blend with a slightly spicy edge that works well as a seasonal candle during autumn and winter months.
Beyond fragrance, you can customize the appearance of your candles through your choice of wax color. Natural, undyed wax in cream or ivory tones creates a rustic, farmhouse aesthetic that lets the green of the rosemary really stand out. If you prefer a more dramatic look, subtle earth tones such as sage green, warm terracotta, or pale dusty blue can transform the same pressed rosemary design into something that feels more intentional and curated. Use candle dye chips or liquid dye formulated specifically for candle wax, as other types of dye can interfere with the wax’s burning properties or produce uneven coloring.
Safety Considerations and Best Practices
Safety is an aspect of candle making that deserves serious attention, particularly when you are incorporating dried botanicals into your designs. Dried plant material is, by its nature, flammable, and it is essential to ensure that any pressed herbs applied to or embedded in your candles are positioned well away from the area where the flame will burn. As a general rule, keep all botanicals at least one inch away from the wick and never embed botanicals directly in the wax around the wick where they could be drawn into the flame as the candle melts down. Always test burn your candles under supervision before giving them to others or burning them unattended.
When making candles at home, there are several important safety guidelines to keep in mind at all times. Never leave melting wax unattended on the stove, as it can overheat and become a fire hazard very quickly. Keep a fire extinguisher accessible in your workspace and know how to use it. Always use a thermometer to monitor wax temperature rather than relying on visual cues alone, since wax can look perfectly liquid well before it reaches dangerous temperatures. If wax does catch fire, never attempt to extinguish it with water, which will cause the burning wax to splatter and spread the fire. Instead, smother it with a metal lid or use a dry chemical fire extinguisher.
For the recipients of your candles, always include a care card with each finished candle that outlines safe burning practices. Recommend trimming the wick to a quarter inch before each burn, burning the candle for no more than four hours at a time, and always keeping lit candles within sight and away from flammable materials, children, and pets. Remind recipients that candles with surface botanicals should be monitored carefully and that the candle should be retired once it has burned down to within half an inch of the base. These simple instructions can make a meaningful difference in candle safety and help ensure that your beautiful handcrafted gifts are enjoyed safely and for as long as possible.
Gifting and Displaying Your Pressed Rosemary Candles
Pressed rosemary candles make truly exceptional gifts for almost any occasion, from housewarmings and hostess gifts to holiday presents and wedding favors. Part of what makes them so special is that they look expensive and painstakingly crafted, even though the materials are relatively affordable and the process, once learned, is quite efficient. With a small investment in quality supplies and a few afternoons of creative work, you can produce a collection of candles that looks genuinely artisanal and would not look out of place in a boutique gift shop or farmers’ market stall.
Presentation makes a significant difference when giving handmade candles as gifts. Consider packaging your finished candles in kraft paper boxes lined with tissue paper, or wrapping pillar candles in a square of natural linen fabric tied with a sprig of fresh or dried rosemary and a piece of jute twine. A handwritten label or tag that names the fragrance, lists the key ingredients, and includes your care instructions adds a personal, professional touch that recipients always appreciate. You might also include the date the candle was made, since handmade candles are best used within one to two years of their pour date for optimal fragrance performance.
In your own home, pressed rosemary candles work beautifully as part of a tablescape, a bathroom display, or a windowsill vignette. Group several candles of different sizes together for a more dramatic effect, mixing pillar candles with container candles and varying the height of each piece using books, wooden boards, or stone risers. Pair your candles with other natural elements such as a small terracotta pot of living rosemary, a bundle of dried wheat, or a few polished stones for a display that feels cohesive and rooted in the natural world. When not in use, store your candles away from direct sunlight to preserve both the color of the wax and the vibrancy of the pressed botanicals.








What do you think?
It is nice to know your opinion. Leave a comment.