










Reusing Plastic Water Bottles to Make Easy Drip Waterers
Introduction: A Simple Solution for Smarter Watering
Plastic water bottles pile up fast. They fill recycling bins and clog landfills by the billions every year, and most of them get tossed after a single use. But here’s something worth knowing: gardeners have figured out a dead-simple way to give those bottles a second life by turning them into slow-drip waterers for plants. You don’t need special tools, you don’t need experience, and you don’t need to spend any money. Whether you’ve got a sprawling backyard, a tiny balcony, or a windowsill lined with houseplants, this is one of those DIY tricks that’s genuinely hard to find a reason not to try.
The idea itself is refreshingly simple. Water trickles out slowly, right into the soil where the roots actually are, which means less evaporation, less runoff, and no more guessing whether you watered deeply enough. Compare that to blasting plants with a hose for thirty seconds — drip watering keeps the soil steadily moist instead of bouncing between sopping wet and bone dry. That consistency is genuinely good for plants. It encourages deeper root growth and helps them handle heat and stress a lot better.
Whether you’ve been gardening for decades or you’re just trying to keep your first tomato plant alive through July, bottle drip waterers are worth adding to your routine. They work in raised beds, container gardens, in-ground vegetable patches, and indoors. By the end of this article, you’ll know exactly how to build them, where to use them, and how to get the most out of them — all from bottles you were probably going to recycle anyway.
Why Drip Watering Works: The Science Behind the Method
To understand why these little bottle waterers actually work so well, it helps to think about how plants drink. Roots absorb moisture most efficiently when the soil stays consistently moist — not waterlogged, not parched, but somewhere reliably in the middle. When you water from a hose or watering can, you tend to dump a lot of water all at once. That can cause runoff, compact the soil surface, and leave moisture distributed unevenly, with some roots swimming and others still dry. Drip watering skips all of that by delivering water slowly and steadily right at the root zone.
Evaporation is a huge factor too, and it’s one that traditional watering methods handle pretty poorly. A good chunk of the water you spray onto plants never makes it to the roots at all — it evaporates off leaves or the top layer of soil before it can sink in. Agricultural research has shown that drip irrigation can cut water use by up to 50 percent compared to sprinklers or flood irrigation, while actually producing equal or better plant growth. Even at the scale of a backyard garden, those savings add up over a whole season.
There’s also a plant health angle that’s easy to overlook. Wet leaves are basically a welcome mat for fungal diseases like powdery mildew and blight, which love damp conditions on leaf surfaces. Because drip waterers put water in the soil rather than spraying it all over the plant, they keep foliage dry and much less hospitable to disease. For vegetable gardeners especially, that kind of disease prevention can be just as valuable as saving water — it can mean the difference between a healthy crop and a fungal disaster that spreads through the whole bed.
Materials and Tools You Will Need
One of the best things about this project is that you probably already have everything you need. At its most basic, all you’re looking at is an empty plastic bottle, something sharp to poke a hole with, and water. That’s really it. The method is flexible enough that you can keep it dead simple or add a few extras to make the system more precise and polished — it’s entirely up to you and how much time you want to put in.
For the bottles themselves, size matters depending on what you’re watering. Smaller half-liter bottles are great for individual containers or seedlings, while one- or two-liter bottles make more sense for thirsty plants in garden beds or large raised planters. Standard water bottles are ideal because their narrow caps make drip rate control easy, but soda bottles and juice bottles work just as well. It’s worth gathering a handful before you start so you can set up waterers throughout the garden in one go.
Beyond the bottles, the other supplies you might find useful are a sharp nail, a thumbtack, a drill with a small bit, or a heated skewer — whatever you have handy for making small, clean holes. Duct tape or waterproof tape can help reinforce any spots where you’ve made modifications. A permanent marker is handy for labeling bottles by plant or fill date. If you want something a little more refined, small rubber grommets or a bit of aquarium tubing inserted into the hole can give you a more consistent, controllable drip. None of those extras are necessary, but they can take your waterers from “quick hack” to “actually reliable irrigation system” without much effort.
Step-by-Step Instructions for Building Your Bottle Drip Waterer
Once you get the hang of it, building a bottle drip waterer takes less than five minutes per bottle. The step that really matters is making the holes, because their size and number determine how fast or slow the water drips. Start with just one tiny hole — made with a pin or thin nail — and test from there. You can always make a hole bigger or add another one, but you can’t make a hole smaller once it’s too large, so starting small is the smarter move.
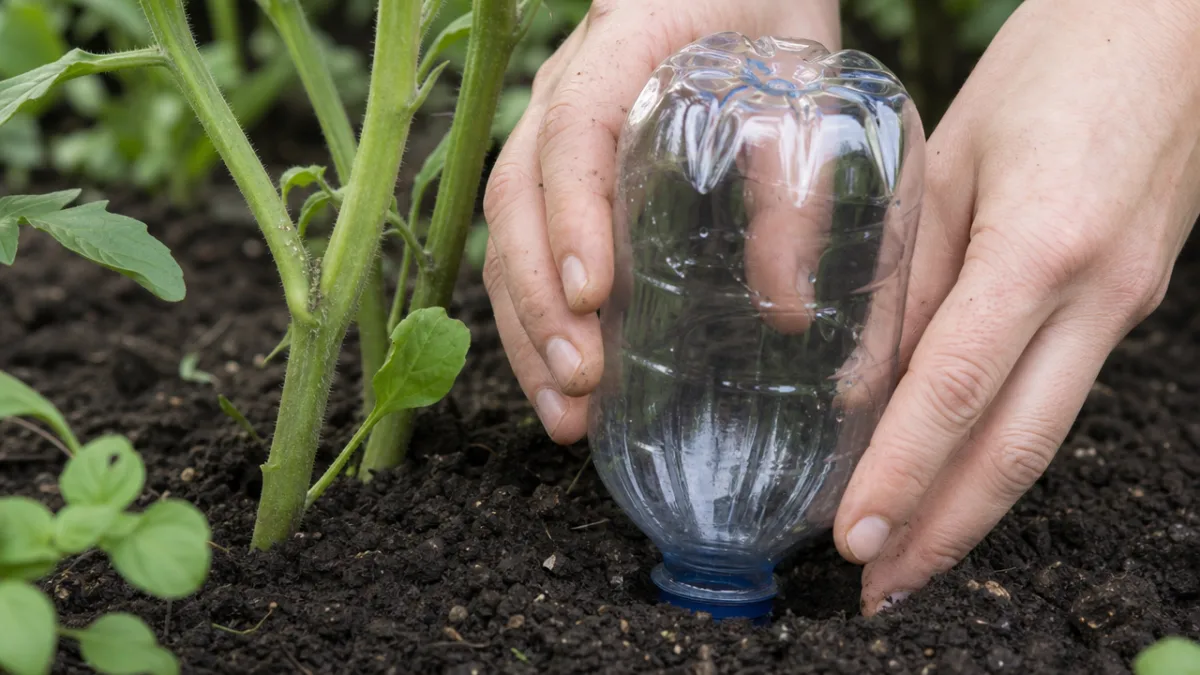
The basic process goes like this: remove the cap, poke one or two small holes directly into the cap itself, screw it back on, fill the bottle with water, and flip it upside down to check the drip rate. You want to see individual slow drops, not a steady stream. If water pours out freely, the holes are too big and you’ll need a fresh cap. Once the drip rate looks right, you’ve got a working waterer. For a buried version, cut the bottom off the bottle entirely, bury the capped end down in the soil next to your plant, and pour water in through the open bottom whenever it needs a refill.
Here’s a quick breakdown of the main approaches, depending on your setup:
- Upside-down hanging method: Poke holes in the cap, fill the bottle, flip it over, and set or hang it near the plant so the cap drips directly onto the soil surface.
- Buried spike method: Cut off the bottle bottom, poke holes in the cap, bury the capped end down in the soil beside the plant’s root zone, and pour water into the open top to refill as needed.
- Side-hole method: Poke small holes along the lower sides of the bottle, bury the lower portion in the soil, and fill from the open top. This spreads moisture more broadly across the root zone.
- Tube extension method: Insert a short piece of aquarium tubing through a hole in the cap to direct water precisely where you need it — especially useful in tightly packed planters where space is tight.
Whichever method you go with, setting up a batch of waterers across a whole garden doesn’t take long, and the payoff in reduced watering time throughout the season is real. A filled two-liter bottle can keep a medium-sized plant happy for one to three days depending on heat, wind, and how thirsty that particular plant is. During a heat wave you might need to refill daily; on a cool overcast stretch, the same bottle could last four or five days without any attention from you.
Best Plants and Garden Situations for Bottle Drip Waterers
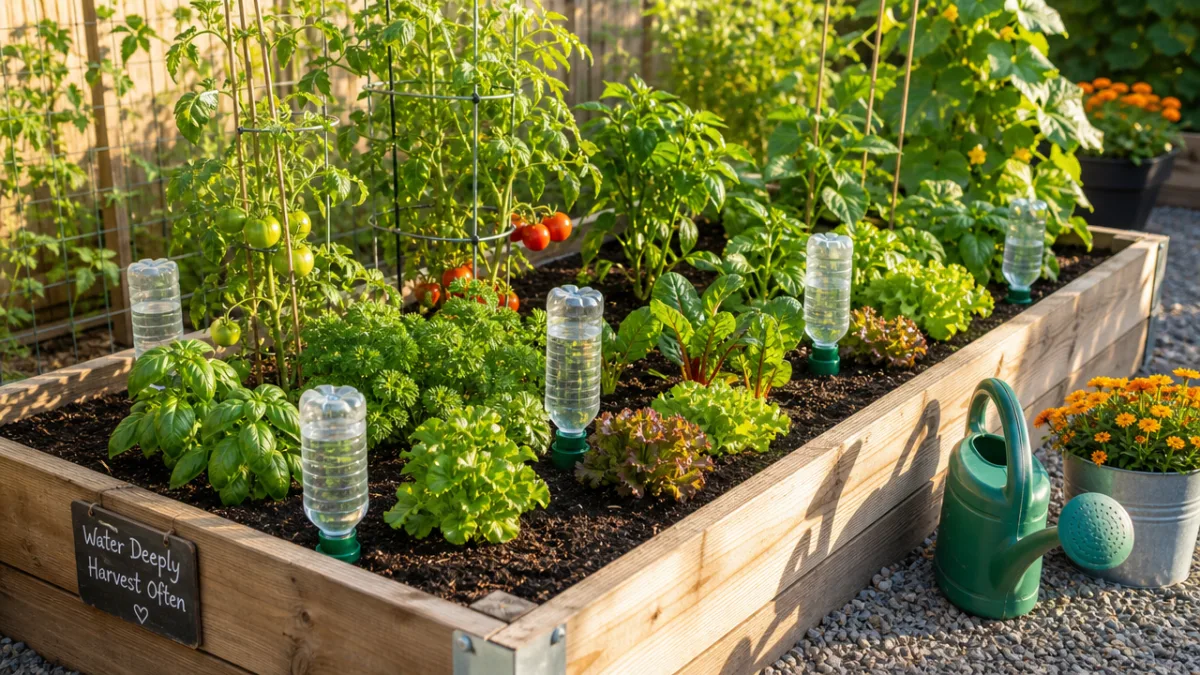
Bottle drip waterers are pretty versatile, but they really shine in certain situations. Thirsty vegetable plants — tomatoes, cucumbers, peppers, squash, eggplant — are among the biggest beneficiaries. These crops need consistent soil moisture to produce well, and they’re prone to problems like blossom end rot when moisture levels swing up and down. Sticking a drip bottle on each side of a large tomato plant, for example, keeps the root zone steadily moist through the hottest weeks of summer without you having to think about it every single day.
Container and potted plants are another great fit. Pots dry out much faster than in-ground beds, especially in warm weather or in exposed, windy spots. A small bottle waterer tucked into a container can easily double or triple the time between waterings, which is a lifesaver if you travel, get busy, or just have a tendency to forget. Herbs like basil, parsley, and cilantro — plants that wilt dramatically when they dry out but snap back quickly with consistent moisture — respond especially well to the steady, gentle supply a drip bottle provides.
There are also some specific gardening challenges where drip bottles are particularly clever solutions. Sloped beds are notoriously hard to water by hand because water runs off the surface before it has a chance to soak in. A buried drip bottle bypasses that problem entirely by delivering moisture straight underground. Dense plantings where a watering can can’t easily reach can be served by a bottle inserted at planting time and forgotten about. And if you’re heading out of town, a collection of drip bottles can act as a makeshift automatic watering system that keeps things alive without any further help from you.
Tips for Getting the Best Results
Like most things in the garden, a little attention to detail goes a long way with drip bottles. First, always fill them with clean water. If your tap water is heavily chlorinated and you’re worried about sensitive plants, just leave the filled bottles sitting uncapped for an hour or two before use — a lot of the chlorine will off-gas on its own. If you collect rainwater in a barrel, that’s even better. Plants tend to love it, and it makes the whole setup feel genuinely self-sufficient from end to end.
Keep an eye on the bottles themselves as the season goes on. Plastic breaks down in UV light, and bottles left in full sun can turn brittle and cracked within a single growing season. They won’t cause any harm when that happens, but cracked bottles drip inconsistently and eventually stop working. Getting into the habit of replacing bottles at the start of each season is easy enough, and since the material is essentially free, it’s not a big ask. If you want to stretch their lifespan, a coat of dark spray paint blocks UV rays and has a nice bonus effect of preventing algae from building up inside the bottle, which keeps the water cleaner longer.
In the beginning, check soil moisture fairly regularly — just push your finger about two inches into the soil near the root zone and feel whether it’s adequately moist. Over time you’ll get a feel for how quickly each plant goes through its bottle and can build a refilling rhythm around that. Keeping a simple garden journal noting which plants drink fastest in hot versus cool weather might sound like overkill, but it’s a small habit that adds up to a noticeably smoother, more efficient watering routine as the season rolls on.
Environmental and Economic Benefits of Reusing Plastic Bottles
There’s a real environmental case to be made for this practice, beyond just the gardening perks. Single-use plastic bottles are among the most pervasive forms of plastic pollution on the planet. Recycling is better than throwing them in the trash, sure, but the recycling process itself takes energy and resources, and a significant chunk of plastic that ends up in recycling bins never actually gets recycled due to contamination or processing limitations. Reusing a bottle — giving it a second functional life before it touches the waste stream at all — is categorically more sustainable than recycling, let alone landfilling.
Every bottle you put to work as a drip waterer is one less piece of single-use plastic heading for a landfill or waterway, at least for a while. If you get an extra growing season of use out of each bottle before it finally gives out, that’s a small but real reduction in plastic waste. Scale that across a whole garden, a neighborhood of gardeners, or a community inspired by a shared tutorial, and the cumulative effect starts to feel more meaningful than any one bottle might suggest. This is exactly the kind of everyday, behavior-driven environmental action that supports bigger systemic efforts to cut plastic production and consumption.
The economic upside is pretty compelling too, especially if you’re gardening on a budget. A commercial drip irrigation kit for even a small garden can run anywhere from twenty to several hundred dollars depending on how elaborate it gets. A bottle drip system costs nothing beyond the few minutes it takes to poke some holes in a cap. Even the water savings translate to real money over a growing season, since drip-watered gardens consistently use significantly less water than those watered by hand or with sprinklers. For anyone who wants to garden productively without spending a lot, bottle drip waterers might be the highest-value tool in the whole shed — and they’re made entirely from stuff most households throw away without a second thought.








What do you think?
It is nice to know your opinion. Leave a comment.