










DIY Wall Decor Ideas: Easy Handmade Room Decoration for an Aesthetic Home
Why DIY Wall Decor Transforms Your Living Space
There is something deeply satisfying about looking at your walls and knowing that every piece hanging there came from your own hands. DIY wall decor is not just a budget-friendly alternative to store-bought art — it is a form of self-expression that turns a house into a home. When you create something with your own effort and imagination, it carries meaning that no mass-produced item can replicate, and visitors to your space will always feel that warmth and intentionality radiating from every corner.
Beyond the emotional value, handmade room decorations offer an incredible degree of flexibility. You are not limited to whatever happens to be in stock at a home goods store. Instead, you can tailor every color, texture, shape, and size to match your existing furniture, your chosen aesthetic, and even the season. Whether your style leans toward cozy boho, clean minimalism, romantic cottagecore, or bold maximalism, DIY projects can be adapted to suit you perfectly without requiring a designer’s budget or professional tools.
The practical benefits are equally compelling. A single afternoon of crafting can yield multiple pieces that would otherwise cost hundreds of dollars combined. Many of the most stunning wall decor projects use inexpensive or even free materials — dried flowers from your garden, old fabric scraps, reclaimed wood, printed images, or leftover paint. This makes DIY decor especially appealing for renters, students, or anyone who wants a beautiful home without breaking the bank. Once you start, you will find it nearly impossible to walk through a craft store without seeing potential in everything around you.
Essential Materials and Tools to Get Started
Before diving into any project, it helps to build a basic toolkit that will serve you across dozens of different DIY wall decor ideas. The good news is that most of what you need is either already in your home or available for just a few dollars. Starting with a well-stocked craft station means less interruption mid-project and a smoother creative flow from start to finish. Think of assembling your supplies as the foundation of your entire decorating journey — the better your foundation, the more ambitious and polished your results will be.
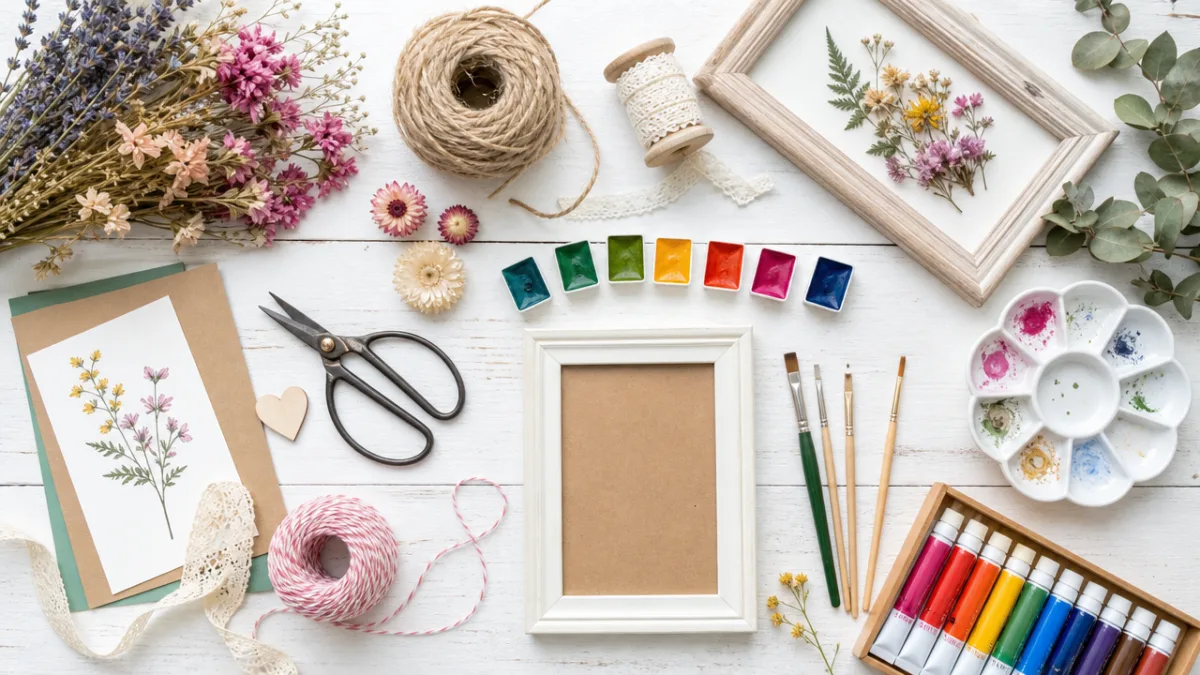
For the most versatile DIY toolkit, consider gathering the following core items that appear again and again across popular handmade decor projects. A hot glue gun is arguably the single most useful tool a home crafter can own, capable of bonding nearly any material quickly and securely. Alongside it, keep a selection of paintbrushes in various sizes, acrylic paints in neutral and accent tones, scissors, a craft knife and cutting mat, twine or jute cord, and an assortment of hooks or adhesive strips rated for wall use. A small collection of wooden frames in different sizes is also worth investing in early, as they serve as the base for dozens of creative ideas.
Natural and organic materials deserve a special mention because they have become central to the most popular aesthetic home decor trends in recent years. Dried pampas grass, preserved eucalyptus, pressed flowers, feathers, seashells, and pine cones are all free or very inexpensive to collect, yet they add a richness and texture to wall displays that synthetic materials rarely match. Keeping a small stash of these elements means you can add organic accents to almost any project, instantly elevating its visual appeal. Store them in glass jars or shallow baskets near your craft space so they remain visible and inspiring at all times.
Top DIY Wall Decor Ideas for Every Aesthetic
Macramé and Fiber Art
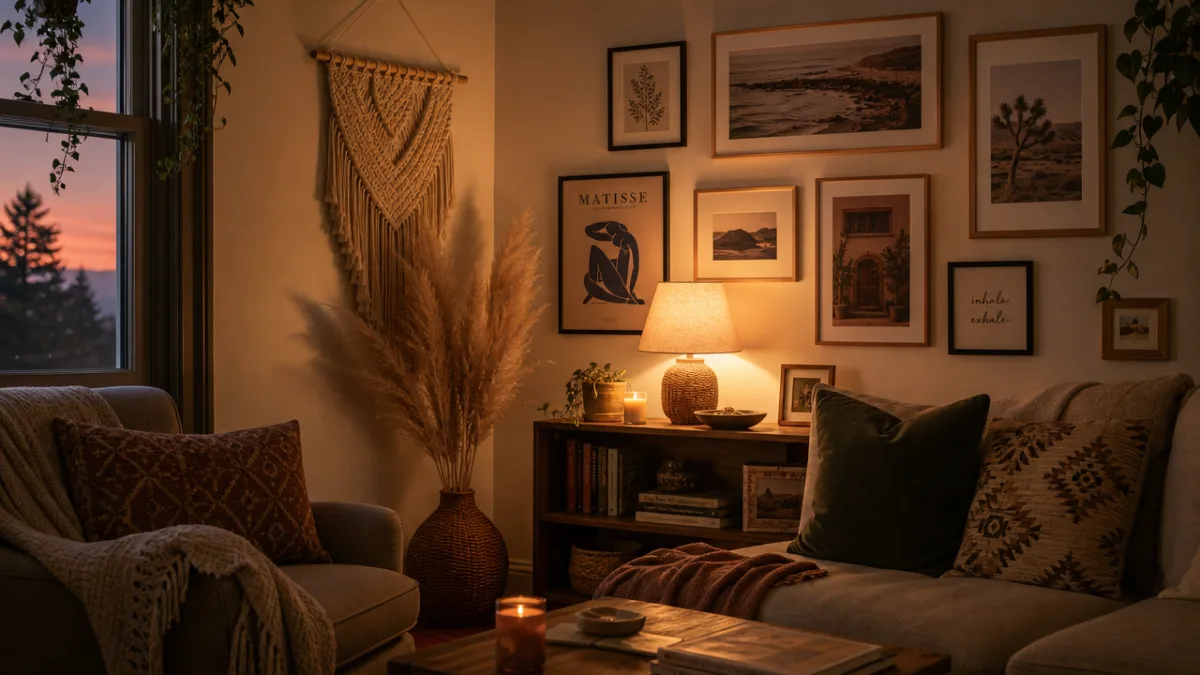
Macramé wall hangings have enjoyed a massive resurgence in interior design, and for good reason — they are endlessly customizable, require no special equipment beyond a wooden dowel and some cord, and produce a result that looks far more complex and expensive than the process actually is. Even a complete beginner can create a beautiful piece within a few hours by learning just two or three basic knots. The square knot and the spiral knot are enough to build intricate patterns, and adding fringe, beads, or dyed sections takes your piece from simple to show-stopping with minimal extra effort.
Woven wall art is another fiber-based option that offers a different texture and visual quality from macramé. Using a simple cardboard loom or a small wooden frame loom, you can weave together yarn, ribbon, fabric strips, and even dried botanicals into a layered, tactile piece of art. The beauty of weaving is that imperfections become part of the charm — uneven rows and color variations add to the handmade character rather than detracting from it. This makes it one of the most forgiving DIY techniques for beginners who worry about achieving perfection.
For a quicker fiber art project, consider a simple tassel wall hanging or a yarn wall sculpture. A cluster of coordinated tassels arranged on a piece of driftwood or a painted dowel creates a boho-chic statement piece in under an hour. Using a palette of two or three complementary colors — dusty rose, cream, and sage green, for example — gives the finished piece a cohesive, intentional look that feels professionally designed. These smaller pieces also work beautifully as part of a gallery wall arrangement, filling gaps between larger art prints and photographs.
Gallery Walls and Framed Art
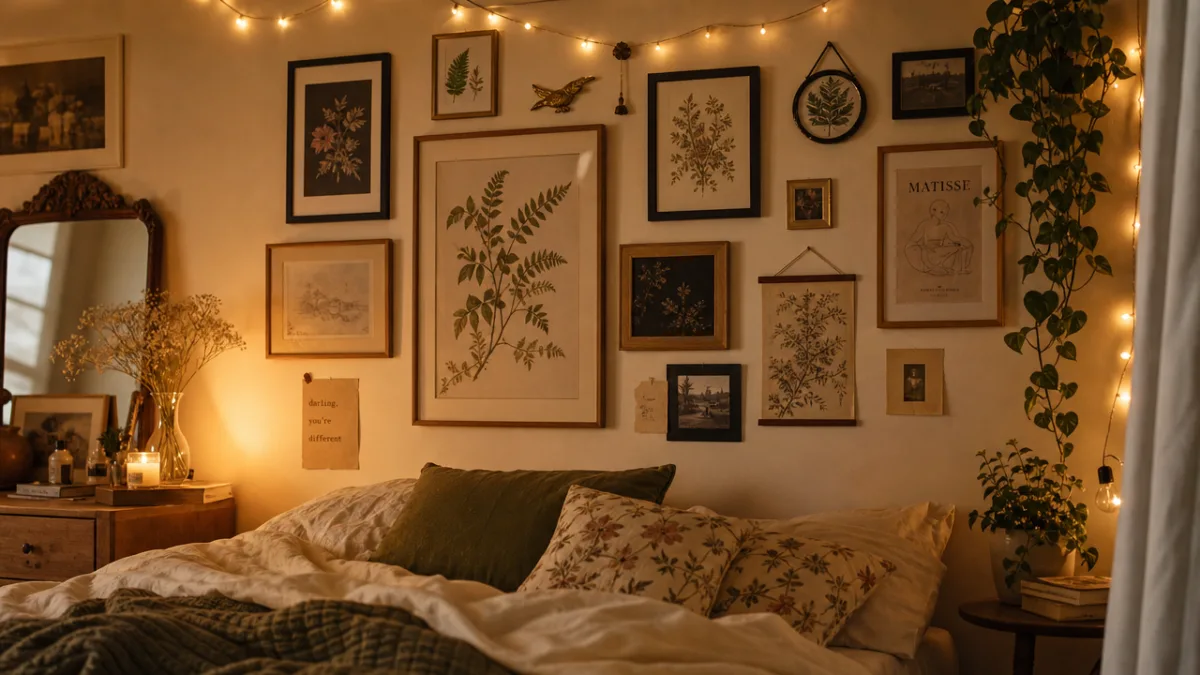
A gallery wall is one of the most impactful decorating moves you can make, and assembling one from DIY art makes it entirely unique to you. The key to a cohesive gallery wall is choosing a unifying element — a consistent frame color, a shared color palette in the artwork, or a repeating motif — while allowing the individual pieces to vary in size, medium, and style. This creates visual interest without chaos, guiding the eye across the arrangement in a way that feels intentional and curated rather than cluttered.
Creating your own art for a gallery wall does not require any formal artistic training. Abstract paintings made by layering acrylics with a palette knife, prints of your own photographs, hand-lettered quotes in ink or watercolor, and pressed botanical arrangements under glass are all accessible to beginners and produce beautiful results. Even simple geometric designs painted with painter’s tape and a single coordinating color can look strikingly modern and sophisticated when framed and grouped together. The secret is consistency in finish quality — clean edges, proper framing, and level hanging make amateur work look professional.
When planning your gallery wall layout, spend time arranging your frames on the floor before putting a single nail in the wall. Photograph the arrangement from above and view it on your phone screen to simulate how it will look at a distance — this quick trick reveals spacing issues and balance problems that are hard to see when you are standing over the pieces. Once you are happy with the arrangement, trace each frame onto kraft paper, cut out the templates, and tape them to the wall with painter’s tape. This allows you to finalize positioning and mark hanging points without any guesswork or unnecessary nail holes.
Seasonal and Nature-Inspired Wall Decor Projects
Pressed Flower and Botanical Art
Pressed flower art is one of the most timeless and universally beloved DIY wall decor techniques, and it has experienced a significant revival as part of the broader cottagecore and botanical aesthetic trend. The process is simple: collect flowers and foliage at their peak, press them between the pages of a heavy book for one to three weeks, and then arrange the dried specimens under glass in a frame. The results are genuinely breathtaking — delicate, jewel-toned florals preserved in perfect detail, looking like something from a Victorian natural history collection or a modern Scandinavian home.
The range of flowers and plants suitable for pressing is wide, and experimenting with different specimens is half the fun. Pansies, violas, cosmos, ferns, Queen Anne’s lace, lavender, and small rose varieties all press beautifully and retain much of their color. Leaves in autumn tones — burgundy, amber, and gold — make striking seasonal pieces that cost nothing to collect. Once you have a collection of pressed specimens, you can arrange them in seemingly infinite ways: symmetrical botanical grids, loose and flowing compositions, initial letters made entirely of petals, or simple single stems in small square frames.
For a more contemporary take on botanical wall art, consider shadow box arrangements that incorporate three-dimensional dried elements alongside pressed flat botanicals. Seed pods, small pinecones, dried citrus slices, and sprigs of dried lavender or rosemary add depth and fragrance to a display. These pieces work particularly well in kitchens, bathrooms, and entryways where a touch of nature feels especially welcoming. Sealing the finished arrangements with a UV-protective glass or acrylic cover extends their lifespan significantly, keeping colors vibrant for years rather than months.
Seasonal Wreaths and Hanging Installations
Wall-mounted wreaths are not just for front doors or holiday seasons — when made in the right materials and style, they serve as stunning year-round art pieces for any interior wall. A dried flower wreath in muted, earthy tones works beautifully in a living room or bedroom throughout every season, while a eucalyptus and ribbon wreath in a hallway adds fragrance alongside visual appeal. The circular shape of a wreath also provides a welcome contrast to the predominantly rectangular frames and canvases that make up most wall decor, creating dynamic visual rhythm in a room.
Beyond traditional wreaths, hanging installations made from branches, driftwood, or embroidery hoops offer a more sculptural approach to wall decor. A branch collected from a local park, stripped of its bark, sanded smooth, and mounted horizontally becomes a beautiful natural display rod from which you can hang crystals, dried flowers, small plants in test tube vases, or framed photographs with macramé cord. This kind of installation has an organic, ever-evolving quality — you can swap out elements with the seasons or as your tastes change, keeping your decor feeling fresh without starting from scratch.
Embroidery hoop art combines the appeal of fiber crafts with the accessibility of a simple, inexpensive frame. Stretch fabric, lace, or even printed images across a hoop, secure it tightly, and add embroidered details, painted elements, or attached dried botanicals. Groups of three to five hoops in varying sizes, hung in a loose cluster on the wall, create a whimsical and layered display that can be updated seasonally by simply re-stretching new fabric or adding fresh botanical accents. This is one of the easiest and most rewarding introductions to DIY wall art for anyone who is just beginning their crafting journey.
Tips for Creating a Cohesive Aesthetic Throughout Your Home
Choosing a Color Palette and Style
The single most powerful tool for making DIY wall decor look intentional and professionally designed rather than randomly assembled is committing to a consistent color palette. This does not mean every piece must be identical — in fact, variety in texture, material, and form is what keeps a curated display interesting. But when all the pieces share two or three recurring colors, they naturally feel like a family rather than a collection of unrelated objects. Choose your palette by looking at the fixed elements of your room: the wall color, flooring, furniture upholstery, and any textiles like curtains or rugs. Pull two or three colors from these existing elements and use them as your guiding thread across all your DIY projects.
Style consistency matters just as much as color harmony. Mixing a rustic farmhouse-style wooden sign with a sleek modern geometric print and a romantic floral watercolor in the same small space can feel disjointed, even if the colors match. Before starting any new project, ask yourself where it fits within the broader aesthetic you are cultivating. This does not mean you cannot evolve your style over time — it simply means making thoughtful, deliberate choices rather than impulsive ones. Keeping a mood board, either physical or digital via Pinterest, gives you a reference point to check new ideas against before committing time and materials.
Texture is the often-overlooked third dimension of a well-designed wall display. A flat photograph, a dimensional macramé piece, a rough-edged wooden sign, and a smooth ceramic wall disc all bring different tactile qualities that enrich the overall experience of the space. Aim for a mix of smooth and rough, flat and dimensional, matte and reflective surfaces across your wall decor collection. This layering of textures makes a room feel rich and considered, the kind of space that draws people in and invites them to look more closely at every detail.
Displaying and Arranging Your DIY Pieces
Even the most beautifully crafted individual pieces can fall flat if they are arranged poorly or hung incorrectly. Spacing is one of the most common issues in amateur wall displays — pieces hung too far apart feel isolated and disconnected, while pieces crowded too closely together create visual noise. As a general rule, aim for two to four inches of space between framed pieces in a gallery grouping, and treat collections of objects like wreaths or three-dimensional pieces with slightly more breathing room to allow each element to be read clearly by the eye.
Consider the height at which you hang your wall decor carefully. The standard guidance from interior designers is to center artwork at approximately 57 to 60 inches from the floor, which corresponds to average eye level. However, this rule works best for single statement pieces. For gallery walls or multi-piece arrangements, treat the entire collection as one visual unit and center that unit at eye level, allowing individual pieces to extend both above and below. When hanging decor above furniture such as a sofa or bed, the bottom edge of the lowest piece should sit roughly six to eight inches above the furniture to create a visual connection between the two elements.
Finally, do not underestimate the power of lighting in making your DIY wall decor shine. Natural light is always flattering, but in the evenings or in rooms with limited windows, strategic artificial lighting transforms a display entirely. Small picture lights mounted above key pieces, clip-on spotlights aimed at a gallery wall, or warm string lights woven around a branch installation all add a magical quality to handmade decor that elevates the entire room. Good lighting is the finishing touch that takes a beautiful craft project and turns it into a genuinely atmospheric interior design feature — one that makes your home feel like a sanctuary every time you walk through the door.
Sharing Your Creations and Finding Ongoing Inspiration
One of the most rewarding aspects of building a collection of DIY wall decor is sharing the journey and the finished results with a community of like-minded creators. Platforms like Pinterest, Instagram, and TikTok are overflowing with home decor enthusiasts documenting their projects step by step, offering not just inspiration but genuine tutorials, supply recommendations, and encouragement for beginners. Engaging with these communities — saving ideas, asking questions, and eventually sharing your own work — creates a feedback loop of creativity that keeps motivation high and pushes your skills forward with every new project.
Pinterest in particular functions as a living mood board that grows and evolves alongside your taste. Creating dedicated boards for different rooms, different aesthetics, or different techniques allows you to organize your inspiration in a way that makes it easy to return to when you are ready to start a new project. The more specific your boards, the more useful they become — a board titled simply “home decor” quickly becomes overwhelming, while boards titled “bedroom botanical wall art” or “boho living room fiber crafts” remain focused and actionable. Many creators also use their Pinterest boards as planning tools, pinning both inspiration images and their own finished results side by side to track their creative growth over time.
Beyond social media, local craft fairs, workshops, and maker communities offer a different but equally valuable kind of inspiration. Seeing handmade work in person — being able to examine the stitches in a woven piece or run your fingers along the texture of a hand-carved wooden sign — reveals details and techniques that photographs cannot fully capture. Many local libraries, community centers, and craft stores offer free or low-cost workshops in macramé, watercolor, and other popular DIY decor techniques. Attending even one of these sessions can rapidly expand your skill set and introduce you to a local network of creative people who share your passion for making beautiful things by hand.
The most important thing to remember as you build your collection of handmade wall decor is that the process itself is as valuable as the finished product. Every piece you create teaches you something new — about materials, about composition, about color, and about your own evolving aesthetic sensibilities. Not every project will turn out exactly as planned, and that is perfectly fine. Some of the most beloved pieces in a home are the imperfect ones, the ones that show the evidence of a learning curve and carry the memory of an afternoon spent doing something creative and absorbing. Give yourself permission to experiment, to fail gracefully, and to keep making — because the walls of a home filled with handmade things are walls that tell a story uniquely and unmistakably your own.








What do you think?
It is nice to know your opinion. Leave a comment.