










Tips for Braiding a T-Shirt Rag Rug: A Complete Guide to Crafting Your Own Colorful Masterpiece
Introduction to T-Shirt Rag Rug Braiding
T-shirt rag rugs might just be one of the most satisfying things you can make at home. You take old shirts that would otherwise get tossed, and turn them into something genuinely beautiful that can handle years of daily use. Braided rag rugs have been a staple of American folk craft for centuries, and right now makers are bringing them back with a sustainable, modern spin — and jersey knit fabric makes the finished rug wonderfully soft and springy underfoot.
What I love about this project is how accessible it is. You don’t need special equipment, complicated stitches, or any real sewing experience — just a pile of old shirts, a pair of scissors, and maybe a large blunt needle. The braiding itself is rhythmic and almost meditative, which makes it a perfect project for a long evening in or a rainy weekend when you want something tactile to do with your hands.
Before you jump in, it’s worth understanding what separates a great braided rug from a frustrating one. Consistency in your strips, even tension as you braid, and a bit of color planning upfront are really the three things that matter most. Your rug can be an all-out rainbow explosion or a carefully curated palette — both can look stunning. But getting a handle on these basics early will save you from having to rework things later, which nobody wants.
Selecting and Preparing Your T-Shirt Materials
Good material prep is what sets a rug up for success. Not every t-shirt works equally well here, and being a little selective goes a long way. Your best bet is 100% cotton — it’s soft, it curls nicely when cut into strips, and it holds up well to foot traffic and repeated washing. Steer clear of synthetic blends or really thin fabrics, since those tend to stretch unevenly and can start to unravel before you’d want them to.
When you’re cutting, aim for strips about one to one-and-a-half inches wide. Go too narrow and the strips feel flimsy and risk snapping under braiding tension; go too wide and the braid gets bulky and stiff rather than soft and supple. The nice thing about jersey is that it naturally curls inward when you stretch it a little, tucking away the raw edges and forming a smooth, cord-like strip that braids really cleanly.
For efficient prep, lay each shirt flat, trim off the hem and armhole sections, then cut horizontal strips straight across the body. When one strip runs out, connect it to the next by cutting a small slit near each end and looping one through the other — it’s a seamless join that disappears right into the braid with no bulky knots. Getting all your strips cut and sorted by color before you start braiding makes the whole process flow so much better.
- Use 100% cotton t-shirts for best results and durability
- Cut strips approximately 1 to 1.5 inches wide for a balanced braid
- Remove hems, collars, and armhole seams before cutting
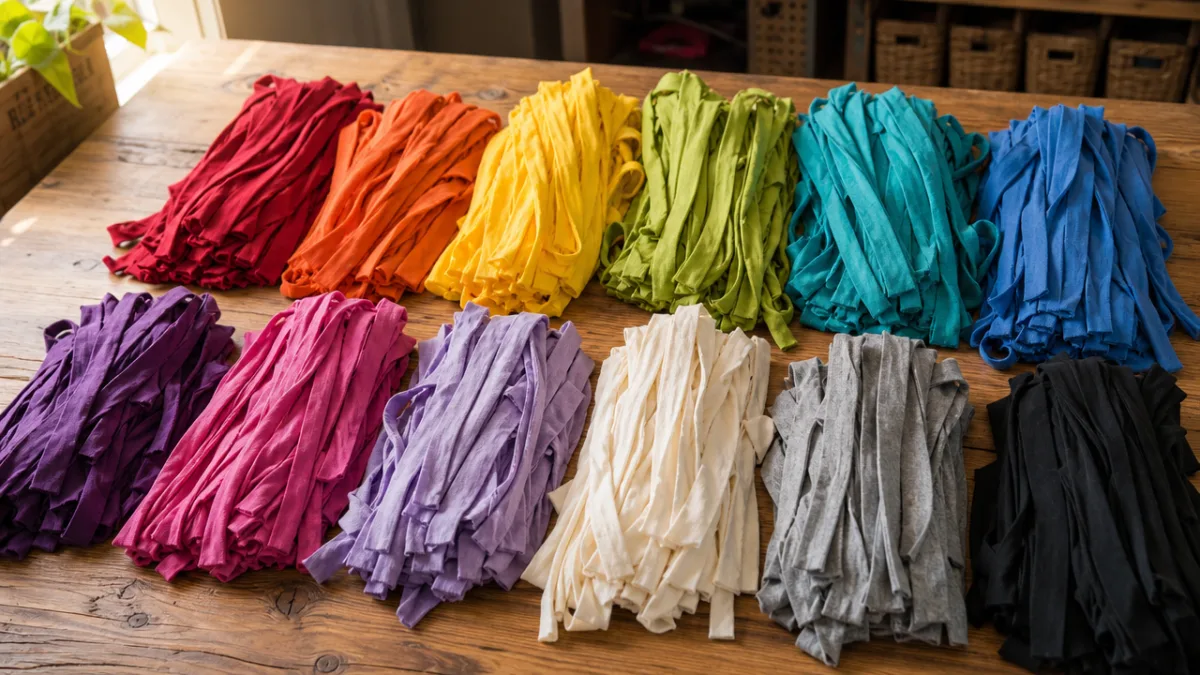
- Sort strips by color family before you begin to keep your design intentional
- Connect strips with a locking loop join to avoid bulky knots in your braid
Understanding Color Planning and Design Layout
Color planning is probably the most underestimated part of making a braided rug, and yet it has the biggest impact on how the finished piece actually looks. A lot of first-timers grab whatever shirts are around and just start braiding — and then wonder why the result feels muddy or visually cluttered. Spending even half an hour thinking through your colors before you begin will make a real difference when you finally unroll that rug on your floor.
One approach that works really well is picking three main colors and alternating them throughout your braid. Once you coil and sew that braid into a rug, those alternating colors naturally form a spiral pattern that draws the eye right to the center. Another popular option is to keep one neutral — white, cream, grey, whatever fits — as a constant strand in every braid, and let the other two strands shift color as you go. The neutral acts as a visual anchor that ties even very different hues together into something cohesive.
If the rug is going into a specific room, pull your colors from what’s already there. Navy cushions and terracotta accessories? Weave those exact tones together. A kid’s room calls for bright, cheerful primaries. A farmhouse kitchen? Faded plaids and stripes in blue and red over white give a classic, vintage feel. Whatever direction you go, lay out your sorted strips and actually step back and look at them together first. It’s such a low-effort step, and it can save you a lot of regret later.
The Braiding Technique: Step-by-Step
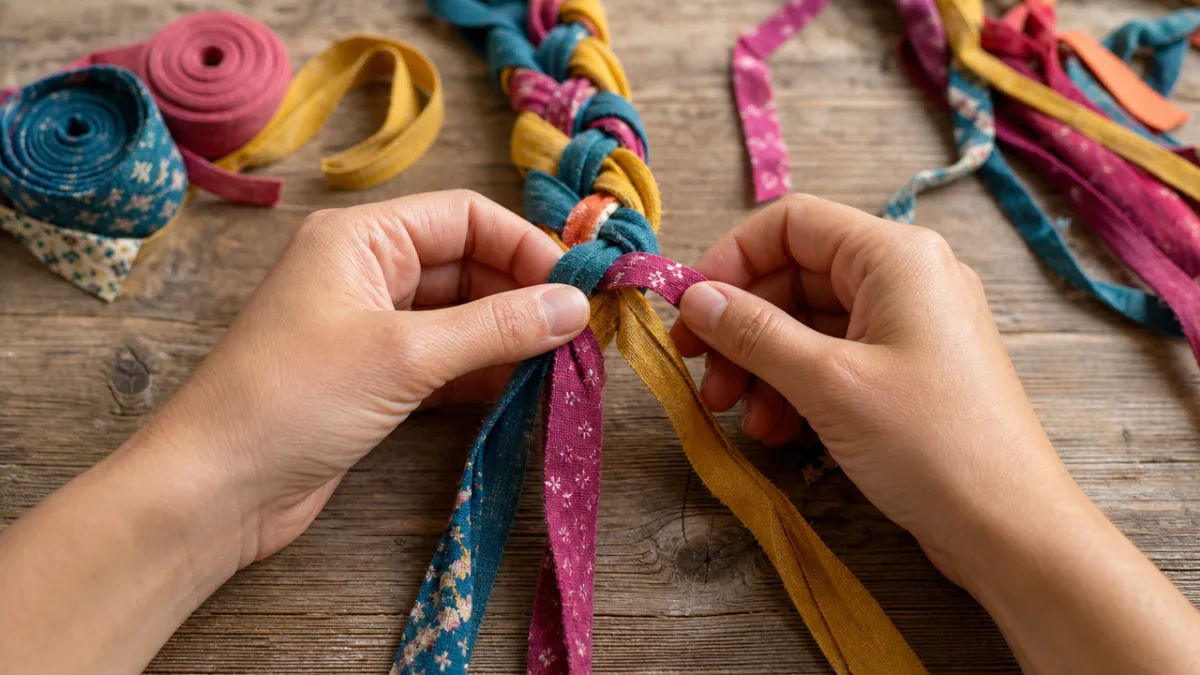
Once your strips are prepped and your colors are sorted, you’re ready to braid. Start by gathering three strips — one of each color if you’re working with a three-color system — and tie them together with a simple overhand knot at one end. Then anchor that knot to something sturdy while you work. A clamp on a table edge, a doorknob, a pin in a foam board — any of these work great. The point is that anchoring it frees both your hands so you can keep your tension consistent throughout.
The braiding motion is the same basic three-strand braid you probably learned braiding hair as a kid: right strand over the middle, then left strand over the new middle, repeat. What’s different with fabric is that you need to keep each strand lying flat rather than letting it twist as you go. Jersey loves to roll on itself, so pause every so often to untwist each strand and flatten it back out. Twisted strands create lumps and uneven texture in the finished braid that will show up once the rug is assembled.
Keep your tension firm and even — tight enough that the braid holds its shape, loose enough that you’re not distorting the fabric. A well-tensioned braid should sit snugly but not strain. As strands run short, add new ones by making your joins an inch or two back from the end of the strand so the junction gets buried inside the braid rather than sitting exposed at the edge where it could weaken or show.
- Tie three strips together and anchor the knot securely before beginning
- Keep strands flat and untwisted throughout the braiding process
- Cross the right strand over the middle, then the left over the new middle, alternating continuously
- Maintain consistent, firm tension throughout to create an even, structured braid
- Add new strips well before your current strips run out, burying the join inside the braid
- Work in long sessions to maintain tension consistency, as stopping and restarting can create visible variations
Coiling and Sewing the Braid Into a Rug
This is where your long braid becomes an actual rug — and also where most beginners hit their first real snag. The most important thing to keep in mind is that your braid has to coil completely flat. If it starts to cup or buckle, you’ve got a tripping hazard as much as an aesthetic problem. Getting that flat coil right means understanding how your braiding tension relates to how the coil needs to be laid out, and that’s something that clicks with a little practice.
To start coiling, take the very beginning of your braid and curl it into the center of your rug. For an oval — the most traditional shape and a great starting point — fold the first few inches of braid back on itself rather than starting with a tight circle. That initial fold sets the length of your oval, and as you keep coiling outward, the shape develops naturally. Stitch the coils together as you go using a large blunt tapestry needle threaded with heavy thread or a strip of the same t-shirt fabric, working through the loops of adjacent rows to lace them together firmly.
Lacing rather than surface stitching is the traditional method, and it’s more durable too. Thread your needle with a long fabric strip, push it through the loops of two neighboring braid rows, and pull them snugly together — no visible thread on the surface. Every couple of loops, pull the lacing taut to keep things tight. Keep checking that your rug is lying flat as you go. If the edges start curling up, you’re pulling the braid in too tightly; if the edge gets wavy and ruffled, you’re feeding the braid in too loosely and need to bring in just a little more tension.
Finishing, Caring For, and Displaying Your Rug
A good finish is what takes your rug from “craft project” to something that looks genuinely made. When your rug is the size you want, taper the last few inches of braid by gradually trimming each strand a little shorter than the last, so the braid narrows naturally to a point instead of just stopping. Tuck that tapered end firmly under the edge of the last coil and stitch it down from several angles so it won’t work loose with use or washing. It’s a small detail, but it makes the rug look intentional rather than hastily finished.
One of the best practical things about t-shirt rag rugs is that they’re fully machine washable, which makes them perfect for kitchens, mudrooms, bathrooms, and kids’ rooms. Cold water, gentle cycle, low heat in the dryer — or just lay it flat outside in the sun. Skip the hot water and high heat, which can cause the cotton to shrink unevenly and may loosen your lacing over time. A quick shake outside before washing helps knock off surface dust and keeps the rug cleaner longer between washes.
On hard floors, always put a non-slip pad underneath — this matters especially on tile, hardwood, or laminate. Beyond day-to-day use, braided t-shirt rugs make genuinely thoughtful gifts, great craft fair pieces, and real statement items in a home. There’s something quietly satisfying about looking down and seeing something beautiful that you made entirely by hand from things that would have been thrown away. Every rug is different, every color combination tells its own story, and no two ever come out exactly the same.
- Taper the final braid end gradually to create a neat, invisible finish
- Tuck and stitch the tapered end securely into the underside of the last coil
- Machine wash in cold water on a gentle cycle for easy maintenance
- Use a non-slip pad beneath the rug on hard floors for safety
- Avoid high heat when drying to preserve fabric integrity and lacing strength
- Store extra braided length rolled loosely rather than folded to prevent creasing
Troubleshooting Common Problems and Building Your Skills
Even people who’ve made a few of these run into issues, so knowing what to look for makes a big difference. The most common problem is a rug that curves up at the edges instead of lying flat. Almost always, this means the braid is being pulled too tightly during coiling, putting more tension on the outer edge than the center can accommodate. The fix is simple: let the braid feed in with a slightly looser arc as you sew, giving it just a tiny bit of extra length around each curve rather than pulling it snug against the previous coil.
Another thing that throws people off is uneven color distribution — patchy, random-looking sections instead of the clean spiral or stripe effect you were going for. This usually comes down to strips of very different lengths being joined without thinking about where those joins land in the braid. If two color changes happen back to back on the same strand, you end up with a cluster of one color and then a long stretch of another. The fix is to keep strips within a color family roughly similar in length, or stagger your joins across different strands so no one section of the braid gets overloaded with changes at once.
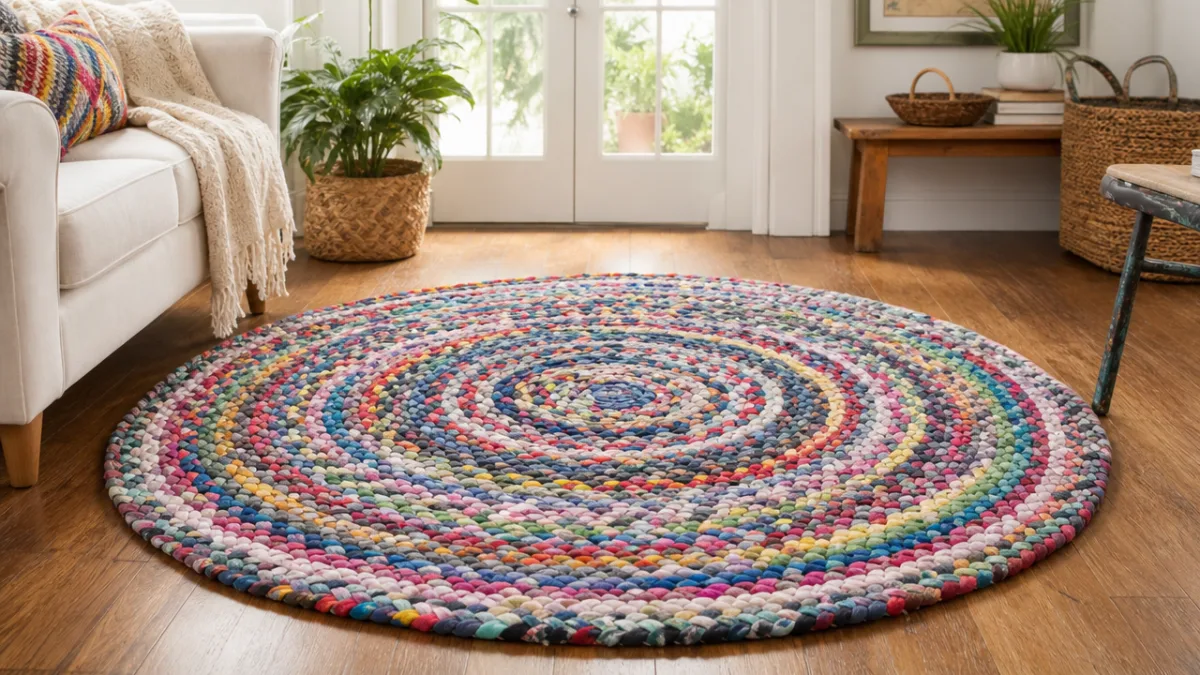
Once you’ve got a feel for the basics, there’s a lot of room to experiment. Round rugs, square rugs, even heart-shaped ones are all possible with the same fundamental technique — you just adjust how you set up the center and manage the coiling at the corners. You can also try mixing strip widths within a single rug for some textural variation, or bring in denim, flannel, or old sweaters alongside your t-shirts for a richer, more layered look. The skills you build on your first rug really do set you up for everything that comes after, and the creative possibilities from there are pretty much limitless.








What do you think?
It is nice to know your opinion. Leave a comment.