










5 Simple Ways to Reduce Candle Soot: A Complete Guide to Cleaner, Healthier Burning
Understanding Candle Soot and Why It Matters
Candle soot is the dark, powdery residue that forms when a candle flame burns incompletely, releasing tiny carbon particles into the air and depositing them on walls, ceilings, jars, and nearby surfaces. While a small amount of soot is a natural byproduct of combustion, excessive soot production is a sign that something has gone wrong with the way your candle is burning. Understanding the root cause of this problem is the first step toward solving it and creating a cleaner, more enjoyable candle experience in your home.
The health implications of candle soot are worth taking seriously. These ultrafine carbon particles can linger in the air long after you’ve blown a candle out, and when inhaled regularly, they may contribute to respiratory irritation, particularly for people with asthma, allergies, or other sensitivities. Beyond the health concerns, soot leaves unsightly black marks on walls and ceilings that can be surprisingly difficult to clean, sometimes requiring repainting entirely. The cumulative damage to your home décor from habitual soot exposure is a practical reason to address the problem proactively.
Soot production is influenced by several interconnected factors, including wick length, wick material, wax type, fragrance load, and the airflow conditions in the room where you burn your candles. Not all candles are created equal, and some are more prone to sooting than others based on how they were manufactured. However, regardless of the candle’s quality, there are reliable, straightforward habits and adjustments any candle lover can adopt to dramatically reduce the amount of soot produced during every burn. The five methods outlined in this guide are practical, easy to implement, and genuinely effective.
Trim Your Wick Before Every Single Burn
If there is one single habit that candle experts universally agree upon, it is this: trim your wick before every burn, without exception. The ideal wick length for most standard candles is approximately one-quarter of an inch, or about six millimeters. When a wick grows longer than this through burning, the flame becomes too large, flickers excessively, and draws more fuel than it can cleanly combust. That excess carbon has nowhere to go but up into the air as soot, creating the telltale black smoke plume and the dark deposits you’ve likely noticed on your candle jar or surrounding walls.
Trimming the wick is a simple task that takes only seconds and makes a remarkable difference. You can use a dedicated wick trimmer, which is specially designed with a long handle to reach into deep candle jars, or a simple pair of scissors or nail clippers will work just as well. Always trim the wick before the candle is lit, never after, and make sure the candle has cooled completely before you reach in with any tool. Removing the trimmed piece of wick from the wax pool is also important, as a stray bit of charred wick floating in the wax can act like a second uncontrolled wick and produce additional soot during the next burn.
Many candle users notice a mushrooming effect at the top of the wick after extinguishing a candle. This carbon buildup, which looks like a small black mushroom cap, is a clear signal that the wick has been burning too long without trimming and that sooting has been occurring. If you regularly see this mushroom shape, making a habit of trimming before every single lighting session will quickly eliminate the problem. Over time, you will also notice that your candles burn more evenly, last longer, and produce a more consistent, cleaner fragrance throw throughout the room.

Burn Your Candle in a Draft-Free Environment
One of the most overlooked causes of excessive candle soot is a flickering flame, and the most common cause of a flickering flame is airflow. When a candle is placed near an open window, a heating or air conditioning vent, a ceiling fan, or even in a hallway where people frequently walk by, the flame is constantly being disturbed by moving air. A stable, teardrop-shaped flame burns cleanly and efficiently, consuming the wax fuel in a controlled and complete manner. A flickering flame, by contrast, is perpetually disrupted in its combustion cycle, leading to an inconsistent burn that produces significantly more soot as a direct result.
Finding the right location in your home for candle burning goes beyond aesthetics. Before you light a candle, take a moment to assess the airflow in the area. Hold your hand near the spot where you plan to place the candle and feel for any subtle air movement. Check whether nearby vents are active, whether windows are open, or whether a fan is running nearby. Moving a candle just a few feet away from a source of airflow can transform a smoky, sooty burn into a clean, steady one. This is a zero-cost adjustment that requires no special equipment and can have an immediate, noticeable impact on soot production.
It is also worth considering the room itself when choosing where to burn candles regularly. Rooms with high ceilings and good insulation tend to have more stable air, while open-plan living spaces with multiple entry points often have more ambient airflow from foot traffic and HVAC activity. Bathrooms, for instance, should be used with caution since exhaust fans can dramatically disrupt a candle flame. If you love burning candles in a particular room but notice persistent sooting, try repositioning the candle to a more sheltered spot, such as inside a fireplace alcove or on a low shelf away from foot traffic zones, and observe whether the soot production decreases.
Choose High-Quality Candles Made with the Right Wax
Not all candle waxes are formulated the same way, and the type of wax used in a candle has a significant influence on how much soot it produces. Paraffin wax, which is derived from petroleum and remains the most widely used candle wax in the world, tends to produce more soot than natural waxes, particularly when it is made from lower-grade paraffin or blended with high amounts of synthetic fragrance oils. This does not mean all paraffin candles are bad, but it does mean that budget paraffin candles with heavy fragrance loads are among the most likely candidates for excessive sooting.
Natural waxes such as soy wax, coconut wax, and beeswax generally burn cleaner than standard paraffin. Soy wax, made from hydrogenated soybean oil, has a lower melting point and burns at a cooler temperature, which tends to produce a more complete combustion with less carbon residue. Beeswax is particularly notable for its clean burn and is often cited as the least sooty wax available, though it comes at a higher price point. Coconut wax, increasingly popular in artisan candle making, also burns exceptionally cleanly and holds fragrance well without requiring excessive fragrance loads that can contribute to soot.
When shopping for candles, look for those that clearly label their wax type on the packaging. Reputable candle makers will proudly advertise the use of soy, coconut, or beeswax. You should also pay attention to the fragrance load, since candles with very strong scents often contain a higher percentage of fragrance oil, which can disrupt clean combustion. A candle that smells overpoweringly strong while unlit may be a sign of an excessive fragrance load. Opting for candles with a moderate, balanced scent, preferably made with natural fragrance oils or essential oils rather than synthetic alternatives, can help you enjoy beautiful aromas with significantly less soot as a byproduct.
Reading reviews and researching candle brands before purchasing is also a worthwhile strategy. Many candle enthusiasts share detailed burn reports online, noting which brands produce noticeable soot and which burn cleanly over multiple uses. Artisan and small-batch candle makers who prioritize quality ingredients are often more transparent about their formulations and more careful about wick sizing, which is another critical factor in soot production. Investing a little more in a well-made candle from a quality brand is almost always a better value in the long run than buying cheaper candles that dirty your walls and fill your air with carbon particles.

Keep the Wax Pool Clean and Free of Debris
The liquid wax pool that forms around a burning candle wick is not just a reservoir of fuel; it is an active part of the combustion system. When foreign materials fall into this pool, they can act as unintended wicks, creating secondary points of combustion that burn in an uncontrolled and incomplete way. Common culprits include trimmed wick fragments, matchstick debris, dust particles, dried flowers or botanicals used as decorative elements, and even insects attracted to the warm glow of a candle flame. Each of these contaminants can contribute meaningfully to increased soot output during the burn.
Maintaining a clean wax pool is straightforward with a little attention. After trimming your wick, always remove the trimmed piece before lighting the candle. If you use matches to light your candles, take care to keep the spent match away from the wax pool entirely, discarding it safely before placing the candle back in its spot. For candles that come decorated with dried botanicals embedded in the wax, be aware that these materials will eventually burn and may produce additional smoke and soot as the candle burns down toward them. Consider choosing unembellished candles if soot reduction is a priority for you.
If you notice debris in the wax pool while the candle is unlit, you can remove it carefully using a toothpick, tweezers, or a small spoon while the wax is still soft from a recent burn. Once the wax has fully hardened, small particles can sometimes be lifted out cleanly without disturbing the surrounding wax. Keeping the area around the candle clean also helps prevent dust and airborne particles from settling into the wax pool between burns. Covering candles with their lids when not in use is one of the simplest and most effective ways to maintain a clean wax pool and reduce the soot-producing potential of stray particles.
Extinguish Your Candle the Right Way
How you put out a candle matters more than most people realize. Blowing a candle out is the instinctive approach, and it certainly extinguishes the flame, but it also sends a final puff of black, smoky soot into the air and leaves the wick smoldering for several seconds afterward. That smoldering wick continues to produce carbon-rich smoke even after the flame is gone, and the residue settles on nearby surfaces. Over time, this seemingly minor detail contributes a surprisingly significant amount of soot to your walls, ceilings, and furnishings, particularly if you burn candles frequently.
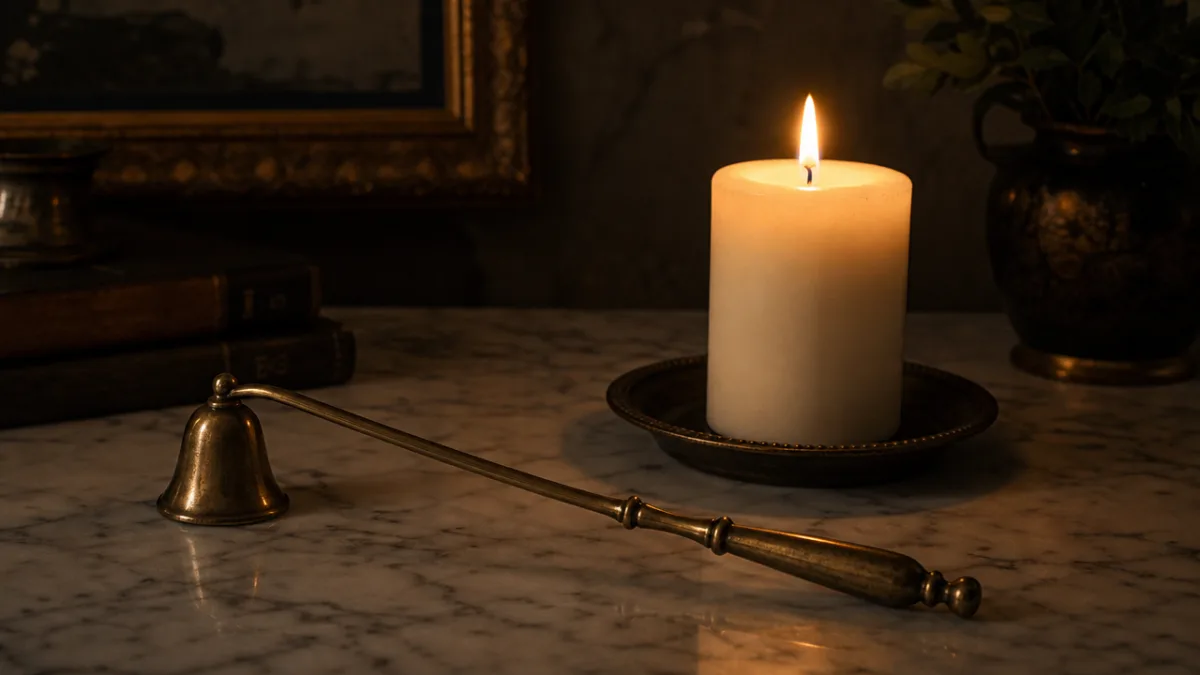
A far better method is to use a candle snuffer, which is a small bell-shaped tool on a long handle that you place over the flame to deprive it of oxygen and extinguish it gently without a puff of smoke. Snuffers have been used for centuries precisely because they provide a cleaner extinguishing action, and they remain one of the best tools in any candle lover’s collection. Another effective technique is the wick dipper method, where you use a thin metal tool to briefly dip the burning wick into the liquid wax pool to extinguish it, then immediately straighten the wick back up. This coats the wick in wax, which primes it for easy relighting while stopping the smoldering entirely.
After extinguishing the candle, allow it to cool completely in a stable, draft-free location before moving it, replacing the lid, or placing it in a storage area. Moving a candle while the wax is still liquid can cause the wick to shift off-center, which leads to uneven burning and more soot production during future uses. Allowing the wax to harden naturally and evenly ensures that the wick remains properly positioned in the center of the candle, where it will burn most efficiently. Small habits like these, practiced consistently over time, accumulate into a dramatically cleaner, healthier candle burning experience throughout your home.
It is also worth noting that candle burn time per session makes a difference when it comes to soot production. Most candle makers recommend burning a candle for no more than four hours at a time. Extended burning beyond this threshold causes the wick to grow excessively long during the session and results in an increasingly large, unstable flame that produces more and more soot as time goes on. Additionally, candles should always be burned long enough during each session for the entire top layer of wax to melt evenly from edge to edge, a process known as achieving a full melt pool. Candles extinguished too early develop a tunnel of melted wax around the wick while the outer edges remain solid, and this tunneling effect creates a progressively worse burning environment that increases soot with every subsequent use.
Quick Reference: The 5 Simple Ways to Reduce Candle Soot
To bring everything together, here is a concise summary of the five proven methods discussed throughout this guide. Each one is simple to implement, requires little to no additional expense, and can be adopted starting from your very next candle lighting session. Consistency is the key factor, since the real power of these habits comes from applying them every single time you burn a candle, not just occasionally when you remember. Over weeks and months, these practices will protect your walls, improve your indoor air quality, and help you get the most out of every candle you own.
- Trim your wick to one-quarter inch before every single burn to prevent oversized flames and excessive carbon release from an overgrown wick that has been allowed to accumulate too much charred material at its tip.
- Burn candles in a draft-free location away from windows, vents, fans, and high-traffic areas where moving air will disrupt the flame and cause the flickering that leads directly to incomplete combustion and visible soot production.
- Choose high-quality candles made with natural waxes such as soy, coconut, or beeswax, and look for candles with moderate fragrance loads and properly sized cotton or wood wicks that are appropriate for the diameter of the candle vessel.
- Keep the wax pool clean and free of debris by removing trimmed wick pieces, avoiding matchstick fragments, and covering candles with their lids between uses to prevent dust and airborne particles from settling into the wax.
- Extinguish candles with a snuffer or wick dipper rather than blowing them out, and limit burn sessions to four hours to prevent wicks from growing excessively long and producing increasingly large, sooty flames.
Implementing even two or three of these changes will produce a visible improvement in the cleanliness of your candle burn. Implementing all five will transform your candle experience entirely, replacing smoky, sooty burns with clean, even, beautifully fragrant flames that illuminate your home without leaving a dark residue behind. Candles are one of the simplest, most affordable ways to create a cozy and inviting atmosphere, and with these habits in place, you can enjoy them fully without the frustrating and unhealthy side effects that come with poor burning practices.
Finally, it is worth remembering that candle care is a form of self-care and home care combined. Taking a few extra seconds before and after each burn to trim the wick, check the environment, and properly extinguish the flame is a small act of mindfulness that pays dividends in a cleaner home, better air quality, and longer-lasting candles. Share these tips with fellow candle lovers in your life, and you may be surprised how many people have been tolerating unnecessary soot simply because they did not know these simple adjustments were available to them. A cleaner burn is well within reach for anyone willing to make a few small but meaningful changes.








What do you think?
It is nice to know your opinion. Leave a comment.