










Free Crochet Butterfly Square Intarsia Chart and Written Pattern: A Complete Guide
Introduction to Intarsia Crochet and the Butterfly Square
Intarsia crochet is a captivating colorwork technique that allows crafters to create stunning, picture-like designs within a single fabric panel. Unlike tapestry crochet, which carries unused yarn across the back of the work, intarsia uses separate yarn bobbins or small yarn packages for each distinct color section. This results in a cleaner, neater reverse side and a finished fabric that lays beautifully flat. The butterfly square is one of the most beloved projects for showcasing this technique, combining artistic elegance with satisfying construction.
The butterfly motif has long been a symbol of transformation, beauty, and the delicate wonders of the natural world. When translated into a crochet square using intarsia methods, the butterfly takes on a charming, almost painterly quality that makes finished projects feel like tiny works of textile art. Whether you are a seasoned crocheter looking to expand your colorwork skills or an enthusiastic beginner ready to tackle something new and rewarding, the butterfly square is an ideal starting point for your intarsia journey.
This comprehensive guide will walk you through everything you need to know about creating your very own free crochet butterfly square using both an intarsia chart and a written pattern. We will cover the materials required, how to read the chart, step-by-step construction guidance, finishing techniques, and creative ideas for using your completed squares. By the end, you will have all the knowledge and confidence needed to bring this beautiful butterfly design to life in your own choice of colors and yarn weight.
Materials and Tools You Will Need
Gathering the right materials before you begin any crochet project is essential for a smooth and enjoyable crafting experience. For the butterfly square intarsia project, you will need a small selection of yarn in at least two contrasting colors — one for the butterfly motif itself and one for the background. Worsted weight yarn is highly recommended for beginners, as the thicker strands make it easier to see your stitches clearly and manage the intarsia yarn changes without frustration. Popular fiber choices include cotton, acrylic, or a cotton-acrylic blend, all of which produce excellent stitch definition.
In terms of tools, you will need a crochet hook appropriate for your chosen yarn weight. For standard worsted weight, a size 5mm (US H/8) hook is typically ideal. In addition to your hook, you will want a yarn needle or tapestry needle for weaving in ends, a pair of sharp scissors, and several small yarn bobbins or simple cardboard bobbin templates to wind your intarsia yarn sections onto. Stitch markers can also be tremendously helpful for keeping track of your position within the chart, particularly when you are first learning to read colorwork grids.
Consider keeping the following supplies on hand before you begin your butterfly square project:
- Approximately 50 grams of background color yarn in worsted weight
- Approximately 30 grams of butterfly motif color yarn in worsted weight
- Optional accent color for wing details or border edging
- Size 5mm crochet hook (or size recommended by your yarn label)
- Yarn needle for weaving in ends
- Small scissors
- Stitch markers in at least two colors
- Yarn bobbins or cardboard bobbin templates
- Printed or digital copy of the intarsia chart
- Row counter or notepad for tracking progress
Color selection is one of the most joyful parts of beginning any crochet project, and the butterfly square rewards bold, thoughtful choices. Classic combinations such as deep navy with golden yellow, soft lavender with cream, or forest green with coral all produce striking results. However, do not feel constrained by convention — the butterfly motif looks equally beautiful in subtle monochromatic tones or vibrant multicolor arrangements. Lay potential yarn selections side by side before committing, ensuring there is sufficient contrast between the background and the butterfly shape so that the design reads clearly in the finished fabric.
Understanding the Intarsia Chart
Reading a crochet intarsia chart can initially feel intimidating, especially if you are accustomed to working exclusively from written instructions. However, once you understand the fundamental principles, charts become an invaluable visual tool that makes colorwork significantly easier to follow. An intarsia chart is essentially a grid in which each square represents one stitch. The colors within those grid squares correspond directly to the yarn color you should use for that particular stitch, allowing you to see at a glance exactly where your butterfly shape will appear within the overall square.
For the butterfly square chart, the grid is typically read from bottom to top, mirroring the direction in which you crochet the fabric. Each row is worked from right to left on right-side rows and from left to right on wrong-side rows, though this can vary depending on whether you are working in turned rows or continuous rounds. The butterfly motif itself is usually centered within the grid, with the distinctive wing shapes spreading outward symmetrically from a central body column. Most charts use simple two-color systems with clear symbols or color fills that are easy to distinguish even in black-and-white printed versions.
A few key principles will help you navigate the butterfly square chart with confidence:
- Start at the bottom right corner of the chart for your first row and work across to the left.
- Move up one row at the end of each completed row, working the next row in the opposite direction.
- Switch yarn colors only when the chart indicates a change, inserting your new color on the final yarn over of the last stitch in the previous color.
- Keep separate yarn bobbins for each isolated color section to prevent tangling and ensure clean color transitions.
- Do not carry yarn across the back in intarsia — drop the old color and pick up the new one from its own separate supply.
- Mark your completed rows on the chart as you go so you always know your current position.
It is well worth spending a few minutes studying the chart before picking up your hook and yarn. Trace the outline of the butterfly shape with your finger, noting where the wings begin and end, where the body column sits, and whether any antenna or wing detail stitches are incorporated into the design. Understanding the overall structure of the motif in advance will help you anticipate upcoming color changes rather than being surprised by them mid-row, which makes the crocheting process significantly more relaxed and enjoyable.
Step-by-Step Written Pattern Instructions
The written pattern for the butterfly square provides a row-by-row text alternative to the chart, making it accessible to those who find written instructions easier to follow or who prefer not to work from a visual grid. The pattern is typically constructed using single crochet stitches throughout, as this stitch produces a firm, even fabric with excellent stitch definition that allows the butterfly motif to appear crisp and well-defined. The square is usually worked in turned rows from the bottom up, beginning with a foundation chain that establishes the width of your finished square.
To begin, make a foundation chain of the required number of stitches as specified in your chosen pattern size. Common sizes for intarsia squares range from 20 to 40 stitches wide, with 30 stitches being a popular middle-ground option that produces a finished square of approximately 15cm (6 inches) in worsted weight yarn. Once your foundation chain is complete, turn your work and begin the first row by working one single crochet into the second chain from the hook, then continuing across the row. Subsequent rows are built upon this foundation, with each row consisting of the same number of stitches as your starting chain.
Color changes within the written pattern are typically indicated using abbreviations such as MC (main color or background color) and CC (contrasting color or butterfly color). A sample row instruction might read as follows: Row 12: SC 8 MC, SC 14 CC, SC 8 MC. This tells you to work eight single crochet stitches in the background color, then fourteen stitches in the butterfly color, and finally eight more stitches in the background color. These instructions correspond precisely to the chart, so if you ever feel uncertain about a written row, you can cross-reference it against the grid for confirmation.
The written pattern is especially valuable for those crocheting in low-light conditions, working on the go, or using screen-reading accessibility tools. It also provides a wonderful learning opportunity for understanding how colorwork charts are constructed, since following both formats simultaneously — written pattern in one hand and chart in the other — reveals exactly how the two systems correspond. Many crafters find that working through their first intarsia square with both tools accessible builds confidence and chart-reading skills that serve them well in future, more complex colorwork projects.
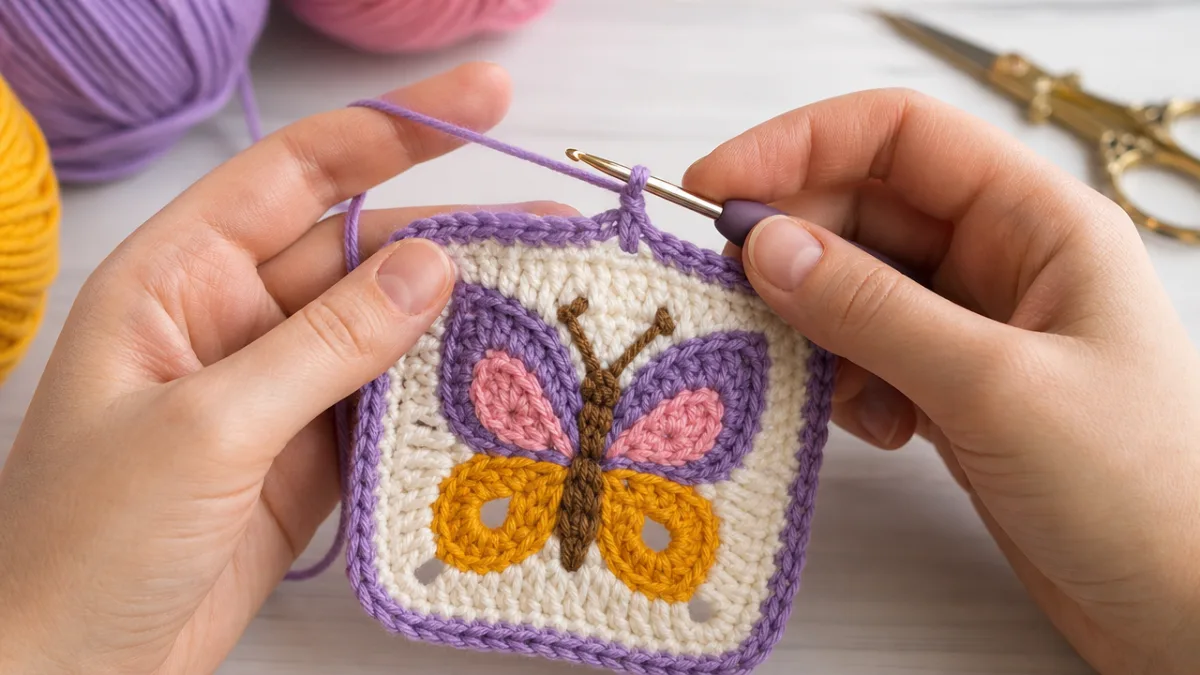
Techniques for Clean Color Changes and Finishing
The hallmark of beautiful intarsia crochet lies in the cleanliness of its color changes. Unlike other colorwork methods where untidy floats or yarn carries can be hidden on the reverse side, intarsia requires each color section to be crisp and well-defined, with no stray strands crossing between sections on either face of the fabric. Mastering the intarsia color change technique is therefore the single most important technical skill for this project, and a little focused practice will yield dramatically improved results very quickly.
To execute a clean color change in single crochet, insert your hook into the next stitch as normal and draw up a loop in the current color. Then, instead of completing the stitch with the current color, drop it and use the new color yarn to complete the final yarn over and pull through. This technique ensures the new color appears at the very beginning of its first stitch rather than halfway through, which keeps the color boundary sharp and precise. After the change, allow the dropped yarn to hang at the back of the work until you return to that section on the next row, at which point you will pick it up again and continue.
Finishing the butterfly square involves two main tasks: weaving in ends and blocking. Because intarsia crochet generates numerous yarn tails at each color change point, you will likely have many ends to weave in once your square is complete. Use a blunt tapestry needle to work each tail securely into the back of the stitches in its corresponding color section, traveling in multiple directions for approximately 5 to 7 centimeters before trimming the excess. This ensures the ends are anchored firmly and will not work their way loose through washing or use.
Blocking is a finishing step that genuinely transforms a crochet square from a slightly puckered, informal swatch into a polished, professional-looking piece. To wet block your butterfly square, soak it briefly in cool water, gently squeeze out the excess moisture without wringing, and then pin it out to your desired dimensions on a foam blocking mat or clean towel. Allow it to dry completely before removing the pins. The result will be a flatter, more evenly shaped square with improved stitch definition and a more refined appearance — well worth the small additional effort.
Creative Ways to Use Your Butterfly Squares
Once you have mastered the butterfly square intarsia pattern, the possibilities for using your finished pieces are truly exciting and extensive. A single butterfly square makes a charming standalone item when transformed into a small framed textile artwork — simply block the square, mount it on a piece of card or linen backing, and place it in a simple frame for a handmade home decor piece that makes a thoughtful and personal gift. The butterfly motif works beautifully in a wide range of color stories, from naturalistic greens and oranges to abstract pastels, making it adaptable to virtually any interior aesthetic.
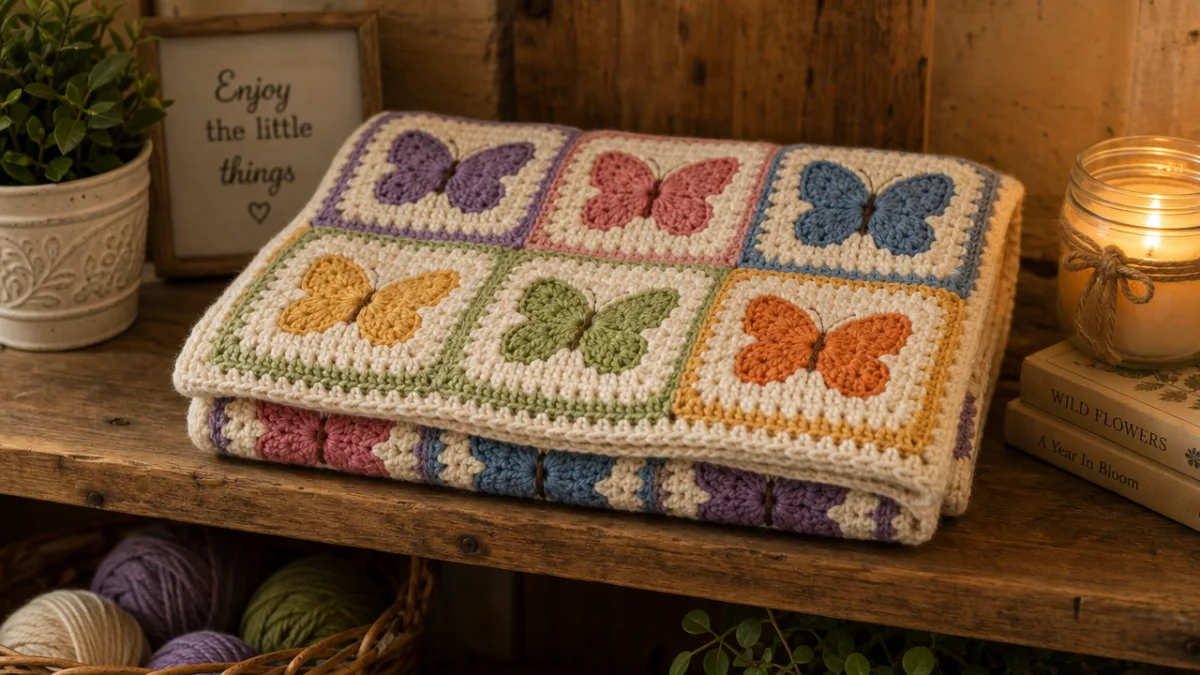
For those who enjoy larger-scale projects, the butterfly square serves as a perfect modular building block for blankets, throws, and wall hangings. Working multiple squares and joining them together using a slip stitch, single crochet join, or flat join creates a patchwork-style fabric with a repeating butterfly motif that is visually dynamic and deeply satisfying to create. You might choose to work all your squares in identical colorways for a cohesive look, or vary the background and butterfly colors from square to square to create a playful, eclectic composition. A standard lap blanket might require anywhere from 16 to 36 squares depending on your finished square size.
Other popular applications for butterfly intarsia squares include the following creative projects:
- Cushion covers with a butterfly center panel and solid color border strips
- Tote bag or market bag panels with butterfly square front and back sections
- Baby blankets combining butterfly squares with solid granny squares
- Table runners featuring a row of butterfly squares joined end to end
- Bookmarks worked in miniature with fingering weight yarn
- Wall hangings with multiple squares arranged in a grid formation
- Patchwork scarves or cowls with butterfly squares alternating with solid panels
The butterfly square pattern also provides an excellent foundation for further exploring intarsia crochet as a craft discipline. Once you are comfortable with the butterfly motif, you may wish to experiment with designing your own intarsia charts, translating simple pixel art or cross-stitch patterns into crochet grids and working them up in your preferred color combinations. The same technical skills — chart reading, clean color changes, yarn bobbin management, and blocking — apply equally to any intarsia design, meaning that every butterfly square you complete builds directly transferable skills for future projects of increasing complexity and ambition.
Tips for Success and Common Troubleshooting
Even experienced crocheters encounter small challenges when first working with intarsia colorwork, and it is worth knowing the most common issues in advance so that you can address them quickly and confidently if they arise. One of the most frequent difficulties is yarn tangling, which occurs when multiple bobbins twist around each other as you work across a row. The most effective solution is to use small individual bobbins wound tightly with only the amount of yarn you anticipate needing for each color section, and to take a moment to untwist your bobbins at the end of each row rather than allowing tangles to accumulate over multiple rows.
Another common challenge is maintaining consistent tension across color change boundaries. It is natural for the first few stitches after a color switch to appear slightly looser or tighter than the surrounding stitches, particularly as you become accustomed to the technique. Consciously tugging the new color yarn gently downward after each change helps set the tension more evenly, and most minor tension inconsistencies will relax and even out significantly after blocking. If tension issues persist, try experimenting with a slightly smaller hook for the affected sections or focusing on keeping a slow, deliberate crocheting rhythm at each color boundary.
To help ensure the best possible results with your butterfly square, keep these practical tips in mind throughout your project:
- Wind only as much yarn onto each bobbin as you need for that section, adding more as required
- Always untwist your bobbins at the end of each completed row
- Check your stitch count at the end of every row to catch errors early
- Cross-reference the written pattern and chart if any row feels uncertain
- Work in good lighting to clearly distinguish your stitch colors
- Block your finished square even if it looks neat before blocking — the results are always worth it
- Take breaks regularly to rest your hands and maintain focus on the chart
Finally, embrace the learning process with patience and curiosity. Intarsia crochet has a slightly steeper initial learning curve than basic single-color work, but the rewards in terms of creative expression and finished project beauty are immense. Many crafters report that their second intarsia square feels dramatically easier than their first, and by the third or fourth repetition, the techniques begin to feel natural and intuitive. The butterfly square is a pattern that grows with you — a project you might work in simple two-color form as a beginner and later revisit with more complex shading and additional accent colors as your skills and confidence develop. Every stitch is a step forward in your crochet journey, and the butterfly you create is a tangible, beautiful testament to that progress.








What do you think?
It is nice to know your opinion. Leave a comment.