










DIY Under Bed Storage Drawer: Reclaim Your Space with a Simple Weekend Project
Why Under Bed Storage Is a Game-Changer for Small Spaces
When living space is at a premium, every square foot matters — and one of the most overlooked areas in any bedroom is the space directly beneath your bed. Depending on your bed frame height, you could be sitting on top of anywhere between 20 and 50 cubic feet of completely wasted storage potential. That’s roughly the equivalent of a large dresser drawer, and in many homes, it’s simply collecting dust bunnies and lost socks.
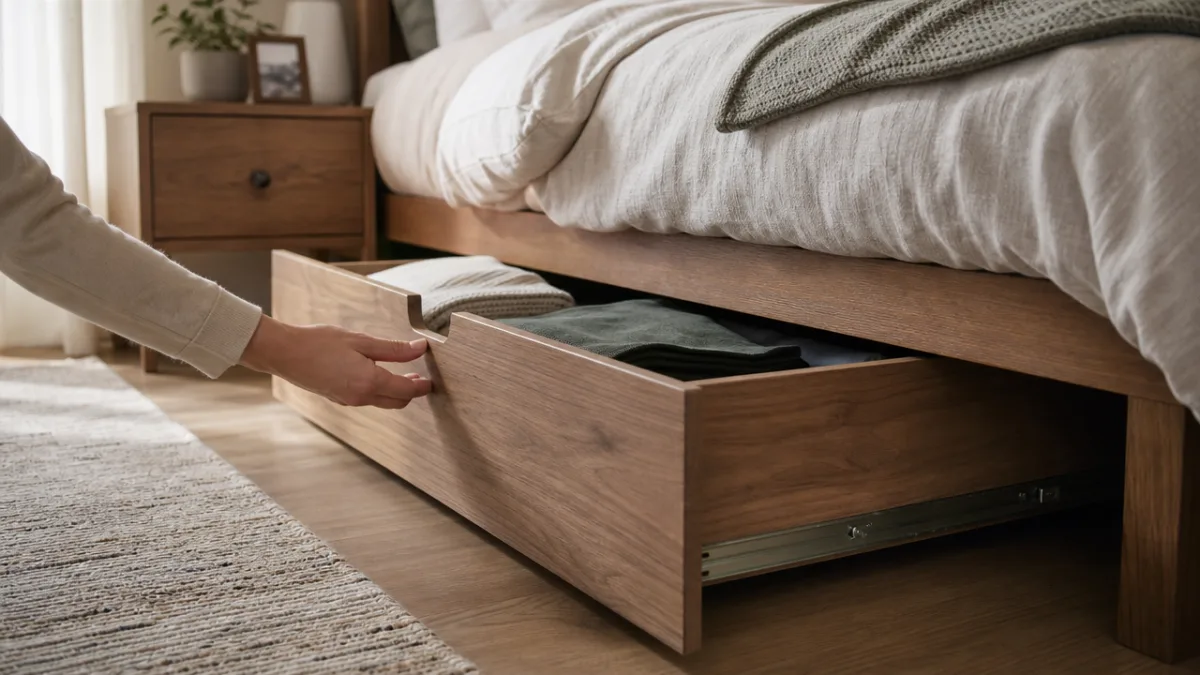
Under bed storage drawers solve this problem with elegance and practicality. Unlike plastic bins that slide around and require you to get down on your hands and knees to fish around blindly, a properly built wooden drawer glides in and out smoothly, giving you immediate access to whatever you’ve stored inside. Whether you’re storing seasonal clothing, extra linens, shoes, or bulky items like spare pillows and blankets, a well-designed drawer keeps everything organized and easy to retrieve.
Beyond pure function, building your own under bed storage drawer allows you to match the aesthetic of your existing bedroom furniture perfectly. You choose the wood type, the finish, the hardware, and the dimensions. This is a project that pays dividends every single day, and once you’ve built one, you’ll wonder how you ever managed without it. The investment in time and materials is modest, but the return in organization and peace of mind is substantial.
Planning Your Under Bed Storage Drawer: Measurements and Materials
Before you pick up a single tool, careful planning is the most important step you can take. Start by measuring the clearance beneath your bed frame — this is the distance from the floor to the bottom of the bed slats or box spring support. You’ll want your drawer to be at least one inch shorter than this clearance to ensure it slides in and out without catching or scraping. Most platform beds offer between 6 and 12 inches of clearance, which is plenty of room for a functional drawer.
Next, measure the width and length of the space beneath your bed. You can build a single wide drawer that spans the full width, or two narrower drawers that sit side by side — one accessible from each side of the bed. Two smaller drawers are often more practical, as they’re lighter and easier to pull out fully without the contents shifting dangerously. Sketch out your design on paper before committing to any cuts, and account for the thickness of your wood on all sides of the box.
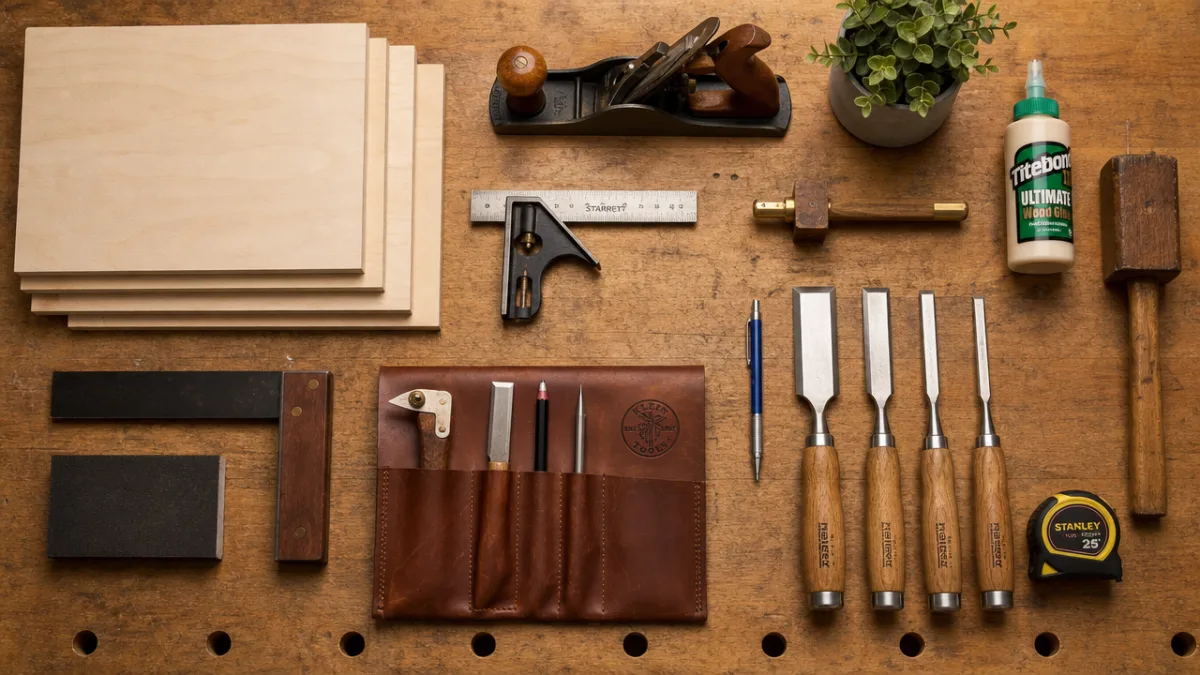
For materials, three-quarter inch plywood is the standard workhorse for the drawer box itself, offering a good balance of strength and weight. The bottom panel can be made from a thinner sheet — quarter-inch or half-inch plywood works well — to keep the overall weight manageable. You’ll also need low-profile caster wheels rated for the weight you intend to store, wood glue, pocket screws or standard wood screws, sandpaper in multiple grits, and your chosen finish or paint.
A basic shopping list for a single drawer sized at approximately 30 inches wide by 24 inches deep by 8 inches tall would include the following items:
- One 4×8 sheet of three-quarter inch plywood (cut down for the sides, front, and back panels)
- One smaller piece of quarter-inch plywood for the drawer bottom
- Four low-profile swivel caster wheels with locking mechanisms
- A drawer pull or rope handle for easy access
- Wood glue, pocket hole screws, and standard 1.5-inch wood screws
- Sandpaper in 80, 120, and 220 grit
- Wood filler for any gaps or imperfections
- Paint, stain, or sealant of your choice
Step-by-Step Building Instructions for Your DIY Drawer
Once your measurements are confirmed and your materials are gathered, it’s time to start cutting. If you don’t own a circular saw or table saw, many home improvement stores will make cuts for you right at the store for a small fee per cut. Bring your cut list with exact dimensions and have them break down your full sheet of plywood into manageable pieces. This saves time, reduces the risk of inaccurate cuts, and makes transporting the wood home much easier.
Begin assembly by attaching the two short end panels to the long side panels. Using a pocket hole jig creates exceptionally strong, clean joints without the need for complicated joinery or visible hardware on the outside of the box. Run a bead of wood glue along the edge before driving in your pocket screws for a joint that is both mechanically and adhesively strong. Clamp the corners as you work and check frequently with a carpenter’s square to ensure everything stays at a true 90-degree angle — a racked drawer box will never slide smoothly.
With your four walls assembled into a rectangular box, flip it upside down and attach the bottom panel. You can either glue and nail the bottom directly to the underside of the box walls, or cut a shallow rabbet groove on the inside of each wall panel so the bottom panel sits recessed slightly. The rabbet method is slightly more advanced but produces a cleaner, more finished look. Once the glue has cured fully — typically 24 hours — fill any visible screw holes or imperfections with wood filler and sand the entire drawer smooth, working through your grits from 80 up to 220.
Installing the caster wheels is the final structural step, and it’s worth taking your time to get it right. Position one wheel at each corner of the drawer bottom, approximately one inch in from each edge. Predrill your screw holes to avoid splitting the plywood, then secure each caster firmly with the provided hardware. Once all four wheels are attached, flip the drawer upright and test the roll on a hard floor. It should glide effortlessly with almost no resistance. If the drawer feels wobbly, check that all four wheels are at the same height and that the bottom panel is flat without any warping.
Finishing Touches: Sanding, Painting, and Adding Hardware
A well-built drawer is only half the story — the finish you apply transforms raw plywood into a piece of furniture that looks intentional and polished. Before applying any finish, wipe the entire surface down with a tack cloth to remove all sanding dust. Any dust left on the surface will get trapped under your paint or stain and create a rough, gritty texture that’s difficult to correct after the fact. Take this step seriously, and your final finish will thank you for it.
If you’re painting the drawer to match your bed frame or bedroom walls, start with a coat of shellac-based primer, which seals the porous plywood edges and prevents bleed-through from the wood grain. Apply two or three thin coats of your chosen paint using a foam roller for flat surfaces and a small brush for corners and edges. Lightly sand between coats with 220-grit paper and wipe away the dust before each new application. This process builds up a smooth, durable surface that can withstand the regular wear and tear of daily use.
For a more natural, wood-forward look, a penetrating oil stain followed by two coats of polyurethane gives a beautiful result. Apply the stain with a foam brush or lint-free rag, wipe away the excess before it dries sticky, and allow it to cure fully before applying your topcoat. Water-based polyurethane dries quickly and has almost no odor, making it ideal for indoor projects. Two coats will provide more than enough protection against scuffs and moisture.
Hardware selection is where personality really enters the project. Consider these options depending on your bedroom style:
- Rope handles: A thick cotton or jute rope threaded through two drilled holes in the front panel creates a casual, bohemian look that suits natural wood finishes beautifully.
- Leather pulls: A folded strip of thick leather fastened with two bolts offers a modern, minimal aesthetic that works particularly well with dark-stained wood or matte black paint.
- Recessed cup pulls: A metal cup pull mortised flush into the front panel is the cleanest option, completely eliminating any protruding hardware that might catch on bed linens.
- Classic bar pulls: Simple metal bar pulls in brushed nickel, brass, or matte black are widely available and timeless, working with almost any bedroom style from farmhouse to contemporary.
Smart Organization Strategies for Your New Under Bed Drawer
Building the drawer is only the beginning — what you put inside it and how you organize the contents determines how useful the drawer actually becomes in your daily life. The most common mistake people make with under bed storage is treating it like a junk drawer or a place to push things out of sight and mind. With a little thought given to categories and containment, your under bed drawer can function as one of the most efficient storage solutions in your entire home.
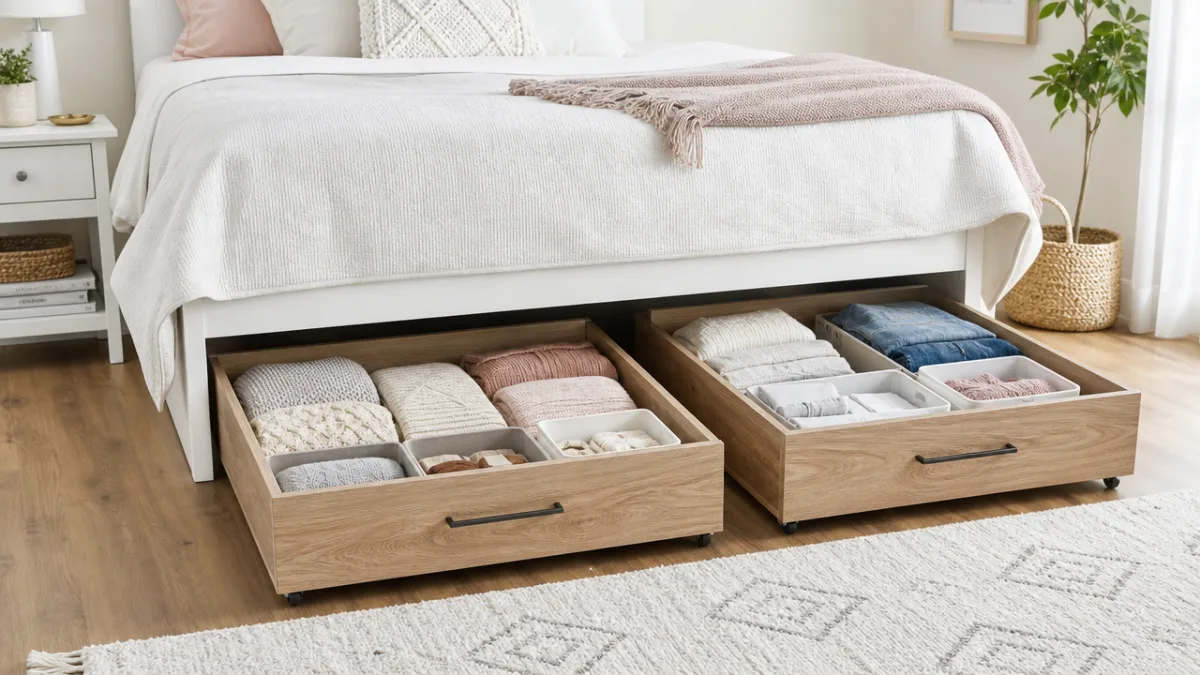
Dividing the interior of your drawer into zones is the single most effective organizational strategy you can apply. Use low-profile bins or shallow cardboard boxes to create sections within the larger drawer. Assign each zone a specific category of items — shoes along one side, off-season accessories in the middle, folded belts or scarves at the other end. When everything has a designated home, restoring order after you’ve retrieved something takes only seconds rather than minutes, and the drawer never devolves into a chaotic pile.
Vacuum storage bags are particularly useful for bulky items like extra duvets, throw blankets, or winter sweaters that would otherwise take up a disproportionate amount of space. Compress these items down to a fraction of their original volume, seal the bag, and lay them flat in the bottom of the drawer beneath your other items. This technique can effectively triple the storage capacity of the drawer for soft goods, and the vacuum seal also protects the contents from dust and moisture.
Labeling is an underrated but powerful tool for maintaining an organized system over the long term. Even if you know exactly what’s in each section when you first organize the drawer, labels eliminate the guesswork for everyone else in the household and make it much faster to locate specific items when you’re in a hurry. Simple adhesive labels on the bins work fine, or you can use a label maker for a more polished look. For seasonal clothing storage, include the season and year on the label so you know exactly what rotation to expect when you swap contents out.
Customizations and Variations to Make the Project Your Own
One of the greatest advantages of building your own storage solution rather than buying one off the shelf is the freedom to adapt the design to your exact needs and preferences. Once you’re comfortable with the basic box construction, there are numerous modifications you can incorporate to enhance both function and appearance. Don’t feel limited by the standard design — think of it as a starting point rather than a blueprint to follow rigidly.
Adding a decorative front panel is one of the simplest and most impactful customizations you can make. Cut a piece of quarter-inch plywood or MDF to match the exact front face of your drawer, then dress it up with applied molding, shiplap strips, or a simple painted geometric pattern before attaching it to the front wall of the box. This decorative face remains fully visible when the drawer is stored under the bed, so it contributes meaningfully to the overall look of your bedroom even when not in use. Coordinate the color or material with your bed frame for a cohesive, built-in look.
If your bed frame sits high enough to allow it, consider building the drawer with a removable interior tray that sits at the top. This creates two levels of storage — a shallow upper tray for frequently accessed items like books, chargers, or a journal, and the deeper lower section for less frequently retrieved items. The tray can be made from the same plywood as the drawer itself and simply rests on cleats screwed to the interior walls. It lifts out completely when you need access to the lower section and sits back in place effortlessly.
For households with children, adding a locking mechanism to the drawer can prevent curious little hands from accessing items stored inside. Many standard cabinet locks or child-proofing latches can be adapted to work on a rolling drawer, mounted on the interior of the front panel so they remain invisible from outside. This is also useful for storing valuables like important documents, passports, or seasonal jewelry that you want to keep secure but don’t necessarily need in a full safe.
Finally, consider the possibility of building an entire system of matched drawers rather than a single unit. Two drawers side by side beneath a queen or king bed, each accessible from one side, creates a symmetrical storage system that feels truly custom and intentional. Build them from the same sheet goods in the same session to ensure identical dimensions, apply the same finish, and use matching hardware throughout. The result is a storage solution that looks as though it came with the bed from the factory — clean, cohesive, and completely integrated into your bedroom’s design language.
Troubleshooting Common Problems and Maintenance Tips
Even the best-planned projects occasionally run into unexpected challenges, and under bed storage drawers are no exception. The most frequently encountered issue is a drawer that doesn’t roll smoothly — either it catches on the floor, tilts to one side, or requires significant effort to push and pull. In the vast majority of cases, this problem traces back to uneven caster wheel installation. Remove the drawer from under the bed, flip it over, and check that all four wheels are secured at exactly the same height and that none have worked loose since installation. Tighten any loose screws and check whether the bottom panel has developed any warping from humidity changes.
Another common problem is a drawer that seems to grow slightly in humid weather and stick or drag on the floor. This is a natural characteristic of wood and plywood, both of which absorb atmospheric moisture and expand accordingly. The best prevention is a thorough topcoat application — two or three coats of polyurethane on all exterior surfaces, including the bottom, significantly reduces moisture absorption and minimizes seasonal movement. If you’re already experiencing sticking due to humidity, a light sanding on the bottom edges of the drawer walls followed by a fresh coat of finish usually resolves the issue.
Routine maintenance for your under bed drawer is simple and infrequent. Once or twice a year, pull the drawer out completely and vacuum or wipe out the interior, checking the contents for any items that can be donated, discarded, or relocated. Inspect the caster wheels for accumulated dust or hair that can impair rolling — a quick pass with a stiff brush or the crevice tool on your vacuum handles this in seconds. Check all screws and tighten any that have worked loose, and touch up any chips or scratches in the finish with a small brush before they have a chance to spread.
With proper care, a well-built under bed storage drawer will serve your household for years, if not decades. The straightforward construction, the quality materials, and the durable finish all contribute to a piece that ages gracefully and continues to perform reliably long after the weekend project is complete. It is one of those rare home improvement endeavors where the difficulty is low, the cost is modest, and the daily benefit is genuinely meaningful — the hallmarks of a project worth every minute you invest in building it.








What do you think?
It is nice to know your opinion. Leave a comment.