










DIY Mushroom Fairy Lights Mirror: A Magical Craft Project for Your Home
Introduction: Why Mushroom Fairy Lights Mirrors Are Trending
Over the past few years, the cottagecore and whimsical home décor aesthetic has taken the interior design world by storm, and one of its most enchanting expressions is the mushroom fairy lights mirror. Combining the soft, dreamy glow of fairy lights with handcrafted mushroom embellishments, these mirrors have become a beloved DIY project for crafters of all skill levels. Whether you hang one in a bedroom, bathroom, or creative studio, the result is always a piece that feels simultaneously magical and deeply personal.
The appeal of this project lies in its accessibility. Unlike many DIY endeavors that require expensive tools or professional skills, a mushroom fairy lights mirror can be crafted with materials found at most craft stores or even sourced from nature walks and thrift shops. The project invites creativity at every stage, from choosing the shape and size of your base mirror to deciding how many mushrooms to sculpt and what color palette feels most like you. No two finished mirrors ever look exactly alike, which is precisely what makes them so special.
Beyond aesthetics, there is something deeply satisfying about creating functional art. A mirror is something you use every day, and when it is surrounded by soft fairy light glow and charming handmade mushrooms, that daily ritual becomes a small moment of joy. This guide will walk you through every step of the process, from gathering your materials to hanging your finished masterpiece on the wall, so that you can experience that joy for yourself and perhaps even gift one to someone you love.
Materials and Tools You Will Need
Before you begin crafting, it is essential to gather all your materials in one place. Having everything within reach before you start will help the project flow smoothly and prevent the frustration of stopping mid-creation to run to the store. The foundation of the project is a plain mirror with a frame wide enough to accommodate your decorations. A wooden frame is ideal because it accepts paint, glue, and wire fixtures easily. You can find suitable mirrors at thrift stores, dollar shops, or craft retailers, and they need not be expensive to work beautifully.
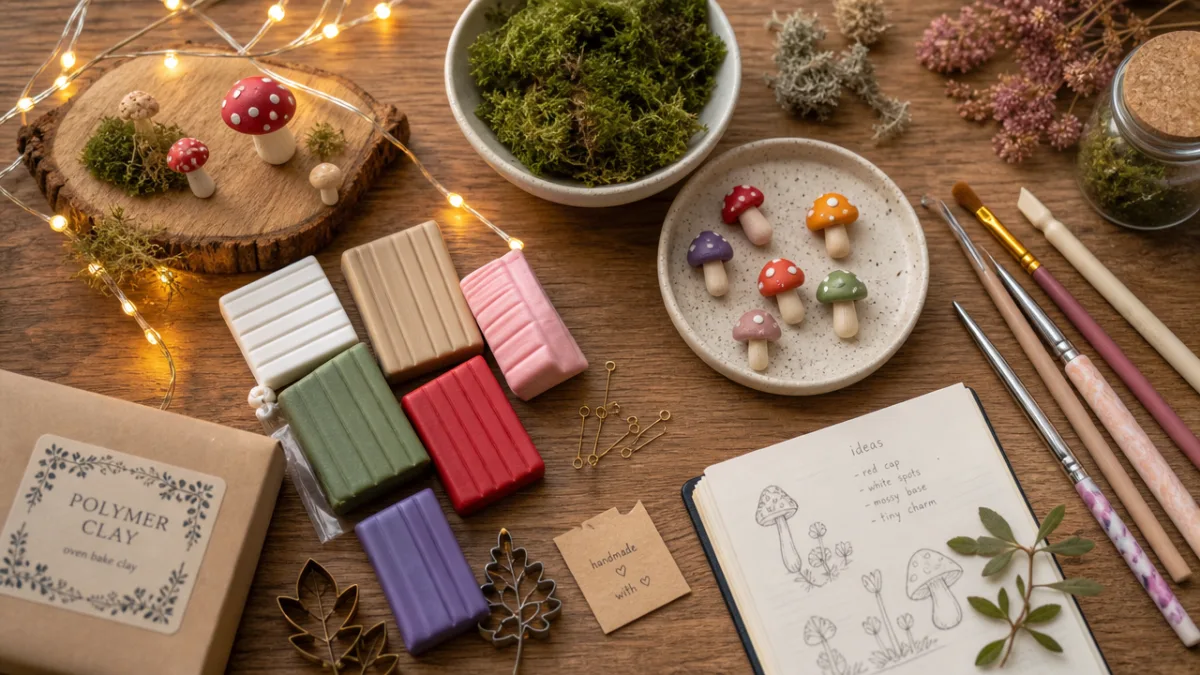
For the mushroom elements, polymer clay is the most popular choice among crafters because it is easy to shape, holds fine details, and becomes durable once baked in a standard home oven. Air-dry clay is also a perfectly valid option if you prefer to skip the baking step, though it is generally a bit more fragile once finished. You will want a selection of acrylic paints to bring your mushrooms to life, along with a fine brush for detail work and a slightly larger brush for base coats. White spots on red caps, soft lavender hues, and earthy browns are all classic mushroom palettes that work beautifully in this project.
The fairy lights themselves are central to the magic of the piece. Battery-operated LED fairy lights are strongly recommended because they eliminate the need for a nearby electrical outlet and make your mirror truly portable. Look for warm white or soft amber lights for a cozy, glowing effect, or choose multicolored lights if you prefer a more playful, festival-like feel. You will also need a strong adhesive such as a hot glue gun, floral wire or thin craft wire for securing the lights, and optional materials like faux moss, dried flowers, twigs, or tiny toadstools to fill out the botanical scene you are creating.
- Plain mirror with a wooden frame (at least 2 inches wide)
- Polymer clay or air-dry clay in white, red, brown, and any accent colors
- Acrylic paints and brushes in various sizes
- Battery-operated LED fairy lights (at least 20 bulbs)
- Hot glue gun and glue sticks
- Floral wire or thin craft wire
- Faux moss sheets or loose preserved moss
- Dried flowers, miniature pinecones, or other natural embellishments
- Mod Podge or clear sealant spray
- Sandpaper (light grit) for smoothing the wooden frame
Sculpting Your Mushrooms: Tips and Techniques
The mushrooms are undeniably the stars of this project, and learning to sculpt even simple, charming versions will elevate your mirror from a nice craft to a truly stunning piece of art. Begin by conditioning your polymer clay by kneading it in your hands until it becomes soft and pliable. This step is crucial because cold, stiff clay will crack during shaping and may not adhere properly to other pieces. Once conditioned, divide your clay into portions based on how many mushrooms you plan to make. A mirror with five to eight mushrooms in varying sizes tends to look lush and intentional rather than sparse or overcrowded.
To form the classic mushroom cap, roll a ball of clay and then press your thumb into the underside to create a gentle dome. The underside indentation gives the cap a natural, three-dimensional look and also creates a socket for the stem to sit in. For the stem, roll a small cylinder and taper one end slightly. Press the tapered end into the underside of the cap, smoothing the joint with your fingertip or a clay tool for a seamless connection. Vary the sizes of your mushrooms deliberately: make two or three larger statement mushrooms and several smaller ones to create the sense of a naturally occurring cluster. Nature is never uniform, and neither should your mushroom groupings be.
Once your mushrooms are shaped, use a toothpick or pin tool to add texture. Gentle scoring on the stems mimics the fibrous texture of real mushroom stalks, and tiny indentations around the edge of the cap simulate gills. After baking your polymer clay mushrooms according to the package instructions (typically 275°F for 15 to 30 minutes depending on thickness), allow them to cool completely before painting. Apply a white base coat first to ensure your colors appear vibrant, then layer on your chosen palette. Classic red-and-white fly agaric mushrooms are enduringly popular, but soft lavender, peach, and teal mushrooms create an otherworldly palette that feels fresh and original.
Sealing your finished mushrooms with Mod Podge or a clear acrylic spray is a step many beginners skip but will always regret. A good sealant protects the paint from chipping over time and gives your mushrooms a lovely, subtle sheen that makes them look more polished. For a matte finish, use a matte sealant; for a slightly dewy, morning-in-the-forest look, a satin finish works beautifully. Allow the sealant to dry completely, usually about an hour, before you begin attaching the mushrooms to your mirror frame.
Preparing and Painting the Mirror Frame
A beautifully decorated frame begins with proper preparation. If your mirror frame is unfinished wood, lightly sand it with fine-grit sandpaper to smooth any rough patches and open the wood grain for better paint adhesion. Wipe away dust with a slightly damp cloth and allow the frame to dry completely before applying any paint. If your frame came with a finish or existing paint color, a light scuff-sanding will help your new paint grip the surface without requiring you to strip the old finish entirely.
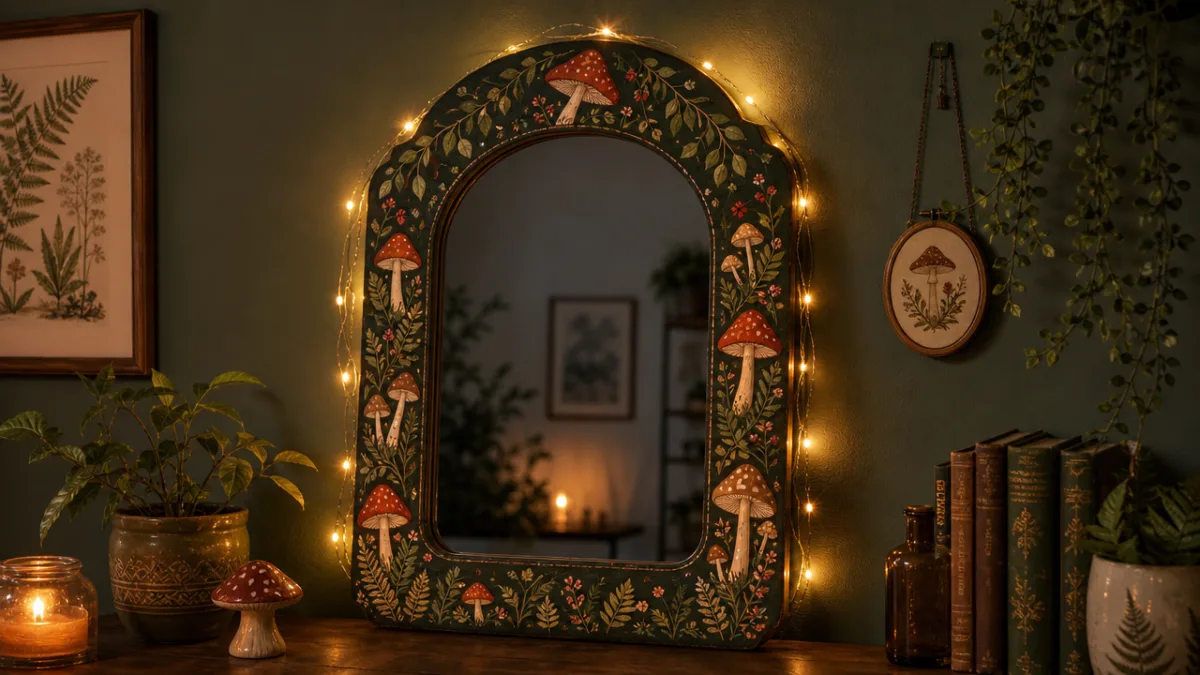
For the base coat of the frame, earthy and botanical tones tend to work best with the mushroom theme. Deep forest green, warm chocolate brown, muted sage, or even a soft black can all create a stunning backdrop that makes your mushrooms and fairy lights pop. Apply two coats of acrylic paint using a flat brush, allowing each coat to dry fully before adding the next. Once your base color is solid, you can add depth and visual interest with dry-brushing techniques: load a stiff-bristled brush with a slightly lighter or contrasting shade, wipe most of the paint off on a paper towel, and then lightly drag the brush across the frame surface. This picks out textures and edges beautifully and gives the frame an aged, organic quality.
If you want to incorporate botanical elements directly into the painted frame, consider adding small hand-painted leaves, vines, or tiny dots to suggest spores or dewdrops. These details do not need to be perfect; in fact, loosely painted botanical motifs look more natural and charming than precisely rendered ones. Once you are happy with your painted frame, apply a coat of Mod Podge or clear sealant to protect your work before moving on to the exciting step of attaching your decorative elements. A sealed frame also creates a stronger bonding surface for the hot glue you will use later.
Assembling the Mirror: Attaching Lights and Embellishments
With your mushrooms sculpted and your frame painted, the assembly stage is where the project truly comes alive. Begin by planning the layout before applying any glue. Lay your mirror flat on a protected work surface and arrange your mushrooms, moss patches, dried flowers, and other embellishments around the frame without adhering anything yet. Take a photo of your arrangement so you have a reference, and then experiment with the fairy lights to understand how they will weave through the scene. Planning this way prevents the regret of gluing a key element in a spot where it blocks the lights or looks visually off-balance.
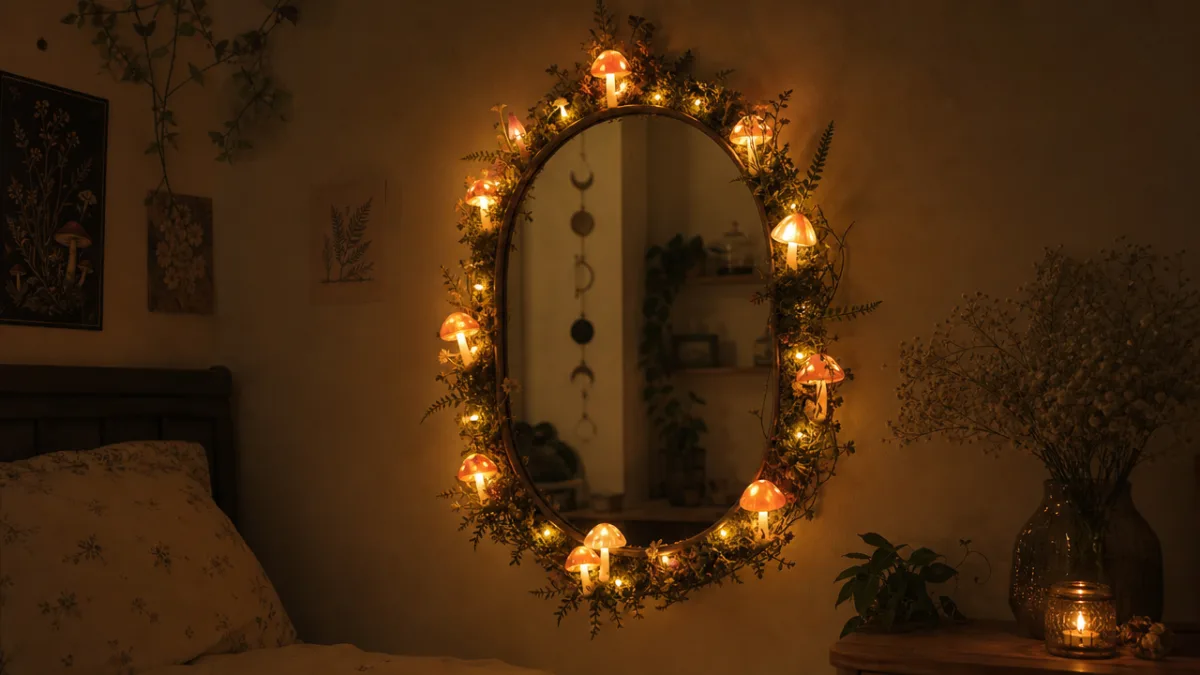
To attach the fairy lights, use small loops of floral wire to create anchors around the frame. Twist the wire tightly around itself to form a small loop, then use a dab of hot glue to fix each loop to the back edge of the frame. Thread the fairy light strand through these loops so the individual bulbs peek out from among your embellishments, creating the illusion that the mushrooms and moss are naturally luminous. The battery pack can be secured to the back of the mirror frame with a strip of strong adhesive or a small velcro dot, keeping it hidden but accessible for battery changes.
Once your lights are secured, begin gluing your embellishments starting with the largest elements first. Press your statement mushrooms firmly onto the frame with a generous bead of hot glue and hold each one in place for about 30 seconds. Work your way down to medium and then small mushrooms, filling in gaps as you go. Press sheets of faux moss into any remaining empty spaces, using hot glue generously as moss tends to be lightweight but can lift at the edges if not fully adhered. Tuck dried flowers and tiny botanical elements around the base of mushrooms to create the sense that everything has grown naturally together over time.
- Plan your layout dry before gluing anything in place.
- Secure fairy light wire loops around the frame perimeter.
- Thread lights through the loops and test them before proceeding.
- Glue large mushrooms first, then medium, then small.
- Fill gaps with moss, pressing edges firmly to prevent lifting.
- Add dried flowers and miniature botanical details last.
- Secure the battery pack to the back of the frame.
- Allow all glue to cure fully before hanging the mirror.
Finishing Touches, Display Ideas, and Care Tips
Once the glue has fully cured, which generally takes several hours, your mushroom fairy lights mirror is nearly complete. Before hanging it, take a final walk around the piece and look for any areas where moss has lifted, any glue strings that need to be trimmed away with scissors, or any mushrooms that feel slightly loose and need an extra dab of adhesive. Switch on the fairy lights and examine the mirror in a dimmed room to see exactly how the glow interacts with your embellishments and where any adjustments might enhance the overall effect. Small tweaks at this stage make a significant difference in the final impression the piece creates.
For display, bedrooms and vanity corners are the most natural homes for this mirror, where the soft fairy light glow contributes to a calm, dreamy atmosphere. However, a mushroom fairy lights mirror also looks stunning in a reading nook, on a gallery wall as a textural centerpiece, or even in a bathroom where the organic elements create a spa-like, forest-bathing atmosphere. When hanging, use a picture hook rated for the weight of your finished mirror, which may be heavier than expected due to the clay and embellishments. If your frame does not have a hanging wire already, attach D-ring hooks and a length of picture wire to the back before mounting.
Caring for your mirror over time requires gentle handling and a few simple habits. Dust the embellishments with a soft makeup brush or a can of compressed air rather than a damp cloth, as moisture can loosen hot glue and cause moss to deteriorate. Keep the mirror out of direct sunlight, which can fade painted elements and dry out clay and moss over time. When the fairy light batteries need replacing, do so carefully so that the battery pack does not tug on the wired loops and dislodge any of the carefully placed decorations. With reasonable care, your mushroom fairy lights mirror should remain a beautiful, glowing focal point in your home for years to come.
If you find yourself loving the process of making this mirror, consider experimenting with seasonal variations. An autumn version might feature deep burgundy and gold mushrooms with dried oak leaves and tiny acorns tucked into the moss. A winter version could incorporate silver and white mushrooms with frosted pinecones and cool blue fairy lights to evoke a moonlit forest floor. A spring edition might feature pastel mushrooms alongside pressed flowers and green-sprouting moss to celebrate new growth. The core techniques remain the same across all variations, but each seasonal version becomes a completely unique expression of your creativity and the particular magic of that time of year.
Gifting, Sharing, and Building a Creative Community
One of the most joyful aspects of the mushroom fairy lights mirror project is how naturally it lends itself to gifting. A handmade mirror of this kind carries far more emotional weight than any store-bought item, and the recipient knows that real time, care, and creativity went into every mushroom, every coil of fairy lights, and every pressed flower tucked into the moss. Consider making a larger mirror for a very special gift occasion such as a birthday, housewarming, or holiday present, or create a smaller, more intimate version as a “just because” gesture for a friend who loves cottagecore aesthetics and whimsical home décor.
Sharing your process on social media platforms is another wonderful way to extend the joy of this project. Documenting your mushroom sculpting, frame painting, and assembly stages in photographs or short videos creates a visual journal of the creative process that others find genuinely inspiring and instructive. Communities of cottagecore crafters, fairy light enthusiasts, and polymer clay artists on platforms like Pinterest, Instagram, and TikTok are warm and encouraging spaces where sharing your work tends to generate thoughtful engagement, helpful tips, and new friendships with people who share your sensibilities. Your finished mirror, lit up and hanging on the wall, photographed in soft candlelit ambiance, will undoubtedly resonate deeply with anyone who has ever been drawn to the quiet magic of handmade, nature-inspired art.
You might even consider turning your passion for this project into a small creative business. Custom mushroom fairy lights mirrors have a genuine market among people who love the aesthetic but lack the time or confidence to make one themselves. Selling through platforms like Etsy allows you to reach buyers who specifically seek out handmade, one-of-a-kind home décor pieces and who genuinely appreciate the craftsmanship behind each item. Pricing your work fairly to account for materials, time, and the artistic skill you have developed is important, and offering customization options such as color palette, mirror size, or seasonal themes can further attract buyers looking for something uniquely suited to their own home and personality.
Ultimately, the mushroom fairy lights mirror is more than a craft project. It is an invitation to slow down, to use your hands, to make something beautiful from simple materials, and to bring a little more wonder into the everyday spaces you inhabit. In a world that often moves too fast and values productivity over creativity, carving out an afternoon to sculpt tiny clay mushrooms and weave fairy lights through a bed of moss is a quietly radical act of self-nourishment. The finished mirror is your reward, a glowing, handmade piece of magic that greets you every day and reminds you of what you are capable of creating when you simply allow yourself the time and space to try.








What do you think?
It is nice to know your opinion. Leave a comment.