










Build Your Dream Backyard Bar: A Complete DIY Guide
Why Every Backyard Needs a DIY Bar
There is something undeniably magical about stepping into your own backyard and being greeted by a beautifully crafted outdoor bar. Whether you are hosting a summer barbecue, a birthday celebration, or simply unwinding after a long week, a dedicated outdoor bar transforms any backyard into a personal entertaining sanctuary. The growing trend of outdoor living spaces has made the backyard bar one of the most sought-after home improvement projects, and for very good reason.
The appeal of a DIY backyard bar goes far beyond aesthetics. Building your own structure gives you complete creative control over the design, materials, and layout. You can tailor every detail to match your home’s exterior, your personal taste, and the specific dimensions of your outdoor space. Unlike purchasing a pre-made bar unit, a custom-built structure can be designed to include exactly the features you want, whether that means a built-in cooler, a kegerator, overhead shelving, or a full sink setup.
Perhaps most compelling of all is the value that a well-constructed outdoor bar adds to your property. Real estate experts consistently note that quality outdoor living improvements yield strong returns on investment. Beyond monetary value, the intangible rewards, including countless evenings spent laughing with friends and family around a bar you built with your own hands, are truly priceless. This guide will walk you through every step of planning, building, and finishing your own backyard bar from the ground up.
Planning and Designing Your Outdoor Bar
Before you pick up a single tool, thoughtful planning is the foundation of any successful DIY project. Start by evaluating your backyard space carefully. Consider the natural flow of foot traffic, proximity to your home’s back door, access to electrical outlets or water lines, and how the bar will relate to other outdoor features like your patio, pool, or garden. Sketching a rough layout on paper or using a free online design tool can help you visualize the finished project and catch potential problems early.
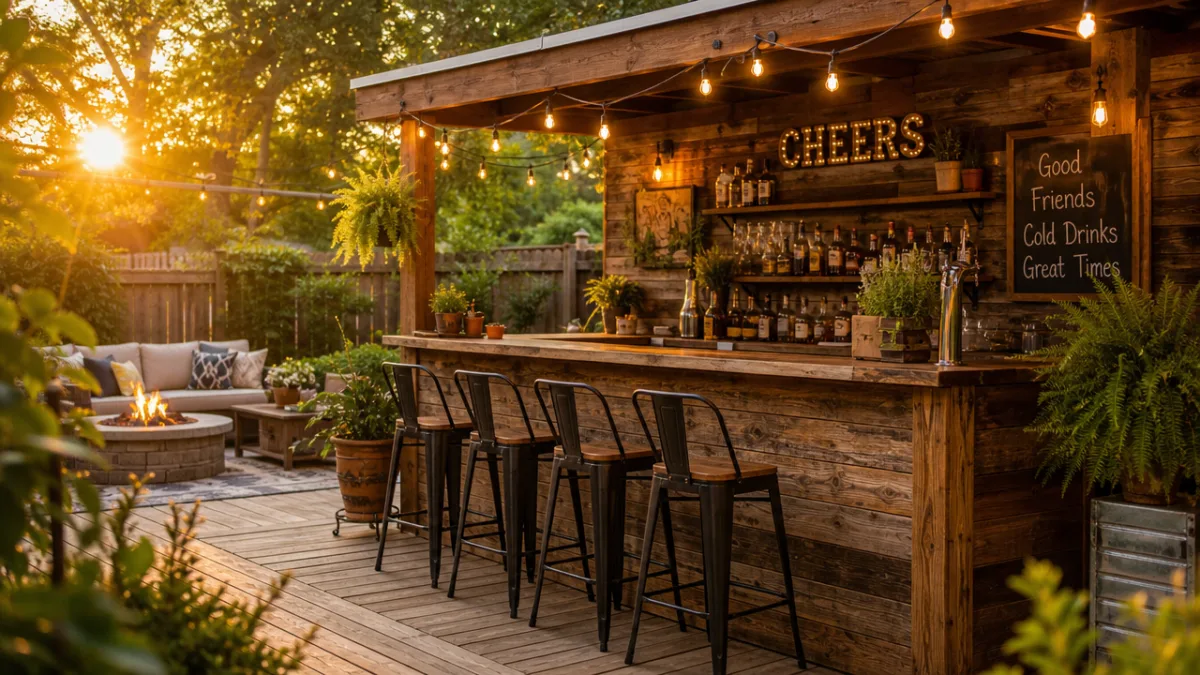
Deciding on the style and size of your bar is one of the most enjoyable parts of the planning phase. Tiki-style bars made from bamboo and thatch bring a tropical resort feel to the backyard. Rustic farmhouse bars built from reclaimed wood exude warmth and character. Sleek modern bars constructed from cedar, concrete, and stainless steel deliver a sophisticated, contemporary look. Browse platforms like Pinterest and Etsy for inspiration and to find downloadable building plans that include cut lists, material estimates, and detailed dimensions tailored to various skill levels.
Once you have settled on a design, it is essential to check local building codes and HOA regulations before proceeding. Some municipalities require permits for permanent outdoor structures, and certain setback rules may affect where you can legally build. Taking the time to research these requirements upfront prevents costly headaches later. Also consider utilities: if you plan to include lighting, a refrigerator, or a blender station, you will need access to a weatherproof electrical outlet, and if you want running water, a nearby water supply line is necessary.
Materials, Tools, and Purchasing a Building Plan
Choosing the right materials is critical to building a backyard bar that will withstand years of outdoor exposure. Pressure-treated lumber is a popular base choice because it resists moisture, insects, and rot. Cedar and redwood are naturally resistant to the elements and are prized for their attractive grain and color. For the bar top, options range from poured concrete and ceramic tile to butcher block, granite, and marine-grade epoxy-coated wood. Each material carries different cost, durability, and maintenance considerations that should factor into your decision.
Before heading to the lumber yard, a detailed materials list is indispensable. This is one of the primary reasons purchasing a professionally designed building plan from a marketplace like Etsy is so worthwhile. These plans, often created by experienced woodworkers and builders, include precise cut lists, hardware specifications, and step-by-step assembly instructions. Many sellers offer multiple size variations within a single purchase, allowing you to choose the layout that best fits your available space. The relatively low cost of a downloadable plan, typically ranging from ten to fifty dollars, can save you hundreds of dollars in wasted materials and hours of frustrating guesswork.
In terms of tools, most backyard bar builds require a fairly standard set of woodworking equipment. A circular saw or miter saw is essential for accurate cuts, while a drill and impact driver will handle the bulk of fastening work. A level, tape measure, and speed square are indispensable for keeping everything plumb and true. Depending on the complexity of your design, you may also need a jigsaw for curved cuts, a router for decorative edges, and a belt sander for smoothing surfaces before finishing. If you do not own all of these tools, renting them from a local hardware store is a cost-effective alternative.
- Pressure-Treated Lumber: Ideal for framing and structural elements that contact the ground or are exposed to moisture.
- Cedar or Redwood: Naturally rot-resistant and visually attractive for visible panels, fascia, and trim work.
- Concrete Board or Tile Backer: Use as a substrate beneath tile or stone bar tops for a durable, waterproof surface.
- Stainless Steel Hardware: Exterior-grade screws, hinges, and drawer pulls resist rust and corrosion in outdoor environments.
- Marine-Grade Sealant or Exterior Stain: Protects all wood surfaces from UV damage, rain, and humidity.
Step-by-Step Construction Process
With your plan in hand and materials gathered, construction begins with building the base frame. Lay out your footprint on the ground and use stakes and string lines to establish perfectly square corners, a step that experienced builders call “squaring the layout.” If your bar will sit directly on a patio or deck, you may attach a ledger board to the existing structure for stability. For freestanding bars placed on grass or soil, consider setting concrete deck blocks or pressure-treated posts to elevate the frame off the ground and prevent premature wood rot.
Once the base frame is assembled and confirmed level, you can begin constructing the vertical framing that forms the body of the bar. This typically involves building wall sections flat on the ground and then raising them into position, a method that makes alignment much easier than trying to build vertically from the start. The front face of the bar, which guests will see most prominently, deserves particular attention. This is where you will install the decorative paneling, whether it is horizontal shiplap boards, vertical fence pickets, stone veneer, or bamboo cladding, that defines the visual character of your build.
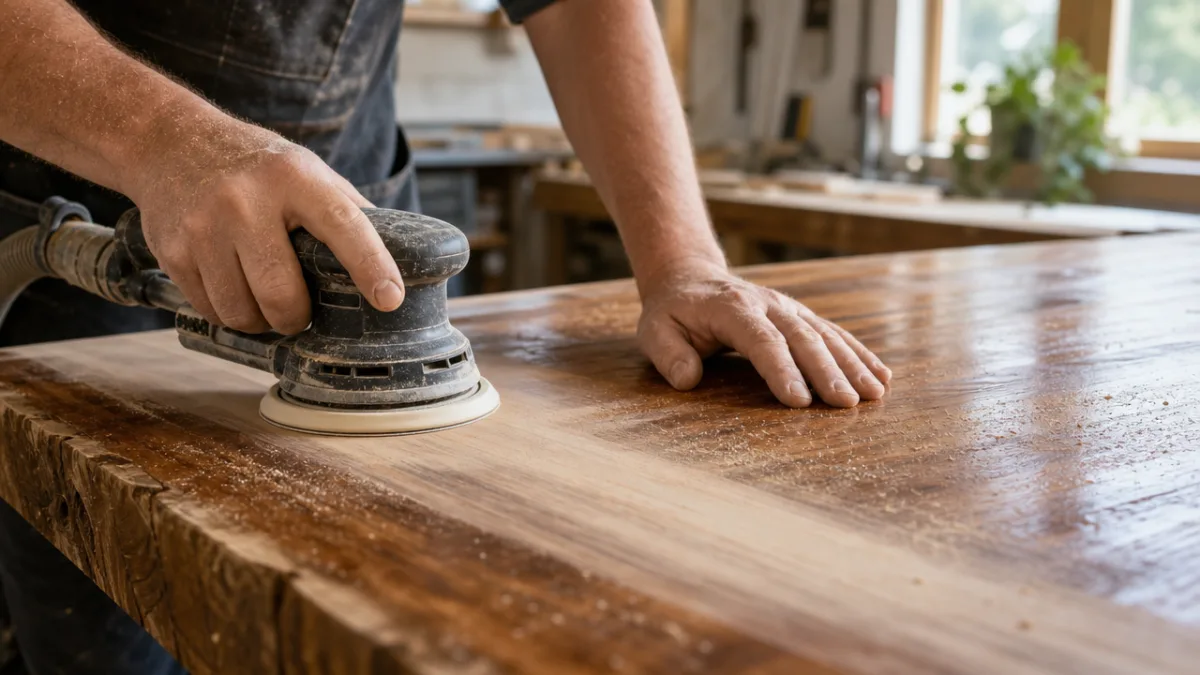
Installing the bar top is often the most satisfying moment of the entire build. If you are using concrete, you will pour it into a custom form built from melamine-coated particleboard, then smooth, cure, and seal it over the course of several days. Butcher block tops simply need to be cut to size, sanded progressively through finer grits, and finished with multiple coats of food-safe oil or outdoor polyurethane. Tile tops require a waterproof substrate, mortar-set tiles, and grouted joints sealed against moisture. Whichever material you choose, take extra care to ensure the surface is perfectly level and adequately supported by the frame below.
Finish carpentry details make the difference between a bar that looks homemade and one that looks professionally built. Install trim pieces to cover raw edges and gaps, add a decorative toe kick along the base, and apply cove or quarter-round molding at transitions. Sand all exposed surfaces thoroughly, starting with 80-grit paper and finishing with 220-grit for a silky-smooth result. Prime and paint or stain all wood before final assembly of any hardware or accessories. This sequence ensures full coverage in hard-to-reach corners and produces a finish that lasts significantly longer than finishing after full assembly.
Adding Features, Accessories, and Finishing Touches
A functional backyard bar is about more than just a flat surface to set drinks on. Thoughtfully chosen features and accessories elevate the entire experience for both the person behind the bar and the guests in front of it. Start with storage, which is arguably the most practical upgrade you can build in. Cabinets with exterior-grade hinges and latches keep bottles, glassware, and supplies organized and protected from the elements. Open shelving behind the bar creates a visually appealing display for spirits and barware while keeping everything within easy reach during entertaining.
Refrigeration is a game-changing addition for any serious backyard bar setup. A compact outdoor-rated refrigerator or a kegerator can be recessed into the frame of the bar for a clean, built-in appearance. Similarly, a small sink connected to a garden hose or a dedicated water supply line makes rinsing glasses and mixing cocktails dramatically more convenient. Ice makers designed for outdoor use are another popular choice. When incorporating any of these appliances, work with a licensed electrician to ensure that all wiring and outlets are rated for outdoor use and protected by a ground-fault circuit interrupter for safety.
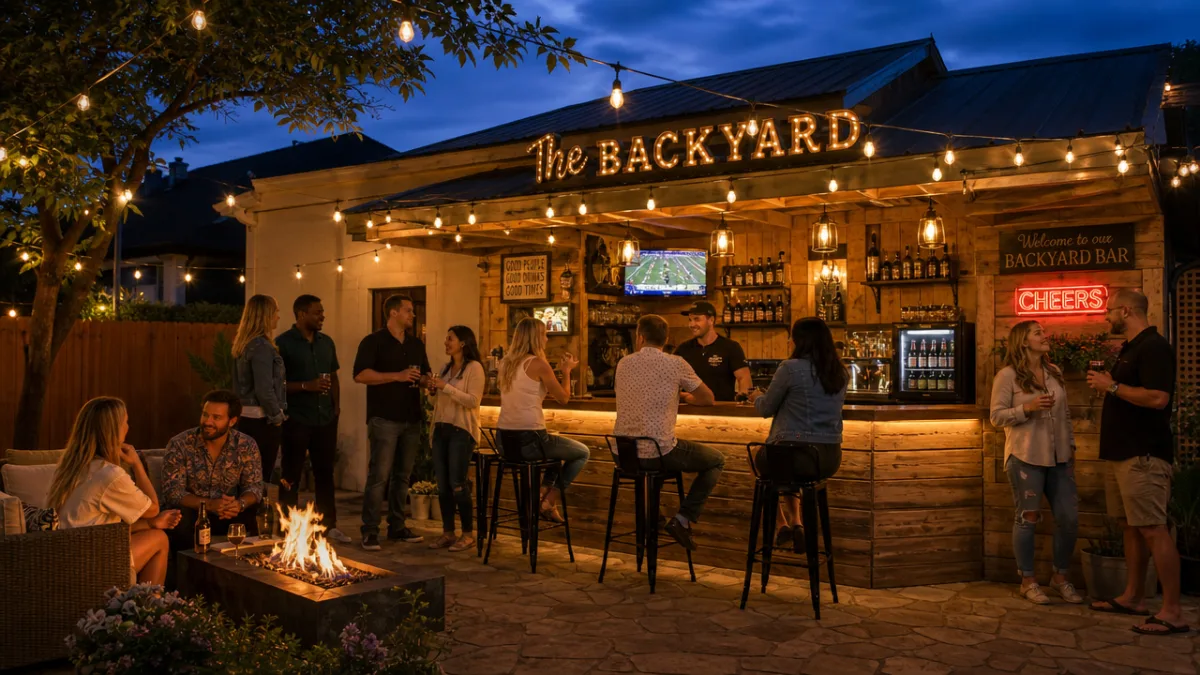
Lighting transforms a daytime bar into an enchanting evening destination. String lights draped overhead or woven through a pergola structure cast a warm, festive glow. LED strip lights installed along the underside of the bar top or inside open shelving create a dramatic backlit effect that makes bottles and glassware sparkle. Solar-powered accent lights placed around the perimeter of the bar area add ambiance without running additional wiring. For task lighting, a focused LED fixture above the work surface ensures the bartender can see clearly when mixing drinks after dark.
- Install a bar rail: A rounded brass or stainless steel foot rail along the base gives the bar a classic pub feel and is surprisingly comfortable for guests leaning in for conversation.
- Add a chalkboard panel: Paint one section of the bar face with chalkboard paint to create a menu board where you can list the evening’s specialty cocktails.
- Hang a bottle opener and cap catcher: Mount a wall-mounted opener to a side panel with a collection box or magnetic strip below to catch bottle caps neatly.
- Include a bottle display rack: Build or mount angled bottle holders into the back bar shelving so labels face forward for an attractive, organized display.
- Install a mini-keg tap: For the dedicated home brewer or craft beer enthusiast, a kegerator with a chrome tap handle is the ultimate backyard bar centerpiece.
Weatherproofing, Maintenance, and Long-Term Care
Building a beautiful outdoor bar is an investment worth protecting, and proper weatherproofing from the very beginning dramatically extends the life of your structure. Every piece of wood that will be exposed to the elements should receive at least two coats of a high-quality exterior stain, paint, or sealant before the bar goes into service. Pay special attention to end grain, which absorbs moisture much more readily than face grain and is the most common starting point for rot. Applying an end-grain sealer or extra coats of finish to cut ends adds meaningful protection.
Seasonal maintenance is a simple but essential habit for preserving your outdoor bar’s appearance and structural integrity. In temperate climates where the bar will be used year-round, plan to clean the surfaces thoroughly in spring, inspect all hardware for rust or loosening, and apply a fresh coat of exterior finish every one to two years depending on the wood species and local weather conditions. In colder climates where the bar will sit unused through winter, investing in a well-fitted weatherproof cover is highly worthwhile. These covers, available in custom sizes from outdoor furniture retailers, shield the entire structure from snow, ice, and freezing rain.
The bar top, being the most heavily used surface, requires the most regular attention. Concrete tops should be re-sealed annually with a penetrating concrete sealer to prevent staining and moisture intrusion. Butcher block surfaces benefit from a monthly application of food-safe mineral oil to prevent drying and cracking. Tile tops should have their grout lines inspected each season and resealed as needed to prevent moisture from working its way beneath the tiles. Stone surfaces like granite or marble need specialized stone sealers that protect against both water and oil-based stains common at a bar setting.
Beyond physical maintenance, thinking about security and organization during the off-season prolongs the life of accessories and appliances. Remove and store outdoor-rated refrigerators and portable appliances indoors during the winter months unless they are specifically rated for freezing temperatures. Drain any water lines connected to a sink to prevent pipe damage from freezing. Store glassware, bottle openers, and other accessories in a weatherproof cabinet or bring them inside. These small seasonal habits, each taking only minutes, add years to the life of your investment and ensure that when warm weather returns, your bar is ready to host with no unpleasant surprises.
Budgeting Your DIY Backyard Bar Project
One of the most common questions people ask before starting a backyard bar build is how much it will cost. The honest answer is that costs vary enormously depending on size, materials, features, and how much of the work you handle yourself versus hiring out. A basic freestanding bar built from pressure-treated lumber with a simple wood top and no plumbing or electrical work can be completed for as little as three hundred to six hundred dollars in materials. A mid-range build incorporating cedar, a tile bar top, recessed lighting, and a built-in mini-fridge typically runs between one thousand and two thousand five hundred dollars.
For those who want a premium outdoor bar experience with natural stone surfaces, a full sink, a kegerator, custom cabinetry, and professional-quality lighting, budgets of three thousand to eight thousand dollars are realistic for materials alone, not counting labor if you hire help for any portion of the project. The good news is that building it yourself versus hiring a contractor to design and build a comparable structure from scratch typically saves sixty to seventy percent of the total cost. That savings potential is precisely what makes a DIY approach so compelling and financially rewarding for homeowners willing to invest their time and effort.
Smart budgeting strategies can help you build a more impressive bar for less money. Buying dimensional lumber in bulk from a big-box home improvement store, taking advantage of seasonal sales, and opting for composite or pressure-treated materials rather than premium hardwoods where they will not be prominently visible all help stretch your budget. Shopping for appliances during holiday sales events and checking marketplaces like Facebook Marketplace or Craigslist for gently used outdoor refrigerators or bar accessories can yield significant savings. Finally, phasing the build, starting with the basic structure and adding features like lighting, a sink, and refrigeration in subsequent seasons, spreads the cost out over time and makes the project financially manageable for almost any household budget.








What do you think?
It is nice to know your opinion. Leave a comment.