










Building Your Own DIY Irrigation System: A Complete Guide
Why Every Gardener Should Consider a DIY Irrigation System
Watering your garden by hand is one of those tasks that sounds simple enough until you actually commit to doing it consistently throughout a long, hot summer. The time investment alone can feel overwhelming, especially as your garden grows and your plant collection expands. A well-designed DIY irrigation system transforms this daily chore into something that happens automatically, giving you back hours of your week while ensuring your plants receive the consistent moisture they need to thrive.
Beyond convenience, a properly installed irrigation system is genuinely better for your plants than hand watering. When you water by hand, it is difficult to deliver water consistently to the root zone, and it is easy to either overwater or underwater without realizing it. Drip irrigation and soaker hose systems deliver water slowly and directly to the soil, reducing evaporation and ensuring that moisture reaches roots rather than sitting on foliage where it can encourage fungal disease and leaf scorch in direct sunlight.
The financial case for building your own system is also compelling. Professional irrigation installation can cost thousands of dollars depending on the size of your property, but a well-planned DIY system for an average home garden can be assembled for a fraction of that cost. More importantly, water savings over time are significant. Studies consistently show that drip irrigation systems use up to fifty percent less water than overhead sprinklers, which translates directly into lower utility bills and a smaller environmental footprint for your gardening practice.
Planning Your Irrigation System Before You Buy a Single Part
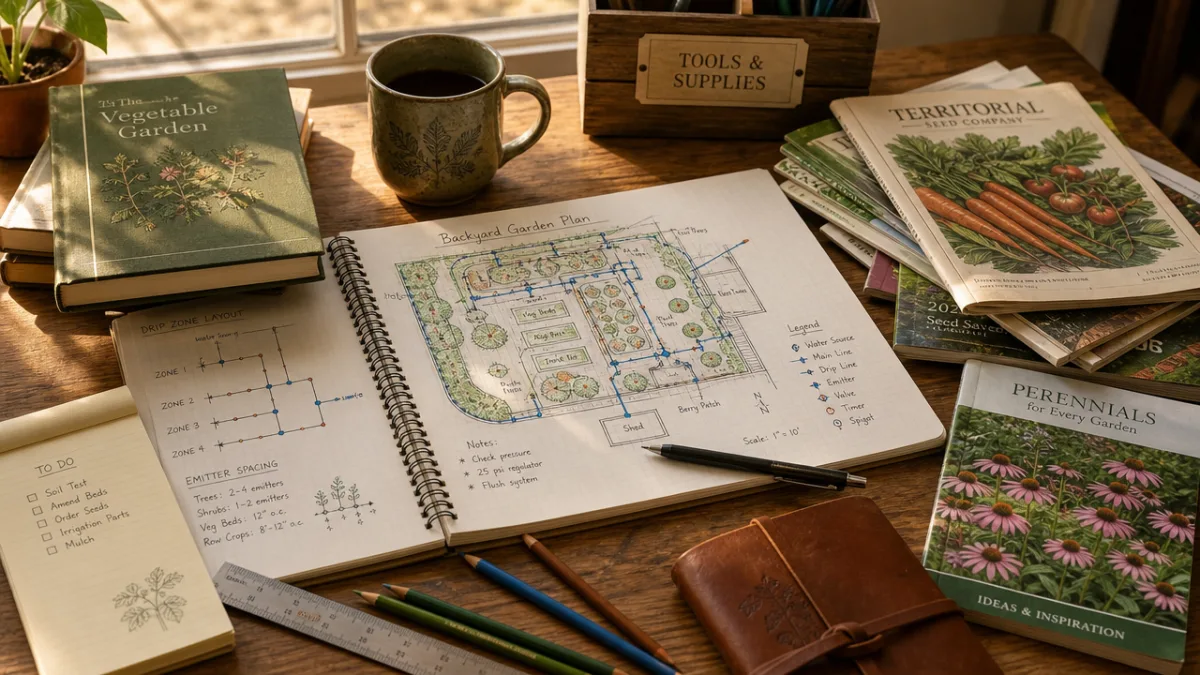
The most common and costly mistake DIY irrigators make is rushing to the hardware store before spending adequate time planning. A thoughtful plan drawn on paper before any purchasing begins will save you multiple return trips to the store, prevent frustrating mid-installation changes, and ensure that your system actually meets the needs of every zone in your garden. Start by sketching your entire garden to scale, marking the location of every bed, container, tree, and shrub that needs regular water.
Once you have your garden map, divide it into irrigation zones based on plant water needs. Vegetables and annual flowers typically need frequent, consistent watering, while established perennials, native plants, and drought-tolerant shrubs need far less. Grouping plants with similar water requirements into the same zone is the foundation of efficient irrigation design. Running high-water and low-water plants on the same line forces you to compromise, either overwatering drought-tolerant plants or underwatering thirsty ones.
You also need to assess your water pressure and flow rate before selecting components, because these numbers determine which emitters and how many lines your system can support. Most home water supplies operate between forty and eighty pounds per square inch of pressure. To measure your flow rate, time how long it takes to fill a five-gallon bucket from the outdoor spigot you plan to use. Divide sixty by the number of seconds it takes, then multiply by five. This gives you your flow rate in gallons per minute, which you will use to calculate the maximum number of emitters on each line.
Consider your water source carefully as well. A timer-equipped outdoor spigot is the most straightforward starting point for most home gardeners. If you are interested in capturing rainwater, you may be able to integrate a rain barrel into your system with low-pressure drip components designed for gravity-fed setups. Knowing your source determines the pressure regulators, filters, and fittings you will need at the head of your system before water ever reaches your plants.
Choosing the Right Components for Your System
The world of irrigation components can feel bewildering when you first encounter the wall of fittings, tubing, and emitters at your local garden center or hardware store. Breaking down the system into its logical parts makes the selection process far more manageable. Every drip irrigation system consists of essentially the same core components working in sequence: a timer, a backflow preventer, a pressure regulator, a filter, a main supply line, distribution tubing, and emitters. Each one has a specific job, and omitting any of them can compromise the performance of your entire system.
Timers range from simple mechanical twist dials to sophisticated multi-zone digital controllers with weather sensors and smartphone connectivity. For most home gardeners, a mid-range digital timer that allows you to program multiple watering windows per day across different days of the week strikes the best balance between functionality and cost. Mechanical timers are inexpensive but offer limited flexibility, while top-of-the-line smart controllers are excellent investments if you have a large, complex garden and want to integrate weather-based adjustments that prevent watering after rainfall.
For tubing, you will typically work with two sizes: half-inch polyethylene tubing serves as your main supply line running from the water source through the garden, while quarter-inch vinyl tubing branches off from the main line to deliver water precisely to individual plants. Emitters are available in a wide range of flow rates, typically measured in gallons per hour, and choosing the right flow rate for each plant type is essential. Shallow-rooted annuals and vegetables often do well with one to two gallon per hour emitters, while large shrubs and fruit trees may need four to six gallon per hour emitters to receive adequate moisture during peak summer heat.
Essential Tools for Installation
- A hole punch tool designed specifically for half-inch polyethylene tubing, used to create openings for barbed fittings and emitters
- Tubing cutters or sharp pruning shears for clean, straight cuts on both main line and distribution tubing
- Tubing stakes and hold-down clips to secure lines against the soil surface and prevent them from shifting
- Teflon tape for sealing threaded connections at the water source and between filter and pressure regulator components
- A measuring tape for accurately spacing emitters and planning tubing runs before cutting
Step-by-Step Installation Process
With your plan finalized and components in hand, installation day arrives with a satisfying sense of purpose. Begin at the water source and work outward, assembling the head unit first. Thread your timer onto the spigot, then attach the backflow preventer, followed by the pressure regulator, and finally the filter. This sequence ensures that water flows through each component in the correct order. Hand-tighten all threaded connections, using Teflon tape on male threads to prevent leaks, then snug them a quarter turn further with pliers wrapped in cloth to protect the fittings.
Lay out your main supply line before punching any holes, following the path you planned on paper. Use stakes every two to three feet to hold the tubing in place and prevent it from rolling or lifting. It helps to leave the tubing in the sun for an hour before installation on cooler days, as warmth makes the polyethylene more flexible and much easier to work with. Run the main line through or around garden beds to within a foot or two of each planting area before branching into your distribution tubing.
When punching holes for emitters and quarter-inch distribution lines, use your hole punch tool at a slight downward angle and seat the barbed fitting firmly until the barbs are fully buried in the tubing wall. A properly seated barb fitting requires surprising force to insert, and that resistance is what creates a watertight seal. Fittings that slide in too easily will drip or blow out under pressure. Cap the end of every main line run with an end cap fitting, which you can later remove if you need to flush sediment from the line at the end of the season.
Once your system is fully assembled, turn on the water and walk every inch of the installation, watching for leaks at connections and verifying that every emitter is flowing. Check that spray patterns from any micro-sprinkler heads are landing where intended and not soaking paths or structures. Run the system through a full programmed watering cycle and observe the soil afterward to confirm that moisture is penetrating to the depth your plants need. Adjust emitter placement and spacing based on what you see rather than relying solely on calculations made on paper.
Maintaining Your System Through the Seasons
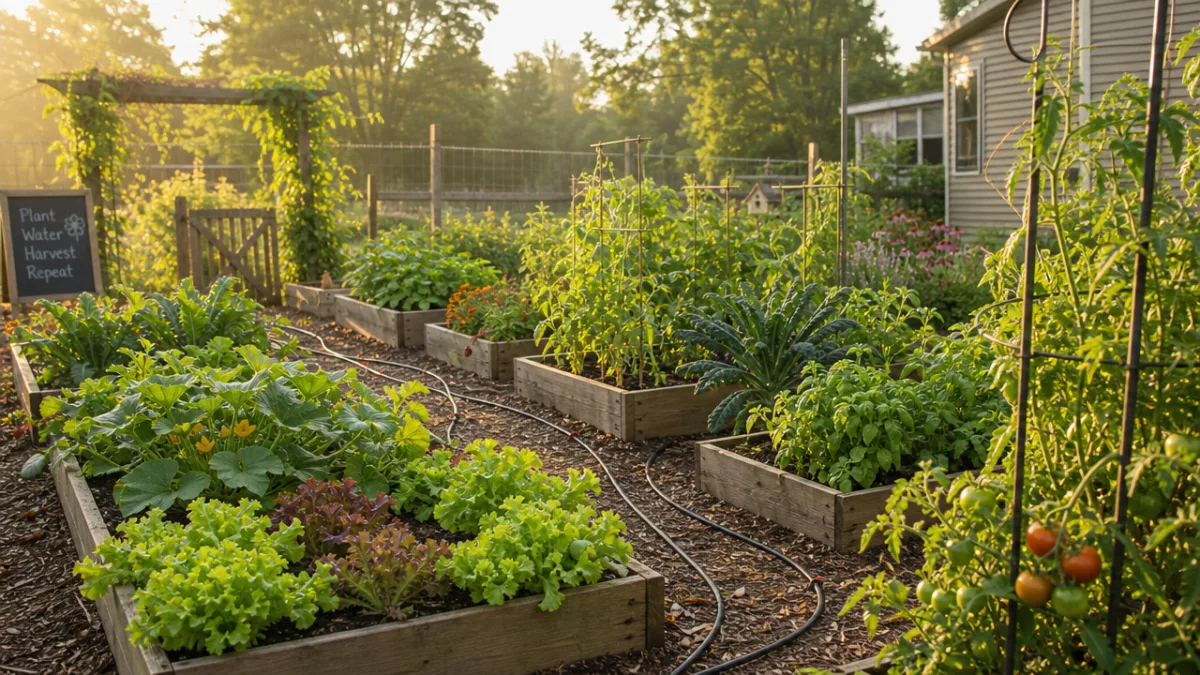
An irrigation system that receives no attention after installation will gradually underperform and eventually fail. Fortunately, maintaining a DIY drip system is far simpler than maintaining the garden itself, and the tasks involved can be organized into a straightforward seasonal rhythm. Building maintenance habits from the beginning of your first season ensures that the system you spent time and money building continues to function well for years rather than months.
During the active growing season, walk your system once a week with attention to any emitters that appear clogged, any tubing that has been disturbed by digging or animal activity, and any areas where plants are showing signs of water stress despite the system running on schedule. Clogged emitters are the most common maintenance issue and are usually resolved by removing the emitter, soaking it in a diluted vinegar solution to dissolve mineral deposits, and reinstalling it. Keep a small bag of spare emitters and fittings nearby so that any damaged components can be swapped out immediately rather than leaving a plant without water while you make a hardware store run.
At the end of the growing season before the first hard frost, winterizing your system properly is essential if you live in a climate where temperatures drop below freezing. Water left in tubing and fittings will expand as it freezes and can crack components that are otherwise perfectly functional. Disconnect your timer and store it indoors. Remove end caps and allow lines to drain completely, tilting or gently agitating tubing to encourage water to flow out. In regions with severe winters, it may be necessary to remove emitters and distribution tubing and store them in a garage or shed until spring.
Seasonal Maintenance Checklist
- Spring startup: flush all lines before planting, replace any cracked fittings from winter, check timer battery, and recalibrate watering schedules for early season conditions
- Early summer: increase watering frequency and duration as temperatures rise and plant water demand increases, verify that emitter flow rates are still adequate
- Midsummer: inspect filter screen and clean if flow seems reduced, check for emitter clogs, adjust schedules to account for heat waves
- Late summer: begin reducing watering as temperatures drop and plant growth slows, check for any tubing that shifted during the season
- Fall winterization: drain all lines, store electronics indoors, remove and store emitters in climates with hard freezes, document your layout for spring reinstallation
Troubleshooting Common Problems and Upgrading Over Time
Even a well-designed and carefully installed system will encounter problems over time, and understanding the most common issues before they arise will help you resolve them quickly without frustration. The vast majority of irrigation problems fall into one of three categories: pressure issues, clogging, and leaks. Learning to diagnose which category a problem belongs to is the first step toward fixing it efficiently. Pressure problems manifest as either too-weak flow from emitters or fittings blowing apart; clogging shows up as individual emitters that stop flowing while others work normally; leaks are usually visible as wet spots in unexpected places or a dramatic drop in overall system performance.
When individual emitters stop flowing while the rest of the system works normally, the cause is almost always mineral buildup or debris inside the emitter body. This is particularly common in areas with hard water or in systems that draw from wells or cisterns with particulate matter in the supply. If cleaning emitters becomes a frequent task, upgrading your inline filter to a finer mesh screen or adding a second filter stage will catch more debris before it reaches your emitters. Some gardeners in hard water areas also use a small inline water softener or acidifier upstream of their filter to reduce mineral scale throughout the system.
As your garden evolves, your irrigation system should evolve with it. Adding a new raised bed, expanding an existing planting area, or introducing containers to your patio all create opportunities to extend your existing system rather than hand-watering new additions. Most drip systems can be expanded by simply adding tee fittings to existing main lines and running new distribution tubing to new zones. The key is to recalculate your total emitter flow after any expansion to ensure you are not exceeding the capacity of your water source, pressure regulator, or timer zone. Keeping good records of your system layout and emitter specifications makes these calculations straightforward when expansion time comes.
Over several seasons, you will develop an increasingly sophisticated understanding of your garden’s water needs at different times of year, in different weather conditions, and as plants mature and their root systems deepen. This accumulated knowledge allows you to fine-tune your system in ways that go far beyond the initial setup. Many experienced DIY irrigators eventually add soil moisture sensors that override the timer when the ground is already adequately wet, or integrate weather-based smart controllers that automatically adjust schedules based on evapotranspiration calculations. These upgrades represent the natural progression of a system that began simply and grew in sophistication alongside the gardener who built it.
The Long-Term Benefits of Investing in DIY Irrigation
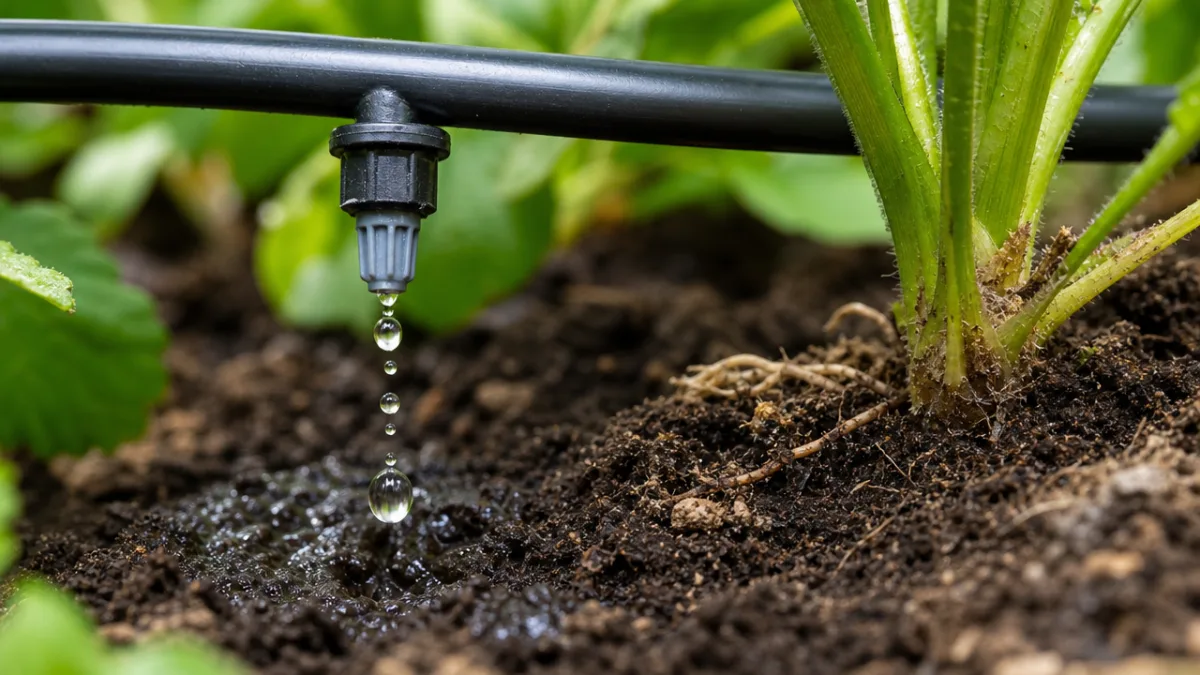
After your first full growing season with an irrigation system in place, the benefits become concrete and measurable in ways that are deeply satisfying. Plants that were previously inconsistent producers become reliable because they are never stressed by drought between waterings. Vegetable yields increase noticeably when plants receive consistent moisture at the root zone through critical growth stages. Flowers bloom more abundantly and for longer periods. Trees and shrubs establish more quickly because young root systems never face the damaging cycles of wet and dry that hand watering creates between sessions.
The time savings accumulate in ways that feel genuinely significant by midsummer. Gardeners who were previously spending forty-five minutes to an hour watering daily suddenly reclaim that time entirely. Many find that they redirect this recovered time toward more engaging garden tasks like pruning, harvesting, composting, or simply enjoying the space they have worked so hard to create. The garden becomes a place of pleasure rather than obligation, which has a positive effect on the quality of attention gardeners give to all of their other garden tasks.
From a broader environmental perspective, the water conservation benefits of drip irrigation are among the most meaningful contributions a home gardener can make. In many regions, residential landscape irrigation accounts for a substantial portion of total household water consumption, and much of that water is lost to evaporation, runoff, and overspray before it ever reaches a plant root. A well-designed drip system effectively eliminates these losses, and when paired with a timer that runs in early morning hours before evaporation rates peak, water efficiency reaches levels that are simply not achievable through any amount of careful hand watering.
Building and refining a DIY irrigation system is also an education in your garden’s ecology that no book or video can provide as effectively as direct experience. You learn how quickly different soil types drain, how deeply water penetrates in a given run time, how individual plants signal stress before visible wilting occurs, and how water needs shift through the arc of the season. This knowledge becomes part of your gardening instinct, informing decisions far beyond irrigation. The system you build with your own hands becomes a tool for observation as much as delivery, and the garden you tend with it becomes a more deeply understood and more richly rewarding space with every passing year.








What do you think?
It is nice to know your opinion. Leave a comment.