










8 DIY Crafts for Home Decor That Will Instantly Transform Your Space
Why DIY Home Decor Is More Than Just a Trend
There is something deeply satisfying about walking into a room and knowing that every carefully placed object, every splash of color, and every Textured surface came from your own two hands. DIY home decor has surged in popularity not because it is cheap or easy, but because it is profoundly personal. When you craft something yourself, it carries a story, a memory, and an energy that no mass-produced item from a big-box store can replicate. Your space becomes a living gallery of your creativity and your personality.
Beyond the emotional rewards, DIY crafts offer a practical advantage that is hard to ignore. Professional interior decorators and high-end furniture brands charge enormous premiums for the aesthetic touches that can genuinely elevate a living space. With a modest investment in materials and a few hours of your weekend, you can achieve results that rival those expensive alternatives. The savings are real, but more importantly, the sense of accomplishment you feel when guests admire something you built yourself is absolutely priceless.
The eight projects explored in this article have been chosen because they deliver maximum visual impact with a reasonable learning curve. Whether you are a seasoned crafter or picking up a glue gun for the very first time, each project offers clear starting points, room for creative variation, and the kind of results that will genuinely transform how your space looks and feels. Read on, gather your supplies, and prepare to see your home in a completely new light.
Macramé Wall Hangings: Bohemian Texture That Commands Attention
Macramé has made a triumphant return to interior design, and for very good reason. The art of knotting cord into decorative patterns produces wall hangings that add warmth, texture, and an unmistakably artisan quality to any room. A large macramé piece above a bed or sofa becomes an instant focal point, drawing the eye upward and making ceilings feel taller in the process. The natural cotton or jute rope used in most macramé projects also introduces an organic element that softens otherwise stark or modern spaces beautifully.
Getting started with macramé requires surprisingly few materials. You will need a wooden dowel or a thick branch, several yards of macramé cord in your chosen thickness, a pair of scissors, and a comb for fringing. The most fundamental knots — the square knot and the lark’s head knot — can be learned within an afternoon by watching a single tutorial video. Once you have those two techniques mastered, the complexity of your designs is limited only by your imagination and the amount of cord you have on hand.
The beauty of macramé as a decor project is its infinite scalability. A small four-inch hanging can accent a gallery wall, while a sprawling three-foot piece can serve as the centrepiece of an entire room’s design scheme. You can also incorporate beads, feathers, dried flowers, or even dyed sections of rope to customize the piece to match your existing color palette. No two macramé hangings ever look exactly the same, which means your finished piece is guaranteed to be a one-of-a-kind work of art.

Upcycled Furniture Painting: Give Old Pieces a Stunning Second Life
One of the most impactful and cost-effective DIY projects you can undertake is transforming tired, outdated furniture with a fresh coat of paint. An old wooden dresser that has been sitting in a garage, a thrifted side table with good bones but a dated finish, or a set of mismatched dining chairs can all become statement pieces with the right paint, technique, and a little bit of patience. Chalk paint in particular has revolutionized furniture upcycling because it adheres to almost any surface without extensive priming or sanding, making the process accessible to complete beginners.
Color selection is the single most important decision in a furniture painting project. Trending choices include deep jewel tones like forest green, navy blue, and terracotta for a sophisticated, modern look, while soft whites, warm creams, and sage greens work beautifully in cottagecore or Scandinavian-inspired interiors. Before committing to a color, test a small patch on the back or underside of the piece and observe it in both natural and artificial light throughout the day, as paint colors shift dramatically depending on the lighting conditions in your room.
Once the paint has dried, consider adding finishing touches that elevate the piece from “painted furniture” to “designer find.” Swapping out hardware — drawer pulls, knobs, and hinges — is a low-cost upgrade that makes a dramatic difference. Distressing the edges with fine sandpaper creates a vintage or shabby-chic aesthetic. Applying a clear wax or varnish topcoat protects the finish and adds a professional sheen. The following techniques can help you achieve different looks:
- Dry brushing a lighter color over a darker base coat creates a subtle, textured depth effect that mimics aged wood.
- Color washing with diluted paint gives furniture a translucent, ethereal quality that works especially well on natural wood grain.
- Stenciling geometric or floral patterns onto drawer fronts adds a decorative detail that looks hand-painted and entirely custom.
- Two-tone painting, where the body and legs of a piece are different colors, creates a playful, designer-inspired look that is very much on trend.
Mason Jar Centerpieces: Versatile, Charming, and Endlessly Customizable
Mason jars have earned their permanent place in the DIY decor hall of fame, and they continue to deliver remarkable results across a staggering variety of styles and settings. A cluster of mason jars filled with wildflowers or eucalyptus branches on a dining table creates a centerpiece that feels both casual and considered. Painted, wrapped in twine, or filled with fairy lights, these humble glass containers are among the most versatile vessels available to the home decorator. Their transparency also allows the filler material to become part of the design, whether that is colored sand, smooth river stones, or layers of dried botanicals.
The transformation process itself is where the real creativity happens. Frosted glass spray paint gives mason jars an elegant, matte appearance that diffuses candlelight beautifully. Wrapping the exterior in natural jute twine and securing it with hot glue creates a rustic, farmhouse-style vase that looks expensive but costs almost nothing. For a more glamorous look, applying craft glue and rolling the jar in fine glitter or metallic powder produces a shimmering effect that catches light in the most delightful way. Painting the interior with acrylic paint and letting it dry completely creates a solid, opaque vessel in any color you choose.
Mason jar decor is not limited to flower vases, and that versatility is a significant part of its appeal. A grouping of jars mounted on a wooden board can serve as a bathroom organizer for brushes and cotton rounds, instantly tidying a cluttered counter while adding a decorative element. In the kitchen, labeled mason jars holding dried pasta, grains, or spices on an open shelf create a pantry display that is both functional and visually satisfying. Suspended from a ceiling beam or curtain rod with wire, jars holding Candles or succulents become a hanging installation that transforms vertical space into a design feature.

Floating Shelves and Gallery Walls: Structure Meets Personality
Few decorating projects deliver as much visual payoff as a well-designed gallery wall or a set of thoughtfully styled floating shelves. These approaches to wall decor allow you to curate a display that evolves over time, reflecting your changing tastes, travels, and milestones. A gallery wall transforms a blank expanse of drywall into a dynamic, layered composition that tells your story. Floating shelves serve a dual purpose, providing storage while also offering a stage for plants, books, ceramics, and sentimental objects that deserve to be seen and celebrated.
Installing floating shelves is well within reach of most DIY beginners, particularly when using bracket-based shelf kits that come with all the necessary hardware. The key to a professional-looking result lies in precise measuring and leveling. Use a laser level or a traditional bubble level to ensure your shelves are perfectly horizontal — even a slight tilt becomes immediately obvious once objects are placed on them. When it comes to styling, follow the interior designer’s rule of odd numbers: groups of three or five objects almost always look more visually dynamic and intentional than even-numbered arrangements.
Creating a gallery wall begins with curation rather than hammers and nails. Lay all your intended pieces on the floor first, experimenting with different arrangements until you find a composition that feels balanced yet interesting. Mix frame sizes, orientations, and finishes for an eclectic look, or keep everything in matching black or white frames for a sleek, editorial aesthetic. Include dimensional objects among your flat prints — a small mirror, a woven wall piece, or a ceramic wall plaque adds depth and prevents the display from feeling flat. Trace each frame on kraft paper, cut it out, and tape these templates to the wall before committing to a single nail hole.
Pressed Flower Art: Nature Preserved in Stunning Detail
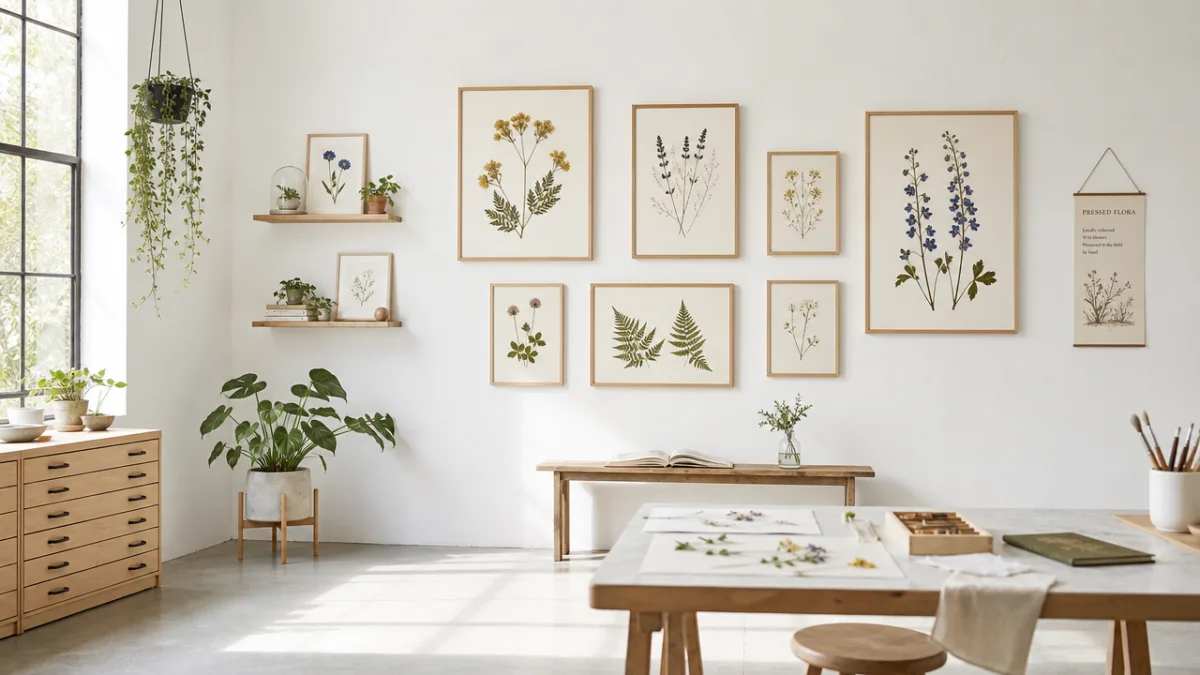
Pressed flower art is one of the most quietly stunning DIY decor projects available, producing framed pieces that look like they belong in an artisan boutique rather than a craft room. The process of pressing and drying flowers flattens them while preserving their color and intricate structural details, creating botanical specimens that can be arranged into compositions of remarkable beauty. A collection of pressed wildflowers in a series of matching frames creates a cohesive, nature-inspired gallery wall that brings the outdoors inside in the most elegant possible way.
The pressing process itself requires little more than patience and the weight of a heavy book. Freshly picked flowers — collected just after they bloom, when their colors are most vibrant — should be arranged flat between two sheets of absorbent paper and placed beneath several heavy volumes for two to four weeks. Flowers with naturally flat profiles like pansies, daisies, and violets press most easily, while thicker blooms like roses need to be carefully separated into individual petals before pressing. Silica gel desiccant packets placed alongside the flowers can speed up the drying process and help retain color more effectively.
Once dried and pressed, the flowers become delicate but stable enough to handle and arrange. Using tweezers to position each piece precisely, you can create intricate botanical compositions on a background of watercolor paper, fabric, or even painted wood panels. A thin layer of clear-drying craft glue applied with a fine brush secures the flowers in place. Sealing the finished arrangement with a UV-protective varnish spray prevents fading and allows these pieces to retain their beauty for many years. Presented in a deep shadow box frame, the finished artwork has a museum-quality presence that will become one of the most admired pieces in your home.
Concrete and Plaster Decor: Industrial Elegance Made at Home
The industrial aesthetic that has dominated interior design for the past decade has made concrete and plaster decor items extraordinarily desirable, and the good news is that these pieces are surprisingly approachable to make at home. Concrete planters, candle holders, coasters, and decorative bowls have a raw, sculptural quality that looks stunning in both modern and eclectic interiors. The matte, cool-toned surface of concrete also acts as a beautiful neutral backdrop for plants, candles, and other organic objects, making it one of the most versatile textures in contemporary decor.
Working with concrete at home requires a few safety precautions — gloves and a dust mask are essential — but the actual process is beginner-friendly. Pre-mixed concrete, available at most hardware stores, can be combined with water and poured into silicone molds or DIY molds made from cardboard or plastic containers. The mixture is workable for a generous window of time before it sets, allowing you to tap out air bubbles, smooth the surface, and make any necessary adjustments. Once fully cured over 24 to 48 hours, the piece can be sanded with fine-grit sandpaper to smooth any rough edges and sealed with a concrete sealer for durability.
Plaster is an even more accessible alternative to concrete, setting more quickly and producing a smoother, lighter-toned finish that works beautifully in softer, more romantic interior styles. Plaster of Paris mixed with water can be poured into small silicone molds to create decorative objects like geometric wall tiles, small sculptures, and dish trays. Adding pigment powder to the wet plaster allows you to create pieces in any color, from dusty rose to deep charcoal. The finished pieces can be painted, sealed, or left in their natural state, and their handmade quality is immediately apparent in the slight variations and textures that distinguish them from anything factory-produced.
Woven Textile Accents: Warmth, Color, and Artisan Craft
Woven textiles represent one of the oldest forms of human craft, and their relevance to contemporary home decor has never been stronger. A hand-woven table runner, a small loom wall hanging, or a set of woven coasters introduces color, pattern, and warmth to spaces that might otherwise feel cold or impersonal. The act of weaving itself — interlacing threads on a simple frame loom — is meditative and deeply satisfying, producing finished pieces that carry the unmistakable energy of something made slowly and intentionally by hand.
A basic frame loom can be purchased inexpensively or constructed from a wooden picture frame and evenly spaced nails. The warp threads — the vertical threads that provide the structure — are strung between the nails, creating the framework onto which you weave your weft threads horizontally. Yarn, ribbon, fabric strips, leather cord, and even natural materials like dried grasses and feathers can all be used as weft materials, giving you enormous creative freedom. Learning the basic plain weave takes only minutes, and from that foundation you can explore more complex patterns including twill, rya knots, and soumak stitches.
The design possibilities for woven home decor are genuinely vast. A large woven wall hanging in earthy tones of terracotta, ochre, and cream immediately establishes a warm, global-inspired aesthetic. A series of small circular weavings mounted together creates a contemporary, graphic installation. Woven pot holders and trivets are functional as well as decorative, protecting surfaces while adding color and texture to a kitchen or dining table. The materials list for beginning weavers is modest in cost, making this one of the most financially accessible entry points into textile art, and the learning curve is gentle enough that most people produce something genuinely beautiful on their very first attempt.








What do you think?
It is nice to know your opinion. Leave a comment.