










5 Gallon Bucket Garden Stand: Complete DIY Guide
Introduction: Why a 5 Gallon Bucket Garden Stand Is a Game-Changer
Container gardening has surged in popularity over the past decade, and for good reason. Whether you live in an apartment with a balcony, a home with limited yard space, or simply want more control over your growing environment, containers offer incredible flexibility. But one of the most frustrating challenges container gardeners face is managing drainage, airflow, and accessibility when their buckets sit flat on the ground. A DIY garden stand built specifically for 5 gallon buckets solves all of these problems at once, transforming a basic setup into a functional and attractive growing system.
The 5 gallon bucket has long been a favorite of budget-conscious gardeners. They’re durable, widely available, inexpensive, and large enough to support a surprising variety of crops including tomatoes, peppers, cucumbers, herbs, and leafy greens. When you elevate these buckets on a custom-built stand, you gain several immediate advantages: better drainage prevents root rot, improved airflow reduces fungal problems, and the elevated height makes tending your plants far more comfortable, eliminating the need to constantly crouch or kneel.
Building your own stand also means you can customize it to your exact needs. Want to fit six buckets in a compact row on your patio? No problem. Prefer a two-tier design that maximizes vertical space? That’s completely achievable with basic woodworking skills and common materials. This guide will walk you through everything you need to know, from selecting the right lumber to the final assembly steps, so you can build a stand that’s sturdy, weather-resistant, and perfectly suited to your garden setup.
Materials List and Tools You Will Need
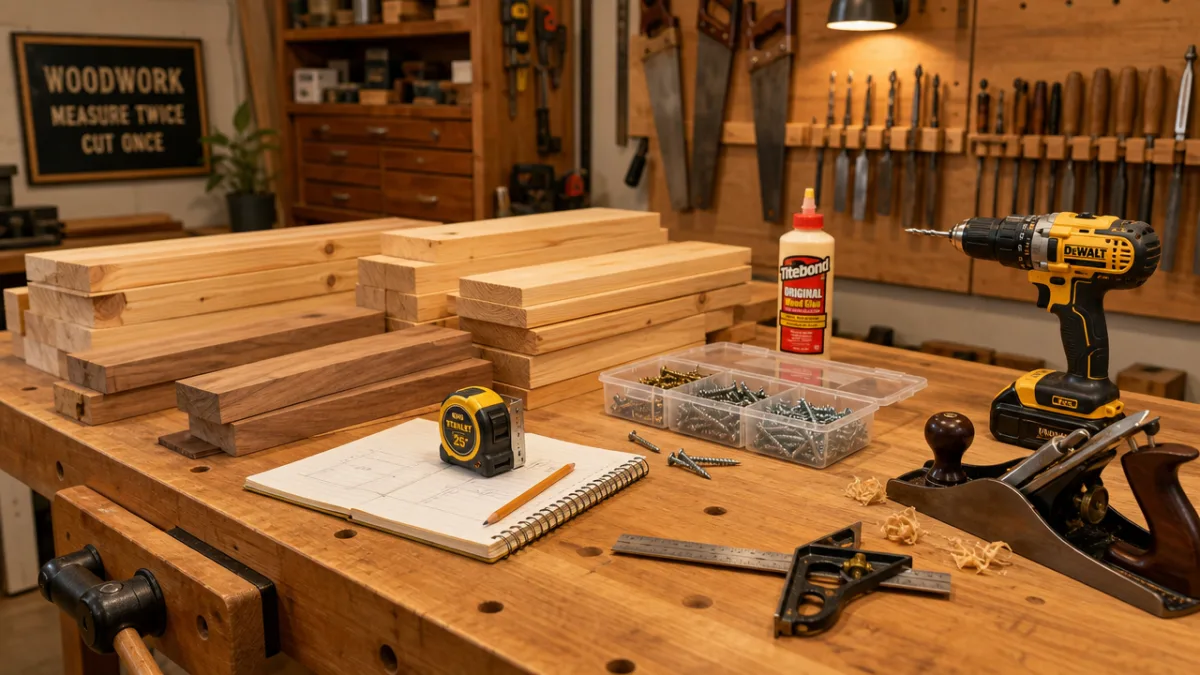
Before you start cutting any wood, it’s essential to gather all your materials. Nothing derails a weekend project faster than discovering you’re missing a key component halfway through. For a standard six-bucket stand measuring approximately 72 inches long, 14 inches wide, and 18 inches tall, you’ll need the following lumber: three 8-foot 2×4 boards for the frame, two 8-foot 1×6 boards for the shelf surface, and four 18-inch 4×4 posts for the legs. These dimensions can be adjusted based on how many buckets you want to accommodate or the available space on your patio or deck.
In addition to lumber, you’ll need a selection of hardware and finishing materials. Corrosion-resistant deck screws in 2.5-inch and 3.5-inch lengths are a must since this stand will live outdoors and be exposed to regular watering and rain. Pick up a tube of exterior wood glue for added joint strength, and don’t skip the wood sealer or exterior paint — untreated lumber will warp and rot within a single growing season when it’s constantly exposed to moisture. Galvanized metal joist hangers can also add structural integrity if you plan to load the stand with multiple heavy, soil-filled buckets.
On the tools side, you don’t need anything exotic. A circular saw or miter saw handles all your cuts cleanly and quickly. A power drill with a Phillips-head bit drives screws efficiently. A tape measure, carpenter’s square, and pencil are non-negotiables for accurate marking. Sandpaper in 80-grit and 120-grit smooths edges and prepares the surface for finishing. A paintbrush or foam roller applies your sealant evenly. If you don’t own a saw, most home improvement stores will make straight cuts for you at little or no charge, which can make this project accessible even to complete beginners.
- Three 8-foot 2×4 pressure-treated boards
- Two 8-foot 1×6 boards for the shelf top
- Four 4×4 posts cut to 18 inches for legs
- 2.5-inch and 3.5-inch corrosion-resistant deck screws
- Exterior wood glue
- Wood sealer or exterior paint
- Galvanized joist hangers (optional but recommended)
- Circular saw or miter saw
- Power drill and bits
- Tape measure, carpenter’s square, and pencil
- 80-grit and 120-grit sandpaper
Step-by-Step Building Instructions
Start by cutting all your lumber to the correct lengths before assembly begins. This is often called “breaking down your stock,” and doing it all at once saves time and keeps your workflow smooth. Cut your 2x4s into two long side rails at 72 inches each, and three shorter cross supports at 12 inches each. These cross supports will sit between the two rails, spaced evenly to create a sturdy rectangular frame. Sand all cut ends to remove splinters and rough edges, since you’ll be handling this lumber frequently during assembly.
Assemble the main rectangular frame by laying your two long side rails parallel to each other on a flat surface. Position one cross support flush at each end and one exactly in the center. Apply a small bead of exterior wood glue at each joint, then drive two 3.5-inch deck screws through the outer face of each rail into the end of each cross support. Use your carpenter’s square frequently to confirm every corner is at a true 90-degree angle. Any deviation here will cause the entire structure to rack or wobble once it’s loaded with heavy buckets.
With the frame assembled, it’s time to attach the legs. Pre-drill each leg attachment point to prevent splitting, then drive two 3.5-inch screws through the inside face of the frame corner into the top of each 4×4 post. Reinforcing each leg connection with a metal corner bracket adds significant load-bearing capacity and is especially worthwhile if you’re planning to place more than four fully loaded buckets on the stand. Once all four legs are attached, flip the stand upright and check that it sits level on your intended surface, shimming as needed.
Attaching the Shelf Surface
The 1×6 boards form the flat top surface where your buckets will rest. Lay them across the frame with a small gap of roughly half an inch between each board to allow water to drain freely rather than pooling on the surface. This drainage gap is one of the most important functional details of the entire design, as standing water on the shelf will accelerate wood rot even if you’ve used pressure-treated lumber. Secure each board with two 2.5-inch screws at every point where it crosses a frame member.
After the boards are fastened, take your time to sand the entire assembled stand. Start with 80-grit to knock down any remaining rough spots, mill marks, or uneven joints, then follow up with 120-grit for a smoother final surface. Pay special attention to the top shelf where your hands will rest most often when you’re tending plants. A smooth surface also accepts sealant more evenly, which means better protection over the long term. Wipe away all sawdust with a damp cloth and allow the wood to dry completely before applying any finish.
Apply two coats of exterior-grade wood sealer, exterior paint, or a combination of stain and sealer, following the manufacturer’s drying time between coats. If you’re using a natural wood look, a transparent deck sealer highlights the grain beautifully while still providing strong moisture protection. For a more decorative finish, exterior latex paint in a color that complements your patio or garden aesthetic is a great choice. Some gardeners even apply a heat-resistant outdoor paint to match the colors of their planters, creating a cohesive, polished look.
Optional Upgrades and Modifications
One popular modification is adding a lower shelf approximately six inches above the ground between the legs. This second tier is perfect for storing empty buckets, bags of potting mix, fertilizer, or garden tools, effectively turning your stand into a compact garden workstation. Build this lower shelf the same way as the top surface, using 1×6 boards screwed to horizontal 2×4 cross pieces attached between the legs. The added weight of stored items also increases the stand’s stability, which is a practical bonus.
Another upgrade worth considering is adding casters, or locking wheels, to the bottom of each leg. This transforms your stand into a mobile planting station that you can wheel into a sheltered area during storms or rotate to follow the sun throughout the day. Look for heavy-duty outdoor casters rated for at least 50 pounds per wheel, and choose locking models so the stand stays firmly in place during normal use. Just be sure to add approximately one inch to your leg length when using casters to maintain your desired working height.
Choosing the Right Wood and Weatherproofing Your Stand
Not all lumber is created equal when it comes to outdoor use, and making the right choice upfront will determine how long your stand lasts. Pressure-treated lumber is the most widely available and budget-friendly option, and it resists rot and insect damage effectively. However, standard pressure-treated wood can warp noticeably as it dries, so purchasing kiln-dried pressure-treated boards or allowing fresh-cut boards to acclimate for a week or two before building can minimize this issue. Always check boards for straightness at the store by sighting down the length of each one before putting it in your cart.
Cedar is an outstanding alternative to pressure-treated lumber for a garden stand. It contains natural oils that resist moisture, rot, and insects without chemical treatment, which makes it a popular choice among gardeners who prefer to keep their growing environment as chemical-free as possible. Cedar is also lighter than pressure-treated pine and has a beautiful warm color that improves with age. The trade-off is cost: cedar typically runs two to three times the price of standard treated lumber, so it may not fit every budget, but it’s an investment that pays off in longevity and aesthetics.
Redwood is another premium option with similar natural rot resistance to cedar, though it’s much harder to find outside of western North America. For gardeners in those regions, reclaimed redwood is sometimes available at salvage yards at reasonable prices and carries significant environmental appeal. For a more economical approach, standard pine boards treated with a high-quality exterior sealer can perform reasonably well for several years, especially if the stand is stored or covered during the harshest winter months. Whatever wood you choose, annual reapplication of sealer or paint dramatically extends the life of the project.
Long-Term Maintenance Tips
Even the best-built outdoor wood project requires ongoing maintenance to stay in top condition. At the start of each growing season, inspect every joint and board for signs of cracking, warping, or early rot. Tighten any screws that have worked loose and replace any boards that show soft spots or dark discoloration, which are early indicators of wood decay. A quick inspection in early spring takes only a few minutes and can catch small problems before they become structural failures that compromise the safety of your loaded stand.
Reapply your chosen finish every one to two years depending on your climate. In regions with intense sun and frequent rain, annual recoating is wise. In drier, more temperate climates you may get two or three seasons from a single coat of quality deck sealer. Before recoating, lightly sand the surface to remove any peeling or flaking finish, clean the wood with a deck cleaner solution, rinse thoroughly, and allow it to dry for at least 48 hours. Applying finish over damp wood traps moisture and actually accelerates the decay you’re trying to prevent.
What to Grow in Your 5 Gallon Bucket Garden Stand
One of the most exciting parts of completing your stand is filling it with buckets and getting plants in the ground, or rather, in the soil mix. Five gallon buckets are surprisingly versatile growing containers, capable of supporting a wide range of vegetables, herbs, and even some dwarf fruit varieties. The elevated position of your new stand creates excellent airflow around each bucket, which is particularly beneficial for crops like tomatoes and peppers that are prone to soil-borne fungal diseases. The drainage holes you’ve already drilled in each bucket bottom will now work perfectly, since water can fall freely away from the stand rather than pooling beneath the bucket.
Tomatoes are arguably the most popular choice for 5 gallon bucket gardening, and for good reason. Compact or determinate varieties like Celebrity, Patio, and Bush Early Girl produce generous harvests within the confines of a single bucket. Pair them with a sturdy stake or small tomato cage and they’ll thrive at the elevated height your stand provides. Peppers, both sweet and hot varieties, are equally well-suited to bucket culture and benefit from the warm soil temperatures that dark-colored buckets absorb from direct sunlight. Herbs like basil, parsley, chives, and oregano are compact enough that you can sometimes fit two or three plants per bucket.
Salad greens including lettuce, spinach, arugula, and kale perform beautifully in buckets and offer one of the fastest returns on your gardening investment, with some varieties ready to harvest in as few as 30 days. Root vegetables like radishes and smaller carrot varieties such as Chantenay or Paris Market also do well given the depth a 5 gallon bucket provides. Cucumbers and bush-type beans are vigorous producers that reward consistent watering and feeding. Strawberries are another perennial favorite for bucket gardening, producing sweet fruit year after year with minimal fuss as long as they receive adequate sun and water.
- Determinate tomatoes — Celebrity, Patio, Bush Early Girl
- Peppers — bell, jalapeño, banana, habanero varieties
- Herbs — basil, parsley, chives, oregano, thyme
- Salad greens — lettuce, arugula, spinach, kale
- Root vegetables — radishes, Chantenay carrots
- Cucumbers — bush varieties for compact growth
- Bush beans — green, yellow wax, or purple varieties
- Strawberries — everbearing or day-neutral types

Cost Breakdown and Why This Project Delivers Exceptional Value
One of the most compelling aspects of this DIY project is how little it costs compared to purchasing a pre-made plant stand or raised bed system of comparable capacity. When you price out the lumber for a six-bucket stand at a major home improvement retailer, you’re typically looking at around $25 to $35 for the pressure-treated boards, another $8 to $12 for screws and hardware, and roughly $10 to $15 for a can of exterior sealer or paint. That brings your total materials cost to somewhere between $43 and $62 for a stand that will accommodate six fully loaded 5 gallon buckets.
Compare that to commercial plant stands, which range from $60 for flimsy, lightweight metal versions to $150 or more for solid wood options with comparable capacity. Many commercially available stands are designed more for aesthetics than function, with tops too narrow for 5 gallon buckets, insufficient weight ratings, or finishes that fail within a single outdoor season. The stand you build yourself is designed from the start to fit your specific buckets, your specific space, and your specific load requirements. That custom fit is something no off-the-shelf product can offer, regardless of price.
Beyond the direct cost savings, building your own stand provides a level of satisfaction that purchasing a ready-made product simply cannot match. There’s a genuine pride of accomplishment that comes from growing food in containers you’ve grown in a stand you built with your own hands. Many gardeners report that this kind of end-to-end ownership of their growing setup deepens their engagement with the hobby overall, encouraging them to experiment more, learn more, and ultimately grow more successfully season after season.
Scaling the Project for Larger Gardens
If six buckets aren’t enough to satisfy your growing ambitions, the modular nature of this design makes scaling up straightforward. Simply add additional cross supports and extend your side rails to accommodate eight, ten, or even twelve buckets in a single long stand. Alternatively, build multiple stands of the same design and arrange them in an L-shape or U-shape around a patio to create an immersive, productive growing environment. The consistent design language of multiple matching stands gives even a modest urban garden a cohesive, intentional appearance that feels more like an outdoor room than a collection of random containers.
For gardeners with significant vertical space available, a two-tier version of this stand opens up remarkable growing potential. Build a taller version with legs measuring 36 inches instead of 18, then add a second set of cross supports and shelf boards at the midpoint to create both an upper and lower growing surface. The upper tier works well for trailing plants like nasturtiums, sweet potato vine, or cherry tomatoes whose cascading growth becomes a visual feature. The lower tier is ideal for shade-tolerant crops like lettuce and cilantro that actually benefit from the filtered light created by the plants above them.
Ultimately, the 5 gallon bucket garden stand is one of those rare DIY projects that delivers outsized value relative to the time and money invested. A single weekend afternoon is genuinely sufficient to build a stand that will serve your garden for five to ten years with minimal maintenance. The skills you practice — measuring accurately, cutting cleanly, driving screws correctly, and applying exterior finishes — are foundational woodworking competencies that will serve you in dozens of future projects. Whether you’re a seasoned builder or picking up a saw for the very first time, this project is an ideal place to start or to add another productive, beautiful element to an already thriving outdoor space.








What do you think?
It is nice to know your opinion. Leave a comment.