










How to Make a Quikrete Walkway or Patio: A Complete Step-by-Step Guide
Introduction to Quikrete Concrete Projects
Building a walkway or patio with Quikrete is one of the most rewarding home improvement projects a homeowner can undertake. Whether you want a clean path through your garden or a durable outdoor entertaining space, concrete offers unmatched longevity and curb appeal. Quikrete makes the process accessible even to first-time DIYers by offering pre-mixed concrete products that take the guesswork out of proportioning materials. With the right preparation and a bit of patience, you can create a professional-looking result that will last for decades.
Quikrete has been a trusted name in concrete and masonry products for over 80 years, and for good reason. Their bagged concrete mixes are formulated for consistent strength, ease of use, and reliable curing times. For walkways and patios, the most commonly recommended product is Quikrete 5000, which achieves a compressive strength of 5,000 psi in 28 days and reaches working strength much faster than standard mixes. This makes it ideal for projects where you want to minimize downtime and get back to using the space quickly.
Before you pour a single bag, it helps to understand the full scope of the project. A concrete walkway or patio involves excavation, base preparation, form building, mixing, pouring, finishing, and curing. Each stage matters and skipping or rushing any one of them can lead to cracking, heaving, or uneven surfaces down the road. This guide will walk you through every phase in detail so you can approach the project with confidence and produce a result you will be proud of for years to come.
Planning and Measuring Your Space
Good planning is the foundation of any successful concrete project. Start by deciding on the dimensions and shape of your walkway or patio. A standard walkway is typically 36 to 48 inches wide, which allows two people to walk comfortably side by side. For a patio, consider how the space will be used. Will you have a dining table, lounge chairs, or a grill? Sketch out a rough layout on paper, noting the dimensions and how the new surface will connect to existing structures like your home’s foundation, garage, or garden beds.
Once you have a design in mind, calculate how much concrete you will need. Quikrete provides an easy-to-use online calculator on their website, but the general formula is length times width times depth (in feet) divided by 27 to get cubic yards. Most residential walkways and patios are poured at a depth of 4 inches, though areas subject to vehicle traffic should be 6 inches thick. Always order or purchase slightly more material than your calculations suggest to account for waste, spillage, and variations in your excavation depth.
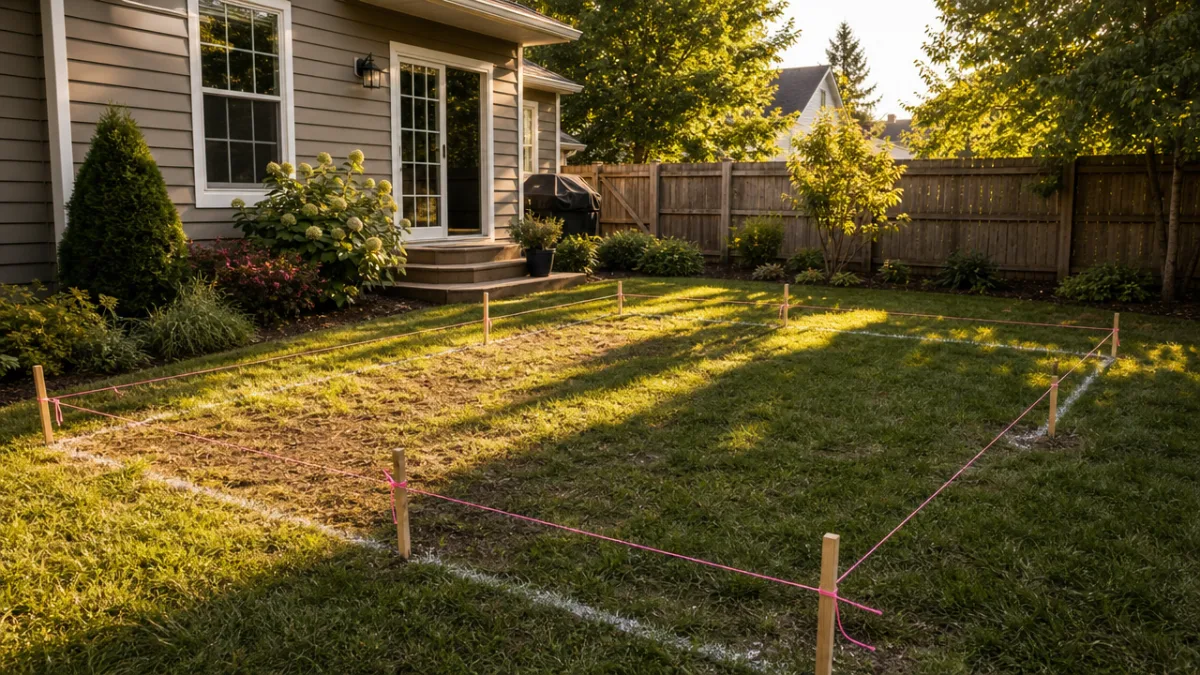
You should also think carefully about drainage during the planning stage. Water that pools on a concrete surface can accelerate surface deterioration and create slippery conditions. Plan for a slight slope away from any structures, typically a 1/8-inch drop per foot of horizontal run. Mark your project area with spray paint or stakes and string to visualize the layout before breaking ground. Taking time at this stage to account for slopes, obstacles like tree roots, and utility lines will save you significant headaches later in the process.
Gathering Tools and Materials
Having all your tools and materials on hand before you begin will make the project run smoothly and prevent costly delays. Concrete cures on its own schedule and waits for no one, so the last thing you want is to make a run to the hardware store in the middle of a pour. Create a complete checklist and gather everything the day before your planned start date. Organize your workspace so that tools are within easy reach and bags of Quikrete are stored in a dry location, off the ground, to prevent moisture absorption.
For the excavation and base preparation phase, you will need a flat spade or sod cutter, a wheelbarrow, a tamper or plate compactor, and a level. For form building, gather 2×4 lumber, stakes, a hammer, screws, and a circular saw. The pouring and finishing phase requires a concrete mixer or large mortar tub, a garden hoe or mixing paddle, a screed board, a bull float or darby, an edger, a hand float, a steel trowel, and a groover for expansion joints. Don’t forget safety gear including gloves, safety glasses, and rubber boots, as wet concrete is caustic and can cause skin irritation with prolonged contact.
The materials list will obviously center on Quikrete concrete mix, but you will also need a compactable gravel base material, typically crushed stone or class II road base, a layer of sand for leveling, and a concrete release agent or plastic sheeting if you want to protect your forms for reuse. If you are pouring a larger patio, consider renting a gas-powered plate compactor and a concrete mixer rather than mixing by hand. These equipment rentals pay for themselves in time saved and in the quality of compaction and mixing they provide compared to manual methods.
Excavating and Preparing the Base
Proper base preparation is arguably the most important step in the entire process, and it is the one most often skipped by impatient DIYers. The base is what prevents your concrete from cracking and shifting over time, particularly in climates that experience freeze-thaw cycles. Begin by removing all sod, vegetation, and organic material from within your marked project area. Dig down to a depth that allows for your gravel base plus your concrete thickness. For a 4-inch slab on a 4-inch gravel base, you will excavate approximately 8 inches below the desired finished surface height.
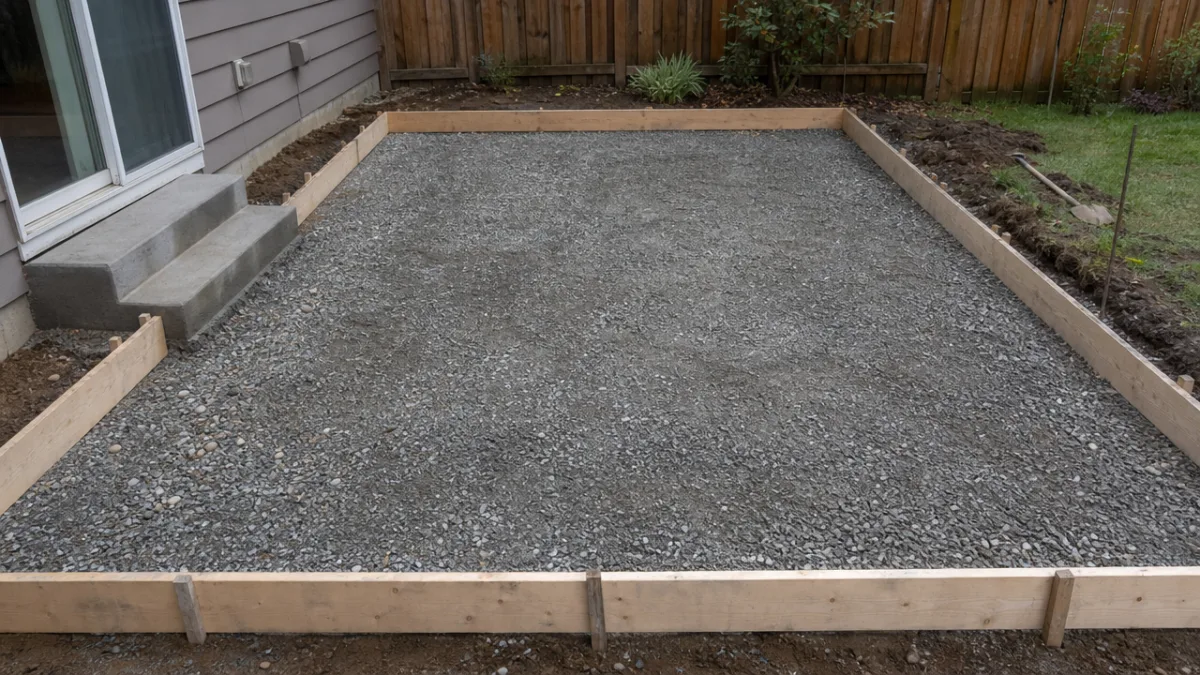
Once excavated, the native soil must be compacted. Use a hand tamper for small areas or a plate compactor for larger projects. The goal is to eliminate any soft or loose areas that might settle unevenly under the weight of the concrete. After compacting the soil, add your gravel base in two-inch lifts, compacting each layer thoroughly before adding the next. The gravel layer serves two critical purposes: it provides a stable, load-bearing platform and it improves drainage beneath the slab, which reduces the risk of frost heaving in cold climates.
With the gravel base compacted and level, you are ready to set your forms. Use 2×4 lumber staked firmly into the ground along the perimeter of your project area. The top edge of your forms will serve as the guide for screeding the concrete to the correct height and slope. Double-check your measurements and slope using a level and a string line. Drive stakes every two feet along the outside of the forms and screw them in place. Once forms are set, spray the inside surfaces with a concrete release agent or line them with a thin film of motor oil to make removal easier after the concrete cures.
Mixing and Pouring the Concrete
Mixing Quikrete concrete correctly is critical to achieving the strength and workability the product is designed to deliver. Whether you are mixing by hand in a wheelbarrow or using a drum mixer, the process begins by adding most of the water first and then gradually adding the dry mix. For Quikrete 5000 and similar products, the general water ratio is approximately 3 quarts of water per 80-pound bag, though you should follow the specific instructions on the packaging. The mix is ready when it reaches a uniform consistency similar to thick oatmeal with no dry pockets and no excessive water sheen on the surface.
Begin pouring the concrete at the far end of your project area and work toward your exit point. This prevents you from having to walk over freshly poured concrete. Empty each batch into the forms and use a shovel or rake to spread it roughly to the correct level. Work the concrete into corners and against form edges to eliminate air pockets. For larger pours, a concrete vibrator can be used to consolidate the mix and remove trapped air, which can weaken the final product. Move quickly but deliberately, as you want all the concrete in place before the initial set begins, which can occur as quickly as 30 to 45 minutes on a warm, sunny day.
Once all the concrete is poured and roughly distributed, use your screed board to level and smooth the surface. Rest the ends of the screed board on the top edges of your forms and pull it toward you in a sawing back-and-forth motion while moving along the length of the pour. This process removes high spots and fills low spots, creating a flat surface aligned with the form tops. You may need to make two or three passes. After screeding, use a bull float to further smooth the surface and push aggregate slightly below the surface, preparing it for the finishing steps that follow.
Finishing and Curing Your Concrete
The finishing stage is where your project transitions from a rough slab to a polished, functional surface, and the timing of your finishing work is everything. After floating the surface with a bull float, wait for the bleed water, which is a thin layer of water that migrates to the top of the slab, to completely evaporate before proceeding. Working the surface while bleed water is still present can weaken the top layer of concrete and lead to scaling or dusting later. The waiting time varies based on temperature, humidity, and wind, but typically ranges from 20 minutes to over an hour.
Once the bleed water has disappeared and the surface has a dull matte appearance, you can begin hand floating and troweling. For a walkway, a broom finish is both the most practical and most popular choice because it provides excellent slip resistance. After hand floating, drag a stiff-bristled push broom across the surface in straight, parallel lines. For a patio, you might prefer a smoother finish achieved with a steel trowel, or a stamped or exposed aggregate finish for decorative effect. Use an edger tool along all form edges to round the perimeter of the slab, which reduces the risk of chipping and gives the finished project a clean, professional look.
Expansion joints are a critical finishing detail that many DIY concrete projects overlook. Concrete expands and contracts with temperature changes, and without planned joints, it will crack unpredictably. Use a groover tool to cut control joints into the surface at intervals of no more than 10 feet or 30 times the slab thickness, whichever is less. These joints create weak points where the slab can crack in a controlled, straight line beneath the surface rather than randomly across the visible surface. After all finishing is complete, the most important step of the entire project begins: proper curing.
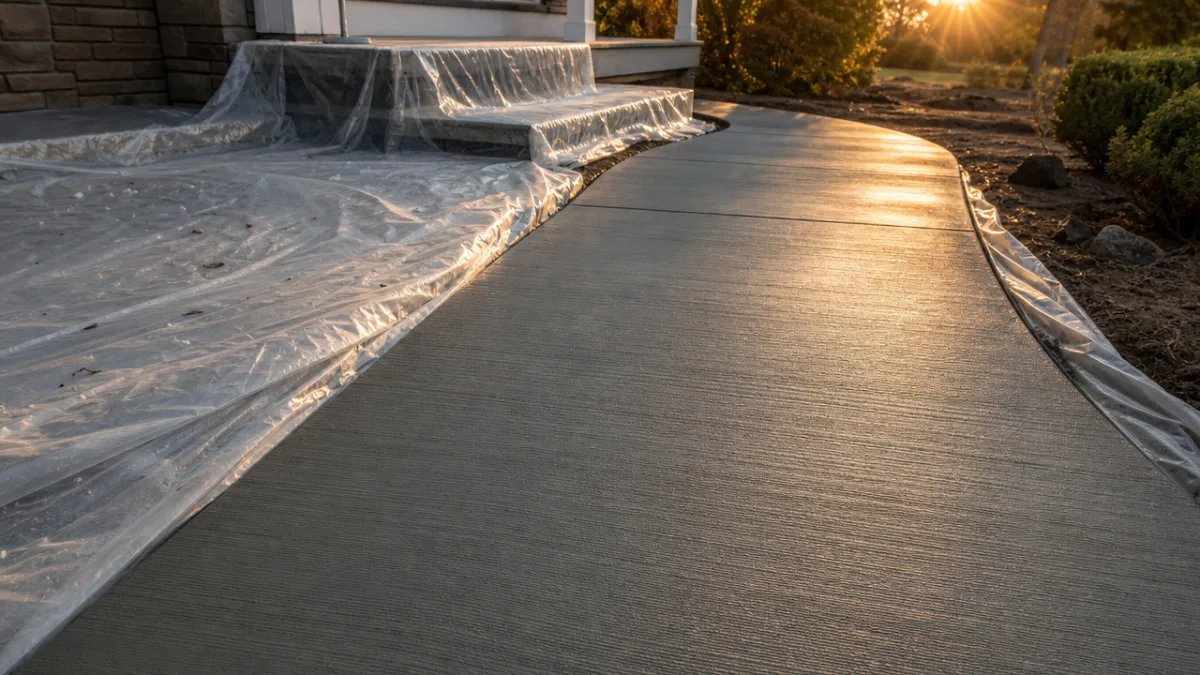
Curing is the process by which concrete achieves its full strength, and it requires moisture and time. Concrete does not harden by drying out; it hardens through a chemical reaction called hydration that requires water. If the surface dries too quickly, that reaction is cut short and the concrete will be weaker and more prone to surface damage. Apply a liquid curing compound immediately after finishing, or cover the slab with plastic sheeting or wet burlap. Keep the surface moist for a minimum of seven days, and avoid foot traffic for at least 24 to 48 hours. Vehicle traffic should be avoided for at least seven days, and full strength is reached in 28 days.
Removing Forms and Final Touches
After the concrete has cured for at least 24 to 48 hours, you can carefully remove the wooden forms. Unscrew the stakes and gently pry the form boards away from the slab using a pry bar. Work slowly and avoid striking the concrete edges, which are still gaining strength during this early period. If you applied a release agent to the forms before pouring, they should come away cleanly with minimal effort. Inspect the exposed edges of the slab for any honeycombing, which are areas where air pockets were not properly consolidated, and fill them with a patching compound if needed.
With the forms removed, backfill the area around the perimeter of the slab with soil or decorative gravel. Compact the backfill gently to prevent erosion and to support the edges of the slab. If your walkway connects to a door threshold, garage, or existing concrete surface, apply a flexible backer rod and self-leveling sealant in the gap to allow for movement and prevent water infiltration. This detail protects both your new slab and the adjoining structure from water damage and freeze-thaw damage over the long term.
Consider applying a concrete sealer once the slab has fully cured after 28 days. A penetrating sealer or film-forming acrylic sealer will protect the surface from staining, moisture penetration, and freeze-thaw damage. This is especially important for patios that will see spills from food, drinks, or barbecue grease. Reapply sealer every two to three years depending on traffic levels and exposure. With proper installation and routine maintenance, your Quikrete walkway or patio can remain in excellent condition for 25 to 30 years or more, making it one of the most cost-effective investments you can make in your outdoor living space.
Tips for Success and Common Mistakes to Avoid
Even experienced contractors occasionally run into issues with concrete projects, but many of the most common problems are entirely preventable with good planning and technique. One of the most frequent mistakes DIYers make is adding too much water to the mix in an attempt to make it more workable. While a wetter mix is easier to pour and spread, every extra quart of water beyond the recommended amount reduces the compressive strength of the finished concrete and increases the likelihood of surface cracking and scaling. Stick to the recommended water ratio and adjust workability by adding Quikrete Acrylic Fortifier instead of water.
Weather plays a significant role in the success of a concrete pour. Ideal conditions are temperatures between 50 and 85 degrees Fahrenheit with low wind and moderate humidity. Pouring in direct sun on a hot, windy day accelerates evaporation and can cause the surface to crack before you even finish floating it. On very hot days, dampen the sub-base with water before pouring and work in the early morning when temperatures are lower. Never pour concrete on frozen ground or when temperatures are expected to drop below 40 degrees Fahrenheit within the first 24 hours, as freezing prevents proper hydration and will ruin the slab.
The following is a quick summary of best practices to keep in mind throughout your project:
- Always wear gloves, eye protection, and rubber boots when working with wet concrete, as it is caustic and can cause chemical burns with prolonged skin contact.
- Do not over-work the surface during finishing; excessive troweling can bring too much water and fine material to the surface, weakening it over time.
- Keep your forms perfectly level and securely staked so they do not shift or bow outward under the weight of the pour.
- Plan your pour so you are not leaving cold joints, which are seams where partially set concrete meets fresh concrete, as these become weak points in the finished slab.
- Cure the concrete for the full recommended period rather than removing plastic sheeting or stopping moisture application prematurely.
- Cut control joints to the proper depth, which is one-quarter of the slab thickness, to ensure they function correctly as planned crack lines.
Finally, do not be discouraged if your first concrete project is not perfect. Every DIYer who has built a walkway or patio will tell you that the second one always looks better than the first. The skills involved, particularly screeding and finishing, improve rapidly with hands-on experience. Quikrete’s wide range of products also gives you flexibility to tackle repairs, patches, or decorative overlays later if you want to refresh the surface or correct minor imperfections. With the information in this guide and a commitment to careful preparation, you have everything you need to complete a beautiful, durable concrete walkway or patio that will serve your home and family for generations.








What do you think?
It is nice to know your opinion. Leave a comment.