










How To Use a Yoga Ball To Make a Concrete Sphere Planter
Introduction: The Magic of Concrete Sphere Planters
Concrete sphere planters have quietly become one of the most popular garden pieces around, and it’s easy to see why. That clean, rounded shape looks great whether your outdoor style leans modern and minimal or warm and rustic, and once you set one down, it’s staying put. What catches most people off guard is how doable these are to make at home — no expensive molds, no professional equipment, just a little patience and some elbow grease.
The trick is using something you probably already have lying around or can grab cheap at any sporting goods store: a yoga ball. The rubber surface of an inflatable yoga ball makes a surprisingly perfect temporary mold for wet concrete. You coat it, let everything cure, then deflate and pull the ball out — leaving behind a hollow sphere with a smooth, curved surface that would be nearly impossible to pull off any other way.
This project lands somewhere between craft, sculpture, and gardening, which makes it a genuinely fun weekend project. Maybe you want a bold centerpiece for a garden bed, a low-key succulent planter tucked into a patio corner, or a row of graduated spheres along a walkway. Whatever you’re going for, this technique can get you there. Here’s everything you need to know, start to finish.
Materials and Tools You Will Need
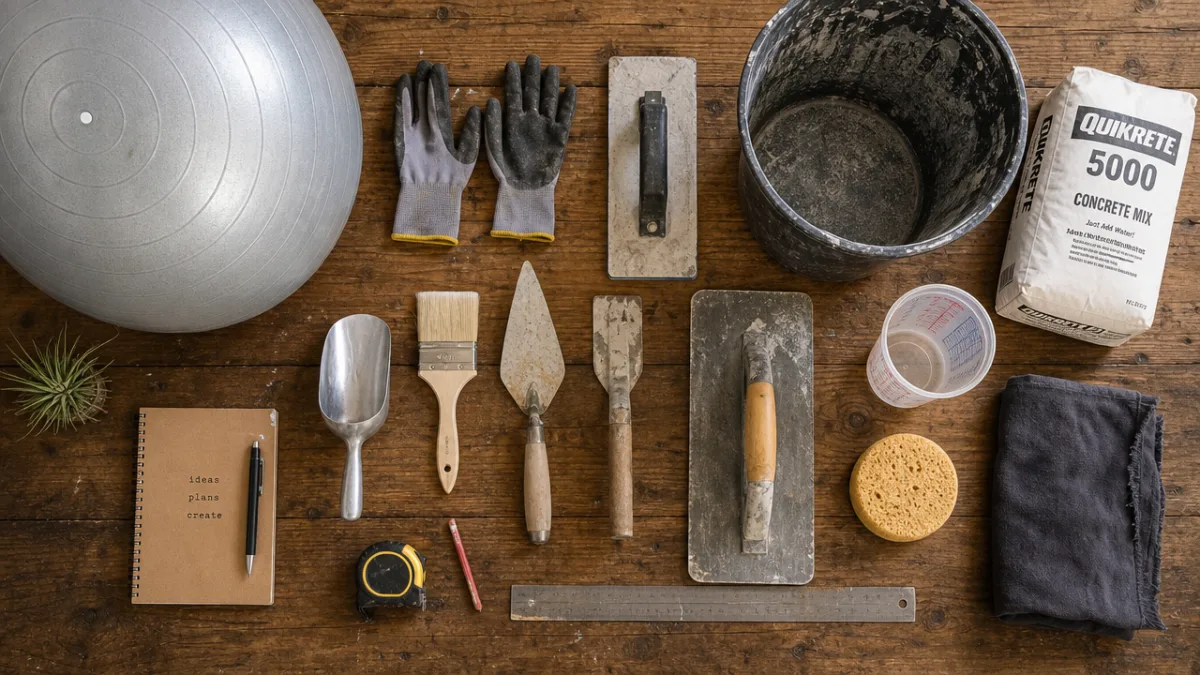
Before you touch the concrete, get everything gathered and laid out first. Concrete doesn’t wait for you once you start mixing, so having everything within reach matters. The good news is nothing on this list is hard to find or particularly expensive — a hardware store or garden center should have it all.
For the concrete, you’ve got a couple of solid options. A standard sand-topping mix or a fiber-reinforced concrete mix both work really well here. Fiber-reinforced is worth seeking out if you can find it, because those tiny embedded strands help prevent cracking as the sphere dries — which is especially important for a hollow form. One thing to avoid: any mix with large gravel aggregate. Those chunky bits make it nearly impossible to get a smooth, even surface.
Here’s everything you’ll want to have on hand before you start:
- One inflatable yoga ball, anywhere from 55 cm to 75 cm depending on how big you want your planter
- One or two 60-pound bags of sand-topping mix or fiber-reinforced concrete
- A large plastic mixing tub or wheelbarrow
- Water and a measuring container
- Rubber or latex gloves and safety glasses
- A stiff-bristled brush or sponge for smoothing
- A bucket of water for wetting your hands and tools as you go
- Plastic sheeting or a tarp to protect your work surface
- A needle or pin for deflating the yoga ball after curing
- Optional: concrete pigment or dye if you want a pop of color
- Optional: a small drainage insert or cork for the drainage hole
It’s also worth thinking through your workspace before you dive in. Outdoors on a mild, calm day is ideal — extreme heat makes the concrete dry too fast and crack, while cold weather drags out the curing process. A shaded spot in your yard or a well-ventilated garage hits the sweet spot. Lay down your plastic sheeting ahead of time, and cleanup becomes much less of a headache later.
Preparing the Yoga Ball and Mixing the Concrete
This is where you set yourself up for success, so take your time. Start by inflating your yoga ball all the way to its full recommended size. A fully inflated ball gives you the tautest, most uniform surface to work on, which directly affects how smooth and round your finished sphere turns out. Once it’s inflated, set it in a bucket or bowl that holds it steady — something that nests the bottom quarter of the ball works perfectly. You want it stable enough that it’s not rolling around on you while you’re trying to work.
Next, give the entire surface of the ball a thin coat of petroleum jelly or cooking spray. This acts as a release agent, creating a barrier between the rubber and the concrete so the ball comes out cleanly after curing. You don’t need to slather it on — a thin, even layer over everywhere you plan to cover concrete is plenty. Just make sure you don’t miss the very bottom where the ball sits in the bowl, since that spot is easy to overlook.
Now for the mix. Pour your dry concrete into the tub or wheelbarrow and add water gradually, following the package directions and mixing as you go. You’re aiming for something about the consistency of peanut butter or thick oatmeal — it should hold its shape when you scoop it up but not be so stiff it crumbles. If it’s too wet, it’ll just slide right off the ball before it has a chance to firm up. When in doubt, go a little stiffer for your first layer.
Applying the Concrete to the Ball
With your concrete mixed and your ball locked in place, it’s time to actually start building the sphere. You’ll be working in layers rather than trying to slap it all on at once — this gives each coat a chance to firm up a bit before you add the next, and it gives you much better control over the thickness and evenness of the walls. Plan on two to three coats total.
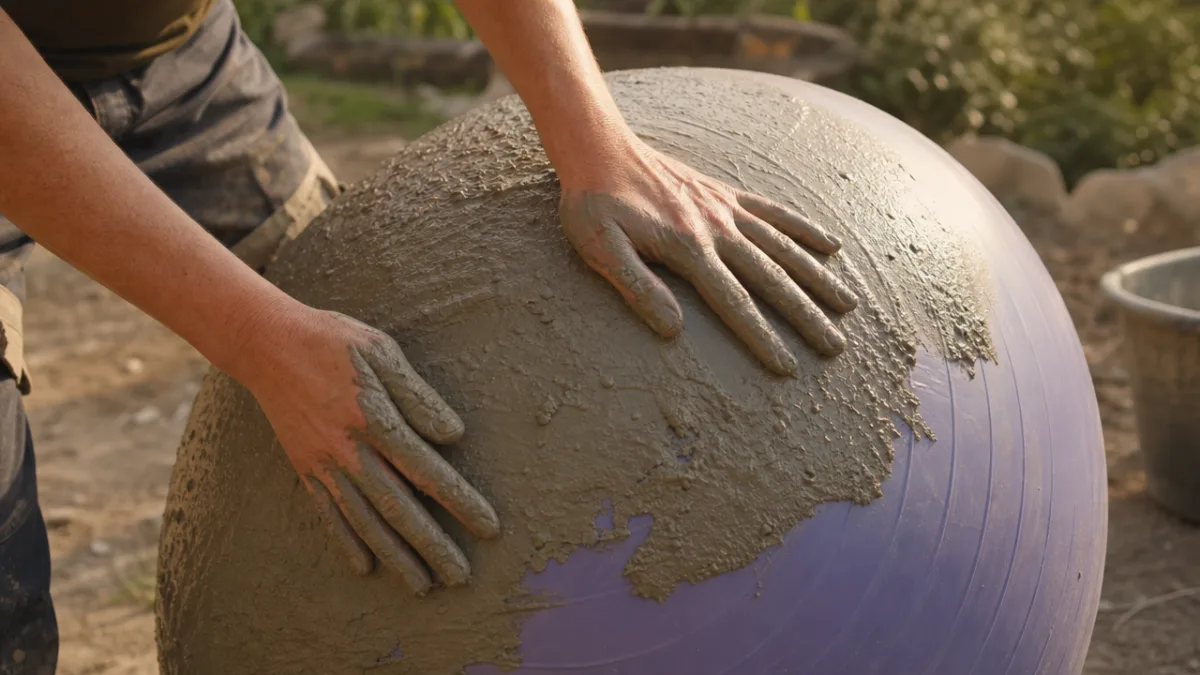
Start at the top and work your way down toward the equator, pressing handfuls of concrete onto the upper hemisphere of the ball. Press firmly with your gloved hands, smoothing as you go and pushing out any air pockets. A wet sponge or brush can help you get a cleaner surface. You’re shooting for about an inch of thickness throughout — enough to be structurally solid without making the finished planter unreasonably heavy. And don’t forget to leave an opening at the very top around the ball’s inflation valve; that’s where your plants will go in.
Once your first layer covers the whole upper hemisphere, let it rest for twenty to thirty minutes until it’s starting to firm up but still feels a little tacky. That’s your window to apply the second layer — it’ll bond seamlessly with the first. Keep smoothing and refining as you go. If you want to add some texture, this is also the moment to press leaves, lace, or other natural materials gently into the surface. Pull them away cleanly and they leave gorgeous imprints behind. When you’re happy with the thickness and texture, let the whole thing start its initial cure.
Curing, Demolding, and Finishing the Sphere
Curing is probably the most important step in the whole project, and also the one that demands the most patience. Once your final layer is on and smoothed out, loosely cover the whole piece with plastic sheeting. Concrete doesn’t “dry” the way most people think — it goes through a chemical reaction called hydration, and keeping moisture in during that process gives you a noticeably stronger result. Leave it alone for at least 24 to 48 hours before you even think about removing the ball.
After that initial wait, press gently on the surface. If it feels completely solid with zero give, you’re ready. Use a pin or needle to puncture the inflation valve and let the air out slowly. As the ball deflates, it’ll pull away from the inside of the concrete and you can work it out through the top opening. If it sticks in a spot, don’t yank — just gently coax it through. The petroleum jelly you applied at the start should make this pretty painless.
Once the ball is out, take a good look at the interior and exterior for any cracks or thin spots. Small surface cracks can be patched with a brush-applied slurry of concrete and water, then left to cure again. After that, you can wet-sand the outside with fine sandpaper if you want a smoother feel, or leave the natural texture if you like the more rustic look. To protect your planter from moisture and freeze-thaw damage over the years, brush or roll on one or two coats of concrete sealer, letting each coat dry completely before adding the next.
Planting and Displaying Your Concrete Sphere Planter
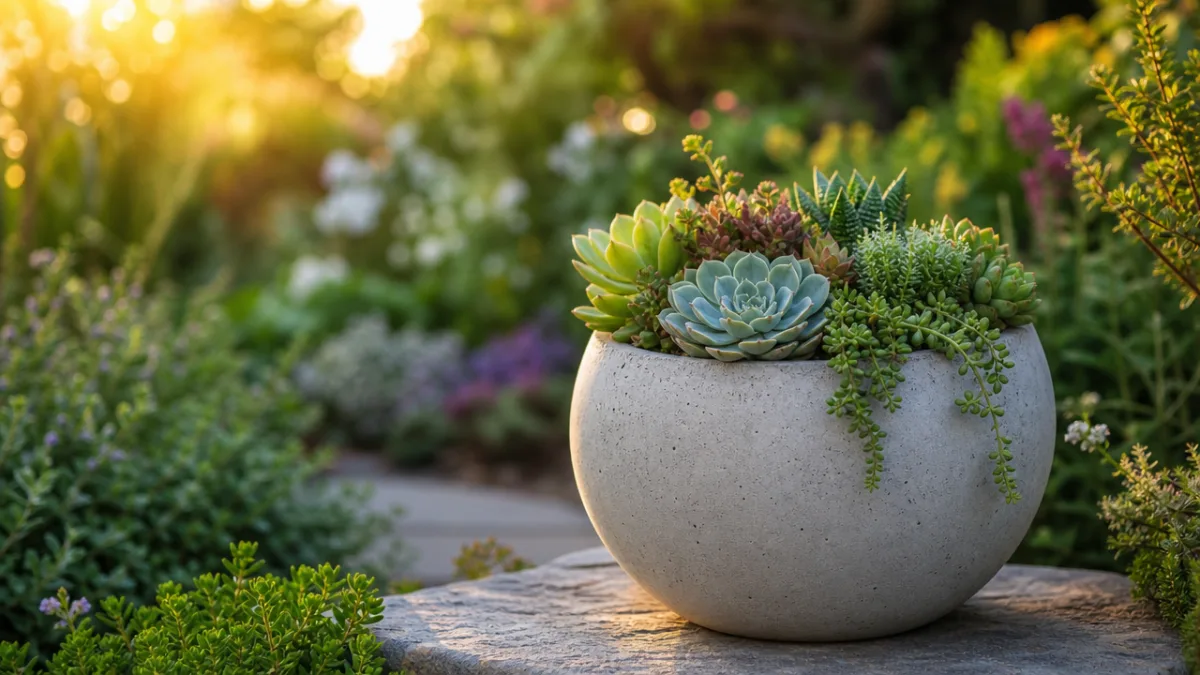
This is the fun part — figuring out what to plant and where to put it. The hollow interior works well for a surprisingly wide range of plants, though some are better suited to the shape than others. Succulents and sempervivums are probably the most popular choice for concrete sphere planters, and for good reason: they love well-draining conditions, don’t need much soil to thrive, and their compact, sculptural forms look fantastic alongside the clean geometry of the sphere.
Before you add any soil, make sure your sphere can drain properly. If you didn’t work in a drainage hole during construction, now’s the time to carefully drill one or two small holes into the lower portion using a masonry bit. Without drainage, water sits inside and roots rot — even tough plants won’t survive that for long. Cover the inside of the hole with a small piece of mesh screen before you add your growing medium, so the soil stays put when you water. A cactus and succulent potting mix drains well and works for most plantings in this kind of container.
As for placement, a single large sphere tucked into a garden bed or set at the base of steps makes a real statement on its own. Three spheres in graduated sizes grouped together create something more dynamic and sculptural. Wherever you put them, setting them on a bed of gravel or pea stone is a nice touch — it improves drainage underneath and lifts them slightly off the ground, which helps them last longer. And because of their weight, you don’t have to worry much about wind or anyone walking off with them, which makes them a great choice for front yard displays.
Tips, Troubleshooting, and Creative Variations
Even when you do everything right, first-timers sometimes run into a snag or two. Cracking during the cure is probably the most common one, and it usually comes down to the concrete drying out too fast — heat, wind, and low humidity are the usual culprits. If you spot hairline cracks forming in the first few hours, mist the surface with water and get it back under the plastic sheeting to slow things down. Deeper cracks that show up after curing can be fixed pretty easily with a concrete patching compound from any hardware store.
Getting an even thickness across the whole sphere is another thing people struggle with at first. Thin spots are a real vulnerability — they crack and break more easily. A quick way to check as you go is to press a toothpick or skewer gently into the concrete; if it slides through more than an inch without resistance, that area needs more material. Thick spots aren’t a structural issue, they just add weight you don’t need. The good news is that your hands get better at sensing this with practice, and by your second or third sphere it starts to feel pretty intuitive.
Once you’ve got the basic technique down, there’s a lot of room to get creative. Here are some variations worth trying:
- Hypertufa blend: Swap out part of the concrete mix for peat moss and perlite to make a lighter, more porous sphere with a beautiful aged-stone look.
- Pigmented spheres: Mix concrete pigment powder in before you apply it to get spheres in charcoal, terracotta, slate blue, or whatever color fits your garden palette.
- Textured finishes: Press burlap, lace, or large leaves into the wet surface before it cures to leave organic, intricate patterns across the exterior.
- Mosaic embellishment: After curing, use tile adhesive and grout to apply broken tiles, glass gems, or pebbles to the outside for a colorful, decorative look.
- Stacked arrangements: Make several spheres and stack them on a structural rod through the center to build a dramatic tower planter as a garden focal point.
These also make genuinely wonderful handmade gifts — for gardeners, for housewarming celebrations, for anyone who appreciates something made with care. A smaller 55-centimeter sphere is very doable over a weekend, sealed and cured by midweek, and ready to plant and gift right on schedule. Change up the texture, color, or planting for each one and every sphere becomes its own thing.
At the end of the day, this project is a great reminder that the best creative tools aren’t always the obvious ones. With a yoga ball, a bag of concrete, and a free weekend, you can make something that will sit in your garden for decades — a little weathered, a little imperfect, and completely one of a kind. That’s kind of the whole point.








What do you think?
It is nice to know your opinion. Leave a comment.