










“`html
DIY Kerplunk: Build Your Own Giant Backyard Game for Endless Outdoor Fun
What Is Kerplunk and Why Build a Giant Version?
If you grew up in the 1960s or beyond, there’s a good chance Kerplunk was somewhere in your toy closet. The classic tabletop version is simple enough: a clear plastic tube threaded with a bunch of sticks, with marbles balanced on top of them. Players take turns pulling sticks out one at a time, desperately hoping they’re not the one who sends a cascade of marbles crashing down. It’s part nerve, part strategy, and part dumb luck — which is exactly why it works for basically every age group.
Now imagine that same game, but big enough to play standing up in your backyard, with plastic balls the size of your fist dropping like a small avalanche. That’s the energy a giant Kerplunk brings to a summer party, family reunion, or neighborhood block party. The moment a bunch of balls come thundering down, everyone within earshot turns to look. It draws a crowd in a way the original tabletop version just can’t pull off — it’s loud, dramatic, and genuinely fun to watch even if you’re not playing.
Building your own is also just a really satisfying project. You’re not spending a fortune on a commercial lawn game set, and you get to make it your own — the size, the colors, the whole vibe. Most adults with basic tools and a free afternoon can pull this off, and the thing will hold up for seasons with almost no upkeep. Honestly, the build itself can be half the fun, especially if you rope in the kids and let them feel like they had a hand in making it before the first game even starts.
Materials and Tools You Will Need
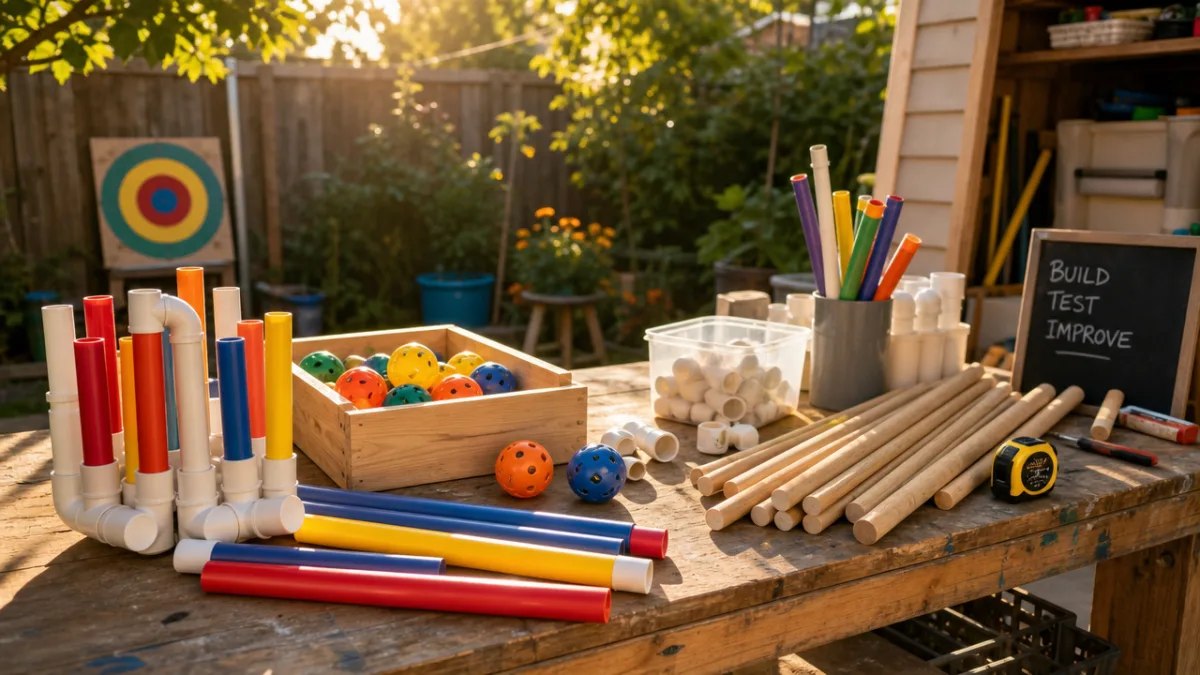
Before you start cutting or drilling anything, get everything together in one place. The main structure of your giant Kerplunk is a cylindrical frame, and the easiest way to build it is with PVC pipe or flexible garden hoops bent into rings. Most people aim for a finished diameter somewhere between 24 and 36 inches — big enough that the sticks and balls have room to do their thing dramatically, but not so massive that it becomes a pain to store or haul around. Make one trip to your local home improvement store and grab everything at once so you’re not stopping mid-build for a forgotten connector.
For the sticks, wooden dowels are the go-to choice. A diameter of about three-eighths of an inch gives you the right balance of stiffness and a little bit of flex, and you want them long enough to poke out on both sides of the frame so players can actually grip them. Plan on 30 to 50 dowels depending on how big your frame ends up. For the balls, plastic ball-pit balls are perfect — they’re colorful, cheap, lightweight, and completely safe for little ones running around nearby. They’re basically the grown-up version of marbles for this project.
Here’s a convenient checklist of everything you’ll want to have on hand before you start:
- PVC pipe (1-inch diameter) or flexible conduit — approximately 10 to 12 feet for a medium-sized frame
- PVC connectors, elbows, and a coupler to close the ring
- Wooden dowels, three-eighths inch diameter, cut to approximately 36 to 40 inches in length — 30 to 50 pieces
- Plastic ball-pit balls — 30 to 50 balls in assorted colors
- PVC cement or strong adhesive for sealing frame joints
- Spray paint in multiple colors for the dowels (optional but highly recommended)
- A drill with a drill bit matching your dowel diameter
- Measuring tape, pencil, and sandpaper
- Zip ties or bungee cords for temporary assembly during drilling
When you’re picking out PVC pipe, go with schedule 40 — it’s the standard stuff at most hardware stores, and it’s the sweet spot between sturdy enough to hold its shape under the weight of the balls and light enough that the finished game isn’t a beast to carry around. If you want a more rustic look, some people use thin wooden rings cut from plywood, but that route requires more woodworking know-how and tools. For most people, PVC is the obvious call — it’s beginner-friendly and ends up looking clean and polished when it’s done.
Step-by-Step Building Instructions
Start by forming your circular frame. Cut your PVC pipe into sections that, when connected, make a circle the size you’re going for. A 30-inch diameter circle needs about 94 inches of pipe around the circumference, so plan your cuts with that in mind and leave yourself a little extra for adjustments. Use PVC elbows and connectors to join the sections — do a dry fit first without any cement so you can tweak the shape before committing. Once you’re happy with it, apply PVC cement at each joint per the manufacturer’s instructions and let it cure completely before moving on.
You’ll need two of these rings — one for the top and one for the bottom of your Kerplunk structure. Vertical supports (more PVC sections, cut to your desired height) hold the two rings apart. A height of 24 to 30 inches is comfortable for most players, kids included. Space the supports evenly around the circumference and attach them to both rings to form a sturdy cylindrical cage. At this point it’ll start to look unmistakably like what it is, which is always a satisfying moment.
Now for the most important step: drilling the holes for your dowels. Mark evenly spaced points around both rings, making sure the marks on the top and bottom line up so each dowel can pass straight across through both sides of the cylinder. A drill press gives you the cleanest results, but a handheld drill works fine if you keep it steady and perpendicular to the pipe. Drill slowly — rushing is how you crack the PVC. Once you’ve got all the holes drilled, test-fit your dowels and make sure they slide in and out easily. If any feel tight, a little sandpaper around the edge of the hole is all it takes to loosen things up.
With everything drilling cleanly, take the frame apart one last time if you want to paint it. Painting the dowels in alternating bright colors — red, yellow, blue, green — makes the whole game look festive, and it also gives players and scorekeepers a way to track which sticks belong to whom. Lay the dowels on a drop cloth somewhere with good airflow and do two coats of outdoor spray paint, letting each coat dry fully. Once everything’s dry and you’ve reassembled the frame, thread the dowels through their holes and drop the ball-pit balls in through the top so they settle onto the lattice of sticks. That’s it — you’re done, and it’s ready to play.
How to Play Giant Backyard Kerplunk
The rules are the same as the original, but everything just feels bigger and more exciting when you’re playing outside at full scale. Before you start, make sure all the dowels are pushed through and the ball-pit balls are sitting on top of the stick lattice inside the cylinder. Players should be able to reach the dowels comfortably from a standing position — which is why getting your frame height right during the build matters. Put a bucket or container under the open bottom of the frame to catch the balls as they fall, or you’ll be chasing them across the yard all afternoon.
On each turn, a player pulls one dowel out of the frame. The whole point is to do it without disturbing the balls resting above. When someone pulls a stick and balls come dropping through, those balls become that player’s penalty points. Once every stick has been pulled, the player with the fewest balls wins. What makes this scoring system so interesting is how the risk compounds as the game goes on — the early pulls feel almost casual, but by the end, every remaining stick feels like it’s holding up the whole pile and nobody wants to be the one to find out.
There are several fun rule variations that can make the game more interesting for different group sizes and age groups:
- Team Play: Split into two teams and take turns pulling. The team with fewer balls at the end wins. This version is great for big gatherings and naturally gets teammates huddled together debating which stick is the safest bet.
- Color Scoring: Before the game starts, assign different point values to different colored balls — maybe red is worth three points, yellow two, and blue one. It adds a strategy layer and makes the final tally more exciting.
- Speed Round: Set a timer and see who can pull the most sticks in 60 seconds without dropping any balls. Younger kids especially love the extra pressure of a countdown.
- Elimination Mode: Any player who drops more than three balls on a single pull is out. Last person standing wins, regardless of total ball count.
Whatever rules you go with, one of the best things about giant Kerplunk is how it naturally pulls people in off the sidelines. Even guests who aren’t playing tend to drift over and start reacting out loud to close calls and dramatic drops. It’s the kind of game that creates its own social energy — no batteries, no screens, no complicated setup. Just your handmade frame, some colorful sticks, and a pile of plastic balls, doing exactly what a good backyard game should do.

Tips for Customization and Personalization
One of the best things about making this yourself rather than buying it is how much room you have to make it your own. Color is the quickest win. Match the dowel colors to whatever party you’re throwing — red, white, and blue for the Fourth of July; bright pink, orange, and turquoise for a tropical luau. You can even brush some chalkboard paint onto the PVC frame and write player names or running scores directly on it, which turns the game into its own live scoreboard throughout the afternoon.
Adding a permanent base is another small upgrade that makes a big difference. The frame stands fine on flat ground by itself, but on uneven grass it can get a little wobbly. Cut a circular disc of three-quarter-inch plywood just slightly bigger than your frame’s bottom ring, add a routed groove or small lip around the edge for the ring to sit in, and seal the whole thing with a couple coats of exterior polyurethane. It’s not a complicated addition, but it makes the game feel much more solid and polished — and it’ll keep things from tipping over mid-play on a bumpy lawn.
If you have young kids at home, consider building a smaller version alongside the full-sized one. A frame that’s about 18 inches in diameter and 18 inches tall is perfectly sized for toddlers and young children, and thinner, lighter dowels are much easier for small hands to grip and pull. Set both games up side by side at family events and every age group has their own appropriately scaled challenge. Paint the junior version in pastel colors or dot it with stars and it immediately reads as the “kids’ game,” which kids absolutely love.
It’s also worth thinking through storage and transport while you’re still in the design phase. A drawstring bag or canvas tote big enough to hold all the dowels and balls keeps everything in one place between uses and makes it easy to throw in the car for camping, picnics, or a weekend at a friend’s place. Some people attach a short rope or a carabiner clip to the frame so the whole structure can hang on a hook in the garage or shed rather than taking up floor space. A little forethought now saves you a lot of frustration at the end of a long, fun day when you just want to pack up and head inside.
Maintenance, Safety, and Making It Last for Years
With a little basic care, this thing should hold up for many seasons without much fuss. The main enemies of an outdoor game are moisture and sun exposure, and they’re basically unavoidable. PVC handles both pretty well on its own, which is a big part of why it’s such a good material for this. Wood dowels are a different story — they’ll absorb moisture and eventually warp or split if you don’t give them some protection. A coat of outdoor sealant or exterior spray paint before you first use them goes a long way toward keeping them in good shape.
After each use, give the frame and dowels a quick wipe-down with a dry cloth before you put everything away. If the game got wet — either from play or from an unexpected rain shower — let all the pieces air dry completely before packing them up. Stacking damp wood dowels in a bag is a fast track to mold and warping, and warped dowels that stick in the holes make the game genuinely aggravating to play. A few extra minutes of drying time is a small price to pay for years of smooth gameplay.
Safety is worth keeping in mind, especially with kids around. The frame itself is pretty harmless — PVC is smooth and light. The bigger hazard is the falling balls. When a big batch drops all at once, they scatter fast and the ground gets slippery in a hurry. Playing on grass helps a lot since the balls roll to a stop much faster than they do on pavement. It’s a good habit to remind younger players to wait until all the balls have settled before reaching in to grab them, and having one adult on loose-ball duty during family sessions is never a bad idea.
If dowels warp enough over time that they no longer slide cleanly, just swap them out. They’re cheap, and keeping a small stash of spares on hand means you’re never stuck mid-game. Same goes for the ball-pit balls — inspect them at the start of each season and toss any that are cracked or punctured. Since they come in big packs at very low cost, restocking isn’t really a budget concern. Keep up with those simple habits and your handmade giant Kerplunk will be pulling people off their lawn chairs and into the action for years to come.
“`








What do you think?
It is nice to know your opinion. Leave a comment.