










DIY Light Ball Lamp: The Ultimate Guide to Making a Stunning Yarn Room Decor Piece
Introduction: Why the DIY Light Ball Lamp Is Taking Over Home Decor
If you have spent any time scrolling through Pinterest or Instagram lately, you have almost certainly stumbled upon the mesmerizing DIY light ball lamp trend. These glowing orbs of yarn-wrapped perfection have captured the hearts of craft enthusiasts everywhere, and it is not hard to understand why. They combine the warmth of soft textile art with the magical ambiance of a glowing light source, creating something that feels both handmade and professional at the same time. The best part? Almost anyone can make one, regardless of their crafting experience level.
The appeal of this project goes far beyond its visual charm. In a world where home decor items are increasingly mass-produced and generic, there is something deeply satisfying about creating a one-of-a-kind piece that reflects your own personal style. A DIY light ball lamp can be customized in virtually endless ways — through color choices, yarn textures, size variations, and even the type of light source used inside. Whether you are decorating a cozy bedroom, a nursery, a dorm room, or a living area, this project fits right in.
What truly sets this craft apart from other trending DIY projects is its accessibility. The materials are inexpensive and easy to find, the process is straightforward enough for beginners, and the results are consistently stunning. Across social media platforms, videos of this craft have gone viral repeatedly because the transformation from a simple balloon and a ball of yarn to a luminous, elegant lamp is genuinely surprising and satisfying to watch. This guide will walk you through everything you need to know to create your own stunning version at home.
Materials You Will Need: Gathering Everything Before You Begin
One of the most important steps before starting any craft project is making sure you have all of your materials ready and within reach. For the DIY light ball lamp, the supply list is refreshingly short and affordable, which makes it an excellent project for crafters who are just building up their supply stash. Most items can be found at your local craft store, dollar store, or ordered online for very little cost, making this one of the most budget-friendly room decor projects you can undertake.
The foundation of this project is a round balloon, which will serve as your temporary mold. You will want a balloon that inflates to a nice, smooth sphere — standard round balloons work perfectly for this. The size of the balloon determines the size of your finished lamp, so consider where you plan to display it before blowing up your balloon. A smaller balloon creates a delicate, subtle light accent, while a larger one becomes a dramatic focal point in any room. Having a few spare balloons on hand is always a smart idea in case one pops unexpectedly during the crafting process.
Here is a complete list of materials you will need to gather:
- One or more round balloons in your desired size
- Yarn in your preferred color or colors (cotton or acrylic both work well)
- White school glue or Mod Podge (a full bottle is recommended)
- A small bowl or container for mixing the glue solution
- Petroleum jelly or cooking spray to coat the balloon
- A string of LED fairy lights or a small battery-operated light
- Scissors and a ruler
- Newspaper or a drop cloth to protect your work surface
- A hanger, hook, or stand for drying and displaying
When selecting your yarn, pay close attention to the weight and texture. A medium-weight yarn gives you good coverage without becoming too thick and stiff, while still allowing light to filter through beautifully. Lighter, thinner yarn creates a more delicate, lace-like effect that lets more light through, producing a softer glow. Chunky yarn will create a more rustic, dramatic look with less light transmission. Consider the mood you want to create in your space when making this decision, as it will significantly affect the final result of your lamp.

Step-by-Step Instructions: How to Make Your Light Ball Lamp
Now that you have all of your materials assembled, it is time to dive into the actual crafting process. Making a yarn light ball lamp involves several distinct stages, and understanding the full process before you begin will help everything go more smoothly. The most important thing to keep in mind throughout this project is patience — the glue needs time to dry completely before you can remove the balloon, and rushing this stage is the most common mistake that causes projects to collapse or lose their shape.
Start by inflating your balloon to your desired size and tying it off securely. Once inflated, coat the entire surface of the balloon generously with petroleum jelly or cooking spray. This step is critically important because it prevents the glue-soaked yarn from bonding permanently to the balloon, allowing you to pop and remove it later without destroying your hard work. Apply the coating evenly, making sure to cover the entire surface including around the tied-off end, and hang the balloon somewhere convenient so it is easy to rotate as you work.
Next, prepare your glue mixture. Pour a generous amount of white school glue into your bowl and mix in a small amount of water — approximately a ratio of three parts glue to one part water works well for most yarns. You want the mixture to be liquid enough to saturate the yarn fully but still thick enough to hold its shape. Cut your yarn into manageable lengths before you begin, or work straight from the ball, dipping sections into the glue mixture as you wrap. Fully saturate each section of yarn by pulling it through the glue between your fingers to remove excess while ensuring complete coverage.
Begin wrapping the glue-saturated yarn around the balloon in a random, overlapping pattern. There is no single correct technique here — some crafters prefer to wrap in long continuous strands that crisscross in multiple directions, while others work in shorter sections at varying angles. The goal is to create an even distribution of yarn across the entire surface of the balloon, with no large gaps that would create weak points in the structure. As you work, periodically rotate the balloon to check your coverage from all angles and fill in any sparse areas.
Continue wrapping until you are satisfied with the density of your yarn coverage. A denser wrap creates a sturdier lamp with a warmer, more diffused glow, while a sparser wrap produces a more delicate-looking piece with more light exposure. Once you are finished wrapping, use a piece of string or yarn to hang the balloon in a well-ventilated area where it can dry without being disturbed. Depending on the humidity in your area and the thickness of your yarn layer, drying can take anywhere from eight hours to a full twenty-four hours. The glue will turn from milky white to completely clear when it is fully dry.
Popping the Balloon and Adding Your Light Source
This is the moment every crafter looks forward to — the big reveal. Once your yarn shell is completely dry (and you will want to be absolutely certain it is, as even slightly damp glue can cause the structure to sag or collapse), it is time to remove the balloon from inside. Use a pin or scissors to carefully puncture the balloon near the tied-off end. You will hear a satisfying pop, and the balloon will begin to pull away from the inside of the yarn shell on its own, thanks to the petroleum jelly coating you applied at the beginning.
Gently reach inside through the opening where the balloon knot was and carefully pull out all of the deflated balloon material, taking care not to stress the yarn structure. If any parts of the balloon seem to be sticking slightly, move slowly and work carefully rather than pulling hard, as the glued yarn is strong but can be damaged by sudden force. Once the balloon is fully removed, you will be left with a beautiful, hollow yarn sphere that holds its shape on its own. Take a moment to appreciate what you have created — it is genuinely impressive every single time.
Now comes the finishing touch that transforms your yarn ball from a decorative orb into a functioning lamp. Thread a string of battery-operated LED fairy lights through the opening in your yarn ball, coiling them loosely inside to distribute the light as evenly as possible. LED fairy lights are the ideal choice for this project for several important reasons. They produce very little heat, making them safe to use inside a yarn and glue structure. They are also energy efficient, battery operated for cord-free placement flexibility, and available in a wide range of colors including warm white, cool white, and multicolored options. Tuck the battery pack just outside the opening or create a small secondary opening at the base of the ball to feed the battery pack through.

Choosing the Right Light for Your Lamp
The type of light you choose will dramatically affect the overall look and atmosphere of your finished lamp. Warm white LED fairy lights create a cozy, golden glow that is reminiscent of candlelight and works beautifully in bedrooms, living rooms, and nurseries. Cool white lights give a cleaner, more modern look that suits contemporary decor styles. For a more playful, festive effect, multicolored lights can be absolutely magical, especially in a child’s room or a creative workspace.
Beyond fairy lights, some crafters opt for a single small Edison-style bulb on a cord, which creates a more dramatic, pendant-lamp effect. If you go this route, make sure you are using a low-wattage LED bulb, as anything that generates significant heat is a fire risk inside a yarn structure. USB-powered lights are another excellent option, as they can be powered through a standard USB port or adapter and eliminate the need to swap out batteries regularly. Whatever light source you choose, ensure that it fits comfortably within your yarn ball without putting pressure on the structure from the inside.
Display Ideas and Creative Variations to Personalize Your Lamp
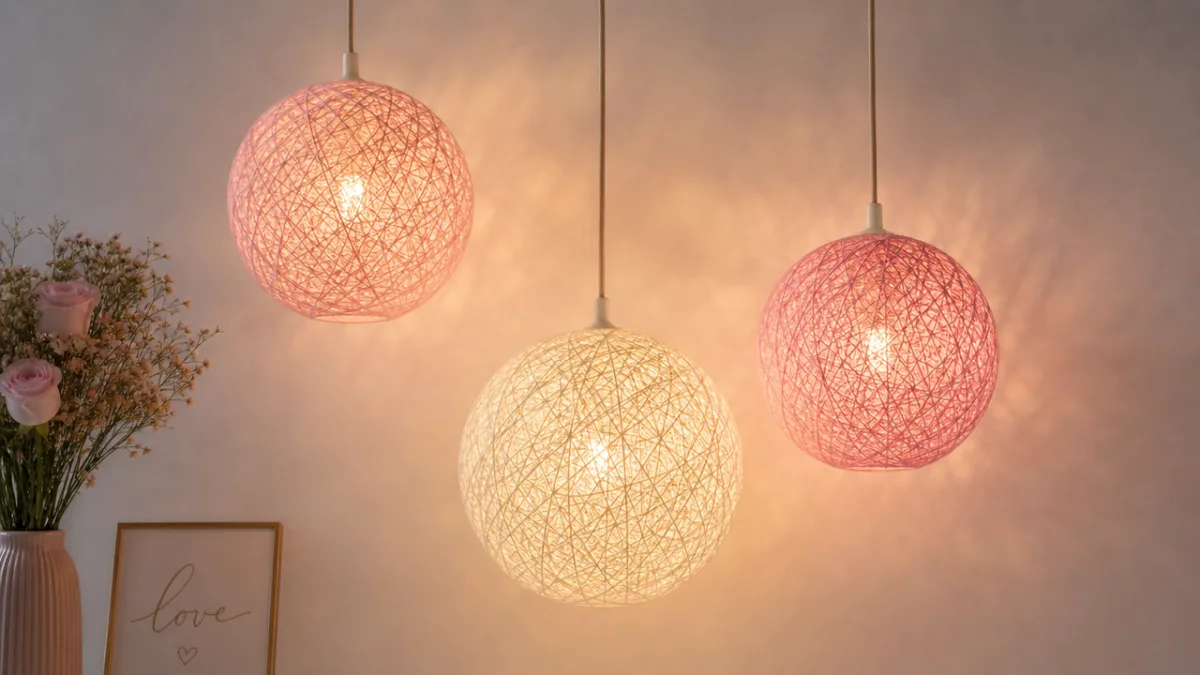
Once your light ball lamp is complete and glowing, the fun of deciding how to display it begins. The most popular approach is to hang the lamp from the ceiling using a simple hook and a length of coordinating yarn, ribbon, or transparent fishing line. A cluster of light ball lamps in varying sizes hung at different heights creates a truly breathtaking installation that works in entryways, above dining tables, in bedrooms, or even as a photo booth backdrop. Grouping three to five lamps together in a similar color palette makes an especially cohesive and impressive statement.
If hanging is not an option in your space, light ball lamps also look wonderful displayed on shelves, nightstands, or inside large glass bowls or vases. Nesting a glowing yarn ball inside a clear glass container adds an extra layer of visual interest and makes the lamp feel even more intentional as a decor piece. For a boho-inspired look, try placing a few on a wooden tray alongside plants, candles, and other natural textures. The warm glow of the lamp plays beautifully against the organic materials and creates a layered, curated vibe that feels effortlessly stylish.
Here are some creative variations to consider as you build your skills with this project:
- Ombre yarn balls: Gradually transition from one color to another by switching yarn colors as you wrap, creating a beautiful gradient effect that glows in multiple tones when lit.
- Mixed texture lamps: Combine different yarn weights and textures — for example, a thin metallic thread alongside a soft cotton yarn — to create depth and sparkle in the finished piece.
- Heart or star shapes: Instead of a balloon, use a differently shaped mold like a heart balloon or a star-shaped form for a more graphic, playful look.
- Macrame-wrapped lamps: Add a macrame hanger or knotted rope detail around the outside of your finished ball for a boho-chic upgrade.
- Seasonal themes: Use orange and black for Halloween, red and green for Christmas, or pastel colors for spring to create themed decorative accents throughout the year.
Color selection is one of the most personal and impactful decisions you will make for this project. For a soft, romantic bedroom, blush pink, dusty rose, and cream tones are enchanting. For a bold, modern living room, deep jewel tones like navy, emerald, or burgundy make a striking statement. Neutral tones like natural oatmeal, ivory, and taupe work with virtually any existing decor and create a timeless look that will never feel dated. Do not be afraid to experiment with color — because materials are so inexpensive, you can easily make multiple lamps in different colorways to see what resonates most with your space.
Tips, Troubleshooting, and Caring for Your Light Ball Lamp
Like any craft project, making a yarn light ball lamp comes with a learning curve, and your first attempt may not be absolutely perfect — and that is completely fine. Understanding the most common challenges and how to address them will help you produce consistently better results with each lamp you make. One of the most frequent issues crafters encounter is a lamp that does not hold its round shape after the balloon is removed. This almost always comes down to insufficient drying time or an uneven application of the glue mixture. If your lamp deflates slightly, try applying an additional thin layer of diluted glue to the outside of the structure and allowing it to dry again fully.
Another common challenge is yarn that slips or slides while you are wrapping, particularly on larger balloons. The petroleum jelly coating on the balloon helps the finished lamp release cleanly, but it can also make it harder for the wet yarn to grip the surface during the wrapping process. Working with slightly shorter sections of yarn at a time and pressing each piece firmly into place before moving on can help with this. Some crafters find it helpful to start by creating a simple grid pattern first — wrapping yarn in one direction and then perpendicular to it — before filling in with more random wrapping. This creates a structural framework that holds subsequent layers more securely.
Caring for your finished lamp is simple and straightforward. Because the yarn is sealed with dried glue, it is reasonably resistant to light dust accumulation, and a gentle puff of air from a can of compressed air or a soft brush can keep it looking fresh. Avoid exposing your lamp to high humidity or moisture, as prolonged dampness can soften the glue and compromise the structure over time. Direct sunlight can cause some yarn colors to fade over time, so consider placement carefully if you want your lamp to maintain its color vibrancy. With reasonable care, a well-made yarn light ball lamp can last for years and continue bringing warmth and charm to your space.
Safety Considerations
Safety should always be a priority when creating and using any DIY light fixture. The most important rule for this project is to use only low-heat light sources — specifically LED lights — inside your yarn and glue structure. Traditional incandescent bulbs generate significant heat that could potentially damage the yarn over time or create a safety risk. Always check that your battery pack or USB power source is functioning properly and shows no signs of overheating before placing it inside the lamp. It is also wise to turn off or disconnect your lamp when you leave a room for an extended period or go to sleep, simply as a general precaution even though LED lights are extremely safe by design.
If you are making this lamp for a child’s room, pay extra attention to the placement and hanging method. Ensure any hanging lamp is secured to a ceiling hook that is rated for the weight of the finished piece, and keep the lamp well out of reach of young children who might try to touch or pull it. For a toddler’s room in particular, a lamp displayed on a high shelf rather than hung overhead is often a safer and equally beautiful option. Battery packs should also be secured or taped in a position where they cannot be easily accessed and opened by curious little hands.
Making a DIY light ball lamp is ultimately one of those rare craft projects that delivers results far more impressive than the effort and cost involved would suggest. It is a project that rewards patience and creativity while remaining accessible enough for crafters of virtually any skill level to enjoy. Whether you make one as a personal room decor upgrade, a heartfelt handmade gift, or a group crafting activity with friends or family, the glowing result is always something truly special. Once you complete your first one, the urge to make a whole constellation of them is nearly impossible to resist — and honestly, the more the merrier.








What do you think?
It is nice to know your opinion. Leave a comment.