










Star Magnolia Care: Your Guide to Stunning Early Spring Blooms
Introduction to the Star Magnolia
If you’ve ever walked past a garden in early spring and done a double-take at a shrub covered in what looks like a cloud of white stars, chances are you were looking at a star magnolia (Magnolia stellata). It’s one of those plants that earns its spot in the garden before almost anything else has bothered to wake up — bursting into bloom while other trees are still bare, with delicate white or pale pink flowers that genuinely stop people in their tracks. Originally from Japan, it’s been charming Western gardeners since the late 1800s, and it’s easy to see why.
Unlike the towering saucer magnolia or the grand southern magnolia, the star magnolia stays nicely compact — usually topping out around eight to ten feet at maturity. That makes it a fantastic choice for smaller gardens, foundation plantings, or even a large container on a patio. Even when it’s not flowering, the multi-stemmed, shrub-like shape gives the garden a bit of structure, and the clean dark green foliage holds its own through summer before dropping in fall.
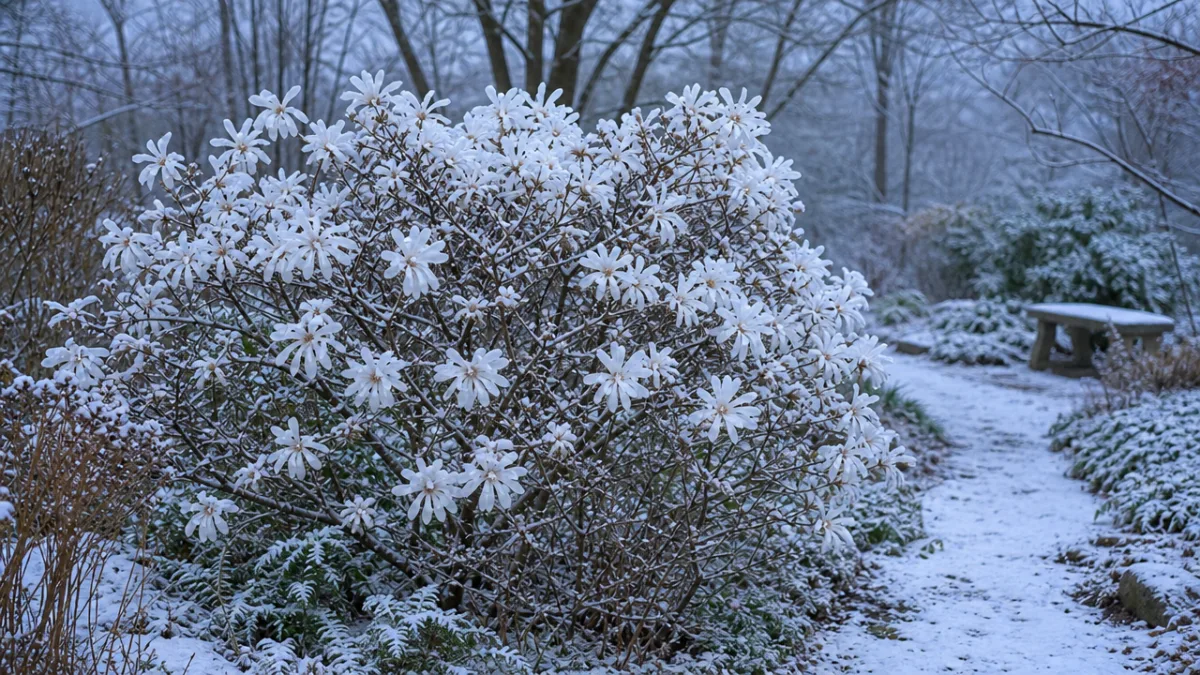
What really makes this plant special is the sheer number of flowers it puts on. Over winter, the branches slowly fill up with silky little buds, and then — often as early as late February or March depending on where you live — they open into flowers with twelve to eighteen narrow petals fanning out like tiny stars. Catching them on a crisp morning with a touch of frost still on the ground is one of those garden moments you genuinely look forward to all year.
Choosing the Right Location
Getting the location right is probably the most important thing you’ll do for your star magnolia, so it’s worth taking a bit of time before you reach for the spade. These plants do best in full sun to partial shade, but if you want the best possible flowering, aim for at least six hours of direct sun a day. More sun means more buds, stronger growth, and a healthier plant overall. A south- or west-facing spot tends to work really well in most temperate gardens.
There’s one siting consideration that’s particularly important with star magnolias, and that’s late frost. Because they bloom so early, those beautiful flowers often get caught by a returning cold snap — and what was pristine white one evening can turn brown and soggy by morning. To give yourself the best chance of dodging this, look for a spot that’s slightly sheltered: the north side of a building, under a high-branched deciduous tree, or tucked behind a wall that blocks cold winds. Even a few degrees of protection can delay flowering by a day or two, and that’s sometimes all you need to avoid the worst of it.
Drainage matters a lot too. Star magnolias really don’t like sitting in wet soil — waterlogged roots will lead to root rot, and that can kill the plant outright. But they’re not fans of bone-dry, sandy soil either. What they want is something in between: a well-draining loam or lightly amended clay that holds a bit of moisture without ever getting boggy. If your soil is on the heavy side, you can plant on a slight raised berm, or work in plenty of compost and some coarse grit to help water move through more freely.

Soil Preparation and Planting Techniques
A little extra effort at planting time will pay off for the entire life of your tree, so don’t rush this part. Star magnolias prefer a slightly acidic to neutral soil pH — somewhere between 5.5 and 6.5 is the sweet spot. It’s worth picking up a simple soil pH test kit from your local garden center before you start. If your soil is too alkaline, you can bring the pH down gradually by working in sulfur, or by mulching with pine needle compost, which acidifies the soil gently as it breaks down.
When it comes to digging the hole, go wide rather than deep — aim for two to three times the width of the root ball, but only as deep as the root ball itself. This wide, shallow approach suits the magnolia’s naturally surface-running roots and encourages them to spread outward into the amended soil rather than fighting their way down into compacted ground. Set the plant so the crown — where the trunk meets the roots — sits at or just slightly above the surrounding soil level. Planting too deep is one of the most common mistakes people make, and it can lead to collar rot and a plant that never really gets going.
Fill the hole back in with a roughly equal mix of your native soil and good garden compost, firming it down gently as you go to remove any air pockets without squashing the roots. Give it a thorough watering after planting, then lay down a generous layer of organic mulch — wood chip, composted bark, or leaf mold all work well — in a ring out to the drip line. Keep it two to three inches deep, but leave a gap of a few inches around the trunk itself so moisture doesn’t build up against the bark.
Recommended Planting Times
Container-grown plants can go in almost any time the ground isn’t frozen, but some windows are better than others. Autumn planting — done about six to eight weeks before the first hard frost — is a great option because the roots can settle into still-warm soil before the plant goes dormant, giving it a real head start come spring. Early spring planting works well too, as long as you’re prepared to water consistently through the first summer.
Bare-root plants, which you’ll sometimes find at specialist nurseries at a lower price point, need to go in during dormancy — so between late autumn and early spring, before the buds break. Handle the roots gently, soak them in a bucket of water for a few hours before planting to rehydrate them, and get them in the ground promptly. It might seem like bare-root plants are slow to get going, but they often catch up to — and sometimes overtake — container-grown plants within a couple of seasons.
Watering, Feeding, and Ongoing Care
For the first two to three growing seasons, consistent watering is really non-negotiable. During this establishment period, the plant is pouring most of its energy into building roots rather than putting on visible top growth, and it can’t yet draw on the deep, wide root system it’ll eventually develop. Water deeply but not too frequently — a good thorough soaking once or twice a week during dry spells is much better than a little splash every day. Letting the soil start to dry out slightly between waterings encourages the roots to go searching deeper, which builds a stronger plant in the long run.
Feeding is pretty low-key with star magnolias — they don’t need heavy fertilization and honestly don’t respond well to it. Once a year in early spring, just as the buds start to swell, scatter a balanced slow-release granular fertilizer formulated for acid-loving shrubs over the root zone and water it in. That’s usually all they need. One thing to watch: don’t feed after midsummer. Late feeding pushes out soft new growth that won’t have time to harden before cold weather arrives, and that can cause real problems going into winter.
Beyond that, the ongoing care for a star magnolia is genuinely straightforward. Top up the mulch layer each spring, keep an eye out for the occasional problem — yellowing leaves can point to iron chlorosis in alkaline soils, and scale insects sometimes turn up on the stems — and deal with anything you spot before it gets out of hand. A star magnolia that’s been well placed and well planted really does take care of itself for the most part.

Signs of Nutrient Deficiency
Because star magnolias like slightly acidic conditions, they can run into trouble when grown in soil that’s too alkaline. The most common sign is interveinal chlorosis — the leaf tissue between the veins goes yellow while the veins themselves stay green. This usually means the plant can’t access iron or manganese, not because those nutrients aren’t in the soil, but because the high pH has locked them into a form the roots can’t absorb. A chelated iron product used as a foliar spray or soil drench will give quick temporary relief, but for a lasting fix you’ll need to address the soil pH itself with sulfur or acidic organic matter.
- Yellowing leaves with green veins point to iron or manganese chlorosis, usually linked to soil that’s too alkaline
- A pale, washed-out look combined with slow growth often means the plant is short on nitrogen and will benefit from an early spring feed
- Small, distorted leaves can suggest a boron deficiency or a virus — worth getting a second opinion from a specialist if you see this
- Leaves dropping early in summer, when it’s not a drought issue, can sometimes indicate a magnesium deficiency, which an Epsom salt solution can help correct
Pruning Your Star Magnolia
Here’s some good news: star magnolias need very little pruning. In fact, the less you cut, the better they tend to look. Left to their own devices, they develop a lovely layered, vase-shaped form over time that you really don’t want to mess with too much. For most gardeners, the only pruning you’ll ever need to do is taking out dead, damaged, or crossing branches, and the best time to do that is right after flowering in spring, without touching next year’s blooms.
Timing really does make all the difference with magnolias, and getting it wrong is the mistake people make most often. The flower buds for next year form on the current season’s growth during summer — so if you prune after midsummer, you’re cutting off next year’s flowers. If you want to reshape or tidy the plant, do it in that short window right after the last flowers fade, usually a two-to-three-week stretch in mid to late spring. Miss that window and you’ll be waiting another year for a full display.
If you’ve inherited an old, overgrown star magnolia that’s gotten too big or leggy, resist the urge to cut it back hard all at once. Magnolias don’t respond well to drastic pruning — you can end up with an ungainly plant that sulks for years before it flowers properly again. A much better approach is to spread the renovation over three or four years, removing the oldest and most crowded stems each spring after flowering until the plant gradually works its way back into shape.
Seasonal Care and Winter Preparation
The key to caring for a star magnolia through the year is understanding what the plant is actually doing at each season and adjusting what you do accordingly. Through summer, once the flowers are long gone, the plant is quietly busy setting next year’s buds and pushing out new growth. Keep the water consistent, add fertilizer now if you didn’t in spring, and make sure the mulch is topped up to keep the soil cool and moist during any dry spells.
As autumn rolls in and temperatures start to drop, the plant begins winding down toward dormancy. This is not the time to fertilize or do anything that might encourage new soft growth — just let it slow down naturally, ease back on watering as the weather cools, and let a few fallen leaves build up around the base for a bit of extra insulation. In colder zones — USDA Zone 5 and below — younger plants can benefit from a loose burlap wrap around the lower trunk to protect against the kind of temperature swings that can crack bark.
It’s also worth mentioning that the star magnolia in winter is actually quite beautiful in its own right. The bare branches, studded with those fuzzy, candle-like buds, have a lovely sculptural quality that shows up especially well against a grey winter sky. If you can position your plant where you’ll see it from a window on cold days, you’ll find it gives you something to appreciate even in the bleakest months. And watching those buds start to swell as the days slowly lengthen in late winter is one of the best things about growing this plant — a quiet, reliable signal that spring is genuinely on its way.
Protecting Blooms from Late Frost
Even if you’ve chosen your spot carefully, there will probably be years when a late frost threatens the open flowers. It’s just part of growing an early bloomer. But a few simple steps can make a real difference between a full display and a disappointing one. If frost is forecast while your plant is in bloom, drape a double layer of horticultural fleece loosely over it in the evening and take it off the next morning once things warm up. Don’t use plastic sheeting — it traps condensation and can actually make the frost damage worse rather than better.
- Keep an eye on the extended forecast during bloom time so a frost doesn’t catch you off guard
- Cover the plant loosely with horticultural fleece each evening when temperatures are expected to drop below 28°F (-2°C)
- Remove the covering promptly each morning once it warms up, so heat and humidity don’t build underneath
- Water the soil around the base in the afternoon before a frost night — moist soil holds heat much better than dry soil
- Accept that some frost damage is just part of the deal with early bloomers, and know that the plant itself will be completely fine
It’s worth saying clearly: frost damage to the flowers, as gutting as it looks, does absolutely nothing to harm the plant itself. Next year’s buds are safely tucked away inside the stems and are completely unaffected by whatever happens to the current season’s flowers. A star magnolia that loses every single bloom to a late frost one year will come back just as generously the following spring, without missing a beat. That resilience is a big part of what makes this plant not just beautiful, but genuinely worth growing for the long haul.








What do you think?
It is nice to know your opinion. Leave a comment.