










6 Creative Wooden Box Craft Ideas to Transform Simple Storage into Stylish Home Decor
Why Wooden Boxes Are the Ultimate Crafting Canvas
There is something timeless about wood as a material. It carries warmth, texture, and a sense of permanence that plastic and metal simply cannot replicate. When you pick up a plain wooden box from a craft store or repurpose one from your pantry shelf, you are holding a blank canvas with extraordinary potential. With the right tools, a little creativity, and some basic crafting supplies, that unassuming container can become a statement piece in your home that guests will admire and ask about for years to come.
Wooden boxes come in an enormous range of shapes and sizes, from small keepsake trinket boxes to large crates that can serve as coffee table centerpieces. This versatility means that no matter what room you are decorating or what storage challenge you are trying to solve, there is almost certainly a wooden box project suited to your needs. Whether you prefer a rustic farmhouse aesthetic, a sleek modern style, or a bohemian layered look, wood can be painted, stained, decoupaged, carved, burned, or wrapped to match any vision you have in mind.
Beyond aesthetics, wooden box crafts are an accessible entry point into the world of DIY home decor. They require minimal investment, forgive beginner mistakes far better than more complex woodworking projects, and can typically be completed in an afternoon or weekend. The sense of accomplishment that comes from transforming something plain and functional into something genuinely beautiful is hard to overstate, and once you complete your first project, you will likely find yourself hunting for more boxes to decorate immediately.
Project One: Decoupage Wooden Boxes for a Vintage Storybook Look
Decoupage is one of the oldest and most beloved paper crafting techniques, and it works beautifully on wooden surfaces. The process involves adhering cut or torn pieces of paper to an object using a specialized glue-like medium, then sealing everything with additional coats of the same medium to create a durable, smooth finish. For wooden boxes, decoupage opens a world of design possibilities because you can use virtually any paper material, from vintage book pages and old sheet music to botanical prints, wrapping paper, napkins, and even fabric.
To get started, gather your wooden box, Mod Podge or a similar decoupage medium, a foam brush, and your chosen paper materials. Lightly sand the box if the surface feels rough, then wipe away any dust with a damp cloth. Tear or cut your paper into pieces of varying sizes and begin adhering them to the box one at a time, brushing a thin layer of decoupage medium onto the box first, pressing the paper firmly, and then brushing another coat over the top of each piece. Overlapping pieces slightly creates a seamless, layered effect that looks intentional and sophisticated rather than patchy or rushed.
Once you have covered all the surfaces you want to decorate and the box is completely dry, apply two to three additional sealing coats of decoupage medium, allowing full drying time between each application. For a glossy, lacquered appearance, choose a gloss-finish medium. For something softer and more matte, an eggshell or flat finish works beautifully. Decoupage wooden boxes make stunning jewelry storage pieces, recipe card holders, or display boxes for a bookshelf vignette, and they age gracefully over time, developing a patina that only adds to their charm.

Project Two: Painted and Stenciled Wooden Boxes for Bold Graphic Impact
Paint is perhaps the most straightforward way to transform a wooden box, but the results can be anything but ordinary when you introduce stenciling into the process. A crisp geometric pattern, a flowing floral motif, or a set of bold typography letters can completely change the character of a plain wooden surface. Craft stores sell thousands of stencil designs in every imaginable style, or you can cut your own from acetate sheets using a craft knife and a printed template, giving you total creative control over the final design.
Begin by applying a smooth base coat of chalk paint or acrylic craft paint in your chosen background color. Chalk paint is particularly popular for wooden box projects because it adheres without requiring primer, dries quickly, and gives a beautifully matte finish that takes wax and distressing techniques exceptionally well. Allow the base coat to dry completely, then position your stencil firmly against the surface, securing it with painter’s tape or a temporary adhesive spray to prevent shifting. Dab your contrasting paint color through the stencil openings using a stencil brush or a sea sponge, using a dry-brush technique to avoid bleeding under the edges.
After removing the stencil and allowing the painted design to dry, you have several finishing options available. Leaving the paint as-is gives a fresh, modern appearance. Lightly sanding the edges and any raised areas creates a charming distressed look ideal for farmhouse and cottage-style interiors. Applying a coat of clear furniture wax and then buffing it to a gentle sheen adds depth and durability to the surface. Painted and stenciled wooden boxes work wonderfully as storage for mail and keys near the front door, as countertop organizers in the kitchen or bathroom, or as display pieces arranged in groups of varying sizes on a sideboard or shelf.
Project Three: Burned and Pyrography Wooden Boxes for Artisan Appeal
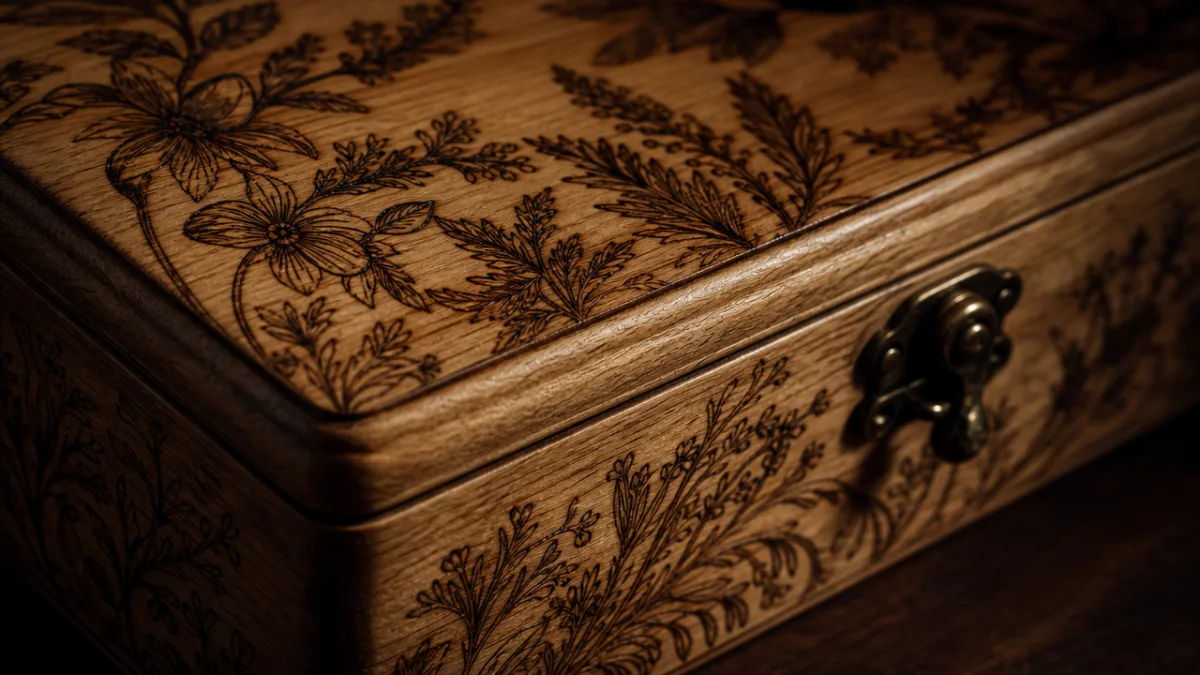
Wood burning, also known as pyrography, is a technique that has experienced a major revival in recent years, and for good reason. The results are genuinely stunning, producing deeply personal, intricately detailed designs that look as though they were crafted by a professional artisan. A wood burning tool, which resembles a soldering iron with interchangeable tips, allows you to draw directly onto wood with heat, creating permanent marks that range from delicate fine lines to bold shaded areas depending on the tip shape and the pressure you apply.
For beginners, it is wise to practice on scrap wood before moving to your actual box, since the heat-based marks cannot be erased once made. Simple designs such as geometric borders, initial letters, small leaf clusters, or repeating wave patterns are excellent starting points. As your confidence grows, you can attempt more complex imagery like detailed mandalas, portraits of animals or beloved pets, maps of meaningful places, or botanical illustrations. Transferring your design onto the wood surface before burning using transfer paper or a light pencil sketch helps enormously in achieving the result you envision.
The natural variation of wood grain interacts uniquely with the burning process, meaning that no two burned boxes will ever look exactly alike even if made from the same template. This unpredictability is part of what makes pyrography so appealing. Once your design is complete, finish the box with a light coat of food-safe mineral oil if it will be used in the kitchen, or a clear matte varnish for display pieces. Burned wooden boxes make extraordinarily personal gifts for weddings, anniversaries, and housewarmings, and they carry a handmade authenticity that mass-produced items simply cannot replicate.
Project Four: Rope and Fabric Wrapped Wooden Boxes for Textural Richness
Sometimes the most impactful decorative transformation does not involve any paint or tools at all. Wrapping a wooden box in rope, twine, fabric, or ribbon is a wonderfully tactile craft that introduces texture and softness into a room, making storage feel cozy and curated rather than utilitarian. Natural fiber ropes made from jute, sisal, or cotton are particularly popular for this technique because they harmonize beautifully with wood and complement a wide range of interior styles from coastal to rustic to Scandinavian minimalist.
To wrap a box in rope, begin by applying a bead of strong craft glue, such as a hot glue gun application or a contact cement, along one edge of the box and pressing your rope firmly into place. Continue wrapping the rope tightly around the box, adding dabs of glue at intervals to secure each row, making sure the rows sit flush against each other without gaps. Depending on the diameter of your rope, covering a medium-sized box takes anywhere from fifteen to thirty minutes of focused wrapping. Finish by cutting the rope cleanly and tucking the end beneath the final wrapped row, securing it with a generous amount of glue.
Fabric wrapping offers an equally beautiful but softer result. Cut strips of fabric in coordinating or contrasting patterns, then adhere them around the box in overlapping layers using Mod Podge or fabric glue. Linen, burlap, cotton canvas, and printed quilting fabric all work extremely well. You can also combine techniques, wrapping the main body in fabric and finishing the edges with rope trim, or covering the lid in a complementary material to create visual contrast. These textured wrapped boxes are especially lovely as bathroom storage for cotton balls and swabs, as desk organizers, or as plant holders with a small pot placed inside.
Project Five: Stained and Natural-Finish Wooden Boxes That Celebrate the Wood Itself
Sometimes the most sophisticated approach is also the most straightforward: letting the natural beauty of the wood speak for itself with the help of a carefully chosen stain. Wood stain enhances the grain patterns already present in the wood, deepening them and giving them dimension without obscuring the fundamental character of the material. A well-stained wooden box can look as though it came from a high-end home goods boutique, and the process of achieving that result is surprisingly simple and approachable even for complete beginners.
Choose your stain based on the wood species you are working with and the mood you want to create. Light honey and golden oak stains feel fresh and Scandinavian, allowing the grain to show prominently. Medium walnut and espresso stains create a richer, more traditional or mid-century modern appearance. Dark ebony and jacobean stains are dramatic and bold, and pair beautifully with brass hardware or gold accents. Apply stain using a lint-free cloth, working in the direction of the grain, and wipe away any excess before it dries. The longer you leave the stain before wiping, the deeper and more saturated the resulting color will be.
After staining, seal the box with a clear protective finish appropriate for its intended use. Polyurethane provides exceptional durability for boxes that will be handled frequently. Danish oil or teak oil gives a more organic, hand-rubbed appearance that feels luxurious to the touch. Beeswax polish is a beautiful natural option that is food-safe and develops a lovely sheen with each application. You can elevate a stained wooden box further by adding new hardware such as decorative hinges, corner brackets in aged bronze, or a small brass latch, transforming it into a piece that looks genuinely custom and intentional.
Project Six: Mixed Media Wooden Box Displays That Double as Art Installations
The final project idea pushes the wooden box beyond storage entirely, reimagining it as a three-dimensional display frame or shadow box that hangs on the wall or stands on a shelf as a piece of art. Open-fronted wooden crates and boxes without lids are ideal for this purpose. By arranging meaningful objects, photographs, pressed botanicals, small sculptures, and fabric backgrounds inside the box, you create a layered, curated composition that tells a story and brings deep personal meaning to your wall decor.
To build a mixed media wooden box display, start by choosing a cohesive color palette or theme. A botanical theme might incorporate a painted background in sage green or warm cream, pressed and dried flowers and leaves, small ceramic pots, and framed plant illustrations. A travel memory box might feature a map background, ticket stubs, small objects collected from meaningful trips, and handwritten notes or captions. A seasonal display box can be changed out throughout the year, giving you an endlessly refreshable piece of decor that keeps your space feeling current and alive without requiring any permanent changes to your walls or furniture.
Mounting multiple wooden boxes together in a grid or asymmetric arrangement creates an even more impactful gallery wall effect. Boxes of varying depths and sizes add visual interest when grouped, and the three-dimensional quality of the display catches light and shadow in ways that flat framed artwork cannot. Consider painting each box a slightly different complementary color to unify the group while maintaining visual variety. Whether you use a single statement box or an elaborate clustered arrangement, this project represents the fullest expression of what wooden box crafting can achieve: taking something humble and functional and elevating it into something that is undeniably, unmistakably art.

Essential Tips for Successful Wooden Box Crafting
No matter which project you choose to attempt first, a few universal principles will help ensure that your results look polished and professional rather than rushed or amateur. Preparation is perhaps the most important of these principles. Taking the time to sand your wooden box thoroughly before beginning any surface treatment makes an enormous difference in the final outcome. Start with a medium-grit sandpaper such as 120-grit to smooth away any rough patches or splinters, then finish with a fine 220-grit paper to create a silky-smooth surface that accepts paint, stain, and glue far more evenly and beautifully.
Patience between steps is equally critical and often the hardest discipline for enthusiastic crafters to maintain. Every layer of paint, glue, or finish needs adequate drying time before the next coat or step is applied. Rushing this process leads to bubbling, peeling, smearing, and uneven results that undermine all the effort invested in the project. When in doubt, give each layer at least double the drying time stated on the product instructions, since humidity, temperature, and the absorbency of the specific wood you are working with can all extend the time needed for proper curing.
Finally, do not underestimate the power of hardware and finishing details to elevate a completed project. Small decorative additions such as the following can transform a competent craft into something truly exceptional:
- Vintage brass or antique bronze hinges and clasps that give boxes an heirloom quality
- Velvet or felt lining inside the box, glued carefully to the interior walls and base for a luxurious touch
- Decorative feet made from small wooden bun feet or furniture glides, raising the box slightly off a surface and giving it a more finished, furniture-like presence
- Rope or leather handles attached through drilled holes, making larger boxes practical as well as beautiful
- Small chalkboard labels or stamped tags attached with twine, adding a functional and charming organizational element
With these principles in mind, your wooden box craft projects are set up for success from the very beginning. Each box you complete will teach you something new about materials, techniques, and your own aesthetic preferences, building a foundation of skills and confidence that grows with every project. The world of wooden box crafting is deep, varied, and endlessly rewarding, and there has never been a better time to pick up a brush, a stain, or a burning tool and begin.








What do you think?
It is nice to know your opinion. Leave a comment.