










Easy DIY Potting Soil Recipe: Create the Perfect Mix for Thriving Plants
Why Make Your Own Potting Soil?
Creating your own potting soil at home is one of the most rewarding decisions a gardener can make. Store-bought mixes often contain fillers, inconsistent ingredients, and chemicals that may not suit every plant’s needs. When you take control of what goes into your mix, you can tailor the texture, drainage, and nutrient profile to match exactly what your plants crave. Whether you’re growing delicate herbs on a windowsill or robust tomatoes in a backyard container, a custom blend makes all the difference in plant health and productivity.
Beyond quality control, homemade potting soil is dramatically more cost-effective than its commercial counterparts. A single bag of premium potting mix from a garden center can cost anywhere from $15 to $30, and if you’re filling multiple large containers, those costs add up quickly. By purchasing bulk ingredients — many of which are reusable or long-lasting — you can produce three to four times the volume for the same price. Over a single growing season, a dedicated gardener can save hundreds of dollars simply by mixing their own blend at home.
There is also a deeply satisfying, almost meditative quality to blending your own soil. You become intimately familiar with the components, understand how they interact, and develop an intuition for what your garden truly needs. This knowledge builds over time and carries forward into every future planting decision you make. It transforms you from a passive consumer of gardening products into an active, informed participant in your garden’s entire lifecycle, from the ground up — literally.
The Problem with Commercial Mixes
Many commercially available potting soils suffer from a common problem: they are formulated to look good on a store shelf, not necessarily to perform optimally in your garden. Bags are often filled with large amounts of peat moss or cheap bark that breaks down rapidly, causing the soil to compact and restrict the airflow roots desperately need. Once compacted, water either pools at the surface and encourages rot, or runs straight through without being absorbed. Neither outcome is good for your plants, and repotting becomes necessary far sooner than it should be.
Another issue is the inconsistent quality between batches and brands. A product that worked beautifully one season may arrive the next year with a different texture, moisture level, or pH. Gardeners who rely entirely on purchased mixes are at the mercy of supply chains, corporate sourcing decisions, and production standards they have no visibility into. Making your own mix eliminates this variability entirely. You know exactly what went in, in what quantities, and you can replicate or adjust the recipe at any time based on your own observations and results.
Essential Ingredients for Your DIY Potting Mix
Every great potting soil recipe starts with a solid understanding of its core components and the role each one plays in supporting plant growth. The three pillars of a well-balanced mix are structure, drainage, and nutrition. Structure refers to the physical body of the soil — the material that holds everything together and gives roots something to anchor into. Drainage ensures that water moves through efficiently so roots never sit in waterlogged conditions. Nutrition provides the macro and micronutrients plants need to photosynthesize, grow, and fruit.
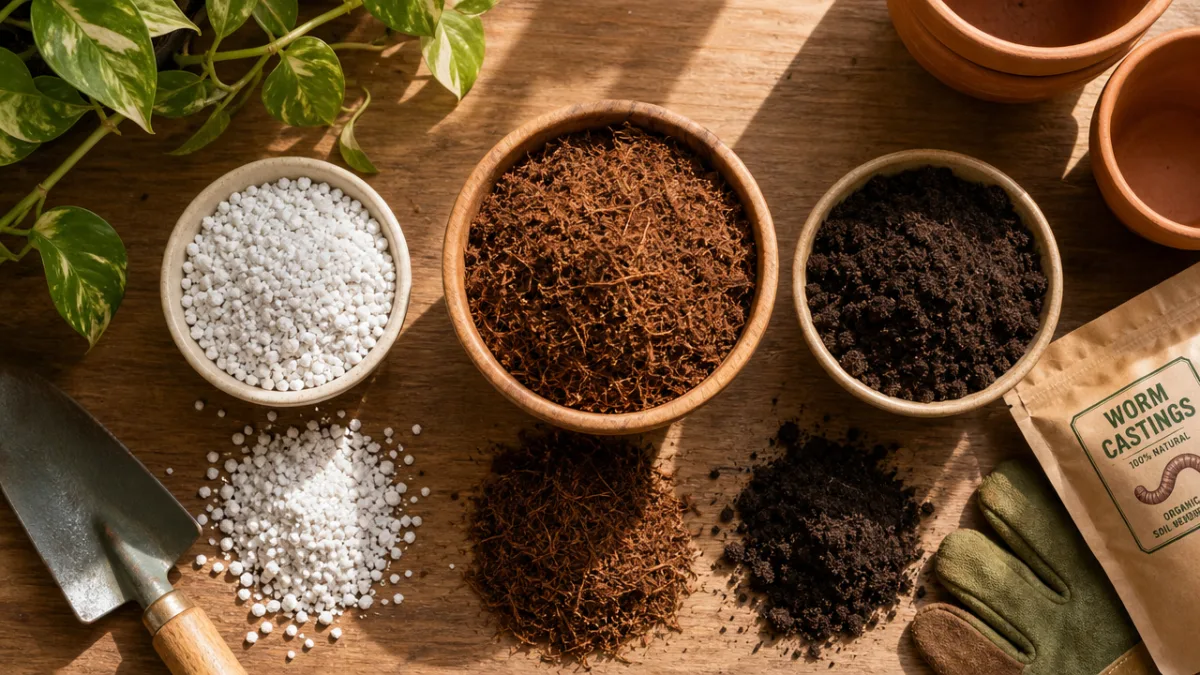
The most commonly used base ingredient is either peat moss or coconut coir. Peat moss is a traditional choice that holds moisture well and provides a slightly acidic environment that many popular houseplants and vegetables prefer. However, peat is a non-renewable resource harvested from fragile bog ecosystems, making it an environmentally contentious choice. Coconut coir — a byproduct of coconut processing — is an excellent sustainable alternative. It has similar moisture-retaining properties, is pH neutral, and is widely available at garden centers and online retailers at very reasonable prices.
Perlite is another essential ingredient in virtually every good potting mix. These small, white, lightweight particles are made from volcanic glass that has been superheated until it pops, much like popcorn. The result is a highly porous material that dramatically improves drainage and aeration in your mix. Without perlite or a similar amendment, even a good base material can become waterlogged during heavy watering. Perlite also prevents compaction, keeping the soil loose and friable over many months of use, which is particularly important for containers that don’t get turned or refreshed regularly.
Optional Boosters and Amendments
Beyond the core trio, there are several amendments you can incorporate to target specific plant needs or growing conditions. Worm castings are perhaps the most universally praised addition — they are essentially worm manure and serve as a slow-release, gentle, organic fertilizer that improves soil structure while introducing beneficial microorganisms. A handful of worm castings added to your mix gives seedlings and transplants a gentle nutritional head start without any risk of burning delicate roots, unlike many synthetic fertilizers.
Horticultural charcoal, also known as biochar or activated charcoal in gardening contexts, is a worthwhile addition especially for container plants and terrariums. It helps filter impurities from the water as it passes through, prevents harmful bacterial buildup in the root zone, and can absorb and slowly release certain nutrients. For plants that are sensitive to stale or sour soil conditions — such as orchids, ferns, and many tropical houseplants — a small proportion of horticultural charcoal in the mix can meaningfully extend the time before repotting is necessary.
The Basic DIY Potting Soil Recipe
The most versatile all-purpose potting mix can be made with just three ingredients and is suitable for the widest range of plants including vegetables, herbs, annuals, and most common houseplants. The proportions are easy to remember and easy to scale up or down depending on how many containers you need to fill. Using a bucket or wheelbarrow as your measuring vessel, this recipe works whether you’re making a single small pot’s worth or enough to fill an entire raised bed’s worth of containers.
Combine the following ingredients by volume, not by weight, to achieve the ideal balance of moisture retention, drainage, and structure. Using volume measurements ensures consistent results regardless of how wet or dry your ingredients happen to be on mixing day. A simple five-gallon bucket works perfectly as your unit of measurement and makes scaling very intuitive even for beginners.
- 2 parts coconut coir or peat moss — forms the moisture-retaining base of the mix and provides structure for roots to grow through comfortably
- 1 part perlite — ensures excellent drainage and aeration, preventing compaction and root rot even after repeated watering cycles
- 1 part compost — introduces organic matter, beneficial microbial life, and a gentle, balanced supply of macro and micronutrients
- Optional: ¼ part worm castings — adds a slow-release nutritional boost and enhances the microbial ecosystem within the mix
- Optional: small handful of horticultural charcoal per gallon of mix — improves water filtration and prevents sour soil development in enclosed containers
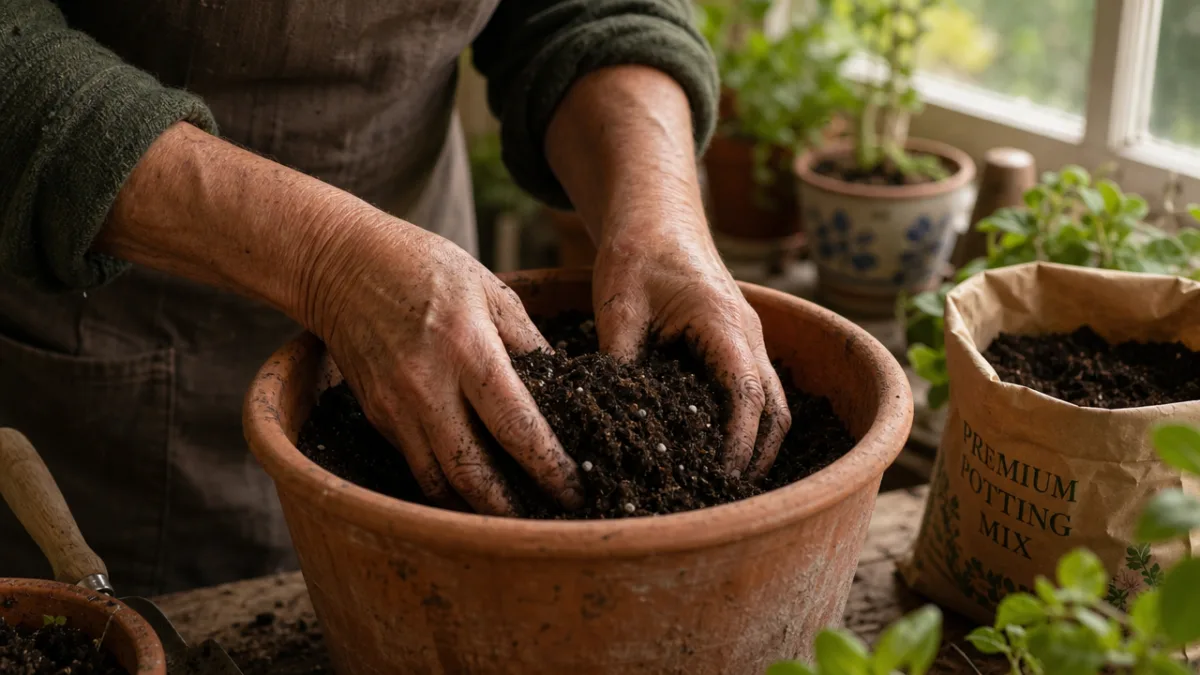
To mix, simply combine all dry ingredients in a large container, wheelbarrow, or tarp spread on the ground. Work through the pile thoroughly with your hands or a garden trowel, breaking up any clumps in the coir or compost as you go. Lightly moisten the mix as you blend — completely dry perlite and coir can be dusty and difficult to work with, and pre-moistening helps the finished mix settle evenly around plant roots without air pockets forming. The final product should feel loose, slightly springy, and just barely damp when squeezed in your hand.
Adjusting the Recipe for Specific Plants
While the basic recipe above works admirably for a wide range of species, certain plant families have specific soil requirements that benefit from targeted adjustments. Succulents and cacti, for instance, need extremely fast-draining conditions to mimic their native arid habitats. For these plants, increase the perlite to 50% of the total mix volume, and consider replacing some of the coir with coarse horticultural sand or pumice. This creates a mix that drains almost instantaneously and dries out quickly between waterings, which is exactly what drought-adapted plants need to thrive.
Acid-loving plants such as blueberries, azaleas, rhododendrons, and gardenias require a lower pH than the standard recipe provides. For these species, use peat moss as your base rather than coconut coir, since peat naturally has an acidic pH between 3.5 and 4.5. You can further lower the pH by incorporating a small amount of sulfur powder into the mix, or by using an acidifying fertilizer during the growing season. Testing your mix with an inexpensive pH meter before planting gives you a baseline from which to make informed adjustments.
Mixing and Storing Your Potting Soil
Mixing your potting soil correctly is just as important as choosing the right ingredients. An unevenly blended mix can create pockets of dense, wet material alongside pockets of pure perlite, neither of which serves your plants well. Take the time to blend thoroughly, working through the pile multiple times if needed, until the texture appears completely uniform from top to bottom and side to side. The goal is a homogeneous material where every handful looks and feels essentially identical to every other handful.
Moisture management during mixing is a skill worth developing. Coconut coir often comes in compressed bricks that must be rehydrated before use — follow package instructions for your specific product, as the amount of water needed varies by brand and compression ratio. Peat moss purchased in bulk bags is usually partially dry and benefits from a light pre-moistening before mixing. Completely dry ingredients create dust that can be irritating to breathe and are harder to distribute evenly. Working outdoors or in a well-ventilated space, wearing a simple dust mask, makes the process more comfortable and safe.
Storage is one of the great advantages of making your own potting soil. Unlike commercial mixes, which often contain moisture-retaining wetting agents that can go rancid or develop fungal growth over time, a properly made DIY mix stores very well when kept in a sealed, pest-proof container. Large plastic storage bins with locking lids work excellently. Stored in a cool, dry location out of direct sunlight, your mix will remain usable for a full year or even longer without any significant degradation in quality or performance.
Troubleshooting Common Mixing Problems
Even experienced gardeners sometimes encounter issues when mixing their own potting soil, and most problems are easy to diagnose and correct. If your finished mix feels heavy, dense, or clumps together tightly when squeezed, it likely needs more perlite or coarse material to open up the texture. Slowly work in additional perlite, a quarter part at a time, until the mix feels noticeably lighter and springs back slightly when compressed. Dense mixes impede drainage and root growth, so it’s always better to err on the side of a slightly lighter, airier texture.
If your mix dries out extremely quickly after watering — within a day or two even in mild conditions — the balance may be tipped too far toward drainage materials at the expense of moisture retention. Consider adding more coir or peat to the blend, or incorporate a small amount of water-retaining crystals (polyacrylamide gel) if you’re gardening in a particularly hot or dry climate. These crystals absorb hundreds of times their weight in water and release it slowly as the surrounding soil dries, acting as a reservoir that dramatically reduces watering frequency.
Using Your DIY Potting Mix for Maximum Results
Now that your mix is ready, getting the most out of it comes down to a few key practices that complement the quality of the blend itself. When potting or repotting plants, always start with a clean container that has been rinsed and, if previously used, disinfected with a dilute bleach solution. This eliminates any lingering pathogens or pest eggs that could compromise your new planting. Fill the container partially, place the plant at the correct depth, then fill in around the root ball, gently pressing the mix to eliminate air pockets without compacting it unnecessarily.
Watering technique matters enormously when using a high-quality, well-draining mix. Because your DIY blend drains efficiently, the impulse to water heavily and frequently needs to be recalibrated. Allow the top inch or two of the mix to dry out between waterings for most plants, and always water until liquid runs freely from the drainage holes. This practice ensures salts and mineral buildup are periodically flushed from the root zone, which is important for long-term plant health especially in container environments where there is no natural leaching from rainfall.
Even the best potting soil eventually depletes its nutrient reserves as plants consume them over the growing season. Plan to begin supplementing with a balanced liquid fertilizer roughly six to eight weeks after initial planting, once seedlings or transplants have established themselves and are actively growing. Slow-release granular fertilizers worked into the top inch of the mix at the start of the season are another effective option that reduces the frequency of intervention. With a healthy mix as your foundation and a consistent feeding routine, your container plants will reward you with vigorous growth, abundant harvests, and beautiful blooms throughout the entire season.
Refreshing and Reusing Your Mix
One of the often-overlooked advantages of a homemade potting mix is how easily it can be refreshed and reused at the end of the growing season, rather than discarded. At season’s end, remove spent plants and their root systems, then spread the old mix in a thin layer to dry thoroughly in the sun. Once dry, break up any compacted clumps, screen out large root pieces, and assess the texture. Mix that has compacted significantly will benefit from the addition of fresh perlite and a portion of new compost to restore its original open, light structure.
To recharge the nutrient content of reused mix, add a generous amount of fresh worm castings — roughly one part castings per four parts old mix — along with a light application of a balanced organic slow-release fertilizer. Some gardeners also choose to solarize reused mixes by sealing them in clear plastic bags and leaving them in direct sunlight for several weeks during hot summer months. This process raises the internal temperature high enough to kill most pathogens, weed seeds, and pest eggs, effectively pasteurizing the mix and making it safe and productive for another planting cycle.
Sustainability and Environmental Considerations
Making your own potting soil is not just a practical choice — it is increasingly an environmentally conscious one. Commercial potting soil production and distribution involves significant packaging waste, transportation emissions, and in many cases the extraction of non-renewable materials like peat from ecologically sensitive northern bogs. These bogs are among the planet’s most important carbon sinks, storing thousands of years’ worth of accumulated carbon. Their disruption for horticultural peat releases that stored carbon back into the atmosphere, contributing meaningfully to climate change in ways that are easy to overlook when you’re simply grabbing a bag at the garden center.
By choosing coconut coir over peat, sourcing compost from your own backyard compost bin, and purchasing perlite and other amendments in bulk with minimal packaging, you can substantially reduce the environmental footprint of your gardening practice. Backyard composting alone transforms kitchen scraps and yard waste that would otherwise enter landfills into a rich, free amendment that continually feeds your soil. A simple compost bin or pile in a corner of your yard can produce enough finished compost to supplement your potting mix throughout the entire growing season at essentially zero cost.
The broader philosophy of making your own potting soil aligns naturally with a more self-sufficient, intentional approach to gardening and living. It encourages you to understand your inputs, minimize your waste, and build a closer relationship with the natural processes that underpin all plant growth. Gardeners who take this path often find themselves drawn deeper into related practices: saving seeds, making compost tea, experimenting with no-till beds, and sharing surplus plants and knowledge with their communities. What begins as a simple recipe for potting soil can grow into a richer, more connected relationship with the living world around you.
Building a Long-Term Soil Practice
The most successful gardeners are those who approach soil not as a one-time purchase but as a living system they cultivate and improve over time. Each season offers opportunities to observe what worked, what didn’t, and how the mix might be refined for even better results the next year. Keep simple notes on your recipe, your ratios, any amendments you tried, and how your plants responded. Over the course of several growing seasons, this record becomes an invaluable personalized guide that no commercial product or generic recipe could ever replicate.
Consider also expanding your ingredient palette as your confidence grows. Azomite, a natural volcanic mineral powder, can be added in small quantities to supply a broad spectrum of trace minerals that compost alone may not provide. Mycorrhizal inoculants — powders or granules containing beneficial fungal spores — can be added at planting time to help establish the symbiotic fungal networks that dramatically expand a plant’s effective root surface area and nutrient uptake. These are the kinds of refinements that elevate a good garden into a genuinely exceptional one, and they all begin with the foundational decision to take your potting soil seriously.
Ultimately, the act of making your own potting soil is a declaration of investment in your garden and in your own growing knowledge. It is a practice that pays dividends not just in cost savings and plant health, but in the quiet satisfaction of working closely with natural materials and processes. Whether you’re a beginner mixing your very first batch or an experienced grower refining a recipe you’ve used for years, the principles remain the same: understand your ingredients, respect your plants’ needs, and trust the process. The garden will respond in kind.








What do you think?
It is nice to know your opinion. Leave a comment.