










Chunky Yoga Mat Strap Crochet Pattern: A Complete Guide to Making Your Own
If you’ve ever fumbled with a rolled yoga mat tucked awkwardly under your arm on the way to class, you already understand the appeal of a good yoga mat strap. Now imagine carrying that mat in something you made yourself — something thick, sturdy, and beautifully textured with the satisfying weight of chunky yarn. A crocheted yoga mat strap is one of those wonderfully practical projects that sits right at the intersection of function and handmade artistry, and it’s far more achievable than you might think, even for crafters who are still building their confidence with a hook.
Crochet has long been celebrated for producing items that are both decorative and durable, and a yoga mat strap is no exception. Unlike delicate lacework or intricate amigurumi, this project leans into simplicity. The chunky yarn does most of the visual heavy lifting, creating a bold, textured fabric that looks impressive without requiring advanced stitchwork. Whether you’re a seasoned crocheter looking for a satisfying afternoon project or a newer maker wanting something genuinely useful to practice on, this pattern offers a great return on your time investment.
Beyond practicality, there’s something deeply satisfying about bringing handmade items into your wellness routine. Your yoga practice is personal, intentional, and often a reflection of your values — sustainability, mindfulness, creativity. A handmade strap carries all of that energy with it. This guide will walk you through everything you need: materials, sizing, the stitch pattern itself, finishing techniques, and ideas for customizing your strap to make it entirely your own.
Materials and Tools You’ll Need
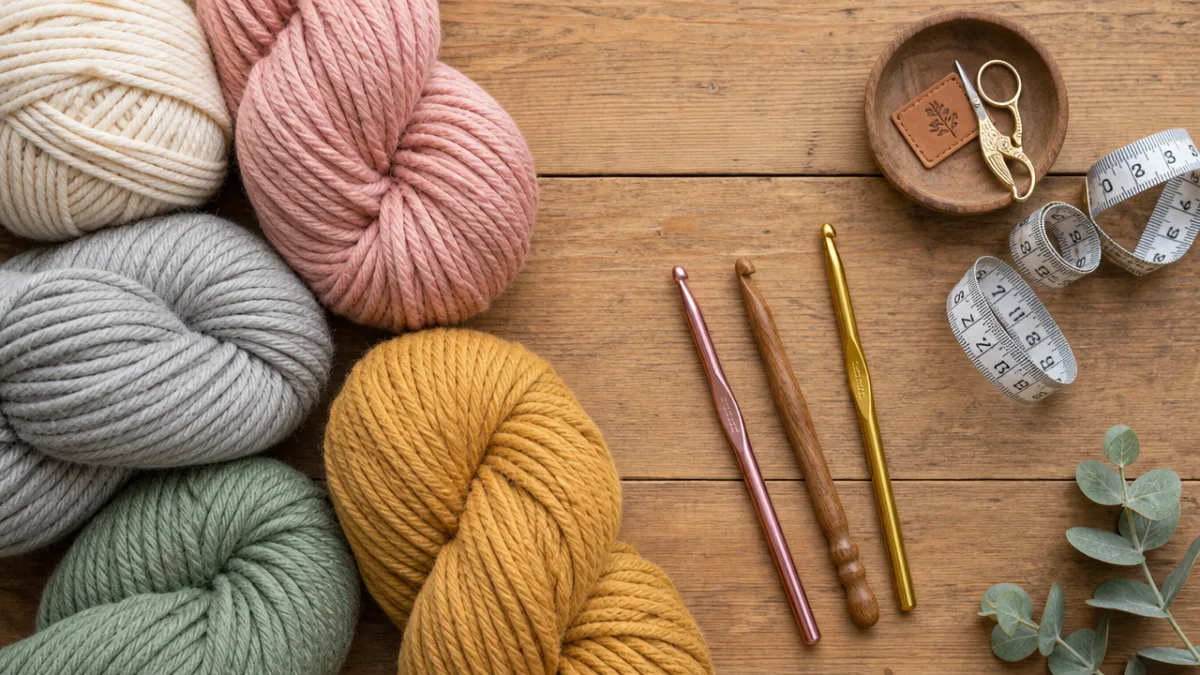
Getting started with the right materials makes a significant difference in both the process and the finished product. For a chunky yoga mat strap, the most important choice you’ll make is your yarn. You’ll want a bulky or super bulky weight yarn — something in the size 5 or size 6 range — that has some structure to it. Cotton or cotton-blend yarns are ideal because they offer strength and durability without much stretch, which is exactly what you need in a carrying strap. Acrylic bulky yarns can work too, especially if you want more color options, though they may stretch slightly more over time.
Look for yarns that are machine washable, since a yoga mat strap is something you’ll likely toss in the wash regularly after sweaty classes. Some excellent options include Lion Brand Pound of Love in a bulky weight, We Are Knitters’ chunky cotton, or any craft store brand that offers a thick, tightly twisted cotton yarn. You’ll need approximately 100 to 150 yards depending on your mat size and how long you want the strap to be. It’s always wise to buy a little extra so you’re not scrambling partway through the project.
For tools, you’ll need a crochet hook sized to match your yarn — typically a size K (6.5mm) or L (8mm) hook works beautifully with chunky yarn. A blunt tapestry needle is essential for weaving in ends cleanly. You’ll also want a pair of scissors, a tape measure or ruler for checking gauge and length, and optionally some D-ring or O-ring hardware in metal or sturdy plastic if you want to add an adjustable buckle to your strap. Stitch markers can help you keep track of rows, especially if you set the project down mid-work.
- Bulky or super bulky cotton or cotton-blend yarn, approximately 100–150 yards
- Crochet hook size K (6.5mm) or L (8mm), or as recommended on your yarn label
- Blunt tapestry needle for weaving in ends
- Sharp scissors
- Tape measure or flexible ruler
- 2 D-rings or O-rings, 1.5 to 2 inches wide (optional, for adjustable strap)
- Stitch markers (optional but helpful)
Understanding Gauge and Sizing
Gauge matters in this project less for aesthetic reasons and more for structural ones. A strap that’s too loosely crocheted won’t hold its shape well under the weight of a yoga mat, while one that’s too tight might feel stiff and uncomfortable to carry. Before you begin the full strap, crochet a small swatch — about four inches square — and measure how many stitches and rows fall within a two-inch span. Adjust your hook size up or down until your fabric feels firm but still pliable, something that drapes slightly but doesn’t sag.
In terms of finished dimensions, a standard yoga mat strap should be approximately 60 to 72 inches long when laid flat, which gives you enough to wrap around a rolled mat and still form a comfortable shoulder carry. The width of the strap can range from about 1.5 to 3 inches depending on personal preference. A wider strap tends to distribute weight more comfortably across your shoulder, while a narrower one looks sleeker and more minimalist. For most standard yoga mats, which roll to about 24 to 26 inches in circumference, a strap in the 64-inch range works perfectly.
If you’re making the strap as a gift or for someone whose mat you can’t measure directly, err on the longer side. It’s much easier to live with a slightly long strap — you can always double-wrap it around the mat — than to discover it’s two inches too short to fasten properly. You can also design the strap with an adjustable buckle system, which we’ll discuss in the finishing section, to accommodate a wider range of mat sizes and carrying preferences. Adjustability adds a small amount of complexity but significantly increases the versatility of the finished piece.
The Stitch Pattern: Step-by-Step Instructions
The foundation of this strap uses a simple but visually appealing combination of single crochet and slip stitches, which creates a dense, rope-like fabric with a beautiful raised texture. Begin by chaining a number of stitches that gives you your desired strap width — for a 2-inch wide strap in chunky yarn, you’ll typically chain 5 or 6 stitches. Work your first row in single crochet back across the chain, inserting your hook through the back bump of each chain stitch for a cleaner edge. At the end of the row, chain 1 and turn.
Continue working back and forth in single crochet, always inserting your hook through both loops of each stitch unless you’re deliberately seeking a ribbed texture, in which case you’ll work through the back loop only. The back-loop-only method, sometimes abbreviated as BLO, creates a beautiful horizontal ridge along the strap that adds visual interest and a bit of extra grip when the strap rests on your shoulder. It also makes the fabric slightly more flexible than standard single crochet, which can be a comfort advantage for a shoulder-carry item.
Work your rows until the strap reaches your desired length, checking frequently with your tape measure. Because you’re working with chunky yarn, progress moves quickly — many makers complete the entire strap body in a single sitting of two to three hours. When you reach your target length, fasten off with a slip stitch, leaving a tail of about six inches for finishing. Don’t cut your yarn too short at this stage, as you’ll need that tail to weave in securely so the strap holds up through repeated use and washing.
For those who want a bit more texture and structure, consider alternating rows of single crochet with rows of half double crochet. The half double crochet stitch adds a subtle height variation that gives the strap a slightly padded feel, which is wonderful for comfort when the strap is loaded with the weight of a mat. You can also experiment with a moss stitch pattern — alternating single crochet and chain-one spaces — which creates a gorgeous open texture that works particularly well with tightly twisted cotton yarns that can show off the stitch definition.
Finishing Techniques and Hardware
Once your strap body is complete, finishing it properly is what separates a truly polished handmade item from one that looks rushed. Start by weaving in all your yarn ends using your tapestry needle, threading the tail through several stitches in different directions rather than simply running it in a straight line. This multi-directional weaving secures the end far more reliably than a simple straight weave, which is especially important for an item that will experience repeated tension and washing. Trim the excess tail close to the fabric once you’re satisfied the end is secure.
To add the carrying loop at each end of the strap, you have a few options. The simplest is to fold each short end of the strap back on itself by about two inches and sew it down with your tapestry needle and a length of matching yarn, creating a loop through which the mat can be threaded. If you’re incorporating D-ring hardware, thread the ring onto the folded end before sewing it down so the ring sits at the loop opening. Two D-rings at one end and a free end on the other create a simple cinch-style adjustable closure that works similarly to a belt.
Blocking is a finishing step that many crocheters skip on utility projects, but it genuinely transforms the final appearance of your strap. For cotton yarn, wet blocking — soaking the finished strap in cool water, gently squeezing out the excess, and then laying it flat to dry in its desired shape — evens out any uneven tension and gives the fabric a smoother, more professional look. Pin the strap to a blocking mat if you have one, making sure it’s straight and the edges are even. Allow it to dry completely before using it, which typically takes eight to twelve hours depending on humidity.
- Weave ends in multiple directions for maximum security before trimming
- Create end loops by folding the strap back two inches and sewing down firmly
- Thread D-rings or O-rings before closing end loops if using adjustable hardware
- Wet block cotton yarn straps for a smoother, more even finished appearance
- Allow the strap to dry completely flat before putting it into use

Customization Ideas and Creative Variations
One of the greatest joys of making something yourself is the freedom to customize it completely. The most immediate opportunity for personalization is color. Solid-color straps have a clean, modern look that pairs well with the natural aesthetic of a yoga studio, but striped or color-blocked versions can be absolutely stunning. To incorporate stripes, simply join a new color at the beginning of any row by pulling the new yarn through the final loop of your last stitch in the previous color. Carry the unused color loosely along the side edge if you’re working short two-row stripes, or fasten off and rejoin to avoid carrying long floats.
If you want to add extra padding for shoulder comfort, consider making the strap in a double thickness. Crochet two identical strap pieces and then join them together by slip stitching or single crocheting around all four edges with a contrasting color, which also creates a decorative border. You can also stuff a thin strip of batting or foam between the two layers before closing the final edge for genuine padded cushioning — this is especially worthwhile if you carry a particularly heavy mat or walk long distances to your studio.
Embellishments offer another avenue for making your strap uniquely yours. Small crocheted flowers, leaves, or geometric motifs can be stitched onto the strap after finishing. Leather fringe attached to one end gives the piece a boho feel that photographs beautifully and feels wonderful in hand. Some makers add a small zippered pouch to their strap — crocheted separately and then attached — for carrying a key, some cash, or a card. This turns the strap into a fully functional carry system, particularly useful if you’re cycling or walking to class and want to keep your hands completely free.
Caring for Your Crocheted Strap and Making It Last
A well-made crocheted strap, especially one worked in cotton or a durable cotton blend, is genuinely built to last for years with proper care. The most important rule is to wash it regularly, since a yoga mat strap inevitably picks up sweat, studio floor grime, and general handling residue. Most cotton yarn straps can go directly into the washing machine on a gentle or delicate cycle in cool water. Turn the strap inside out or place it in a mesh lingerie bag to protect it from snagging on other items in the wash. Avoid hot water, which can cause cotton to shrink and may distort the shape of the strap over time.
Drying your strap flat rather than in a tumble dryer is the single best thing you can do to preserve its shape and length. Heat in a dryer can cause yarn fibers to contract and may weaken the structure of tightly worked single crochet over time, particularly if the yarn has any synthetic fiber content. Lay the strap on a clean towel or a drying rack and reshape it by hand if needed, making sure the edges are straight and the overall piece lies flat. Once fully dry, store it rolled loosely or hanging rather than folded sharply at the same spot repeatedly, which can create permanent crease lines.
If your strap begins to show wear — thin spots, fraying at the edges, or loosening end loops — it’s usually quite easy to repair. A bit of matching yarn and a tapestry needle can reinforce any weak seam or re-weave a worn area. If the end loops become loose, simply rework the sewn section with fresh yarn, making sure to secure the new stitches into the same anchor points as the original. With basic maintenance, a chunky crocheted yoga mat strap can outlast many commercially manufactured alternatives, which is not only satisfying but genuinely better for the environment and your wallet in the long run.

Why Handmade Yoga Accessories Make the Perfect Gift
If you’ve made it through your first yoga mat strap and you’re feeling confident, you’ve also just stumbled upon one of the best handmade gifts in the crafter’s repertoire. Yoga practitioners tend to be people who appreciate thoughtfulness, intentionality, and quality — all things that a handmade item communicates the moment it’s unwrapped. A crocheted yoga mat strap is personal without being presumptuous, practical without being boring, and beautiful without requiring the recipient to find a place to display it. It works for birthdays, holidays, and wellness-themed gift exchanges alike.
The time investment for a single strap is modest enough that you can realistically make several in a weekend if you’re planning for multiple recipients. Set up a mini production line by preparing all your yarn in advance, using the same hook and chain count for each, and varying only the color to personalize each one. This approach is particularly useful for teacher appreciation gifts — imagine presenting your yoga instructor with a strap in their favorite color, made by hand by a student they see every week. That kind of gesture is remembered long after a gift card would have been forgotten.
Packaging handmade yoga accessories adds another layer of care that elevates the gift experience. Roll the strap around the yoga mat it’s sized for if you’re gifting the mat too, or coil it neatly inside a small box lined with tissue paper in a coordinating color. Attach a small hand-lettered tag with the fiber content and washing instructions — this practical detail shows that you’ve thought about the longevity of the item and respects the recipient’s time. You might also include a small card explaining that the piece was handmade, which adds a personal narrative that a store-bought item simply cannot provide.








What do you think?
It is nice to know your opinion. Leave a comment.