










How To Make Beautiful Leaf Butterfly Art: A Complete Guide to Nature-Inspired Crafting
Introduction to Leaf Butterfly Art
Leaf butterfly art is one of the most enchanting and accessible forms of nature crafting available to artists of all skill levels. By using real leaves gathered from your garden, local parks, or woodland walks, you can create stunning butterfly compositions that celebrate the natural world while producing genuinely beautiful decorative pieces. This ancient-meets-modern craft bridges the gap between outdoor exploration and indoor creativity, making it a perfect activity for families, hobbyists, and serious artists alike.
The beauty of leaf butterfly art lies in its fundamental simplicity. Leaves, with their intricate venation patterns, varied shapes, and rich seasonal colors, are nature’s own artwork waiting to be reimagined. When arranged thoughtfully into butterfly wing formations, these organic materials take on an entirely new meaning, transforming from fallen debris into objects of striking visual poetry. The natural imperfections in each leaf — the subtle holes, the irregular edges, the gradients of color — become features rather than flaws in the finished piece.
Beyond its aesthetic rewards, leaf butterfly art offers a deeply meditative experience. The process of collecting leaves encourages mindful observation of the natural world, prompting you to notice details you might otherwise overlook — the way light filters through a maple’s lobes, or how autumn turns a single oak leaf into a tapestry of amber, rust, and gold. Whether you are a seasoned crafter or a complete beginner, this guide will walk you through every stage of the process, from gathering your materials to displaying your finished masterpiece.
Gathering and Preparing Your Leaves
The success of your leaf butterfly art begins long before you sit down at your crafting table. Selecting the right leaves is a thoughtful process that rewards patience and a discerning eye. When collecting leaves, look for a variety of sizes, shapes, and textures. Symmetrical leaves work particularly well for butterfly wings because they naturally mirror one another, but asymmetrical specimens can add wonderful character and movement to more abstract compositions. Aim to gather far more leaves than you think you will need, as having an abundant selection gives you creative freedom during the arrangement phase.
The best time to collect leaves is during dry weather, when the leaves are free of moisture and less prone to tearing. Autumn provides the most spectacular palette, with leaves displaying fiery oranges, deep reds, warm yellows, and rich browns that need no enhancement to look extraordinary. Spring and summer leaves offer a different beauty — vivid greens and delicate pale undersides that can create fresh, lively butterfly compositions. Avoid leaves that are already decomposing, very thin, or riddled with large insect damage, though small holes and minor imperfections can add charm and authenticity.
Once collected, your leaves must be properly pressed and dried before use. Arrange them between sheets of absorbent paper — newspaper works well — and place them inside heavy books or a dedicated flower press. Stack additional weight on top and leave them undisturbed for at least one to two weeks. Properly pressed leaves will be flat, dry, and pliable enough to handle without crumbling. Rushing this stage is the most common beginner mistake; insufficiently dried leaves will curl, warp, or rot after being incorporated into your artwork, ruining hours of creative effort.
- Collect leaves during dry weather to minimize moisture and tearing during pressing.
- Choose a variety of sizes — large leaves for upper wings, smaller ones for lower wings.
- Press leaves between absorbent paper layers for a minimum of ten to fourteen days.
- Store pressed leaves flat in labeled envelopes sorted by color, size, or species for easy access during crafting.
- Gather some very small leaves or petals to use as body and antenna accents for your butterfly figures.
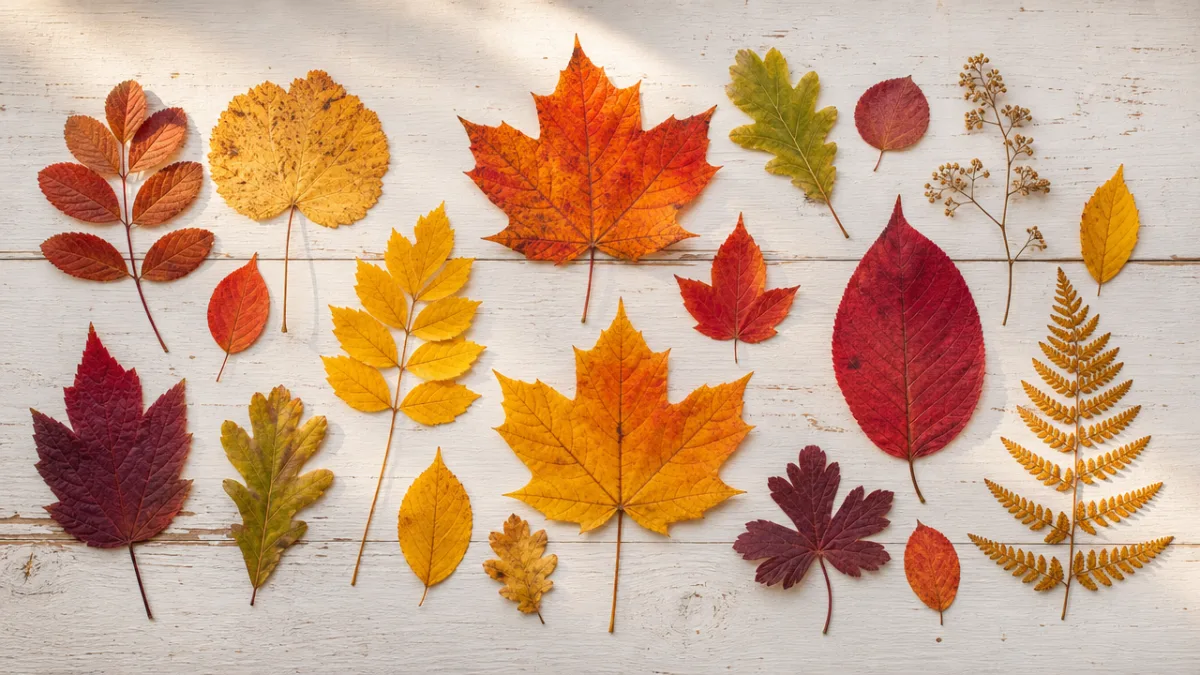
Materials and Tools You Will Need
One of the most appealing aspects of leaf butterfly art is how little specialist equipment it requires. Most of the materials you need are either freely available in nature or inexpensive craft supplies you may already own. At the core of your toolkit are your pressed leaves, but surrounding those, a handful of essential materials will help you create polished, lasting artwork. Having everything laid out and ready before you begin your composition will make the creative process far more enjoyable and fluid.
Your background surface is just as important as the leaves themselves. Watercolor paper, cardstock, canvas board, or even reclaimed wooden panels all make excellent bases. The color and texture of your background dramatically affects the mood of the finished piece — a creamy white card stock creates a clean botanical illustration feel, while a piece of aged kraft paper or dark canvas lends a more dramatic, jewel-toned effect to the same leaves. Experiment with different backgrounds using scrap leaves before committing to your final surface.
For adhesive, a good quality PVA glue, decoupage medium, or clear-drying craft glue works best. Avoid using glue sticks as these often fail to provide a lasting bond with organic materials. Fine-tipped tweezers are invaluable for positioning small or delicate leaf fragments precisely without disturbing surrounding pieces. A soft watercolor brush is useful for applying thin layers of adhesive beneath leaves and for sealing the finished artwork. Optional but highly recommended extras include fine-line black pens for adding butterfly body details, metallic paint pens for accents, and a can of matte or gloss varnish spray for preservation.
- Pressed and dried leaves in a variety of sizes, shapes, and colors
- Watercolor paper, cardstock, canvas board, or wooden panel as your background
- PVA glue, decoupage medium, or clear-drying craft glue
- Fine-tipped tweezers for precise leaf placement
- Soft watercolor or foam brush for adhesive application
- Fine-line black or brown pen for adding body and antenna details
- Optional: metallic paint pens, watercolor paints, or colored pencils for embellishment
- Matte or gloss varnish spray to seal and preserve the finished artwork
Designing Your Butterfly Composition
Before applying any glue, spend generous time in the design and planning phase of your leaf butterfly art. This is where your creative vision takes shape, and the decisions you make here will define the character and impact of your finished piece. Begin by sketching a simple butterfly outline lightly in pencil on your background surface. Standard butterfly anatomy is straightforward — two large upper wings and two smaller lower wings, with a slender body running through the center — but within that framework, the variations are virtually limitless in terms of proportion, angle, and personality.
Experiment with arranging your pressed leaves within the pencil outline before committing any adhesive. Try different combinations of leaves in each wing quadrant, noting how contrasting colors and shapes play against one another. A classic and highly effective approach is to use matching pairs of leaves for left and right wings to create symmetry, which is immediately recognizable as butterfly-like to the viewer’s eye. However, deliberately breaking symmetry with different but harmonious leaf types on each side can produce a more dynamic, painterly effect that feels intentional rather than accidental.
Consider the overall color story you want your butterfly to tell. Monochromatic compositions — using leaves of a single hue in varying tones and sizes — have an elegant, sophisticated quality. Complementary color pairings, such as deep burgundy against golden yellow, or forest green against burnt orange, create high visual drama. For a softer, romantic feel, analogous color schemes using leaves in neighboring color families — all the warm oranges, golds, and reds of autumn — produce a harmonious, glowing effect. Take photographs of your dry-arrangement experiments so you can compare options before selecting your favorite.
- Lightly sketch your butterfly outline in pencil directly onto your background surface.
- Dry-arrange your pressed leaves within the outline to experiment with different compositions.
- Photograph each arrangement option so you can compare them side by side.
- Select your final leaf arrangement and note which leaf goes where before removing them for gluing.
- Choose small, slender leaves or twisted stems to form the butterfly’s body and antennae.

Step-by-Step Assembly of Your Leaf Butterfly
With your design planned and your materials ready, you can begin the most satisfying stage: assembling your leaf butterfly. Work methodically from the largest elements down to the smallest, as this makes it far easier to fit smaller accent leaves around already-positioned larger pieces. Begin by applying a thin, even layer of your chosen adhesive to the back of your largest leaf using a fine brush or the tip of a cotton swab. Position it carefully within your outlined wing area and press it down gently but firmly, working from the center outward to eliminate air pockets.
Continue adding leaves one at a time, slightly overlapping neighboring pieces to create depth and the impression of layered wing scales. This overlapping technique is one of the most important skills in leaf butterfly art — it transforms a flat collage of separate elements into something that reads as organic and cohesive, much as real butterfly wings are made of thousands of overlapping scales. Use your tweezers throughout this stage to position smaller or more delicate leaves with precision. Wipe away any excess glue immediately with a slightly damp cloth before it dries on the surface of your leaves.
Once all four wings are assembled, turn your attention to the butterfly’s body. A narrow, elongated leaf, a twisted stem, or even a rolled piece of leaf material can serve beautifully as the abdomen and thorax. Glue this central body piece firmly in place, covering the inner edges of the wings where they meet the center, which also helps to unify the composition visually. For antennae, fine curved stems, thin strips of leaf, or even hand-drawn lines with a fine-point pen all work well. Allow the entire piece to dry completely — ideally overnight — before moving on to any embellishment or finishing steps.
Embellishment is entirely optional, but it can elevate a simple leaf butterfly into something truly spectacular. Some artists add fine lines of gold or silver metallic pen to highlight the leaf veins, creating a luminous, stained-glass effect. Others use diluted watercolor washes applied very gently around the edges of the butterfly to add a softly glowing halo of color. You might also add tiny dots, swirls, or geometric patterns using a fine-line pen to echo the natural patterns found on real butterfly wings. The key is restraint — the leaves themselves are already beautiful, and embellishment should enhance rather than overwhelm.
Finishing, Sealing, and Displaying Your Artwork
Once your leaf butterfly is fully assembled and completely dry, the final and crucial stage is sealing the artwork to protect it from moisture, dust, and the natural deterioration that organic materials undergo over time. Pressed leaves, while stable when dry, remain somewhat fragile and susceptible to humidity changes that can cause warping or color shift. A proper sealant will lock in the colors, strengthen the leaves, and give your finished piece a professional-quality appearance that will last for years or even decades.
The most convenient and effective sealing method for most crafters is a spray varnish applied in thin, even coats. Hold the can approximately thirty centimeters from the surface and sweep across the artwork in smooth, overlapping passes. Apply two to three light coats rather than one heavy one, allowing each coat to dry fully between applications. Matte varnish preserves the natural, earthy quality of the leaves and is generally the more popular choice for botanical art. Gloss varnish intensifies the colors and adds a slight sheen that can make jewel-toned autumn leaves look absolutely luminous and rich.
When it comes to displaying your leaf butterfly art, the framing choice matters enormously. A simple, clean frame with a wide white or cream mat allows the organic complexity of the butterfly to breathe and take center stage. Shadow box frames work particularly well if your leaves are slightly raised from the surface, as they provide the depth needed to prevent the glass from pressing against the artwork. For a more bohemian or naturalistic display, your butterfly art can be mounted on a wooden panel and hung without glass, though this is better suited to lower-humidity environments where the leaves are less likely to reabsorb moisture.
Leaf butterfly art also makes an extraordinarily meaningful and personal gift. Unlike mass-produced decorations, each piece is genuinely unique — no two leaves are ever identical, and the hand-assembled nature of the work carries an unmistakable warmth and intentionality. Consider pairing a framed leaf butterfly with a small card explaining which species of leaves were used and where they were collected, particularly if the leaves hold personal significance — from a specific garden, a memorable walk, or a meaningful season. This added layer of storytelling transforms the artwork from a beautiful object into a cherished keepsake.

Tips, Variations, and Creative Extensions
Once you have mastered the basic leaf butterfly, a world of creative variations opens up before you. One popular extension is to create a series of butterflies at different scales — a large, elaborate specimen as the focal point surrounded by smaller, simpler ones — to suggest a butterfly garden in mid-flight. Another approach is to incorporate other natural materials alongside your leaves: pressed flower petals, small feathers, dried grasses, seed heads, or even fragments of birch bark can all contribute interesting textures and colors to expanded butterfly compositions.
For those interested in a more painterly effect, try working on a pre-painted watercolor background. Wash your paper with loose, flowing watercolor in blues, greens, and purples before pressing your leaves, and the depth and atmosphere this creates beneath the leaf butterfly will be remarkable. The organic shapes of the painted background and the organic shapes of the leaves will harmonize in a way that no printed background ever could. You might also experiment with collaging torn tissue paper or handmade washi tape onto the background before adding your leaf butterfly, creating richly layered artwork with beautiful visual complexity.
Leaf butterfly art is a wonderful activity to share with children, offering an accessible entry point into nature observation, patience, and creative composition. Younger children can manage simpler two-leaf butterfly designs using just one large leaf per wing, while older children can tackle more elaborate multi-leaf compositions. The activity naturally encourages outdoor exploration, botanical curiosity, and fine motor skill development. Consider organizing a leaf-collection walk as a precursor to the crafting session, turning the whole experience into an extended nature study that connects children meaningfully with the environment around them.
More advanced artists might explore using the leaf butterfly format as a jumping-off point for mixed media work, combining the leaves with photography, printmaking, or botanical illustration. A pressed-leaf butterfly layered over a botanical print or a watercolor painting of a garden scene creates a wonderful dialogue between different art forms and different ways of representing nature. You could also explore the Japanese art of oshibana — pressed flower composition — as a closely related tradition that shares many techniques and philosophies with leaf butterfly art, and draw inspiration from the exquisite works in that centuries-old tradition.
- Try creating a series of butterflies in different sizes for a gallery-wall effect.
- Incorporate other natural materials like petals, feathers, or seed heads for added texture.
- Work on a pre-painted watercolor background for atmospheric depth and richness.
- Introduce children to the craft as a nature study activity combining outdoor exploration with indoor creativity.
- Explore oshibana and other pressed botanical art traditions for additional inspiration and technique.
- Experiment with dark backgrounds — black card or navy paper — for a dramatic, jewel-box effect.
- Create greeting cards, bookmarks, or gift tags using miniature leaf butterfly compositions.
Leaf butterfly art, at its heart, is an invitation to slow down and look more carefully at the natural world. In an age of digital saturation and manufactured aesthetics, there is something profoundly nourishing about making something beautiful from materials gathered by hand outdoors, transformed through patience and care into lasting artwork. Each leaf butterfly you create carries within it the memory of the season and the place where its materials were gathered — a quiet, permanent record of a moment spent in nature, pressed between paper and preserved for years to come.








What do you think?
It is nice to know your opinion. Leave a comment.