










Surfboard Name Craft for Kids: The Ultimate Guide to a Fun Summer Activity
Introduction: Why Surfboard Name Crafts Are the Perfect Summer Project
When summer arrives and children are buzzing with energy, parents and educators are always on the lookout for creative activities that can channel that enthusiasm into something meaningful and memorable. The surfboard name craft is one of those rare gems that combines artistic expression, personalization, and the breezy spirit of the season into a single, joyful project. It is the kind of activity that children return to again and again, proudly displaying their creations long after the summer sun has faded.
What makes this craft especially wonderful is its remarkable versatility. Whether you have a toddler just learning to hold a crayon or a school-aged child with a passion for detailed artwork, the surfboard name craft can be adapted to suit any skill level. The basic premise — cutting a surfboard shape out of cardboard or foam and decorating it with a child’s name — is simple enough for the youngest crafters, yet rich enough in creative possibility to keep older children engaged and challenged for hours on end.
Beyond pure entertainment, this activity carries genuine educational value. Children practice letter recognition and spelling as they map out their names across the board. They develop fine motor skills through cutting, gluing, and painting. They learn about color theory as they experiment with tropical palettes. And perhaps most importantly, they build confidence and a sense of ownership by creating something uniquely their own. This is not just a craft; it is a developmental experience wrapped up in summer fun.
Gathering Your Supplies: Everything You Need to Get Started
Like any successful craft project, the surfboard name activity begins long before the first stroke of paint or the first snip of scissors. Taking time to gather and organize your supplies in advance transforms what could be a chaotic scramble into a smooth, enjoyable experience. Most of the materials for this project are either already in your home or available at very low cost from your local dollar store or craft shop, making it an incredibly budget-friendly choice for families and classrooms alike.
The foundation of the project is the surfboard itself. You have several excellent options depending on your budget and the age of your child. Flat corrugated cardboard — the kind that comes from shipping boxes — is free, widely available, and easy to cut. For a sturdier and more realistic feel, foam sheets from the craft store offer a lightweight, slightly textured surface that paints beautifully. Some parents even use wooden craft plaques cut into an elongated oval shape for a truly lasting keepsake. Any of these bases will work wonderfully, so choose based on what is most convenient and affordable for you.
Once you have your base material sorted, you will want to gather the following supplies to bring the project fully to life:
- Acrylic or washable tempera paints in bright, tropical colors such as turquoise, coral, sunny yellow, lime green, and hot pink
- Paintbrushes in a variety of sizes — wide brushes for backgrounds and fine-tipped brushes for detail work and lettering
- Scissors (child-safe for younger kids, standard for older children and adults cutting the board shape)
- A pencil for sketching the surfboard outline and planning the letter placement before committing to paint
- White paint or gesso as a primer coat to help colors show up vividly on cardboard surfaces
- Foam stickers, sequins, glitter glue, and washi tape for extra embellishment and texture
- A clear sealant spray or Mod Podge to protect the finished artwork from smudging
- Ribbon or string for hanging the completed surfboard on a wall or door
Having everything laid out before you begin eliminates the frustrating mid-project interruptions that can break a child’s concentration and enthusiasm. Set up your workspace on a table covered with a plastic tablecloth or old newspaper to protect the surface. Pour paints into a palette or on a paper plate, fill a cup with water for rinsing brushes, and lay out all the decorative elements within easy reach. This kind of organized setup also teaches children an important lesson about preparation and the satisfaction of working in an orderly environment.

Step-by-Step Instructions: Creating Your Surfboard Masterpiece
Now comes the exciting part — actually making the craft. Walking through each step carefully ensures that even first-time crafters will feel confident and capable throughout the process. The joy of this project lies not only in the finished product but in every individual step along the way, each one offering its own small moment of creativity and discovery. Encourage children to think of themselves as real artists while they work, because in every meaningful sense, that is exactly what they are.
Start by drawing or tracing your surfboard shape onto your chosen material. A classic surfboard has a pointed top, a rounded bottom, and gently curved sides that taper toward both ends. If you are working with younger children, it may be helpful to pre-cut the shapes yourself so they can jump straight into the decorating portion. For older children, cutting out the shape themselves adds an extra layer of engagement and develops important fine motor control. Once the shape is cut, apply a coat of white paint and allow it to dry completely — this step usually takes about twenty to thirty minutes and is essential for ensuring that your colors appear bright and true.
While the base coat dries, invite your child to plan their design on a piece of scrap paper. Ask them to think about what colors they love most, what patterns remind them of the ocean, and where they want their name to appear on the board. Planning on paper first removes the pressure of making permanent decisions and encourages thoughtful creative thinking. Some children will want bold, solid stripes of color. Others will dream up elaborate wave patterns, starfish details, or tropical flower motifs. All of these are wonderful choices, and the planning stage is where those unique visions begin to take shape.
Follow this general sequence of steps to complete the surfboard:
- Apply the white base coat and allow it to dry fully before proceeding.
- Paint your background color or pattern — waves, ombre washes, or bold stripes — and let this layer dry completely.
- Add secondary design elements such as suns, stars, fish, or flowers using smaller brushes and contrasting colors.
- Sketch your name lightly in pencil across the center of the board, spacing the letters evenly and proportionally.
- Paint over the pencil letters with a thick, bold color that stands out clearly against the background.
- Outline the letters with a black paint pen or fine brush for a polished, pop-art effect that makes them really stand out.
- Add embellishments like foam stickers, glitter accents, or sequins while the surface is slightly tacky for best adhesion.
- Once everything is fully dry, apply a coat of Mod Podge or sealant to protect and preserve the finished design.
- Attach a piece of ribbon to the back of the board for hanging and display your masterpiece with pride.
Throughout this process, resist the urge to guide children too heavily toward a particular aesthetic. The magic of this craft lives in the child’s own creative choices, even when those choices seem unconventional or unexpected. A surfboard painted entirely in purple with a name written in zigzag letters is not a mistake — it is an expression of a unique and wonderful personality. Your role as a guide is to facilitate, encourage, and celebrate whatever they create with genuine enthusiasm and affirmation.
Creative Variations: Taking the Craft to the Next Level
Once you have completed the basic surfboard name craft, you will likely find that both you and your child are hungry for more creative possibilities. The foundational design is just the beginning of what this versatile craft format can offer. With a few imaginative tweaks, the surfboard project can be transformed into a whole series of activities that keep summer creativity flowing for weeks on end. This section explores some of the most exciting and engaging variations that families and educators have developed around this beloved craft.
One popular extension of the basic project is turning the surfboard into a personalized room sign. Instead of simply displaying the child’s name in plain lettering, encourage them to decorate the board in a way that reflects their personality, hobbies, and interests. A child who loves dinosaurs might add painted dinosaur footprints and prehistoric plants alongside their name. An aspiring astronaut might paint a starry galaxy background with rocket ships weaving between the letters. A soccer enthusiast might recreate their team’s colors in bold stripes with a soccer ball motif at each end. When the board becomes a true portrait of the child’s identity, its meaning transcends mere decoration.
For group settings such as summer camps, classrooms, or birthday parties, the surfboard name craft transforms beautifully into a collaborative experience. Consider organizing a “surf shack” themed craft station where children can create their boards side by side, sharing supplies and admiring one another’s work. When completed, a wall display of all the boards creates a stunning, colorful gallery that celebrates every individual name and personality in the group. This communal version of the project also opens up wonderful conversations about similarities and differences, about the beauty of diverse creative choices, and about what makes each person in the group special and unique.
Here are some additional creative variations to inspire your next surfboard crafting session:
- Mini surfboard gift tags: Cut small surfboard shapes from cardstock and have children write a recipient’s name on each one to use as personalized gift tags for summer birthday presents.
- Family surfboard set: Create a matching set of boards, one for each family member, using a cohesive color palette that ties them together while still showcasing each person’s individual style.
- Seasonal update boards: Make the board design interchangeable by attaching a blank name plate with velcro so the background can be swapped out for different seasons or holidays throughout the year.
- Alphabet surfboard series: Create a whole set of miniature surfboards, each featuring a single letter of the alphabet, to hang in sequence as an educational wall display in a child’s bedroom or playroom.
- Photo display board: Incorporate small printed photos into the design, using Mod Podge to adhere them to the surface alongside the name and decorative elements for a truly personal keepsake.
Educational Benefits: Learning Through Creative Play
It would be easy to look at the surfboard name craft and see only a fun way to pass a summer afternoon, but educators and child development specialists would be quick to point out the deep and meaningful learning that occurs throughout every stage of this activity. Creative crafting is one of the most powerful vehicles for early childhood learning precisely because it disguises intentional skill-building within the irresistible wrapper of play. Children are so absorbed in the joy of creating that they barely notice how much they are growing in the process.
The most obvious academic benefit of this particular craft is its engagement with literacy. Spelling and writing one’s own name is one of the foundational milestones of early childhood education, and the surfboard craft approaches this milestone in a way that feels meaningful and celebratory rather than rote and repetitive. When a child works hard to paint each letter of their name in vibrant colors on a beautiful surfboard, they are not simply copying letters from a worksheet — they are claiming their name as something worth displaying, something to be proud of, something that represents their whole wonderful self. This emotional connection to the act of writing is precisely what transforms a basic literacy exercise into a lasting developmental experience.
Fine motor development is another significant area of growth embedded in this activity. The act of holding and controlling a paintbrush, cutting along a curved line, applying glue carefully, and pressing small stickers into place all require and develop the precise hand and finger control that children need for writing, buttoning clothes, and dozens of other daily tasks. Research in occupational therapy consistently demonstrates that craft activities like this one are among the most effective and enjoyable ways to build fine motor strength and coordination in young children. The best part is that the child never feels like they are doing therapy — they feel like they are making something beautiful.
Beyond literacy and motor skills, the surfboard name craft also nurtures the following areas of child development:
- Color recognition and theory: Choosing and mixing colors teaches children about primary and secondary colors, complementary contrasts, and the emotional associations of different hues.
- Spatial reasoning: Planning how to fit their name and design elements onto the board develops spatial awareness and early geometric thinking.
- Patience and perseverance: Waiting for paint to dry and working through the multi-step process builds frustration tolerance and the understanding that good things take time and effort.
- Decision-making and autonomy: Making hundreds of small creative choices throughout the project strengthens a child’s ability to trust their own judgment and preferences.
- Pride and self-esteem: Completing a visible, tangible project and displaying it builds genuine confidence and a healthy sense of accomplishment.
Tips for Success: Making the Most of Your Crafting Session
Even the best-planned craft activity can go sideways without a little thoughtful preparation and a few key strategies up your sleeve. After years of parents and educators sharing their experiences with the surfboard name craft, a clear set of best practices has emerged that can make the difference between a session that flows effortlessly and one that dissolves into frustration. The tips in this section draw on that collective wisdom to help you set yourself and your child up for a truly joyful and successful crafting experience.
First and foremost, embrace the mess. Crafting with children is inherently, gloriously messy, and fighting against that reality only creates tension and inhibits creativity. Lay down plenty of protective covering, dress your child in old clothes or a dedicated craft smock, and give yourself explicit permission to let things get a little chaotic. The mess is where the magic happens — it is the physical evidence of genuine, uninhibited creative engagement. After the session ends, cleanup becomes part of the experience, teaching children the important lesson that those who create are also responsible for tidying up after themselves.
Timing is another crucial factor in the success of any crafting session with young children. Most children between the ages of three and seven have an effective crafting attention span of roughly thirty to forty-five minutes before fatigue and frustration set in. If the surfboard project feels too ambitious to complete in one sitting — and for younger children it often will — plan it across two or three shorter sessions over consecutive days. Breaking the project into stages (cutting and priming on day one, painting the background on day two, adding the name and details on day three) actually enhances the child’s investment in the outcome, as they have more time to think about their creative decisions and build anticipation for the next stage.
Keep these additional success tips in mind as you plan and execute your surfboard crafting session:
- Pre-mix any paint colors you want your child to use before the session begins to avoid lengthy delays and accidental messes during the activity itself.
- Offer a curated selection of colors rather than the entire paint collection — too many choices can overwhelm young children and lead to muddy, overworked results.
- Photograph the finished surfboard before displaying or gifting it so that you always have a digital record of the artwork to look back on in future years.
- If a child makes a “mistake” they are upset about, gently show them how an extra layer of paint can turn any accident into an opportunity for a creative new direction.
- Play beach-themed or tropical music softly in the background to enhance the summer atmosphere and keep energy and mood elevated throughout the session.
- Display the finished surfboard prominently in the child’s room or a shared family space so they can experience the daily pride and joy of seeing their work celebrated.
Displaying and Preserving Your Surfboard Creation
The moment a child completes their surfboard name craft marks only the beginning of that creation’s life in your home. How you choose to display and preserve the finished piece sends a powerful message to your child about the value of their creative work and the effort they invested in making it. Thoughtful display transforms a craft project into genuine art, and children who see their work treated with respect and care are far more likely to continue developing their creative confidence and skills throughout childhood and beyond.
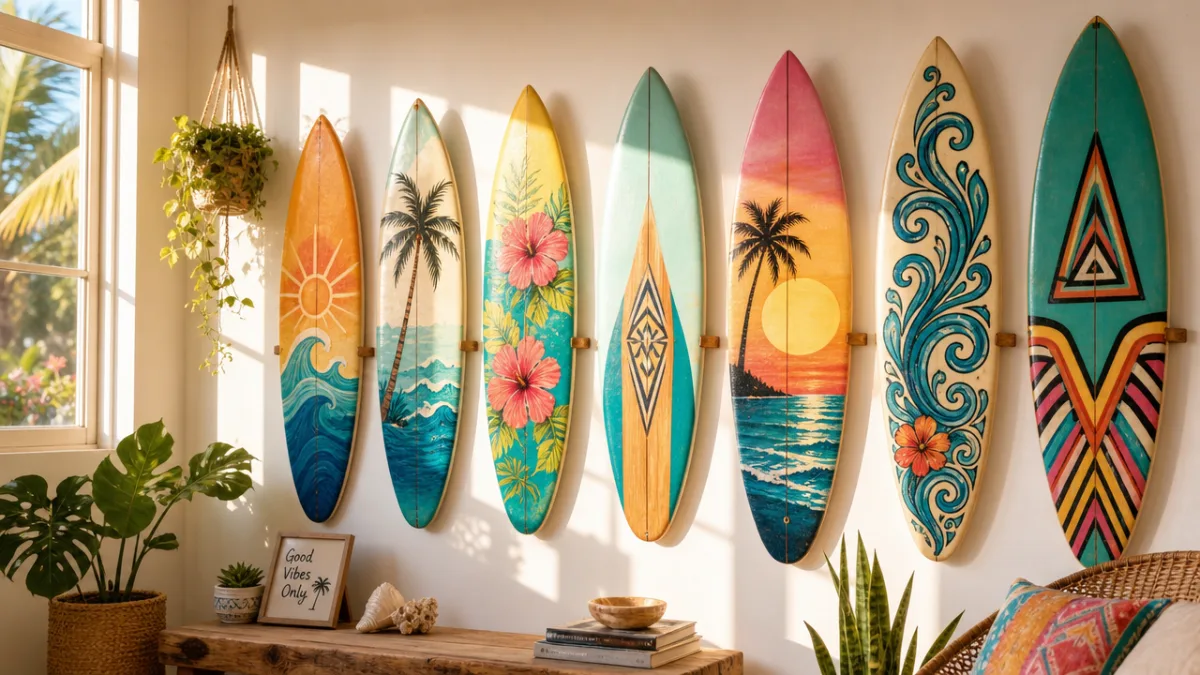
For immediate display, the simplest approach is to attach a loop of ribbon or a sawtooth picture hanger to the back of the board and hang it on a bedroom door, a wall peg, or a special art display rail. Many families now use tension wire systems or wooden art display rails specifically designed for showing off children’s artwork, and the surfboard’s distinctive shape makes it a particularly striking addition to such a display. If you have created multiple boards — perhaps for siblings or as part of a classroom project — hanging them together in a cluster or in a horizontal row creates a vibrant, eye-catching gallery effect that transforms a wall into a celebration of creativity.
For longer-term preservation, especially if the board is made from cardboard or foam, applying two or three coats of Mod Podge or a dedicated craft sealant will protect the surface from humidity, dust, and the inevitable fingerprints that find their way onto anything a child loves enough to touch repeatedly. If you have used a wooden base, a coat of clear lacquer spray will provide even more durable protection. Some families choose to photograph the completed artwork professionally and create prints or canvas reproductions that can be displayed for years without any concern about the original piece deteriorating. These reproductions make treasured gifts for grandparents and other family members who may not be lucky enough to receive the original.
The surfboard name craft ultimately represents far more than the sum of its painted cardboard and glittery embellishments. It is a snapshot of a child at a particular moment in their development — their favorite colors, the way they formed their letters, the creative instincts that guided their design choices. Preserving and celebrating that snapshot is one of the most loving and meaningful things an adult can do. So display it proudly, protect it carefully, and every time you pass it hanging on the wall, take a moment to remember the joy, the concentration, the laughter, and the creative spark that brought it into being on one beautiful summer day.








What do you think?
It is nice to know your opinion. Leave a comment.