










Easy DIY Wooden Box Craft Ideas for Beginners and Home Decor
Why Wooden Box Crafts Are Perfect for Beginners
If you’re looking for a craft project that actually delivers on its promise of being beginner-friendly, wooden box crafts might be exactly what you’ve been searching for. They hit that sweet spot between “so simple it feels pointless” and “so complicated you give up halfway through.” Whether you’re brand new to DIY or just want to add a little handmade charm to your home, wooden boxes are wonderfully forgiving to work with — and you don’t need a garage full of power tools or any woodworking background to make something you’ll genuinely be proud of.
Here’s the part that really makes wooden box crafts accessible: you can buy pre-made unfinished boxes right at your local craft store or online, which means you skip the whole cutting-and-shaping-wood phase entirely. All your energy goes straight to the fun stuff — painting, staining, decoupaging, gluing things on. Craft stores carry everything from tiny little jewelry boxes to big storage crates, so there’s genuinely no shortage of starting points no matter what you have in mind.
And let’s talk about the budget side of things, because it’s actually kind of remarkable. A basic unfinished wooden box can cost just a couple of dollars. From there, you can raid your craft supplies, your junk drawer, even your recycling bin — leftover paint, fabric scraps, twine, old buttons — and turn that plain little box into something that looks like it came from a boutique home decor shop. That combination of low cost and high impact is a big part of why people get hooked on this craft and keep coming back for more.
Essential Materials and Tools You Will Need
Before you dive in, it’s worth pulling together a core set of supplies that’ll carry you through lots of different projects. The box itself is obviously your starting point — look for ones made from balsa wood or lightweight pine, since they’re easy to sand, paint, and work with using basic tools. Michaels and Hobby Lobby both have solid selections, and if you’re planning to make several projects or gifts, online marketplaces often sell bulk packs at a great price.
For decorating, a few staples will serve you really well. Pick up sandpaper in both a medium and fine grit so you can smooth rough edges and prep the surface before you start. Acrylic craft paints are a beginner’s best friend — they dry fast, clean up with water, and come in basically every color imaginable. If you want a more furniture-like finish, wood stains and sealants (easy to find at any hardware store) do a beautiful job. And don’t skip the Mod Podge — it’s both a glue and a sealant, making it indispensable for decoupage and all kinds of other projects.
As for tools, you really don’t need much. A few foam brushes and a couple of fine-tipped paintbrushes will handle most of your painting and staining. A hot glue gun is incredibly handy for attaching things like dried flowers, moss, shells, or ribbon. Painter’s tape and a pencil let you create neat lines and geometric patterns without needing any freehand painting skills. And if you want to add hinges or clasps to turn your box into a proper keepsake chest, a small screwdriver and a few screws are all it takes.
- Unfinished wooden boxes in various sizes
- Sandpaper (120-grit and 220-grit)
- Acrylic craft paints and wood stains
- Mod Podge or decoupage medium
- Foam brushes and fine-tipped paintbrushes
- Hot glue gun and glue sticks
- Painter’s tape for clean edges
- Decorative hardware (hinges, clasps, knobs)
- Embellishments: twine, ribbon, dried flowers, shells
Popular Wooden Box Decorating Techniques
Once your supplies are ready, the fun really starts — picking a technique that fits your style and how much time you want to invest. For absolute beginners, simple painting is a great place to start. It can be as easy as a single solid color or as detailed as a hand-painted pattern, depending on how adventurous you’re feeling. Chalk paint has become a real favorite in the DIY world because it sticks to wood without any priming, dries to a lovely matte finish, and sands down beautifully if you want that distressed, vintage-farmhouse look that’s everywhere in home decor right now.
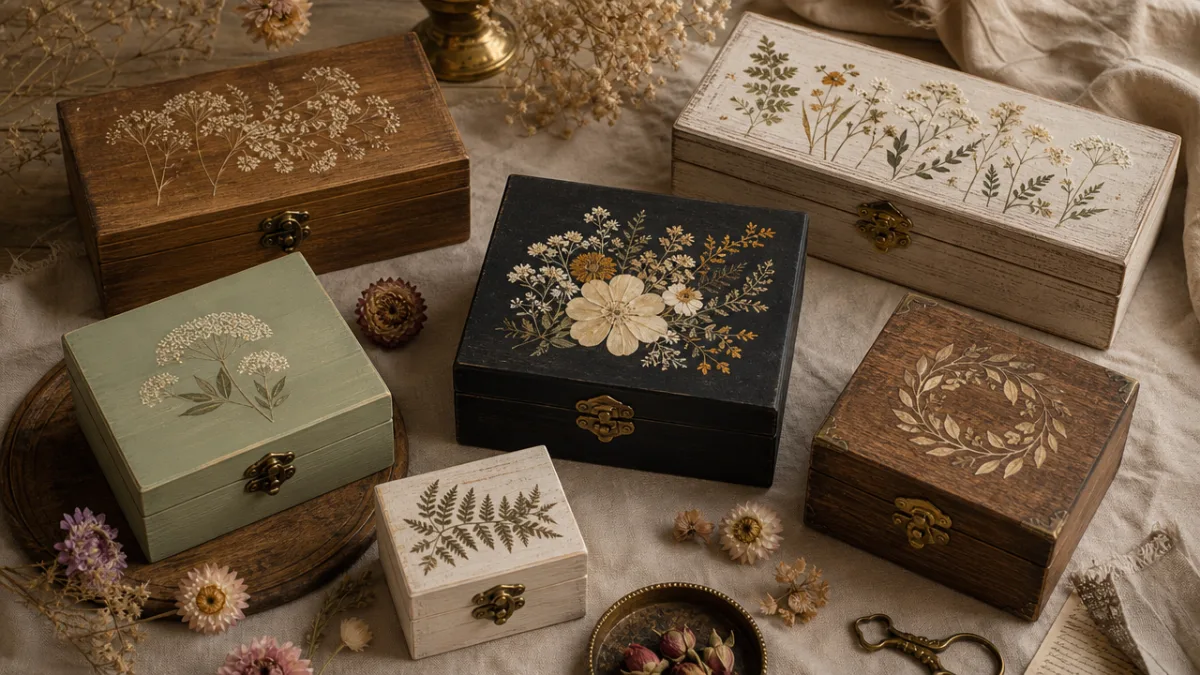
Decoupage is another technique worth getting excited about — it’s incredibly versatile and the results can honestly look stunning. You can cover a wooden box with paper napkins, tissue paper, fabric, old book pages, maps, printed photos, whatever speaks to you. The process is simple: brush a thin layer of Mod Podge onto the box, lay down your paper or fabric, smooth out any bubbles, and seal with more Mod Podge once it’s dry. A wooden box decoupaged with vintage botanical prints, for example, ends up looking like something you’d pay serious money for at a home goods store.
If you’re feeling a bit more adventurous, wood burning (or pyrography) is worth exploring. Using a wood-burning pen, you can etch patterns, words, florals, or geometric designs directly into the wood. The contrast between those dark burned lines and the natural wood grain gives everything a handcrafted, artisan quality that’s really hard to replicate any other way. Starter kits are affordable and usually come with stencils, so it’s more approachable than it sounds. Pair the finished piece with a light stain or oil, and the depth and warmth it adds is genuinely beautiful.
- Chalk Paint and Distressing: Apply two coats of chalk paint, let dry completely, then sand edges lightly for a worn farmhouse look.
- Decoupage: Layer torn paper or napkins with Mod Podge for a collage effect, sealing with multiple topcoats.
- Stenciling: Use adhesive stencils and a dry brush technique to add repeated patterns like florals, geometric shapes, or typography.
- Wood Burning: Etch designs with a pyrography pen for a handcrafted, artisanal appearance.
- Ombre or Color Washing: Blend two or more paint colors while still wet for a gradient watercolor effect.
- Nature Embellishment: Glue on dried moss, bark, twigs, or pressed flowers for an organic, botanical style.
Creative Wooden Box Ideas for Every Room in Your Home
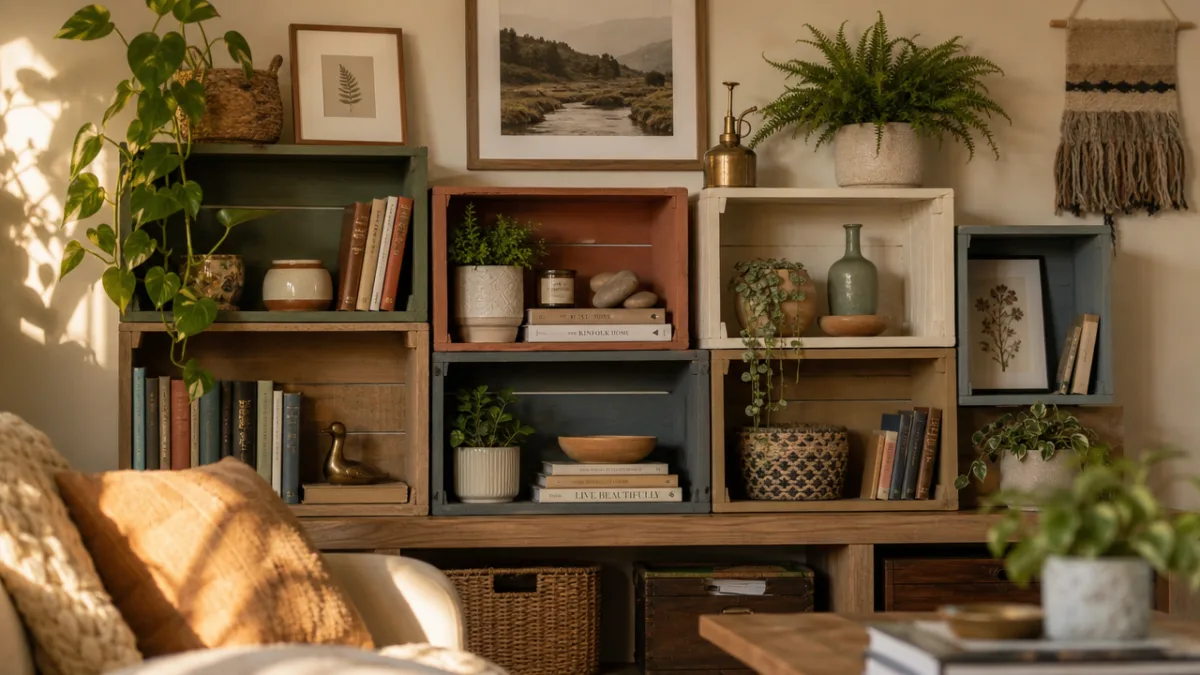
One of the things that makes wooden box crafts so satisfying is how easily they adapt to different spaces and purposes around the house. In the living room, a set of painted boxes in coordinating colors can quietly solve the eternal problem of remote controls, charging cables, and random small items that always seem to be floating around. Grouped on a shelf or coffee table, they pull together into a cohesive, intentional display that makes the whole room feel a bit more put-together — and it costs a fraction of what you’d spend on actual storage furniture.
The kitchen is another great spot for wooden box projects. Think herb planters, recipe card holders, or a catch-all for utensils. A simple wooden crate lined with burlap and filled with small potted basil, thyme, and rosemary looks genuinely lovely on a countertop and is completely practical too. Add some hand-lettered chalkboard paint labels or small brass plates, and the whole thing takes on this nice rustic-but-refined quality. These also happen to make really thoughtful gifts for anyone who loves cooking or growing things.
Bedrooms, bathrooms, and home offices all have their own possibilities too. A few small decorative boxes on a dresser or vanity can organize jewelry, hair accessories, or makeup while adding a bit of warmth and texture to the space. In a kid’s room, painted and labeled boxes make tidying up genuinely easier — and a lot more visually appealing when each box has a clear home for a different type of toy or art supply. And in a guest room or office, a beautifully decorated wooden box adds personality in a way that plain functional storage just never does.
Seasonal and Holiday Wooden Box Projects
There’s something especially satisfying about making seasonal wooden box projects — the themes practically suggest themselves, and the end results feel festive in a way that store-bought decor rarely does. At Christmas, a wooden box painted in deep forest green with gold stenciling, a few pine cones, and a velvet ribbon becomes a gift box that people genuinely don’t want to throw away. Advent calendar sets made from small numbered wooden boxes are also hugely popular right now, and for good reason — they’re reusable, eco-friendly, and so much more charming than a paper calendar you toss every January.
Fall and Halloween are perfect for leaning into rich, moody colors and earthy textures. A wooden box in deep burgundy or burnt orange, stenciled with leaves and filled with potpourri or fairy lights, makes a beautiful seasonal centerpiece. For Halloween, you can go all out — decoupage with vintage spooky imagery, paint boxes to look like miniature coffins, or hot-glue on faux cobwebs, skeleton keys, and black lace for a theatrical gothic look that fits the season perfectly.
Spring and summer naturally call for lighter, breezier palettes and botanical touches. A wooden box painted in soft lavender or sky blue, decorated with pressed wildflowers set under a coat of resin, is the kind of thing that genuinely looks like functional art sitting on a windowsill. Easter and Mother’s Day both lend themselves beautifully to handmade gift boxes — filling a decorated wooden box with small, thoughtful items makes the box itself part of the gift, and it’s the kind of thing people hold onto long after the occasion has passed.
Tips for Finishing, Sealing, and Displaying Your Wooden Box Creations
The finishing stage is honestly where a lot of wooden box projects go from good to really impressive, and it’s mostly just a matter of not skipping steps. Whatever decorating technique you used, sealing your work properly is what makes it last. For painted boxes, two or three thin coats of clear acrylic varnish or polyurethane protects against everyday handling, moisture, and light. A matte finish tends to feel more rustic and handmade, while a glossy coat reads as more polished and refined — just go with whichever fits the vibe you were going for.
Adding small hardware details at this stage can completely change how a box looks. Tiny brass hinges, vintage-style clasps, corner brackets, drawer pulls — these things are inexpensive but they have a disproportionate effect on how finished and special the piece feels. Thrift stores, flea markets, and online vintage shops are great places to hunt for them, which adds a fun treasure-hunting element to the whole process. Even swapping out a plain wooden knob for a ceramic or crystal one can make a simple box look genuinely antique.
When it comes to displaying your finished boxes, a little thought goes a long way. Grouping boxes in odd numbers — threes or fives — is one of those design principles that just works; it creates balance without looking stiff or symmetrical. Varying the heights and sizes within a grouping adds depth and makes the arrangement feel more considered. Styling them alongside candles, small plants, books, or natural objects like stones or driftwood helps them feel at home in the room rather than like isolated craft projects sitting on a shelf.
One last thing: don’t underestimate how much joy there is in sharing these projects, whether as gifts or through social media and local craft communities. A handmade wooden box — especially one personalized with someone’s name, favorite colors, or a meaningful design — is one of the most heartfelt gifts you can give. And sharing your work online tends to open doors to a genuinely warm community of DIY enthusiasts who are happy to offer ideas, encouragement, and inspiration as you keep going and your confidence grows with each new project.








What do you think?
It is nice to know your opinion. Leave a comment.