










Crochet Vegetables Free Pattern: A Complete Guide by SitnCrochet 2026
Introduction to Crochet Vegetables and Why They’re So Beloved
If you’ve ever wanted to turn a ball of yarn into an adorable little carrot or a tiny stuffed tomato, you’re definitely not alone. Crochet vegetables have found a special place in the crafting world, winning over everyone from total beginners to experienced hookers who just can’t resist a cute amigurumi project. There’s something genuinely magical about watching a simple hook and some yarn become a miniature broccoli floret or a chubby little pumpkin. And the best part? These little guys are actually useful — think play food sets for kids, quirky kitchen decorations, or fun educational toys that help toddlers get to know their veggies.
SitnCrochet has built a real reputation for patterns that feel approachable without cutting corners on quality, and the 2026 vegetable collection keeps that streak going. What makes their designs stand out is the attention to detail — the stitch counts are clear, the construction is logical, and somehow each little vegetable actually looks like itself. Whether you’re putting together a gift for a toddler or dreaming up a full farmer’s market vignette for your kitchen shelf, these free patterns deliver a lot without costing you a thing.
There’s also a very practical case for crochet vegetables that doesn’t get talked about enough. They’re small, which means you can actually finish one in a single evening — a rare and beautiful thing if your schedule is packed. They also eat through very little yarn, making them one of the best stash-buster projects out there for using up those half-skeins you’ve been holding onto. In 2026, with more crafters thinking seriously about sustainability, a project that uses up leftover materials and produces something genuinely lovely feels especially satisfying.
Understanding the Materials and Tools You Will Need
Getting your supplies sorted before you start will save you a lot of frustration later. Yarn choice really does matter here — for amigurumi-style vegetables, a smooth, tightly spun cotton is the way to go. Cotton holds stitch definition well, so your increases, decreases, and magic rings all come out looking crisp and intentional rather than soft and blurry. DK and worsted weights are the most popular choices, though some crafters prefer sport or fingering weight when they want to work on something smaller and more detailed.
One important amigurumi habit to get into early: go down one or two hook sizes from what your yarn label recommends. This gives you a tighter, denser fabric with fewer gaps, which matters a lot once you start stuffing your vegetables with polyfill. If your fabric is too loose, the stuffing peeks through and that smooth, neat look disappears fast. Most SitnCrochet patterns will tell you exactly which hook size they used, which takes the guesswork out of it completely.
Besides yarn and a hook, there are a few other things you’ll want to have on hand. Polyester fiberfill is the go-to stuffing choice — it’s soft, holds its shape well, and gives your finished pieces that satisfying, slightly squishy feel. You’ll also need a blunt yarn needle for sewing pieces together and weaving in ends, plus a pair of sharp scissors. And don’t underestimate stitch markers — when you’re working in continuous rounds, they’re genuinely your best friend for keeping track of where each round starts.
- Smooth cotton yarn in DK or worsted weight, in vegetable-appropriate colors such as orange, green, red, yellow, and purple
- Crochet hook sized appropriately for your yarn, typically going one to two sizes smaller than recommended for tighter amigurumi fabric
- Polyester fiberfill stuffing for shaping and giving body to completed pieces
- Blunt-tipped yarn needle for seaming and weaving in ends neatly
- Locking stitch markers to track round beginnings in continuous spiral crochet
- Sharp scissors for clean yarn cuts
- Optional: wire armature or pipe cleaners for vegetables with stalks that need to stand upright
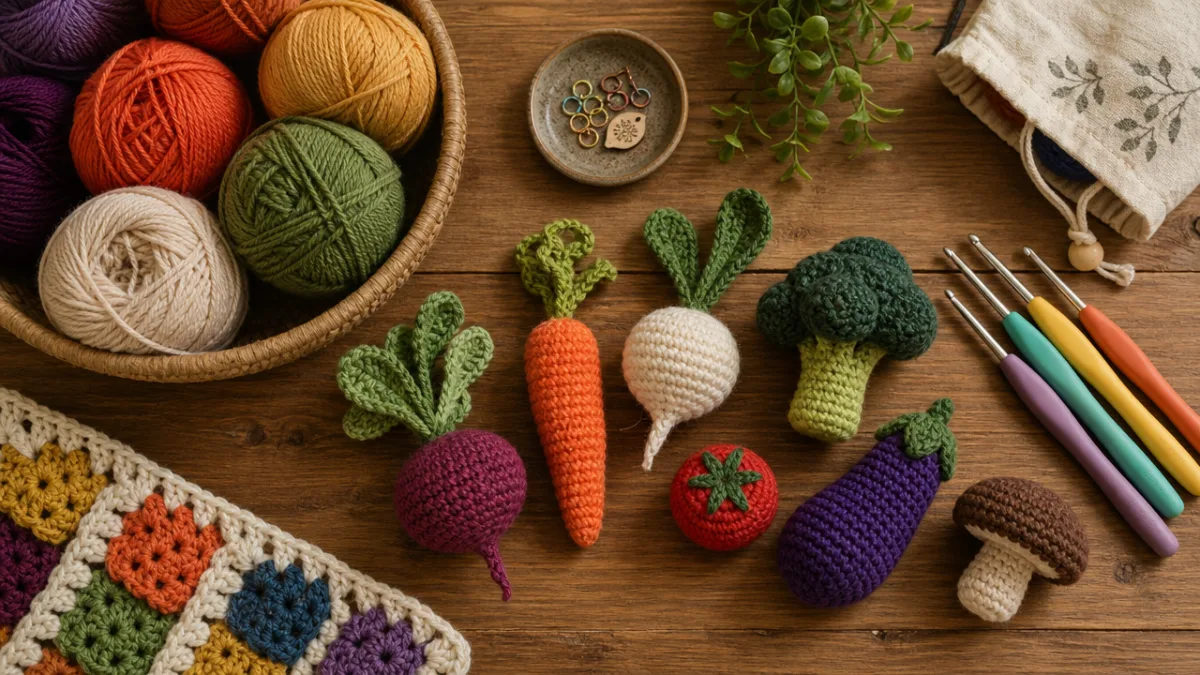
Mastering the Core Crochet Stitches for Vegetable Patterns
The good news is that crochet vegetable patterns — including everything in the SitnCrochet 2026 collection — don’t require a huge repertoire of stitches. Once you’ve got a small handful of fundamentals down, you can make pretty much everything. The magic ring is where almost every amigurumi project begins, and for good reason. It lets you start crocheting in the round without leaving a hole in the center, which is exactly what you need for something like a tomato or a turnip. If it’s new to you, practice it a few times on scrap yarn before diving in — it clicks quickly once you get the feel for it.
Single crochet is the stitch you’ll come back to again and again throughout these patterns. It’s short, dense, and creates the kind of firm, even fabric that makes amigurumi look so polished. Increases — where you work two single crochets into the same stitch — let you widen your piece as you build out from the center. Decreases bring things back in and close up shapes as you approach the end. Getting comfortable with that increase-and-decrease rhythm is what gives your vegetables that rounded, dimensional quality that makes them look so satisfying.
A few patterns in the collection branch out into other stitches for texture and detail. Half double and double crochet show up in leafy tops and decorative elements. Surface slip stitches can carve indentation lines into peppers or add segments to a corn cob. Bobble and popcorn stitches occasionally pop up to mimic the bumpy surface of certain vegetables. Each pattern introduces these techniques as you need them, but having a basic sense of what they are ahead of time will help you work more confidently when they appear.
Step-by-Step Overview of Popular Vegetables in the Collection
The SitnCrochet 2026 collection covers a really satisfying range of produce, and each one has its own approach and personality. The carrot is probably the most iconic starting point — you work from the narrow tip upward, gradually increasing to get that classic tapered shape, then finish with a chain stitch stem and a few loops of green yarn for the feathery top. It’s a great first project because the construction flows in one clean direction, and finishing it gives you a genuine boost of confidence before you tackle anything more complex.
Broccoli is where things get a bit more interesting structurally, and honestly it’s one of the most rewarding pieces in the whole collection. The floret head and stalk are made separately — the head uses small bobble clusters to capture that bumpy, tree-like texture, while the stalk is just a firmly stuffed tube of single crochet. Sewing the two together is the finishing touch, and the result looks surprisingly true to life. If you use a slightly variegated green for the floret, you’ll get some lovely depth in the coloring without any extra effort.
The rest of the collection is just as thoughtfully designed. There’s a chubby little pumpkin with embossed ridges, a glossy red tomato with its star-shaped green calyx, and a purple eggplant whose curved shape comes entirely from clever placement of increases and decreases. The corn cob pattern is especially clever — it uses yellow and cream yarn together to simulate rows of kernels, then wraps up with green husk leaves in extended single crochet. Grouped together in a basket or bowl, this whole collection makes for a display that’s genuinely hard not to smile at.
- Carrot: Begin at the narrow tip with a magic ring, increase gradually as you work upward, and finish with a chain stitch stem topped with loopy green fronds
- Broccoli: Work the stalk as a firm stuffed tube, create the floret head using bobble clusters in green, then sew the two components together securely
- Tomato: Build a sphere using standard amigurumi increases and decreases, stuff firmly, and attach a crocheted star-shaped calyx at the top in leafy green
- Pumpkin: Crochet an orange sphere, then use a length of brown or tan yarn pulled through the center to create the characteristic ridged sections
- Eggplant: Shape an elongated teardrop in deep purple, attaching a small green calyx and a short stem at the narrow end to complete the look
- Corn: Work the cob in alternating yellow stitches to simulate kernel rows, then attach flat green husk leaves around the base
Tips for Achieving Professional-Looking Results
A well-written pattern gets you most of the way there, but the little details in how you actually work really do make a difference between a finished vegetable that looks polished and one that looks a bit rough around the edges. Tension is probably the biggest factor, and it’s one of those things that just gets better naturally as you crochet more. Inconsistent tension creates an uneven, lumpy fabric that’s hard to ignore. If yours tends to wander, try working in a comfortable position and giving your hands a break when they start to fatigue — tired hands tend to grip tighter, which throws everything off.
How you stuff your vegetables matters more than you might expect. Too little polyfill and the piece looks flat and sad; too much and the fabric stretches out and loses its shape. You’re aiming for something that feels firm but still has a little give to it — a bit like a stress ball. Add stuffing gradually as you work rather than waiting until the opening is nearly closed, since it becomes really hard to distribute it evenly once there’s barely any room to work. Pull the fiberfill apart into small, loose wisps before you push it in, and you’ll avoid the lumpy pockets that come from inserting it in big clumps.
Color selection and those last little finishing details can genuinely take your vegetables from cute to impressive. A slightly shiny cotton works beautifully for tomatoes and peppers, giving them that characteristic gloss. For earthier vegetables like potatoes or turnips, a matte cotton or cotton-acrylic blend feels more appropriate. And when it comes to weaving in ends, take the extra time to bury the tails deep inside the stuffing rather than just anchoring them at the surface — your finished pieces will stay looking neat and tidy even after a lot of handling.
Creative Ways to Use and Display Your Crochet Vegetable Collection
Once you’ve got a few vegetables finished, you’ll probably start noticing just how many fun things you can do with them. Play food sets are one of the most popular uses — fill a little basket or wooden crate with crocheted tomatoes, carrots, broccoli, and peas, and you’ve got a gift that any young child would love. Since everything is made from yarn and fiberfill, the pieces are soft and safe, and when they inevitably end up in sticky little hands, you can just toss them in the wash.
For grown-ups and home decorators, crochet vegetables make genuinely charming kitchen accents. A wooden bowl of colorful crocheted produce sitting on a counter or dining table adds warmth and texture in a way that feels personal and handmade rather than generic. You could also string miniature vegetables on twine or ribbon to make a garland for your kitchen shelves or windows — it’s the kind of farmhouse-inspired touch that tends to do really well on social media, if that’s your thing. And it’s hard to walk past it without feeling a little cheerful.
Beyond home decor, crochet vegetables have found their way into photography props, craft fair displays, classroom teaching aids, and even theatrical productions that need lightweight prop food. Some crafters have arranged entire collections in shadow box frames as wall art. Gift-wise, the potential is huge — a housewarming basket, a gift for a new parent, a custom Etsy order for someone who wants something handmade and truly one of a kind. Once you start thinking about it, the possibilities are kind of hard to stop.
Accessing the Free SitnCrochet 2026 Patterns and Building Your Community
One of the best things about the SitnCrochet 2026 vegetable collection is that every single pattern is completely free. That’s not a trial or a teaser — it’s the whole thing, no charge. SitnCrochet has always believed that good patterns should be available to anyone who wants them, and you can find the full collection right on their website and blog. The format is clean and easy to read, with clear stitch counts and round-by-round instructions throughout. A lot of the patterns also link out to photo tutorials or video walkthroughs, which are a real lifesaver if you’re the kind of person who needs to see something done before it clicks.
Getting connected with the SitnCrochet community can make the whole experience a lot richer too. The social media groups around these patterns are genuinely warm and active — people share their finished objects, ask questions when they get stuck, and cheer each other on. Seeing how different makers interpret the same pattern, whether that means choosing unexpected colors, scaling things up, or adding googly eyes to a carrot, is one of the best parts. A lot of community members also share their own modifications and variations, which can spark ideas you never would have come up with on your own.
If you’re just discovering SitnCrochet, starting with the vegetable collection is a really solid introduction to how the designer thinks and works. The patterns are well-tested and clearly organized, and they give you a reliable foundation to build from. As you work through more of them and start feeling confident, you’ll naturally find yourself curious about other SitnCrochet projects — amigurumi animals, seasonal decorations, wearables, home goods. The vegetables are both a rewarding project on their own and a genuinely welcoming door into a much bigger creative world.








What do you think?
It is nice to know your opinion. Leave a comment.