







![How To Build a Shed Floor [Step-by-Step Guide]](https://i.pinimg.com/originals/93/fa/25/93fa2562b4f59fc3ed9bb6fcaa5882af.jpg "How To Build a Shed Floor [Step-by-Step Guide]")


How To Build a Shed Floor: A Complete Step-by-Step Guide
Why a Solid Shed Floor Matters
The floor of your shed is arguably the most critical structural component of the entire build. Without a properly constructed foundation and floor system, even the most beautifully framed walls and well-installed roof will eventually shift, warp, or rot. A solid shed floor provides the stable, level base that every other element of your structure depends on, and skipping corners here almost always leads to expensive repairs down the road.
Many first-time shed builders make the mistake of focusing all their planning energy on the walls and roof while treating the floor as an afterthought. In reality, the floor takes on the full weight of everything stored inside — lawn equipment, power tools, garden supplies, lumber, and more. Over time, an improperly built floor can sag under that load, causing doors to stick, walls to rack out of plumb, and the entire structure to lose its integrity.
Beyond structural support, a well-built shed floor also protects the interior from ground moisture, pests, and temperature fluctuations. By elevating the floor frame off the ground and using pressure-treated lumber where needed, you create a barrier that dramatically extends the life of your shed. This guide walks you through every step of the process so you can build a floor that will last for decades with minimal maintenance.
Planning Your Shed Floor: Size, Layout, and Materials
Before you cut a single board or drive a single screw, you need to spend meaningful time in the planning phase. Start by determining the exact dimensions of your shed. Common sizes include 8×10, 10×12, 12×16, and 16×20 feet, but your specific needs, available yard space, and local zoning regulations will all influence the final decision. Sketch your layout on graph paper or use a free online shed planning tool to get a clear picture of what you are working with.
Material selection is just as important as dimension planning. For the floor frame, you will almost certainly want to use pressure-treated lumber rated for ground contact, typically marked as PT or ACQ. This treatment protects the wood from rot and insect damage, which is especially important for the parts of the frame that sit close to or on the ground. For the decking itself — the surface you will actually walk on — three-quarter-inch tongue-and-groove plywood rated for exterior use is the most popular and practical choice among DIY builders.
You will also need to plan for your foundation type before building the floor. Options include concrete piers, precast concrete blocks, gravel pads, concrete slabs, and adjustable steel post anchors. Each has its own advantages, cost profile, and installation requirements. Most homeowners without a poured slab opt for concrete deck blocks or adjustable pier blocks, which are affordable, easy to install, and allow excellent airflow beneath the floor to prevent moisture accumulation. Make sure to check local building codes, as some municipalities require permits for structures above a certain size.
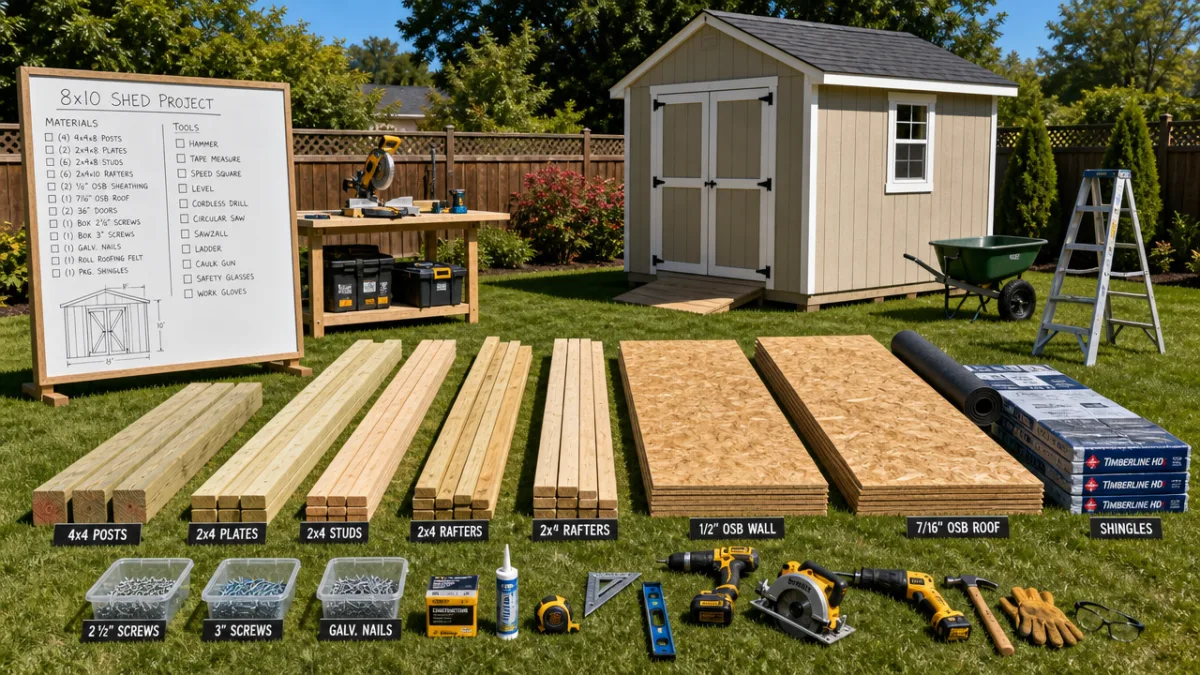
Create a complete materials list before heading to the lumber yard. Typical materials for a 12×16 shed floor include treated 4×6 skids or beams, treated 2×6 or 2×8 floor joists, three-quarter-inch exterior-grade plywood sheets, joist hanger hardware, structural screws or nails, and concrete foundation blocks. Having everything on-site before you begin prevents frustrating mid-project runs to the hardware store and keeps your build moving efficiently.
Preparing the Site and Setting the Foundation
Proper site preparation is the unsung hero of a successful shed build. Begin by selecting the most level area of your yard that also offers good drainage. Avoid low spots where water tends to collect after rain, and stay clear of areas shaded by large trees where roots can interfere with your foundation and falling leaves can trap moisture against the structure. Once you have chosen your spot, mark the perimeter using stakes and string lines, then use a line level or laser level to check how flat the ground actually is.
Clear the area completely of all grass, sod, and organic material within the footprint of your shed. Organic matter holds moisture and continues to decompose under your structure, causing settling and pest issues over time. After stripping the sod, consider laying landscape fabric across the entire footprint and then covering it with several inches of compacted gravel. This gravel base provides drainage, prevents weed growth, and creates a stable surface on which to set your foundation blocks.
Place your concrete deck blocks or pier blocks at regular intervals across the gravel base. For a 12×16 shed, you will typically need blocks along the perimeter and along the center to support mid-span beams. Each block must be set at precisely the same height relative to a level reference plane — this is where patience pays off. Use a long, straight board and a spirit level, or set up a laser level to check each block. Adjust gravel beneath individual blocks until everything is perfectly level. Even small height discrepancies will cause your floor frame to twist and your walls to go out of plumb.
Building the Floor Frame: Beams, Joists, and Headers
With your foundation in place, you are ready to begin framing the floor. Start by cutting your main beams or skids to length. For most shed floors, these are made from pressure-treated 4×6 lumber that runs the full length of the shed and rests directly on the concrete blocks. These beams carry the weight of the joists and everything above them, so accurate cuts and solid bearing surfaces are essential. Set the beams in place on the foundation blocks and verify they are level and parallel before proceeding.
Next, cut your rim joists — the outer frame members that run perpendicular to and cap the ends of the field joists. These are typically made from the same dimension lumber as the interior joists, often treated 2×6 or 2×8 depending on your shed’s size and intended load. Fasten the rim joists to the ends of the beams using structural screws or nails, forming a rectangular outer frame. Check both diagonals of this rectangle to confirm it is perfectly square — equal diagonal measurements mean a square frame. Adjust as needed before proceeding.
Install the interior floor joists between the rim joists at regular on-center spacing, which is typically 12 or 16 inches depending on your plywood thickness and expected floor loads. Use metal joist hangers to secure each joist to the rim joists for maximum strength and to ensure the top faces of all joists remain flush. Joist hangers are far superior to toenailing alone and add meaningful resistance to the kinds of lateral forces that can loosen connections over time. Drive the full complement of specified nails or screws into every hole on every hanger — this is not the place to cut corners.
Once all joists are installed, step back and sight down the frame from each end. Every joist should be plumb, evenly spaced, and aligned at the top face. If any joists are crowned — meaning they bow upward — orient them crown-side up so the weight of the floor loading will push them into a flatter position over time rather than sagging. This small detail, known to every experienced carpenter, helps keep your floor level and squeak-free for years to come.
- Use pressure-treated lumber rated for ground contact on all beams and rim joists
- Space interior joists at 12 or 16 inches on center for proper plywood support
- Install metal joist hangers at every interior joist location
- Check diagonal measurements to confirm a square frame before adding decking
- Orient any crowned joists with the crown facing upward

Installing the Plywood Decking
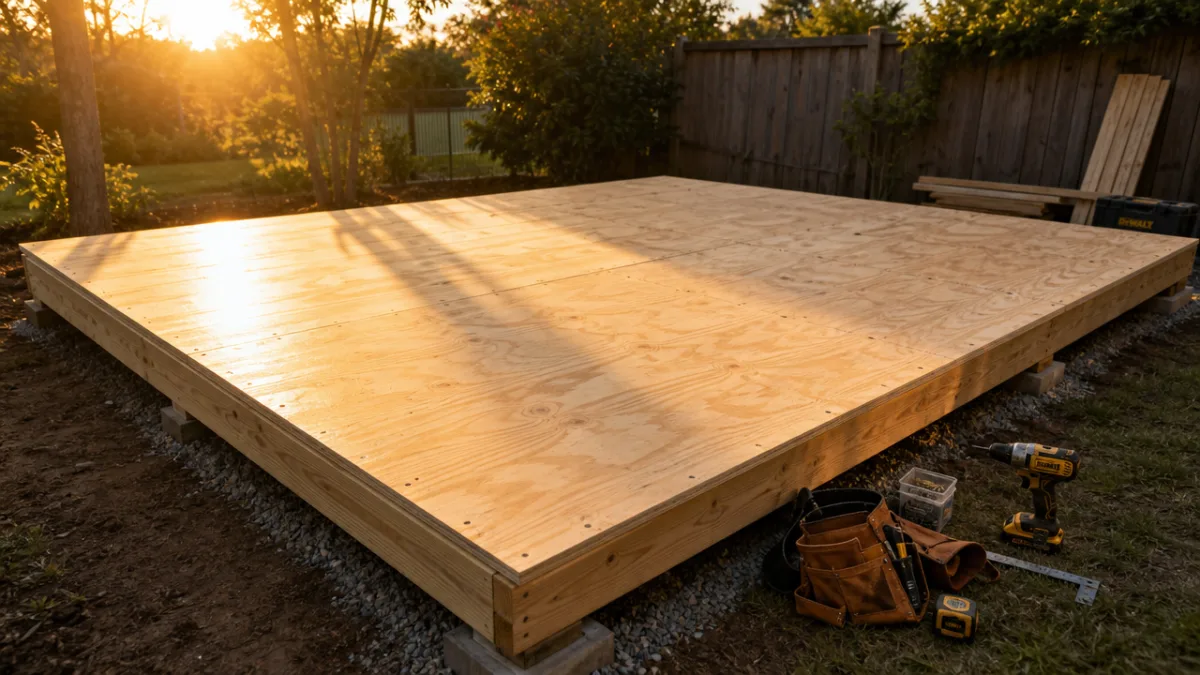
With a square, level floor frame in place, you are ready to install the plywood decking — the surface that ties everything together and creates the actual floor you will stand on. Start by measuring and cutting your first sheet of three-quarter-inch tongue-and-groove exterior plywood. Begin at one corner of the frame, making sure the factory edge of the panel aligns with the outside face of your rim joist and that the end of the panel lands on the center of a joist below. This is crucial for proper support at panel seams.
Fasten each plywood sheet using ring-shank nails or structural screws driven into every joist below at intervals of about six inches along the edges and eight inches in the field. Ring-shank nails grip far better than smooth nails and resist the pull-through that can occur with heavy floor loads. As you fasten, work from one side of the sheet to the other to prevent the panel from buckling or developing a hump in the middle. Apply a thin bead of construction adhesive to the top face of each joist before laying the panel for even greater rigidity and to eliminate squeaks.
Stagger the end joints of successive plywood rows so they do not all line up on the same joist. This staggered pattern, often called a running bond, distributes loads more evenly and adds significant structural strength to the assembly. When using tongue-and-groove plywood, fit the groove edge of each new panel onto the tongue of the adjacent panel and tap it snug using a scrap block and hammer. This interlocking connection prevents the panels from developing a height difference at their edges, which would create an annoying bump underfoot.
Leave a small gap — about one-eighth of an inch — at all panel end joints to allow for seasonal wood movement. In humid conditions, plywood expands, and panels without expansion room can buckle. The tongue-and-groove connection at long edges controls vertical movement there, but at the butt joints at the ends of panels, that small gap is your insurance policy against a wavy floor surface during wet seasons. Once all panels are down, walk the entire surface and drive any fasteners that are sitting above the surface flush so they do not create trip hazards or interfere with wall plates.
Moisture Protection and Final Inspections
Even with pressure-treated framing and exterior-grade plywood, taking additional steps to protect your shed floor from moisture will pay dividends for decades. One of the most effective measures is to apply a coat of waterproofing sealer or exterior wood preservative to the underside of the plywood decking before the walls go up. At this stage, the underside is still accessible, so take the time to roll or brush on a generous coat that penetrates the wood fibers and forms a moisture-resistant barrier against the humid air that naturally collects beneath the floor frame.
Consider stapling or tacking a layer of six-mil polyethylene sheeting across the bottom of the floor frame before installation — or even after the frame is built — as a vapor barrier. This plastic sheeting catches moisture rising from the ground and prevents it from coming into direct contact with the wood above. While the gravel base and elevated frame already reduce ground moisture significantly, the vapor barrier adds an extra layer of protection that is especially valuable in humid climates or areas with high water tables. Overlap seams by at least 12 inches and tape them with housewrap tape for a continuous barrier.
Before declaring the floor complete and moving on to wall framing, conduct a thorough final inspection. Walk every square foot of the floor, looking and listening for soft spots, squeaks, or areas that feel springy underfoot. Check all joist hanger connections to confirm every nail hole is filled. Verify that the perimeter of the floor is still square by re-measuring the diagonals — they should still be equal after all the fastening work. Use a four-foot or longer level to check for any high or low spots across the surface. Address any issues now, before walls and roof make these repairs exponentially more difficult.
Take photographs of the completed floor frame from multiple angles before covering it with plywood, and again once the decking is installed. These photos serve as a valuable reference if you ever need to run electrical conduit, add anchors, or make repairs in the future. They also serve as documentation for insurance purposes and, in some jurisdictions, as part of a permit closeout inspection. A little extra diligence at this stage reflects good craftsmanship and sets the tone for the rest of the build.
- Apply waterproofing sealer to the underside of the plywood before walls go up
- Install a six-mil polyethylene vapor barrier beneath the floor frame
- Walk the entire surface to identify squeaks, soft spots, or protruding fasteners
- Re-check diagonal measurements to confirm the floor remains square
- Use a long level to identify and correct any high or low spots
- Photograph the completed frame and decking for future reference
Common Mistakes to Avoid When Building a Shed Floor
Even experienced DIYers can run into trouble with shed floor construction when they rush through critical steps or rely on outdated techniques. One of the most common and costly mistakes is failing to account for drainage around the shed. Water that pools against or beneath the structure will eventually overwhelm even the best-treated lumber and vapor barriers. Always grade the surrounding soil so that it slopes away from the shed on all sides, ideally at a minimum slope of one inch per foot for the first six feet. Adding a perimeter gravel apron further redirects surface water and keeps mud from splashing against the base of your walls.
Another frequent error is using the wrong type of fasteners. Standard bright nails and drywall screws are not appropriate for pressure-treated lumber, which contains chemicals that accelerate corrosion in uncoated metals. Always use hot-dipped galvanized or stainless steel nails, screws, joist hangers, and hardware throughout the floor frame. Using improper fasteners can cause connections to fail within just a few years, long before the wood itself shows any sign of deterioration. The small price premium for the correct hardware is trivially small compared to the cost of rebuilding a failed connection.
Under-sizing floor joists for the intended load is another mistake that is easy to avoid with a little research. A shed used to store lightweight garden tools needs far less floor strength than one housing a vehicle, heavy machinery, or a wood shop with cast-iron table saws and workbenches. Span tables published by lumber manufacturers tell you exactly what joist size and spacing you need for a given span and load. Taking five minutes to consult these tables before purchasing lumber can be the difference between a floor that feels rock-solid for 30 years and one that begins to bounce and sag within a few seasons of use.
Finally, many builders neglect to account for the weight of the floor system itself when planning their foundation block placement. Adding too few foundation blocks, or placing them in a pattern that leaves long unsupported spans on the main beams, invites sagging over time. As a general rule, no beam should span more than six to eight feet without an intermediate support point. For heavier loads or larger sheds, reduce that span further. It costs very little to add an extra concrete block or two to the layout, and that simple step can add years or even decades to the life of your shed floor.








What do you think?
It is nice to know your opinion. Leave a comment.