










DIY Solar Mushroom: A Complete Guide to Crafting Magical Glowing Garden Decor
Introduction to Solar Mushroom Garden Art
Garden decor has evolved far beyond simple gnomes and wind chimes. DIY solar mushrooms represent a delightful intersection of sustainable technology, whimsical artistry, and practical outdoor lighting. These enchanting creations harness the power of the sun during daylight hours and reward gardeners with a soft, magical glow once darkness falls. Whether you are an experienced crafter or a curious beginner, building your own solar mushroom is an achievable and deeply satisfying weekend project that transforms any outdoor space into a fairy-tale scene.
The appeal of solar mushroom decor lies not only in its aesthetic charm but also in its environmental friendliness. Unlike traditional garden lighting that draws power from the electrical grid, solar mushrooms operate entirely on renewable energy. A small photovoltaic cell embedded in the cap absorbs sunlight throughout the day, charging an internal battery that powers an LED light at night. This means zero electricity costs, zero wiring headaches, and a guilt-free way to illuminate garden paths, flower beds, and hidden nooks throughout the warmer months.
Beyond the practical benefits, there is something deeply personal about crafting garden art with your own hands. Every brushstroke, every choice of color, and every carefully placed dot of paint makes your solar mushroom uniquely yours. Families often tackle this project together, with children painting cheerful spots while adults handle the solar component assembly. Community gardens and school projects have also embraced solar mushroom crafting as a wonderful way to combine STEM concepts with creative expression, making the project educational as well as beautiful.
Materials and Tools You Will Need
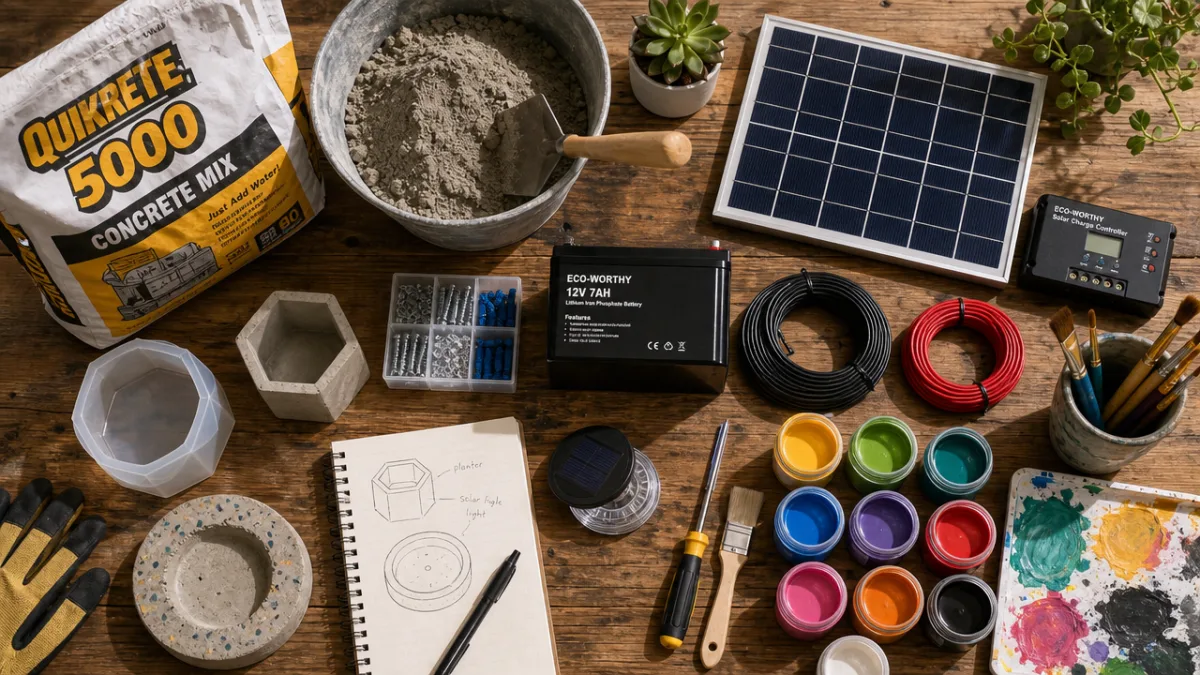
Gathering the right materials before you begin is essential to a smooth crafting experience. The foundation of most DIY solar mushrooms is a concrete, resin, or hypertufa mixture poured into a mold, though some crafters prefer repurposing terracotta pots, upcycled plastic containers, or even carved foam. Each material has its own strengths: concrete is durable and weather-resistant, resin allows for translucency that glows beautifully at night, and hypertufa offers a natural, porous texture that looks authentically organic in a garden setting. Choosing your base material will shape every subsequent decision in the project.
The solar component is the technical heart of the project. You can purchase inexpensive solar stake lights from garden centers or online retailers and disassemble them to extract the solar panel, battery, LED bulb, and light sensor circuit board. Alternatively, dedicated solar fairy light kits designed for crafting projects are available and often come with waterproof housings that simplify integration. Whichever route you choose, confirm that the solar panel is appropriately sized for the battery capacity, and that the LED produces the color and intensity of glow you envision for your finished mushroom.
Decorative supplies round out your shopping list and are where creative freedom truly shines. You will want exterior-grade acrylic paints in colors ranging from classic red and white to fantastical purples, blues, and golds. Sealing products such as polyurethane or outdoor Mod Podge protect your paintwork from rain and UV fading. Additional embellishments might include glass beads, mosaic tiles, glitter sealant, or glow-in-the-dark paint for extra nighttime luminosity. Having a dedicated workspace covered with a drop cloth, along with protective gloves and safety glasses for the mixing phase, will keep the process tidy and safe.
- Concrete mix, resin casting kit, or hypertufa ingredients (peat moss, perlite, Portland cement)
- Mushroom-shaped molds or materials to construct your own molds
- Solar stake light or solar crafting kit with LED, panel, battery, and sensor
- Exterior acrylic paints and fine-tipped brushes
- Waterproof sealant such as outdoor Mod Podge or polyurethane spray
- Wire mesh or fiber reinforcement for larger concrete mushrooms
- Mixing buckets, trowels, gloves, and safety eyewear
- Optional: mosaic tiles, glass gems, glow-in-the-dark paint, glitter sealant
Building the Mushroom Structure
The construction phase begins with preparing your molds. For a classic toadstool shape, many crafters use a large plastic bowl for the cap and a plastic cup or cardboard tube for the stem. Coat the interior surfaces of your molds with petroleum jelly or cooking spray to ensure easy demolding once the material has cured. If you are working with concrete or hypertufa, mix your materials according to package instructions until you achieve a consistency similar to thick oatmeal. Work quickly, as concrete begins to set within thirty to forty-five minutes depending on temperature and humidity.
Pour or press your mixture into the cap mold first, filling it to a depth of approximately one to two inches. This hollow approach reduces overall weight and leaves room to embed the solar housing in the center. While the mixture is still workable, press a small waterproof container or section of PVC pipe into the center of the cap mixture to create the channel through which your solar wiring will pass. This embedded channel is a critical detail that makes the eventual solar installation clean and professional-looking rather than an afterthought.
Once the cap has firmed up enough to hold its shape, you can work on the stem. For a solid stem, fill your cylindrical mold completely and allow it to cure. For a hollow stem that allows wires to run internally from ground to cap, create a wrapped tube by pressing your mixture around a smaller central tube or a tightly rolled piece of plastic sheeting. After both components have fully cured, typically twenty-four to seventy-two hours depending on the material, you can demold them and assess the result. Minor imperfections such as air bubbles or rough patches can be filled with additional mixture or exterior patching compound and sanded smooth once dry.
Joining the cap and stem requires a strong, weather-resistant adhesive or, for heavier concrete pieces, a small threaded rod embedded in both components during casting. Apply a generous bead of construction adhesive to the top of the stem, align the cap carefully, and allow the joint to cure undisturbed for at least twenty-four hours. Prop the assembly with foam blocks or rolled towels to keep it perfectly level while the adhesive sets. A well-bonded joint is crucial to the long-term durability of your mushroom, particularly if it will be installed in a garden environment where it may be bumped, subjected to frost heave, or buffeted by wind.
Integrating the Solar Light System
Installing the solar components is the most technical aspect of the project, but it is far more approachable than it might initially seem. Begin by testing your solar kit outdoors for a full day to confirm everything is functioning correctly before embedding it in your mushroom. Note how the light sensor triggers the LED as you shade the panel with your hand; this behavior confirms the circuit is intact. If you purchased a complete solar stake light for disassembly, carefully open the housing with a small screwdriver and identify each component before proceeding with integration.
Thread the wiring from the solar panel through the channel you created in the cap during casting. The panel itself should sit flush in the top or upper surface of the cap where it will receive maximum sunlight exposure. Secure it with waterproof epoxy or silicone sealant, ensuring no gaps exist through which water could penetrate and damage the circuitry. The battery and light sensor board can be housed in the hollow section beneath the cap or within the upper stem, protected inside a small weatherproof enclosure such as a repurposed pill bottle or a purpose-built waterproof electronic case sealed with silicone.
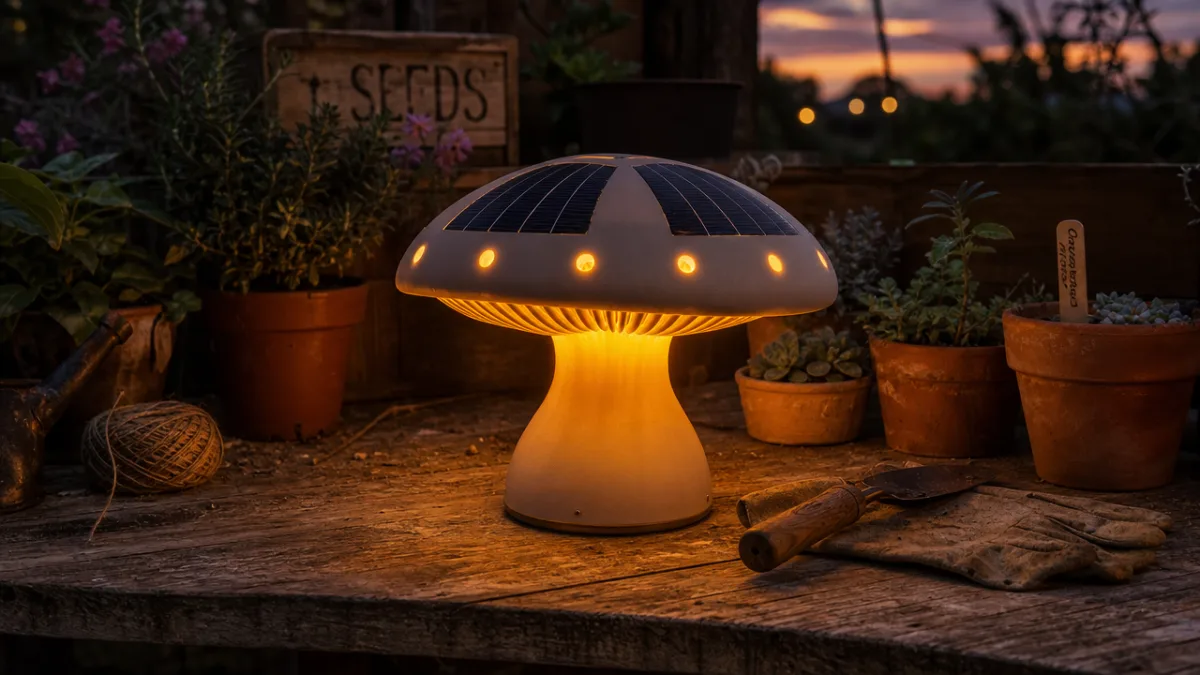
The LED light itself should be positioned at the base of the cap interior or within the stem so that its light radiates upward through translucent or thin sections of your mushroom structure, or downward through a translucent stem toward the ground. For resin mushrooms, the material’s natural translucency distributes the glow beautifully throughout the entire form. For concrete or hypertufa mushrooms, you may wish to drill a small opening at the cap edge or underside where the LED can peek out to cast its glow across the garden floor. Whichever arrangement you choose, seal all penetrations thoroughly with silicone to maintain waterproofing.
- Test the solar kit outdoors for a full day before installation to verify all components work.
- Thread wiring through the pre-cast channel in the cap before the adhesive fully cures.
- Mount the solar panel flush with the cap surface using waterproof epoxy.
- House the battery and circuit board in a sealed waterproof enclosure within the body.
- Position the LED for maximum visual impact, either glowing upward or casting downward light.
- Seal every wire penetration and junction with exterior-grade silicone sealant.
- Conduct a final dark-room test before painting to confirm the system activates correctly.
Painting and Decorating Your Solar Mushroom
With the structural and electrical work complete, you arrive at the most expressive phase of the entire project: decorating your mushroom. Begin with a base coat of exterior acrylic paint in whatever color you have chosen for the cap. The classic Amanita muscaria look calls for a vivid red cap with white polka dots, but the creative possibilities are essentially limitless. A midnight blue cap dusted with silver suggests a moonlit fantasy, while a soft sage green with gold spots feels earthy and sophisticated. Apply two to three base coats, allowing each to dry fully, to achieve solid, even coverage over the absorbent surface of concrete or hypertufa.
Details are what elevate a simple painted object into a piece of garden art that draws the eye and invites closer inspection. Use fine brushes to add depth and dimension with shading and highlighting techniques borrowed from decorative painting traditions. Darken the underside of the cap with a deeper hue of your base color to suggest shadow, and highlight the topmost curve with a lighter, almost creamy tone to simulate sunlight catching the form. The gill lines on the underside of the cap can be rendered with a fan brush loaded with a contrasting earthy tone, adding authentic botanical detail that surprises and delights viewers who peer beneath the mushroom.
Spotted decoration, the signature element of storybook mushroom imagery, can be executed in several ways depending on your desired level of perfection. The fastest method is to dip the flat end of a pencil eraser or a round makeup sponge into white paint and press it directly onto the surface, creating consistent, round dots. For more variation in spot size, use different diameter dowels or the ends of various brushes. Mosaic artists sometimes glue white ceramic tiles or glass gems onto the cap surface instead of painting spots, creating a three-dimensional texture that catches both sunlight and the LED glow at night in spectacularly beautiful ways.
Once your decorative painting is complete and fully dry, apply two to three coats of a high-quality exterior sealer to protect all your work from the elements. Spray sealants are quick and even, while brush-on sealants allow you to work the product into textured surfaces more thoroughly. Pay special attention to the joint between cap and stem, the area around the solar panel, and any surface that will face prevailing wind and rain. A well-sealed mushroom can remain vibrant and structurally sound through multiple seasons, rewarding your initial investment of time and creativity with years of glowing garden beauty.
Placement, Care, and Seasonal Maintenance
Selecting the right location for your finished solar mushroom is as important as any step in the construction process. The solar panel requires a minimum of six hours of direct or bright indirect sunlight each day to fully charge the battery and ensure a full night of glowing. South-facing garden spots in the northern hemisphere are ideal, but be mindful of shade cast by trees, fences, or structures at different times of day. Placing your mushroom at the base of a taller plant might look charming from a design perspective but can significantly reduce charging efficiency and result in a disappointingly dim or short-lived nightly display.
Installation options vary depending on the size and weight of your mushroom and the nature of your garden. Smaller, lighter mushrooms can be mounted on a wooden stake driven into the soil, with a corresponding socket built into the base of the stem during casting. Heavier concrete mushrooms benefit from a more permanent installation involving a poured concrete footing or a bed of compacted gravel that prevents tipping. In regions with harsh winters, some gardeners prefer to make their mushrooms portable, allowing them to be moved to a sheltered location during the coldest months to protect both the decorative finish and the battery from freezing temperatures, which significantly degrade lithium and NiMH battery performance.
Routine care keeps your solar mushroom looking its best season after season. Clean the solar panel surface monthly with a damp cloth to remove dust, pollen, bird droppings, and other debris that reduce charging efficiency. Inspect the sealant around the panel and all wire penetrations annually, and reapply silicone wherever you notice cracking or separation. The rechargeable battery within the solar kit has a finite lifespan, typically two to three years of regular cycling, and will eventually need replacement. Most solar housings allow for straightforward battery swaps, and sourcing the correct replacement type is usually as simple as noting the original battery’s specifications printed on its label.
Refreshing the decorative finish every one to two years keeps your mushroom vibrant even as sun, rain, and temperature fluctuations gradually dull exterior paintwork. Light sanding followed by a fresh coat of base color and touch-ups to detailed areas, finished with a new application of sealant, can make an aging mushroom look freshly crafted. Some gardeners embrace this maintenance as an opportunity to redesign entirely, painting over a tired red-spotted classic with a more adventurous color scheme that better suits a garden’s evolving planting palette. This adaptability is one of the enduring joys of DIY garden art: it grows and changes alongside the gardener who made it.
Inspiration, Variations, and Community Ideas
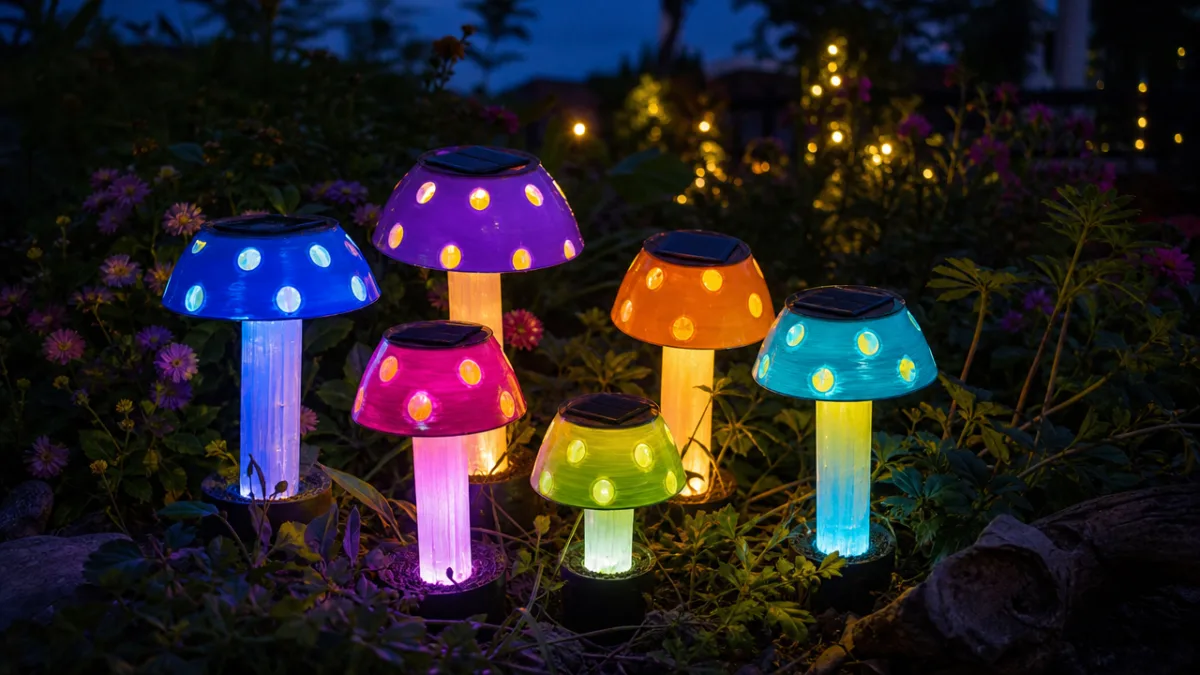
The basic DIY solar mushroom concept serves as a springboard for an enormous range of creative variations. Scale is an obvious dimension to explore: a collection of mushrooms ranging from tiny two-inch specimens tucked among ground cover plants to a dramatic eighteen-inch centerpiece creates a landscape of varied heights and visual interest that mimics the natural way fungi colonize a forest floor. Grouping odd numbers of mushrooms together, a principle borrowed from Japanese garden design, tends to produce arrangements that feel more naturally pleasing than symmetrical pairings.
Material experimentation opens entirely new aesthetic territories. Fiber-reinforced resin mushrooms can be cast in remarkably thin walls, allowing the entire cap and stem to glow with diffused light rather than merely emitting a pinpoint beam. Hypertufa mushrooms develop beautiful weathered patinas over time as mosses and lichens colonize their porous surfaces, eventually making them look like features of an ancient, untouched woodland. Some artists embed colored glass pieces into their concrete caps before curing, creating stained-glass effects that are spectacular when backlit by the LED. Others wire multiple mushrooms together in a single solar circuit, creating an interconnected fairy ring that glows uniformly.
The DIY solar mushroom community online is remarkably generous with shared knowledge, pattern templates, and troubleshooting advice. Pinterest boards, YouTube channels, and craft forums are filled with makers who have solved common problems and developed clever refinements that can save hours of frustration for newcomers. Participating in this community by sharing photographs of your own finished mushrooms and answering questions from beginners creates a rewarding cycle of inspiration and mutual support. Craft fairs and farmers markets have also proven to be excellent venues for selling solar mushrooms, with many makers reporting that their charming creations attract considerable attention and generate meaningful supplementary income.
For educators and parents, the solar mushroom project offers a remarkably rich teaching opportunity that spans multiple subjects and skill levels. Children as young as five can participate in painting and decorating, while older students can take ownership of the solar component installation and learn foundational concepts in photovoltaic energy conversion, circuit design, and battery chemistry through hands-on experience. The finished object serves as a lasting, functional reminder of what they built and how it works, a far more powerful learning anchor than any worksheet or textbook diagram. Schools that have introduced solar mushroom projects into their curricula consistently report elevated student engagement and a stronger sense of connection to environmental sustainability themes.
Ultimately, the DIY solar mushroom is far more than a garden ornament. It is a small but meaningful act of creativity and sustainability, a statement that beauty and environmental responsibility can coexist joyfully. Every evening as darkness gathers and your handmade mushroom begins its gentle glow, powered by nothing more than the sun that set hours before, there is a quiet satisfaction in knowing that you made this thing with your own hands, that it harms nothing, and that it brings a touch of enchantment to every passerby who notices it glimmering softly among the leaves and flowers of your garden. That combination of craft, science, and wonder is what makes the solar mushroom such an enduringly popular and beloved DIY project for makers of all ages and experience levels.








What do you think?
It is nice to know your opinion. Leave a comment.