










Back To School Gnome Craft For Preschool And Kindergarten
Why Gnome Crafts Are Perfect For Back To School Season
The start of a new school year is such a mixed bag of feelings for little ones. Preschool and kindergarten kids are walking into classrooms that can feel really big and unfamiliar, and honestly, a little scary. That’s where a fun, imaginative activity like making a back to school gnome can work wonders. Gnomes have this magical, friendly quality that kids just connect with, and having something whimsical to make right away sends a clear message: this is a place where creativity and fun are welcome.
Craft activities really do pull double duty in early childhood settings. They give kids a hands-on way to express themselves and stretch their imaginations, but they’re also quietly building real skills — things like fine motor coordination, color recognition, counting, and learning to follow multi-step directions. A gnome craft hits all of those notes at once, and because the end result is so charming, kids feel genuinely proud of what they’ve made.
Back to school gnome crafts have quietly become a beloved tradition in early childhood classrooms all over the country. A lot of teachers pull this one out during the first week as a low-key icebreaker — kids get to sit together, make something cute, and start feeling comfortable with their new surroundings without any pressure. And that little gnome they take home? It becomes a sweet reminder that school is actually a pretty great place to be.
Materials You Will Need For This Adorable Craft
When you’re crafting with young kids, getting organized ahead of time makes all the difference. Little hands get antsy fast, so having everything ready to go keeps the energy positive and the whole thing running smoothly — for the kids and for you. The good news is that everything you need for this gnome craft is easy to find and genuinely budget-friendly, whether you’re a classroom teacher, a homeschool parent, or running a daycare.
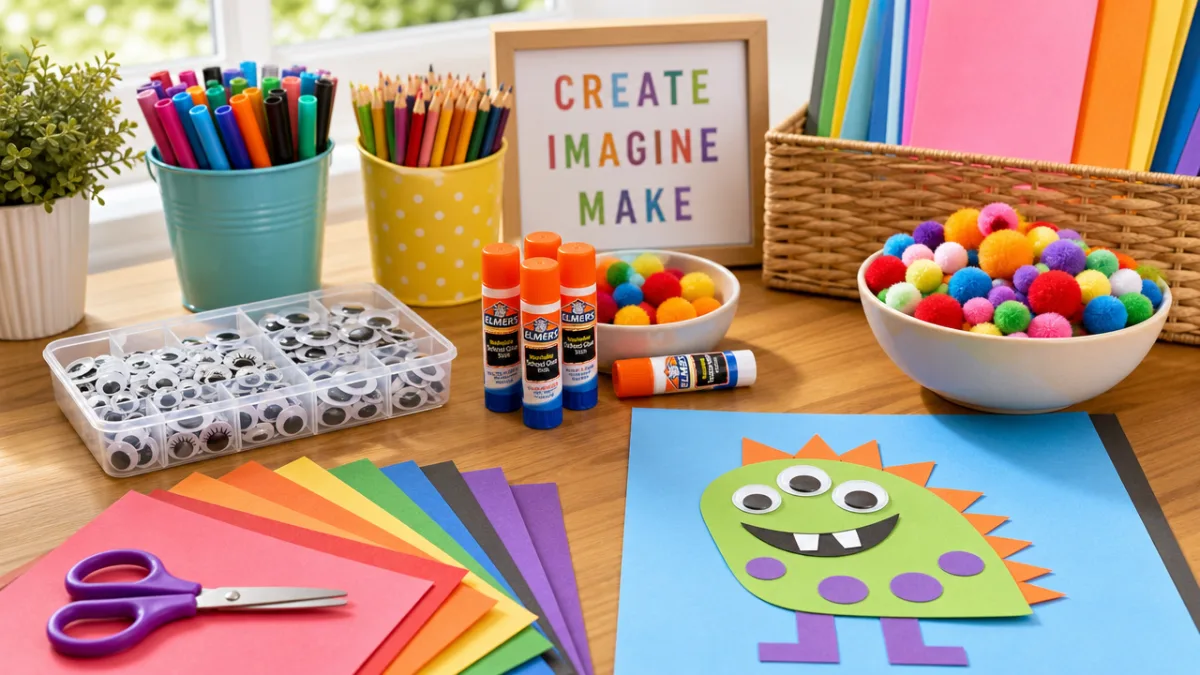
The core supplies are super simple. You’ll need construction paper in a range of colors — skin-toned shades like tan, peach, or brown for the face, and whatever bright, fun colors your kids gravitate toward for the hat and body. Googly eyes are non-negotiable (they add so much personality), and pom-poms make the most perfect little gnome nose you can imagine. For the beard — which is honestly one of the most satisfying parts — cotton balls or white felt give you that fluffy, touchable texture kids love.
Here’s a full list of what you’ll want to have ready for each child:
- Construction paper in multiple colors including tan, peach, brown, red, green, blue, and yellow
- Googly eyes in small and medium sizes
- Pom-poms in white, cream, or colorful shades for the nose
- Cotton balls or white felt for the beard
- Child-safe scissors with rounded tips
- Glue sticks or washable white craft glue
- Markers and crayons for adding details and personalizing the gnome
- Optional embellishments such as small buttons, ribbon scraps, or foam stickers shaped like pencils or apples
- A printed template if you prefer uniform shapes for younger children
- Cardstock for backing if you want a sturdier finished product
For your youngest preschoolers, it really helps to pre-cut the shapes ahead of time so kids can put all their energy into the decorating and creative choices. For older kindergarteners, though, letting them cut their own shapes with a little supervision is actually a great opportunity to practice scissor skills — something that’s genuinely important at that stage of development. Read the room and adjust accordingly.
Step-By-Step Instructions For Making Your School Gnome
Making this gnome is refreshingly forgiving, which is exactly what you want when you’re working with a mixed group of little ones. Younger preschoolers might need more help along the way, while some kindergarteners will practically run with it on their own. And here’s the thing — there’s really no wrong way to make a gnome. Each one comes out with its own quirky personality, and when you line them all up together in the classroom, the result is absolutely adorable.
Start by cutting out the basic shapes. The main piece is a tall triangle that serves as both the body and the hat all in one — that classic gnome silhouette. Let kids pick whatever color they want for this part, because that little moment of choice goes a long way toward making them feel invested in their creation. Then cut a small circle from a skin-toned paper for the face — think roughly the size of a large coin, just big enough to hold the eyes and nose comfortably.
Follow these steps to put your gnome together from start to finish:
- Cut your large triangle from colored construction paper and lay it flat on your workspace as the base of the gnome.
- Cut a small circle from tan or peach paper and glue it approximately one-third of the way down from the top of the triangle, centering it horizontally.
- Glue two googly eyes onto the face circle, placing them in the upper half of the circle.
- Choose a pom-pom for the nose and glue it just below the eyes, right in the center of the face circle.
- Fluff several cotton balls or cut a piece of white felt into a curved beard shape and glue it below the face, allowing it to spread across the lower portion of the gnome body.
- Add a small contrasting triangle or folded cuff shape at the tip of the hat using a different color of paper to create a classic gnome hat look.
- Use markers or crayons to add any additional details like rosy cheeks, a tiny smile peeking out above the beard, or decorative patterns on the gnome’s hat or body.
- For the back to school theme, cut out small paper shapes like pencils, apples, rulers, or backpacks and glue them onto the gnome’s body or beside the figure for a festive touch.
- Allow all glue to dry completely before handling or displaying the finished gnome.
Most kids will finish in around twenty to thirty minutes, though some will zoom through while others want to linger and fuss over every little detail — and both of those things are totally fine. Give yourself a little extra buffer in the schedule so nobody feels rushed. Put on some upbeat music, let kids chat with each other while they work, and lean into the social, cozy vibe that makes craft time so special.
Educational Benefits And Developmental Skills This Craft Builds
Here’s what’s easy to forget when you’re looking at a cute little gnome: so much learning is happening in the making of it. A well-designed craft like this one touches multiple developmental domains at once, which is exactly what early childhood educators are always working toward. We’re talking fine motor skills, language development, creative thinking, social-emotional growth, and even early math concepts — all woven into one activity that kids just think of as fun.
Fine motor development is probably the most obvious benefit here. Every time a child squeezes a glue bottle, snips with scissors, peels a sticker, or carefully places a tiny googly eye, they’re working the small muscles in their hands that are absolutely essential for writing readiness. Research on early childhood development makes it pretty clear: kids who get regular practice with fine motor activities show up to writing tasks more confident and more capable. This gnome, with all its fiddly little pieces, is genuinely good exercise for those developing hands — and it doesn’t feel like practice at all.
But the benefits go well beyond the physical. Following multi-step instructions asks a lot of a young brain — kids have to hold information in working memory, sequence what comes next, and check in with themselves along the way. Those are executive function skills, and they matter across every subject a child will ever encounter in school. Language development gets a workout too, as kids describe their color choices, wonder aloud about gnomes and where they come from in stories and folklore, and narrate what they’re doing to anyone who will listen.
The social-emotional piece might actually be the most important part of all, especially right at the start of school. For a child who’s feeling nervous or shy, sitting next to someone and making something together is a gentle, natural way to start warming up. And when that gnome is finished and displayed on the classroom wall or brought home to show a parent, the pride kids feel is real. They made something. People can see it. That sense of visibility and competence is exactly the kind of feeling you want kids to associate with school from day one.
Creative Variations And Customization Ideas
One of the best things about this craft is how easy it is to remix. The basic gnome is already charming, but the format is so flexible that you can take it in a hundred different directions depending on your theme, your season, or what your kids are into. Teachers who work with the same group all year often turn the gnome into a recurring tradition — a familiar, comforting format that shows up in new ways throughout the year, and kids absolutely look forward to it.
For a more personal touch, encourage kids to make their gnome a little self-portrait — pick a hat color they love, draw tiny features that reflect something true about them. You can also invite kids to name their gnome and come up with a backstory, which is a sneaky great way to build early literacy skills. Some teachers take this even further by having kids dictate a sentence or two about their gnome, writing it down and attaching it to the back. Suddenly you’ve got a craft and a tiny collaborative story all in one.
Here are some fun variations to carry the gnome tradition through the whole school year:
- Fall gnome with orange and yellow hat and a tiny paper leaf in hand
- Holiday gnome wearing a red hat with a white pom-pom trim and a festive belt
- Valentine’s Day gnome holding a heart-shaped sign with a kind message written on it
- St. Patrick’s Day gnome in green with a clover decoration
- Spring gnome with a flower-decorated hat and pastel colors throughout
- 100th Day of School gnome with tiny numbered dots across the hat or body
- Community Helper gnome dressed as a firefighter, doctor, or teacher with tiny paper accessories
For the back to school version specifically, lean into those classroom details that make the theme feel special. Cut tiny backpack shapes from craft foam, draw little pencils on the gnome’s hat, or glue a small red apple near the gnome’s feet. These little touches reinforce school vocabulary in a way that feels playful and natural rather than like a lesson. You could also pair the craft with a read-aloud about starting school or a gnome-themed picture book to create a really rich, layered experience around the whole activity.
Tips For A Smooth And Successful Classroom Craft Experience
Running a craft project with a room full of preschoolers or kindergarteners can feel a little chaotic — but it really doesn’t have to. A bit of thoughtful prep beforehand, some clear and simple expectations, and a willingness to embrace the wonderful messiness of real creative work with young children goes a long way. This can genuinely be one of the highlights of your school day when you set it up well.
One of the most effective things you can do is set up individual trays or small baskets for each child before anyone sits down. When kids have their own set of materials, there’s a lot less bickering over supplies, and there’s something genuinely exciting about discovering what’s in your tray. If you write each child’s name on their tray, you’ve also just created a natural early literacy moment — little ones love spotting their own name, and it makes the whole setup feel like it belongs to them.
Taking a few minutes to walk through each step slowly before anyone picks up their scissors is really worth it. Young children need to both see the finished model and watch someone move through the process in real time. If you’re working with a larger group, an easel or document camera helps make sure everyone can actually see what you’re doing. Invite kids to name the steps as you go — it builds vocabulary and comprehension without feeling like a lesson. And keep your demo gnome visible throughout craft time so kids have something to reference if they get stuck.
Finally, don’t shortchange the closing ritual. Kids need time to transition out of creative work, and rushing it tends to end things on a sour note. Try a quick gallery walk so children can admire each other’s gnomes before the glue is even fully dry, or take a group photo of everyone holding their finished creation. These little moments of celebration help kids feel that their effort genuinely mattered — and that feeling is what makes them excited to show up and make something new next time. The back to school gnome isn’t just a cute decoration. It’s a memory, a confidence boost, and a warm welcome into everything the new school year is going to bring.








What do you think?
It is nice to know your opinion. Leave a comment.