










Flea Market Mirror Makeover: Transforming Thrifted Finds into Stunning Home Décor
The Magic of Flea Market Treasure Hunting
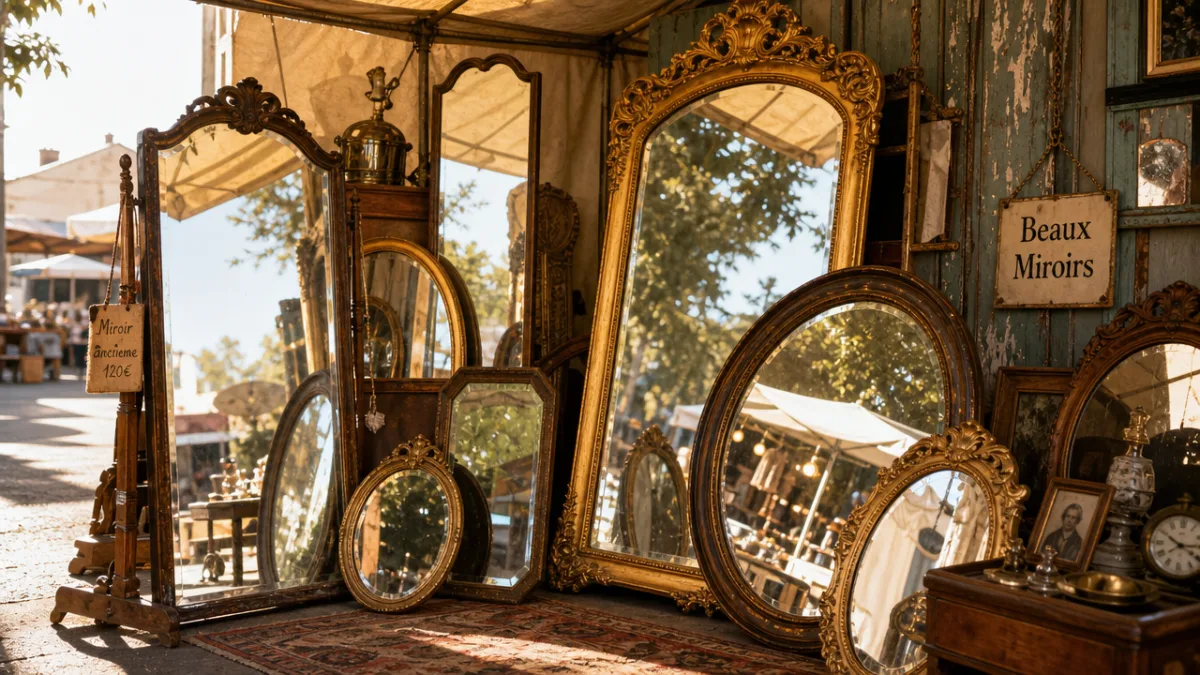
There’s something almost magical about wandering through a flea market on a Saturday morning — coffee in hand, eyes drifting across rows of forgotten things just waiting for someone to notice them. And honestly? Mirrors might be the best find of all. Even a beat-up frame with peeling paint or a slightly foggy surface has good bones. With a little imagination and some elbow grease, it can go from someone’s castoff to the most interesting piece in your home.
The variety you’ll encounter is part of what makes it so fun. One stall might have a grand, over-the-top baroque frame with flaking gold paint; the next might have a clean little mid-century piece with simple geometric lines. You might find a chunky farmhouse mirror that weighs a ton, or a delicate oval with carved flowers running along the edge. No two are alike, and that’s exactly the point. Every piece has its own history, its own quirks — and its own potential.
The money side of things is pretty hard to argue with, too. A mirror that would run you several hundred dollars at a home décor boutique might cost you twenty bucks at an estate sale. Add in some paint, primer, and maybe a few decorative touches, and you’ve got something genuinely custom — something that actually fits your taste, not just whatever was trending when it rolled off a factory line. It’s affordable, creative, and a little bit sustainable, which is probably why the flea market makeover has become such a staple in the DIY world.
Sourcing the Right Mirror for Your Makeover
Not every flea market mirror is worth your time and money, so it pays to know what you’re looking at. The first thing to check is the frame itself. Give the corners and edges a gentle press — if they wobble or feel like they’re about to fall apart, that’s a red flag. A frame that’s fundamentally solid, even if it’s got ugly paint or outdated varnish all over it, is so much easier to work with than one that’s crumbling or warped. Wood and resin frames tend to be the most forgiving if you’re planning to refinish.
Take a good look at the mirror glass, too. A little foxing — those dark, speckled spots that show up when moisture gets behind the silvering over time — can actually look really charming in the right setting. But if there are deep scratches, heavy cloudiness, or large patches where the reflective coating has gone missing, you might be looking at a glass replacement. That’s doable; a local glass shop can usually cut and install a new panel for a reasonable price. Just factor it into your budget before you hand over your cash.
Think about size and where you plan to put it. A big, dramatic frame can anchor an entryway or become the centerpiece of a living room wall. Something smaller and simpler might be perfect above a bathroom vanity or a bedroom dresser. It also helps to have your finished vision in mind before you buy. A heavily carved baroque frame practically begs for gilding and rich colors, while a flat, minimal frame is a blank canvas for a clean painted finish or even a fabric treatment.
Essential Supplies and Preparation Techniques
Once you get your mirror home, prep work is where the real project begins — and honestly, it’s the step that makes or breaks everything else. Skipping it is the number one mistake beginners make, and it almost always shows up later as chipping, peeling, or a finish that just looks off. Start with a thorough cleaning. A mild dish soap solution and a soft cloth will take care of most dust, grime, and grease. For anything really grimy, a degreaser or TSP substitute works great.
Once it’s clean, figure out whether you need to sand. Most painted or varnished frames benefit from a light scuff with medium-grit sandpaper — around 120 to 150 grit — just to give the new paint something to hold onto. If your frame has a lot of carved detail, a flexible sanding sponge or a small folded piece of sandpaper lets you get into the crevices without flattening the detail work. After sanding, wipe the whole frame down with a tack cloth or a barely damp rag to get rid of all the dust before you move on to priming.
Having everything you need on hand before you start will make the whole process much smoother. Depending on your chosen technique, you’ll probably need some or all of the following:
- Painter’s tape and plastic sheeting to keep paint off the mirror glass
- A good primer suited to your frame material — wood, resin, or metal each have their own best options
- Your paint of choice — chalk paint, spray paint, and standard latex all work well depending on the look you’re going for
- Fine-grit sandpaper (220 grit) for smoothing between coats
- Small foam rollers and artist’s brushes for detailed areas
- Wax, polycrylic, or another topcoat to seal and protect the finished surface
- Optional extras like gold leaf, rope, shells, mosaic tiles, or fabric if you’re feeling adventurous
Before any paint touches the frame, tape off the mirror glass carefully and press the edges of the tape down firmly so nothing seeps underneath. If there are gaps between the glass and the frame, tucking a thin strip of cardstock under the tape edge adds a little extra insurance. And if the glass isn’t permanently set in with adhesive, some people find it easiest to just remove it entirely before painting — that’s definitely the most foolproof approach if it’s an option.
Popular Makeover Techniques and Finishes
Chalk paint has earned its reputation in the DIY world, and for good reason. It sticks to almost anything without priming, dries fast, and has a gorgeous matte finish right out of the can. It’s also incredibly easy to distress — just apply one or two coats, let each one dry fully, then lightly sand the raised areas with 220-grit paper to let the layer underneath peek through. Seal it with clear or tinted wax and you’ve got a soft, professional-looking finish with barely any effort.
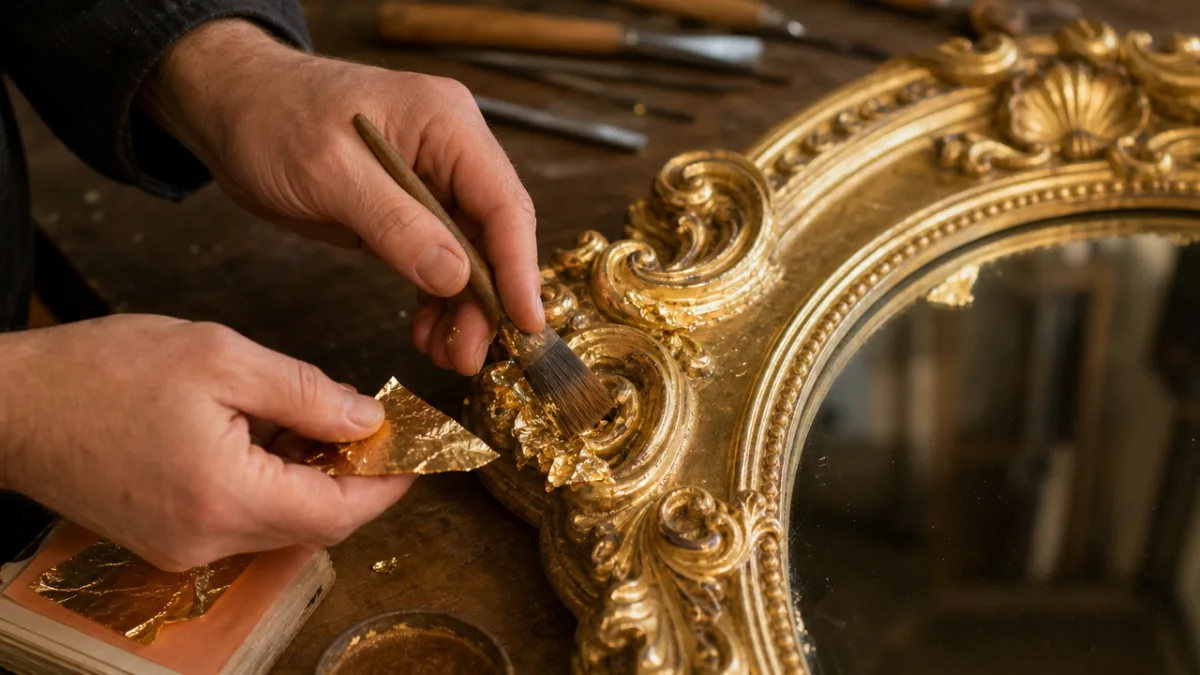
If you want something with a little more drama, gold or metallic leafing can take a tired flea market frame and make it look like it belongs in a museum. Imitation gold leaf is widely available at craft stores and online and costs a fraction of what real gold leaf runs. The process is pretty straightforward: brush on a special adhesive called sizing, let it get tacky, then carefully lay down thin sheets of the leaf and press them gently with a soft brush. Buff away the excess and you’re left with a richly textured, light-catching finish that genuinely reads as luxurious.
But paint and leaf are just the beginning. There’s a whole world of creative techniques worth experimenting with, and the same basic flea market frame can look completely different depending on which direction you take it:
- Rope wrapping: Hot-gluing natural jute or sisal rope around a simple frame gives it an easygoing coastal feel that works really well in beach-inspired or bohemian rooms.
- Mosaic tiling: Broken tiles, sea glass, or pieces of old china plates can be adhered to a flat frame and grouted for a colorful, artisan-style finish.
- Fabric upholstering: A wide, flat frame covered in linen, velvet, or printed cotton creates a soft, textile-forward look that ties in beautifully with existing upholstery.
- Shell or stone embellishment: Shells, pebbles, or even semi-precious stones glued directly onto the frame produce something that feels genuinely one-of-a-kind.
- Faux concrete or plaster finish: Using a palette knife or sponge with specialty texture mediums, you can convincingly mimic raw concrete or aged plaster for a modern industrial look.
Step-by-Step Guide to a Classic Painted Makeover
If this is your first mirror makeover, a clean painted finish is the perfect place to start. It’s forgiving, endlessly versatile, and the results are genuinely satisfying. Start with a clean, lightly sanded frame that’s free of dust. Apply your primer in a thin, even coat, using a small brush to work it into any carved or detailed spots. Then let it dry completely — water-based primers usually take one to two hours, but give it more time if it’s humid or cold out.
Once the primer is fully dry, apply your first coat of paint in smooth, even strokes going the same direction. Chalk paint handles a slightly thicker application just fine since it’s formulated to brush out smoothly. Standard latex paint does better in thinner coats to avoid drips and obvious brush marks. Let the first coat dry all the way — don’t rush it — and then take an honest look at the coverage. Most frames need two full coats, and really dark or porous frames might need a third.
After the final coat has had at least 24 hours to dry, it’s time to seal. Clear wax is the classic choice for chalk paint and gives a soft, slightly warm finish. If the mirror is going somewhere humid like a bathroom, water-based polycrylic is a smarter pick because it handles moisture much better. Apply your sealer in thin, even coats, letting each one dry before adding the next, then buff it to whatever sheen you like — anywhere from a flat matte to a gentle satin glow.
Styling and Displaying Your Finished Mirror
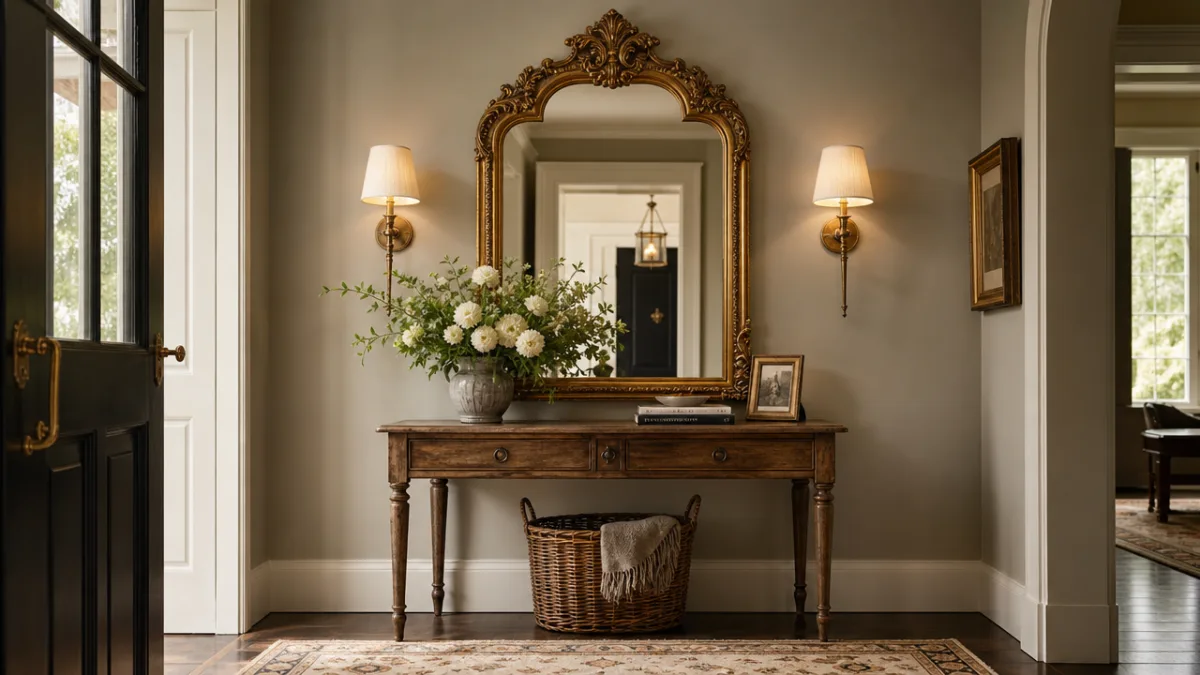
A mirror you’ve put real work into deserves a thoughtful spot to live. Where you place it matters both aesthetically and practically. Mirrors are great tools for bouncing light around a room, making spaces feel bigger, and giving a vignette or a focal wall something to anchor it. Try to position yours so it’s reflecting something worth looking at — a window, a piece of art, a nicely styled console table — rather than a blank wall or a cluttered corner.
Don’t underestimate the hanging hardware, either. A large or heavy mirror really should go into wall studs, not just drywall anchors. D-ring hangers, French cleats, and mirror clips are all solid options depending on the weight and profile of the frame. If yours doesn’t have any existing hardware, a quick trip to the hardware store will sort you out. It’s worth taking the extra five minutes to do it right — both for the safety of the mirror and for your walls.
A single statement mirror above a fireplace, a console table, or a bed’s headboard can be incredibly striking on its own. But if you have the wall space and a few pieces to work with, a gallery arrangement of differently shaped mirrors in coordinating finishes is a really fun way to go. Mix a large oval with a small rectangle and maybe a sunburst mirror in the same color family, and it feels intentional and collected rather than random. The trick is keeping some thread of consistency — whether that’s color, finish, or general frame style — so the whole thing reads as a deliberate grouping.
Sustainability, Community, and the Bigger Picture of Thrift Transformations
Every mirror you rescue from a flea market is, in a small but real way, a vote against waste. The home décor industry throws away an enormous amount every year — things discarded simply because a trend moved on or a surface got scuffed. Choosing to refinish and repurpose instead of buying new keeps usable materials out of the waste stream and reduces demand for new production. When you transform a thrifted mirror, you’re participating in a circular economy in the most hands-on way imaginable.
The community around this kind of work has grown a lot in recent years, mostly thanks to social media. Makers share their before-and-after moments, their material recommendations, their hard-won tips — and the whole thing is remarkably welcoming. Whether you’ve never held a paintbrush or you’re looking to level up your gilding technique, there are tutorials, forums, and fellow enthusiasts ready to help. Pinterest, Instagram, and YouTube have made these skills more accessible than ever, and there’s something genuinely lovely about that.
But at the end of the day, the flea market mirror makeover is about more than a nice object on your wall. It’s the pleasure of a slow Saturday spent looking for potential in overlooked things. It’s learning a hands-on skill that connects you, in a small way, to generations of people who figured out how to make something beautiful from humble materials. It’s the specific, quiet pride of pointing to something in your home and saying — honestly — that you made it yourself. That you saw something others walked past, recognized what it could be, and brought it back to life. That’s a pretty wonderful thing.








What do you think?
It is nice to know your opinion. Leave a comment.