










The $2 Storage Solution That Will Transform Your Home Organization
If you’ve ever walked through a home goods store and admired those beautiful faux leather storage baskets — only to wince at the $30, $40, or even $60 price tags — this project is about to change your life. The DIY faux leather storage basket trend has taken the crafting world by storm, and for good reason: the results look genuinely luxurious, the process is surprisingly simple, and the total cost can come in at just around $2 per basket when you discover the secret material hiding in plain sight at your local dollar store or craft supply shop.
Home organization doesn’t have to be expensive to look intentional and polished. In fact, some of the most stylish storage solutions you’ll find on social media and in interior design blogs are made from the most unexpected materials. This particular project falls firmly into that category. The “surprise material” at the heart of this basket is none other than craft foam sheets — the thin, flexible sheets typically sold in packs for kids’ art projects. When cut, folded, and assembled correctly, craft foam mimics the look and feel of faux leather with remarkable accuracy, especially once a little paint or finish is applied.
Whether you’re trying to organize your bathroom counter, corral remotes and chargers in the living room, or create a tidy catch-all for your desk, this project delivers a functional and fashionable result. The basket holds its shape, handles everyday use with ease, and looks right at home next to pieces that cost ten times as much. Once you make one, you’ll almost certainly want to make a dozen more.
Why Craft Foam Is the Perfect Faux Leather Substitute
Craft foam, sometimes called EVA foam or foam sheets, has been a staple in elementary school art rooms for decades, but savvy DIYers have discovered that this humble material has a much broader range of applications. At its core, EVA foam is a closed-cell foam polymer that is lightweight, flexible, waterproof, and incredibly easy to cut with basic scissors or a craft knife. These properties make it not just a passable stand-in for faux leather, but in some ways a superior choice for small storage baskets and bins.
The texture of craft foam, particularly the slightly matte surface finish found on most standard sheets, bears a genuine resemblance to smooth faux leather when viewed at normal distances. Apply a coat of acrylic paint in a rich neutral — think cognac, black, ivory, or deep forest green — and the transformation becomes even more convincing. Some crafters take it a step further by adding a thin layer of Mod Podge or a matte sealant, which deepens the color and adds a subtle sheen that very closely approximates the look of bonded leather goods sold at boutique home stores.
Beyond its visual qualities, craft foam is extraordinarily forgiving as a crafting material. Unlike actual leather or even most fabric-based alternatives, it doesn’t fray, doesn’t require hemming, and holds creases beautifully when scored lightly with a bone folder or the back of a butter knife. This means you can fold crisp, clean corners and edges without any special equipment, skill, or experience. For a beginner crafter, it’s an ideal starting point. For an experienced maker, it’s a satisfying quick project that delivers instant, photogenic results.
Materials You’ll Need and Where to Find Them
One of the most appealing aspects of this project is how accessible all the materials are. You don’t need a specialty craft store, an online order, or a trip to a warehouse club. In most cases, a single visit to a dollar store or the craft aisle of a general merchandise retailer will get you everything you need. The craft foam sheets themselves are typically sold in multipacks for $1 to $2, which means a single pack can yield several baskets depending on the size you’re making.
The supplies list is intentionally minimal, which is part of the beauty of this project. You’ll want to gather your materials before you begin so the assembly process flows smoothly from start to finish. There’s nothing more frustrating than getting halfway through a project only to realize you’re missing a key component. Fortunately, with this basket, that scenario is almost impossible given how simple and widely available everything is.
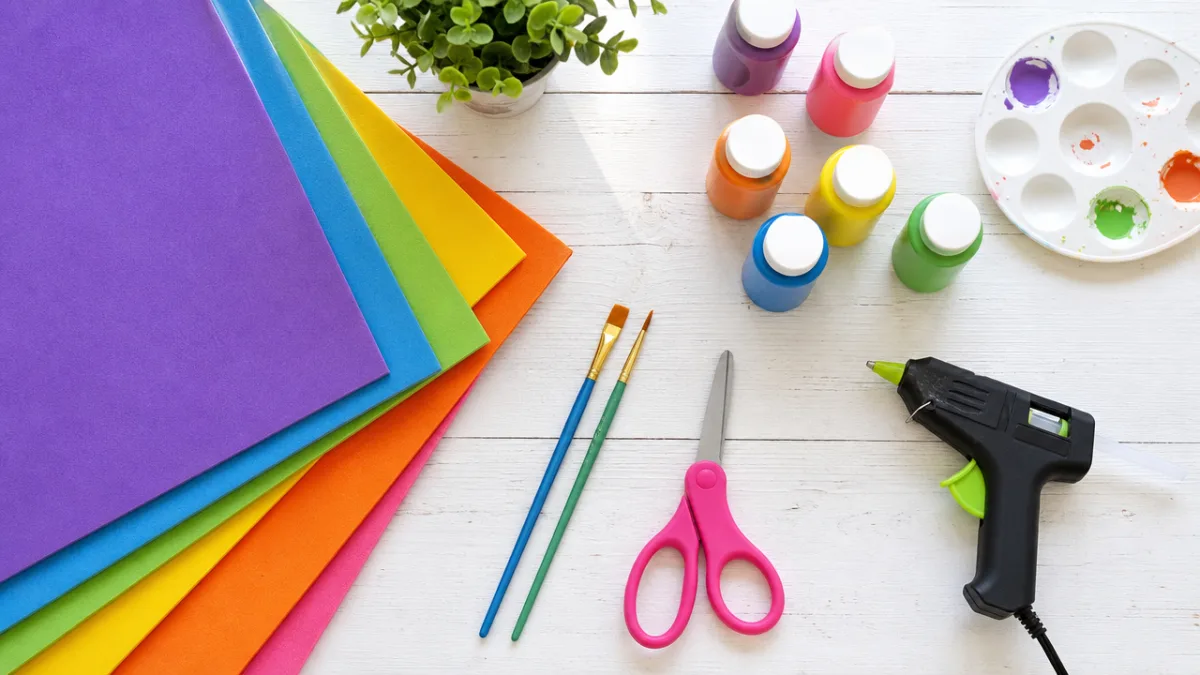
Here’s what you’ll need to get started:
- Craft foam sheets — standard 9×12 inch sheets work well for small baskets; larger sheets or multiple sheets taped together allow for bigger builds
- Acrylic paint in your chosen faux leather color — black, tan, brown, and cognac are all classic choices
- A foam brush or sponge brush for applying paint evenly without visible brush strokes
- Scissors or a craft knife and cutting mat for clean, precise cuts
- A ruler and pencil for measuring and marking your fold lines
- Hot glue gun and glue sticks to assemble and secure the basket sides
- Matte or satin Mod Podge or acrylic sealer for a finished, polished look
- Optional: gold or silver brads, leather cord, or washi tape for decorative details and handles
The total cost of this supply list, assuming you purchase everything new, typically falls between $5 and $10 for a starter kit — but since many of these items come in quantities that allow for multiple projects, the per-basket cost drops significantly. If you’re making a series of matching baskets for a shelf or drawer unit, you’ll quickly bring that per-unit cost down to the promised $2 or less.
Customizing Your Basket for Any Room
One of the greatest strengths of this DIY project is its versatility. Unlike a purchased basket that comes in a fixed size and color, your handmade faux leather basket can be tailored to fit exactly the space where it will live. Before you start cutting, measure the shelf, drawer, or countertop where you plan to use the basket. Design your basket to those dimensions and you’ll end up with something that looks built-in rather than borrowed from another corner of the house.
Color is another enormous opportunity for customization. The craft foam base is essentially a blank canvas, and acrylic paint adheres to it beautifully. For a modern, monochromatic aesthetic, paint your basket in the same shade family as your wall color or existing storage pieces. For a pop of personality, try a deep jewel tone like emerald, navy, or burgundy. If you prefer a natural, organic look, a warm tan or camel color with a slightly matte finish reads almost exactly like real leather and works with virtually any interior style from farmhouse to Scandi-minimalist to boho.
You can also customize the shape and structure of the basket. The most common version is a simple rectangular box shape, but with the same technique you can create round-ish baskets by curving the foam sides before the glue sets, trapezoid shapes that are wider at the top for easier access, or even lidded boxes for a more decorative, keepsake-style container. Adding folded cuffs at the rim, punching small holes for a leather cord handle, or embossing a simple geometric pattern into the foam surface with a stylus are all ways to take the basic form and make it feel truly bespoke.
Step-by-Step Instructions for Building Your Basket
Now for the satisfying part: actually making the thing. The construction of this basket is straightforward enough that even a first-time crafter can achieve great results on the first try. The key is to work methodically, let each glued section set for a moment before moving on, and not rush the painting step at the end. Take your time and the payoff will be a basket that genuinely looks like it came from a boutique home goods shop.
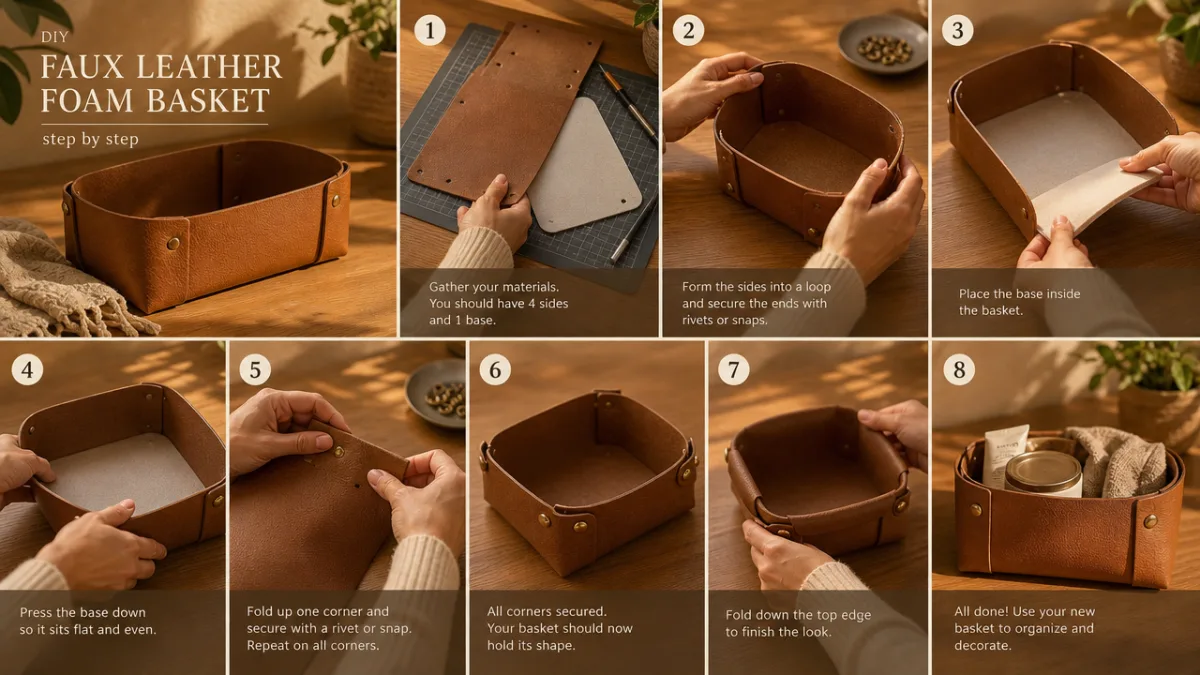
Start by deciding on your basket dimensions. A good beginner size is approximately 6 inches long, 4 inches wide, and 3 inches tall. Using your ruler and pencil, draw and cut the following pieces from your craft foam: one rectangle for the base (6×4 inches), two long side panels (6×3 inches), and two short end panels (4×3 inches). If your foam sheets aren’t large enough, you can overlap and hot glue two sheets together for additional surface area, making sure the seam lands somewhere it will be hidden by the basket’s interior or folded cuff.
Follow these steps for assembly:
- Paint all pieces before assembly. It’s far easier to get even coverage on flat pieces than on an assembled box. Apply two to three thin coats of acrylic paint, letting each coat dry completely before adding the next.
- Add your sealer. Once the paint is fully dry, brush on a thin layer of Mod Podge or acrylic sealer and allow it to cure. This step locks in the color and creates that subtle leather-like sheen.
- Assemble the base and sides. Run a line of hot glue along the bottom edge of one long side panel and press it firmly to the long edge of the base. Hold for 10 to 15 seconds until the glue sets. Repeat with the opposite long side.
- Attach the end panels. Apply hot glue to the short edges of the base and to the inner edge of the adjacent side panels where they meet, then press the end panels into place. The corners should be clean and tight.
- Reinforce the corners. A small additional bead of hot glue run along the inner corners of the basket adds structural integrity and ensures the basket holds its shape even when weighted with contents.
- Add finishing details. If you’re adding a folded cuff at the top, simply cut a strip of foam, paint and seal it, then fold it over the rim and glue it in place. Add brads, cord handles, or decorative stitching lines drawn with a fine-tipped permanent marker to complete the illusion.
The entire process from cutting to finished basket typically takes between 45 minutes and an hour and a half, depending on dry time for paint. If you’re making multiple baskets in a batch — which is the most efficient approach — you can paint all your pieces at once, let them dry together, and then assemble them in sequence. A batch of six matching baskets can be completed in an afternoon, which makes this an ideal weekend project before a big home organizing push.
Tips for Getting the Most Realistic Faux Leather Look
The difference between a basket that looks like painted foam and one that genuinely reads as faux leather comes down to a few key techniques that experienced crafters have refined through trial and error. The first and most impactful tip is to use a sponge brush or a sea sponge rather than a standard bristle brush when applying your base coat of paint. Sponging on the paint creates a subtly uneven texture that mimics the slight variation in tone and texture seen in real leather hides, as opposed to the flat, uniform coverage that a brush leaves behind.
Layering colors is another technique that dramatically elevates the realism of the finished product. Start with a medium-toned base coat — say, a warm camel — and then lightly sponge on a slightly darker shade in a dabbing motion to suggest depth and shadow, particularly along the bottom edges and corners. Finish by dry-brushing a slightly lighter highlight color across the flat surfaces. This three-color approach gives the basket a dimensional quality that flat painted foam simply can’t achieve, and it’s the technique used by professional prop makers and theatrical set designers to replicate leather on a budget.
Finally, pay close attention to your edges and corners. In real leather goods, these areas often show the most character — slight creasing, a hint of lighter wear, the clean line of a stitched seam. You can replicate this by scoring your fold lines lightly before bending the foam (which creates a natural, sharp crease), drawing faux stitch lines with a white or contrasting fine-tip marker along the seam lines, and using a darker shade of paint along the very edge of the foam to suggest depth. These finishing details take only a few extra minutes but contribute enormously to the overall impression of quality and craftsmanship.
Displaying and Organizing with Your New Baskets
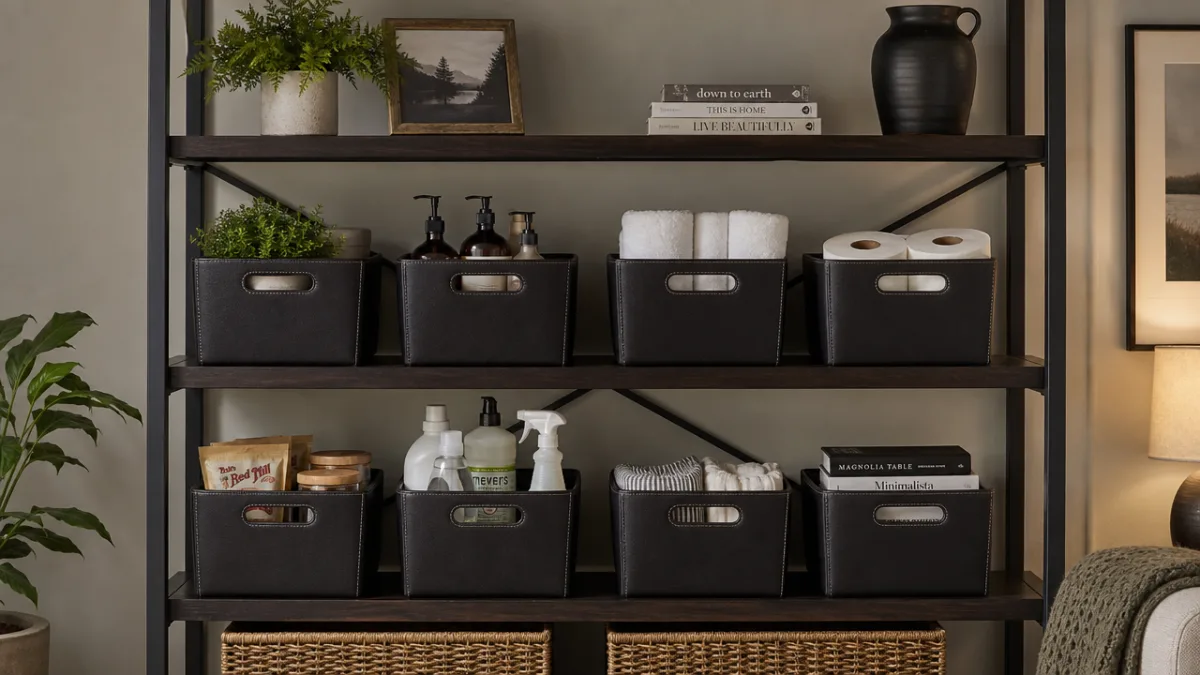
Once your baskets are complete, the fun of actually using them begins. One of the most impactful ways to deploy a set of matching DIY faux leather baskets is on an open shelving unit, where their uniform appearance creates an instant sense of cohesion and intentionality. The shelves that previously looked cluttered and chaotic are suddenly transformed into something that belongs on an interior design blog. The key is consistency: matching baskets in the same color and size do far more visual work than an assortment of mismatched containers, no matter how individually charming each piece might be.
In the bathroom, these baskets are ideal for corralling the small items that tend to proliferate on countertops and in under-sink cabinets — cotton rounds, hair ties, mini bottles from hotel stays, charging cables that somehow migrate everywhere. Because the foam is naturally water-resistant, a little splash or humidity won’t damage the basket the way it might affect a fabric or cardboard alternative. In the kitchen, a basket on the counter can hold loose packets of sweetener, tea bags, or small condiment packets. On a desk, it becomes the perfect home for paper clips, sticky notes, and the other small office supplies that otherwise vanish into drawer chaos.
Consider labeling your baskets with small adhesive labels or by cutting tiny label holder shapes from contrasting foam and gluing them to the front of each basket. This practical addition turns your storage baskets into a full organization system rather than just a collection of pretty containers. You can also nest smaller baskets inside larger ones for a modular approach to drawer organization, using the baskets as dividers within a single drawer to keep categories of items separate and easy to find at a glance. The result is the kind of organized, aesthetically pleasing storage setup that usually requires a significant investment — achieved here for a few dollars and an afternoon of genuinely enjoyable crafting.
Making This Project Your Own: Creative Variations to Try
Once you’ve mastered the basic basket, a whole world of variations opens up. The same craft foam technique can be used to create magazine holders, desktop file organizers, jewelry trays, plant pot covers, and even small gift boxes. The fundamental skill — cutting, painting, and gluing foam sheets into three-dimensional forms — transfers to virtually any container shape you can imagine. Spend some time looking at the storage and organization accessories you wish you had in your home, and then challenge yourself to recreate them using this method.
Texture is a particularly rich area to explore as you get more comfortable with the technique. You can use embossing tools, ball-point styluses, or even everyday objects like the tip of a knitting needle to press patterns into the foam surface before painting — crocodile scales, a woven grid pattern, geometric diamonds, or abstract linear designs all add visual interest and further enhance the leather illusion. If you have a Cricut or Silhouette cutting machine, you can cut incredibly precise shapes, monogram letters, or decorative cutouts from contrasting foam pieces and adhere them to the basket surface as three-dimensional appliqués.
Sharing your finished baskets on social media or within crafting communities is also a wonderful way to extend the value of this project beyond your own home. The visual impact of a well-made faux leather basket is strong enough to generate real interest, and detailed process photos or a quick video of the assembly steps can help other crafters discover this technique for themselves. Some makers have turned this skill into a small side business, selling handmade organizational baskets at craft fairs or on platforms like Etsy, where the combination of attractive aesthetics, customizability, and reasonable price point makes them a consistent seller. Whether you keep every basket for yourself or share the process and the products with others, this $2 DIY project delivers value that far exceeds its modest cost.








What do you think?
It is nice to know your opinion. Leave a comment.