










DIY 3D White Cloud Painting on Canvas: A Complete Guide to Textured Sky Art
Introduction to Textured Cloud Painting
There is something quietly magical about clouds. They drift across our skies in endless variation, never repeating the same shape twice, and they carry with them a sense of calm, possibility, and wonder. For centuries, painters have chased the challenge of capturing clouds on canvas, from the luminous skies of John Constable to the dreamy impressionist heavens of Claude Monet. Today, a new wave of creative exploration has brought cloud painting into the realm of the tactile and three-dimensional, using palette knives and thick acrylic mediums to build clouds that literally rise from the canvas surface.
This style of textured cloud art has surged in popularity across social media platforms, particularly on Pinterest, where breathtaking examples of 3D white cloud paintings have inspired thousands of home artists to pick up a palette knife and try their hand at something bold and expressive. The beauty of this technique lies not just in the finished result, but in the deeply satisfying process of building up layers of paint with broad, confident strokes that create dimension, depth, and a sense of movement that flat brushwork simply cannot achieve.
Whether you are a complete beginner who has never painted before or an experienced artist looking to explore a new medium, this guide will walk you through everything you need to know. From the materials you will need to gather, to the step-by-step process of creating a stunning 3D textured cloud painting, to tips for displaying your finished work, this comprehensive article covers it all. By the end, you will feel fully equipped and genuinely excited to create your own sky-inspired masterpiece.
Understanding the Materials and Tools You Need
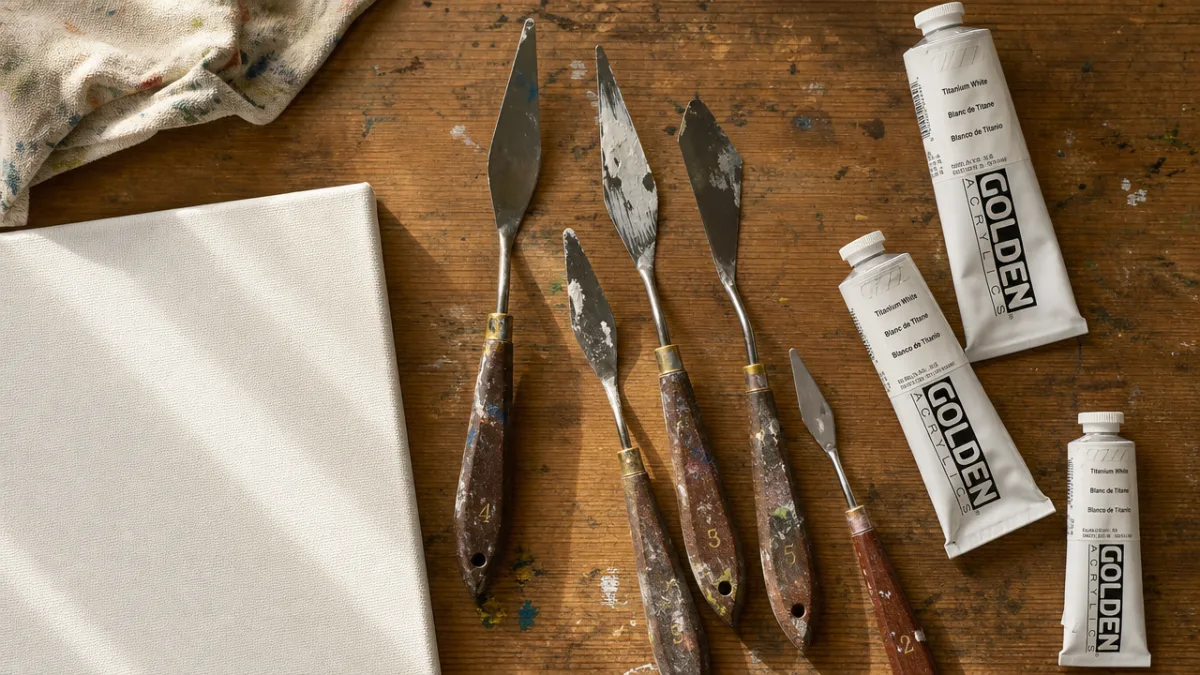
Before you can begin painting, you need to assemble the right materials. The good news is that textured cloud painting does not require an expensive or elaborate supply list. In fact, part of what makes this art form so accessible is that the core tools are relatively few and modestly priced. The most important tool in your kit is the palette knife, sometimes called a painting knife. Unlike a brush, the palette knife applies paint in thick, sweeping motions that leave behind beautiful ridges, peaks, and valleys in the paint surface, which is exactly what gives 3D cloud paintings their characteristic depth and dimension.
Acrylic paint is the medium of choice for this style of work, and for good reason. Acrylics are water-based, which makes them easy to clean up and safe to work with indoors. They dry relatively quickly, allowing you to build up layers without waiting days between sessions. They also adhere beautifully to canvas and mix well with a variety of texture-enhancing mediums. For a cloud painting, you will primarily be working with white paint, but having a range of blues, grays, and even soft lavenders or pinks on hand will allow you to add atmospheric nuance to your sky background.
Here is a helpful list of the core supplies you will want to gather before beginning your project:
- A stretched canvas, ideally at least 12×16 inches to give yourself enough room to work expressively
- A set of palette knives in at least two or three different sizes and shapes, including a flat diamond-shaped blade and a smaller pointed one
- Heavy body white acrylic paint, which has a thick, buttery consistency ideal for building texture
- Acrylic texture paste or modeling paste to add extra body and dimension to your cloud forms
- A selection of blue acrylic paints in varying tones, from pale sky blue to deeper cerulean or prussian blue
- A large flat brush for applying the background wash
- A palette or disposable mixing pad for blending colors
- A cup of water and paper towels for cleaning your tools between colors
One important consideration when selecting your canvas is the weight and texture of the surface. A standard stretched cotton canvas works perfectly well for this technique, but if you want extra stability when applying thick layers of paint and texture paste, consider using a canvas board or a linen canvas mounted on a solid backing. The added rigidity prevents the canvas from flexing under the weight of heavy paint application, which can sometimes cause cracking as the layers dry.
Preparing Your Canvas and Laying the Sky Background
The foundation of any great cloud painting is the sky background, and this step deserves your full attention and care. A well-executed sky background creates the atmospheric depth that makes your clouds appear to float convincingly in space. Begin by deciding on the mood and time of day you want your sky to evoke. A bright midday sky calls for clean, pale blues with hints of white near the horizon. A sunrise or sunset sky might incorporate soft pinks, warm oranges, and golden yellows blending into deeper blues overhead. Even a dramatic stormy sky, layered with grays and deep blue-greens, can serve as a stunning backdrop for voluminous white clouds.
Once you have settled on your palette, wet your large flat brush and load it with your lightest blue paint slightly diluted with water. Apply this color across the entire canvas in broad horizontal strokes, working from the top down. As you move toward the horizon line, gradually pick up more white on your brush and blend it into the blue to create that natural lightening effect that skies exhibit near the horizon. While the paint is still wet, you can blend in subtle hints of other colors, soft lavender shadows or warm peachy tones, using gentle circular blending motions to avoid harsh lines.
Allow your background to dry completely before moving on to the cloud layer. Because acrylic paint dries relatively quickly, this typically only takes 20 to 30 minutes depending on the thickness of your application and the ambient humidity. Some artists prefer to use a hairdryer on a low heat setting to speed up the drying process. While you wait, take the time to study photographic references of real clouds. Notice how cloud formations have distinct light-facing surfaces that are brilliant white and shadow-facing undersides that carry soft grays and blue-tinted shadows. Understanding this light logic will help you create clouds that look genuinely convincing and three-dimensional.
Building 3D Cloud Forms with Palette Knife Technique
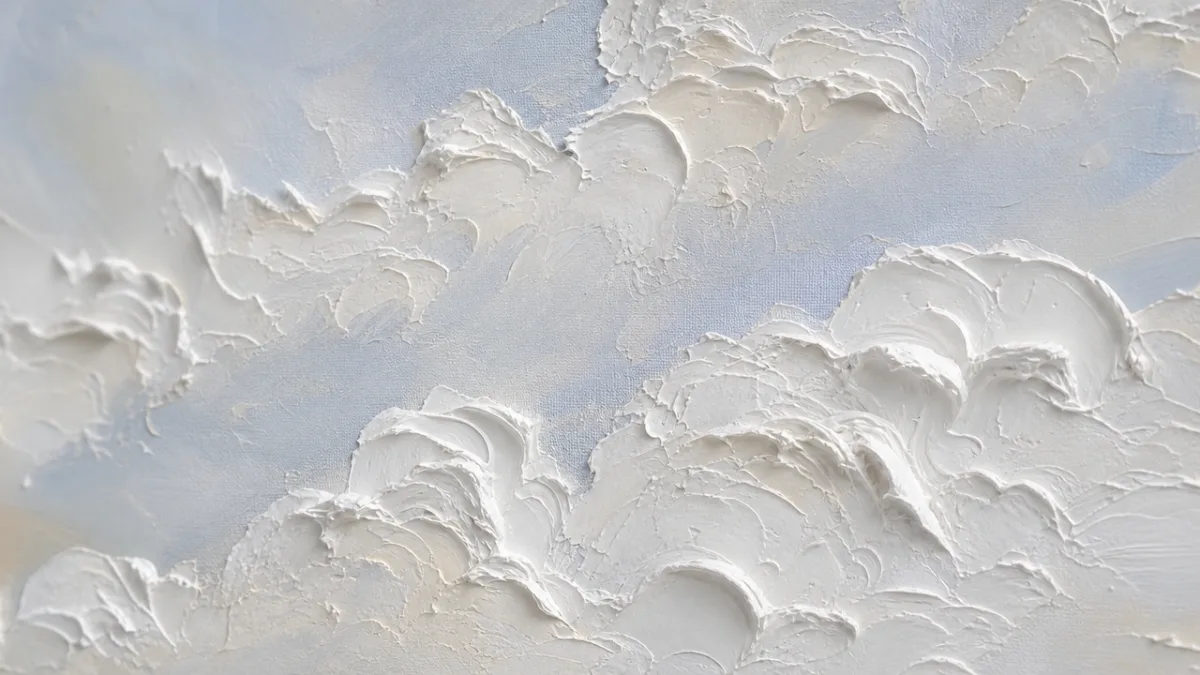
This is the most exciting and transformative stage of the entire process, the moment when your canvas begins to take on a life of its own. Load your palette knife generously with thick white acrylic paint or a mixture of white paint blended with a small amount of texture paste for extra body. The mixture should be thick enough to hold its shape and create ridges when applied to the surface. Hold your knife at a low angle to the canvas and begin laying in the general shape of your cloud mass using broad, sweeping strokes. Do not worry about precision at this stage; clouds are organic, irregular forms, and a loose, confident approach will serve you better than careful, timid marks.
As you build up your cloud forms, think in terms of rounded, pillowing masses stacked on top of one another. Real cumulus clouds, the classic puffy white clouds most people associate with fair weather, are formed by rising columns of warm air and have a distinctly cauliflower-like structure. To replicate this effect with your palette knife, use a combination of techniques: flat, sweeping strokes to establish broad areas of white, then the edge of the knife to create crisp ridges and peaks, and finally the flat of the blade pressed gently into the paint and lifted away to create soft, rounded textures. Vary the pressure and angle of your knife constantly to keep the surface interesting and dynamic.
Shading is what separates a flat, unconvincing cloud from one that appears to truly billow and float. While your white paint is still wet, mix a small amount of blue-gray or soft lavender into white to create your shadow tone. Apply this shadow color to the lower edges and underside of your cloud forms, blending it gently into the bright white highlights above using small, careful knife strokes. The transition from light to shadow should be gradual and soft in some areas, but you can allow it to be slightly more abrupt where the cloud has a defined edge catching strong light. This interplay of light and shadow is what gives the clouds their remarkable sense of volume and depth.
Here are some key palette knife techniques to practice and incorporate into your cloud painting:
- The sweeping stroke: Hold the knife almost parallel to the canvas and drag it across the surface in a single confident motion, depositing a thick band of paint with textured edges on both sides.
- The press and lift: Press the flat of the knife blade firmly into a wet area of paint and pull it straight up and away, leaving behind a soft, rounded peak that mimics the billowing edge of a cloud.
- The edge stroke: Use only the thin edge of the knife blade to draw fine lines or create sharp ridges that define the most illuminated edges of the cloud catching direct light.
- The scrape: Use the flat blade to scrape back through wet paint, revealing the layer beneath and creating subtle gradations or refining an edge that has become too harsh.
- The dab and twist: Touch the tip of the knife into a wet area and twist slightly before lifting, creating small swirling textures that suggest movement within the cloud mass.
Do not rush this stage. Build your clouds up gradually, allowing some areas to dry slightly before adding additional peaks and highlights on top. The dimensional quality that makes this style of painting so visually arresting comes from genuine physical layers of paint stacked on one another. The highest points of your clouds, the brightest, most light-struck peaks and edges, should be applied last, using pure white paint laid on thickly and confidently in single, decisive strokes that you do not go back and fuss with.
Adding Depth, Detail, and Atmospheric Perspective
Once your primary cloud forms are established and mostly dry, you can begin refining and enriching the painting with detail work and atmospheric effects. One of the most powerful tools in a sky painter’s arsenal is the concept of atmospheric perspective, the way that objects farther away in a scene appear lighter, cooler in color temperature, and less sharply defined than those in the foreground. In a sky painting, this means that clouds near the top of your canvas, which represent clouds closer to the viewer, can be rendered with more texture, contrast, and detail, while clouds lower on the canvas, nearer the horizon, should be smaller, softer, and more muted in tone.
To add atmospheric depth to the areas between and behind your cloud forms, use a clean brush or the very flat of your palette knife to apply thin, transparent glazes of pale blue or white, softened with a little water or glazing medium. These subtle washes unify the sky and push background cloud elements further away from the viewer, creating a convincing sense of receding space. You can also use a dry brush technique, loading a flat brush with a tiny amount of very pale blue-white paint and dragging it lightly across dried texture to create the gossamer wisps of cirrus clouds or the soft atmospheric haze that often fills the spaces between larger cloud formations.
Fine detail work can be added using the pointed tip of a small palette knife or even a fine brush. Look at your painting from a distance to identify areas that feel flat or unresolved, and add small, sharp highlights to the most prominent peaks. A thin line of pure, bright white applied along the upper edge of a well-defined cloud ridge can dramatically increase its three-dimensional impact. Conversely, deepening the shadows in the recessed areas beneath cloud masses by adding soft touches of cooler gray or even a hint of soft blue-violet can increase the sense of depth and volume significantly.
Finishing, Varnishing, and Displaying Your Cloud Painting
Once you are satisfied with your painting and all the layers are completely dry, it is time to think about finishing and presentation. Acrylic paintings benefit greatly from the application of a protective varnish, which seals the paint surface, protects it from dust and UV damage, and gives the finished work a unified, professional appearance. You can choose between matte, satin, or gloss varnish depending on the look you prefer. A gloss varnish will make your colors appear more vivid and give the painting a rich, luminous quality, while a matte varnish creates a softer, more gallery-like finish. A satin varnish offers a pleasing middle ground.
Apply the varnish using a wide, soft brush in long, even strokes, working in one direction to avoid streaks. Allow the first coat to dry completely before applying a second coat in the perpendicular direction for even coverage. Pay particular attention to the heavily textured areas of your cloud forms, making sure the varnish gets into all the nooks and ridges of the paint texture. Once varnished and fully cured, your painting will be significantly more durable and its colors will remain vibrant for years to come.
When it comes to displaying your finished cloud painting, consider the following presentation options:
- Hang it unframed with painted or wrapped edges for a modern, gallery-style look that suits contemporary interiors
- Float-mount it in a simple white or natural wood frame that complements the airy quality of the sky subject
- Display it as the centerpiece of a curated gallery wall alongside other nature-inspired artworks in coordinating tones
- Place it above a fireplace mantel where the vertical space and natural focal point give it the prominence it deserves
- Use it as a backdrop in a reading nook or meditation corner where its calming quality can enhance the mood of the space
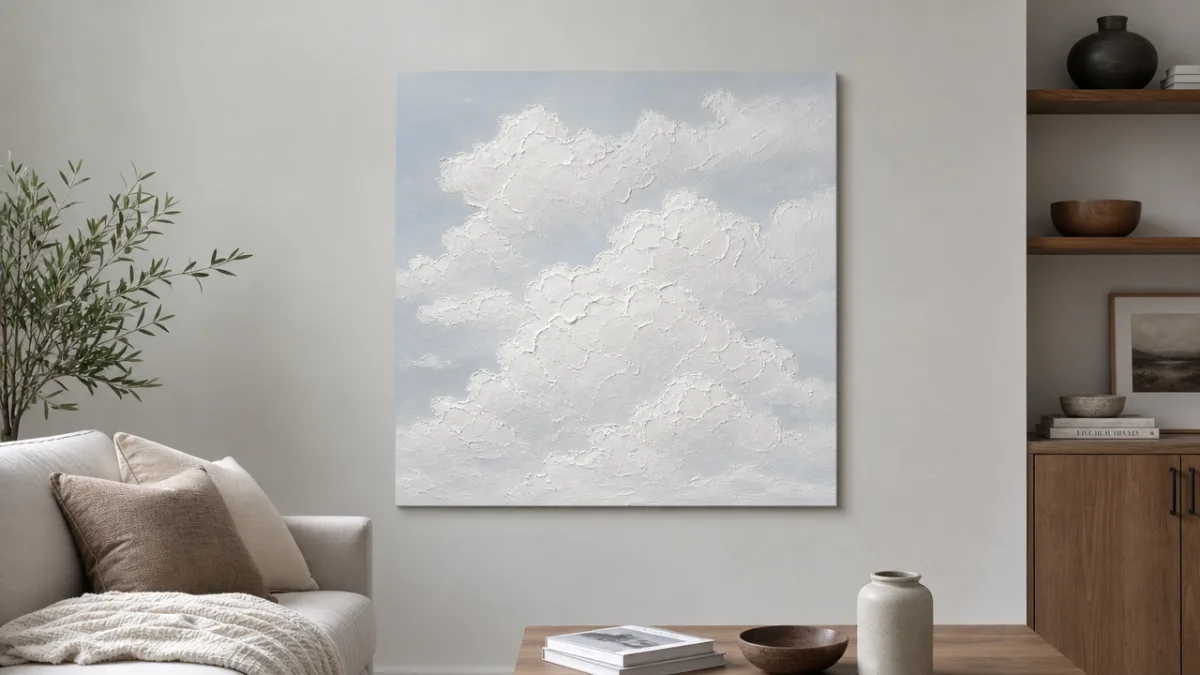
The placement of your painting in relation to natural and artificial light also plays an important role in how its texture reads. Side lighting, whether from a nearby window or a directional picture light mounted above the frame, will cast small shadows across the ridges and peaks of your textured cloud forms, dramatically enhancing their three-dimensional quality. This creates a painting that seems to change subtly throughout the day as the quality of light in the room shifts, giving your artwork a dynamic, living quality that flat printed reproductions can never achieve.
Tips for Continued Growth and Creative Exploration
Completing your first 3D cloud painting is a meaningful accomplishment, but it is also just the beginning of what can become a deeply rewarding creative practice. Each painting you make will teach you something new about how paint behaves, how light interacts with texture, and how your own artistic instincts continue to develop and mature. One of the most effective ways to grow quickly as a palette knife painter is simply to paint often and without excessive self-criticism. The confidence and muscle memory that come from regular practice cannot be shortcut, and many of the most beautiful effects in this style of painting come from happy accidents discovered during the process.
Experiment with variations on the basic cloud painting concept to keep your practice fresh and your creativity engaged. Try working on a dramatically larger canvas to see how the palette knife technique scales up and takes on an entirely different physical energy when you are working at a monumental size. Explore different color palettes beyond the classic blue-and-white sky, painting storm clouds in dramatic charcoal and silver, or sunset clouds in shades of apricot, rose, and deep violet. You might also experiment with mixed media approaches, incorporating collage elements, metallic accents, or even three-dimensional objects embedded in the paint surface to push the work in unexpected directions.
Connecting with a community of like-minded artists can be an invaluable source of inspiration, feedback, and encouragement. Online communities on platforms like Pinterest, Instagram, and dedicated art forums are filled with artists at every level of experience who share their work, their process, and their lessons learned. Watching video tutorials of palette knife painting techniques in action is particularly helpful, as it allows you to observe the rhythm, pressure, and speed of the strokes in a way that still images cannot convey. Many accomplished artists offer both free content and structured online courses that can accelerate your development significantly while still allowing you to learn at your own pace from your own home studio.
Finally, do not underestimate the personal and emotional value of making art with your hands. In a world increasingly dominated by screens and digital interaction, the act of physically manipulating paint, of feeling it yield and respond beneath the blade of your knife, of watching an image emerge from nothing over the course of an hour or an afternoon, is a profoundly grounding and satisfying experience. Your cloud paintings are not merely wall decorations; they are records of your presence, your attention, and your creative energy at a particular moment in time. Each one is uniquely yours, and that is something genuinely worth celebrating.








What do you think?
It is nice to know your opinion. Leave a comment.