










DIY Mushroom Paintbrush Holder: A Cute & Easy Clay Craft Tutorial
Introduction: Why You’ll Love This Mushroom Clay Craft
If you’ve been looking for a charming, functional craft project that combines creativity with practicality, this DIY mushroom paintbrush holder is exactly what you need. Inspired by the enduring popularity of cottagecore aesthetics and the resurgence of air-dry clay crafting, this adorable project transforms a humble blob of clay into a whimsical mushroom sculpture that proudly displays your paintbrushes, pens, or pencils on your desk. It’s the kind of craft that makes your workspace feel magical every single day.
Clay crafting has seen an enormous resurgence in recent years, and it’s easy to understand why. Working with clay is meditative, satisfying, and surprisingly accessible to beginners. You don’t need a kiln, specialized equipment, or years of artistic training to produce something genuinely beautiful. Air-dry clay is inexpensive, widely available at craft stores, and forgiving enough for first-time crafters to achieve professional-looking results with just a little patience and the right guidance along the way.
This mushroom paintbrush holder is especially popular because it sits at the intersection of function and decoration. Rather than hiding your art supplies in a plain cup or jar, you get to display them in a handmade piece that reflects your personality and aesthetic sensibility. Whether you’re decorating a home studio, a student desk, or a crafting corner, this project adds a touch of handmade charm that no store-bought organizer could ever replicate.
Who Is This Project For?
This project is genuinely suitable for a wide range of skill levels. Complete beginners will find it approachable because the basic mushroom shape requires no advanced sculpting techniques — just simple pinching, rolling, and shaping methods that anyone can master within minutes of picking up the clay. The forgiving nature of air-dry clay means you can smooth over mistakes easily, adjust proportions as you go, and take your time without the material drying out mid-session if you keep it properly covered.
More experienced clay crafters will enjoy this project because it offers plenty of opportunities to add intricate detail, experiment with texture, and push the design in creative directions. You can add tiny sculpted mushrooms as embellishments, carve detailed gills into the underside of the cap, or incorporate botanical elements like leaves and berries to create a full fairy-tale forest scene. The basic structure is simple, but the creative ceiling is genuinely limitless for those who want to explore.
Parents and teachers will also find this an excellent project for children aged eight and up, as the steps are straightforward enough to follow independently while still requiring enough focus and fine motor skill to feel genuinely rewarding. It makes a wonderful weekend activity, a school holiday project, or a birthday party craft session. The end result is something kids will be proud to display and use, which makes the whole experience even more meaningful and memorable.
Materials You’ll Need for Your Mushroom Paintbrush Holder
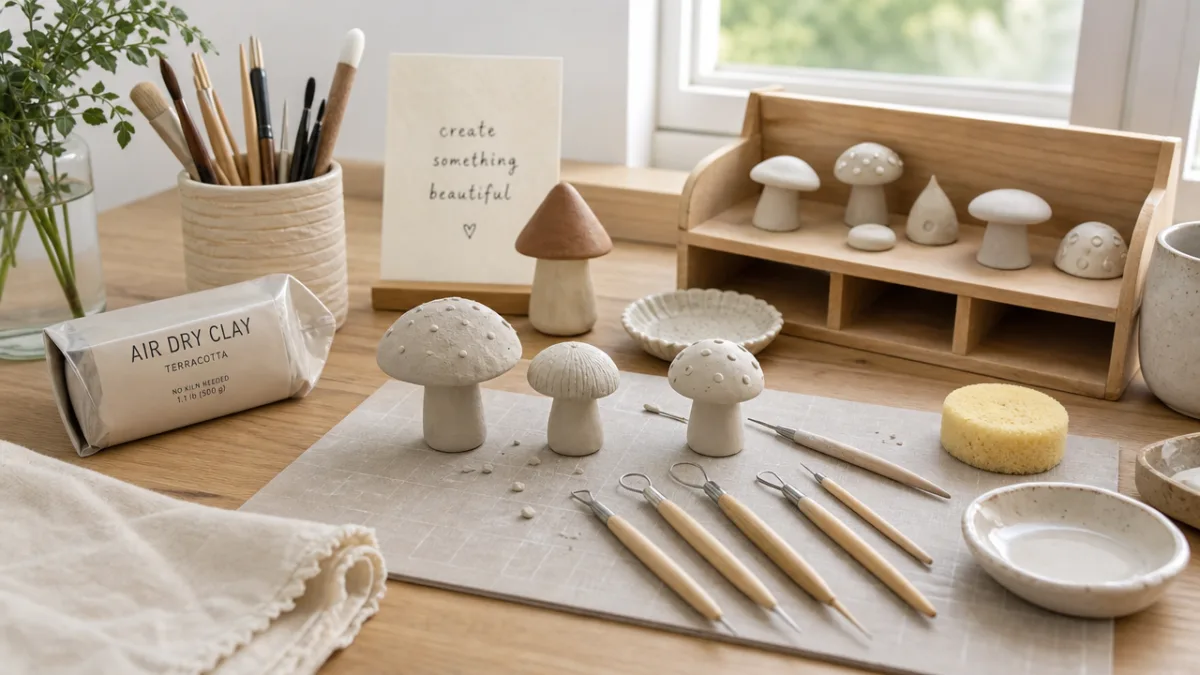
Before you begin sculpting, gathering all your materials in one place will make the process far smoother and more enjoyable. The good news is that this project requires very few specialized supplies, and most of what you need is either already in your craft stash or available inexpensively at any arts and crafts retailer. Having everything laid out and ready before you start prevents the frustration of mid-project supply hunts and keeps your creative momentum going strong throughout the entire making process.
The most important material is, of course, air-dry clay. White or off-white clay is the most versatile choice because it accepts paint beautifully and gives you complete control over the final color scheme. You’ll need approximately 300 to 500 grams for a medium-sized holder that can comfortably accommodate six to eight paintbrushes or pencils. Popular and reliable brands include DAS, Crayola Air Dry Clay, and Arteza, all of which are widely available both in physical stores and through online retailers at very reasonable price points.
Beyond the clay itself, you’ll want a smooth working surface such as a silicone mat or a piece of parchment paper to prevent sticking. A small bowl of water is essential for smoothing the clay surface and joining pieces together seamlessly. Basic sculpting tools — even inexpensive ones from a beginner’s set — help you add texture and detail, though a toothpick and the back of a spoon can substitute admirably if you don’t have dedicated clay tools on hand.
Complete Materials List
- Air-dry clay in white or off-white, approximately 300–500 grams
- Acrylic paints in red, white, brown, and green (or your preferred color palette)
- Fine and medium paintbrushes for the painting stage
- Small bowl of water and a damp cloth for smoothing
- Silicone mat or parchment paper as a work surface
- Clay sculpting tools or substitute household items (toothpick, spoon, butter knife)
- Sandpaper in fine grit (around 220 grit) for smoothing once dry
- Matte or gloss sealant spray or brush-on Mod Podge to protect the finished piece
- Rolling pin or smooth cylindrical bottle for flattening clay evenly
- Optional: polymer clay in accent colors for added detail elements
When it comes to paints, acrylic paints are strongly recommended over watercolors or oil-based paints. Acrylics adhere exceptionally well to the porous surface of air-dry clay, dry quickly between layers, and are available in a huge range of colors at very affordable prices. For the classic red mushroom cap with white spots — the iconic toadstool look — you’ll primarily need cadmium red or bright red, titanium white, raw umber or chocolate brown for the stem, and perhaps a soft sage green for any leafy base embellishments you choose to include.
Step-by-Step Sculpting Instructions
Begin by conditioning your clay. Take a generous handful and knead it firmly for two to three minutes until it becomes warm, pliable, and smooth throughout. Any cracks or crumbles at this stage indicate the clay needs more working. If the clay feels too stiff, wet your fingertips slightly and continue kneading — just be careful not to add so much water that the clay becomes sticky or begins to break down in texture, as that can weaken the final structure significantly.
To create the mushroom stem, which will serve as the actual holder for your brushes, roll a thick cylinder of clay approximately seven to eight centimeters tall and five to six centimeters in diameter. This cylinder needs to be sturdy enough to hold multiple brushes without tipping, so don’t be tempted to make it too narrow. Flatten the bottom firmly on your work surface to create a stable base, then use your fingers or a smooth tool to refine the slightly organic, gently curved shape that gives mushroom stems their characteristic natural look.
Next, use a pencil, dowel rod, or the handle end of a paintbrush to create holes in the top of the stem. Press straight down firmly and evenly to create clean cylindrical holes approximately one centimeter in diameter. Space these holes evenly across the top surface of the stem, making sure they are deep enough — at least three to four centimeters — to securely hold brushes upright without wobbling. Create anywhere from five to ten holes depending on how many tools you want the holder to accommodate comfortably.
Creating the Mushroom Cap and Decorative Details
The mushroom cap is what gives this holder its unmistakable whimsical identity. Take a larger portion of clay and shape it into a dome or rounded triangle form with a flat underside. The cap should be wider than the stem below it — this classic proportional relationship is what immediately reads as a mushroom to the eye. Carefully score the underside of the cap and the top rim of the stem using a toothpick or clay tool, apply a small amount of water to both surfaces, then press them firmly together and smooth the joint seamlessly with your fingertips.
For the classic fairy tale toadstool appearance, roll small balls of white clay in various sizes to serve as the iconic spots on the cap. Score both the flat base of each spot and the corresponding area on the cap surface, apply water, then press each spot gently into place. Smooth the edges where each spot meets the cap surface to ensure they look fully integrated rather than simply glued on. You can also add texture to the underside of the cap using a toothpick to suggest gill-like lines, which adds beautiful visual depth to the finished piece.
Additional decorative details can elevate this project from lovely to truly extraordinary. Consider sculpting small mushroom babies at the base of the stem, creating a tiny family cluster effect. Thin rolled clay snakes can form ivy or vine tendrils wrapping around the stem. Tiny leaf shapes pressed lightly against the base add a forest floor quality that perfectly complements the woodland theme. Each additional detail requires patience and delicate handling, but the cumulative effect is genuinely stunning and deeply personal to your creative vision.
Painting and Finishing Your Mushroom Holder
Patience is the single most important virtue during the drying phase. Air-dry clay needs a minimum of 24 hours to dry sufficiently for painting, and thicker pieces may require 48 to 72 hours of complete drying time. Place your finished sculpture in a location with good air circulation, away from direct sunlight or heat sources, which can cause uneven drying and surface cracking. Turn the piece gently every eight to twelve hours to ensure the underside and inner surfaces dry at the same rate as the outer surfaces.
Once fully dry, inspect the surface carefully for any cracks. Small surface cracks are common and easily repaired by dampening them slightly with water and pressing a tiny amount of fresh clay into the gap, smoothing thoroughly. Allow any repairs to dry completely before proceeding to the painting stage. If the surface feels rough or shows fingerprint texture you’d prefer to eliminate, sand gently with fine-grit sandpaper using light circular motions, then wipe away all dust with a barely damp cloth before painting begins.
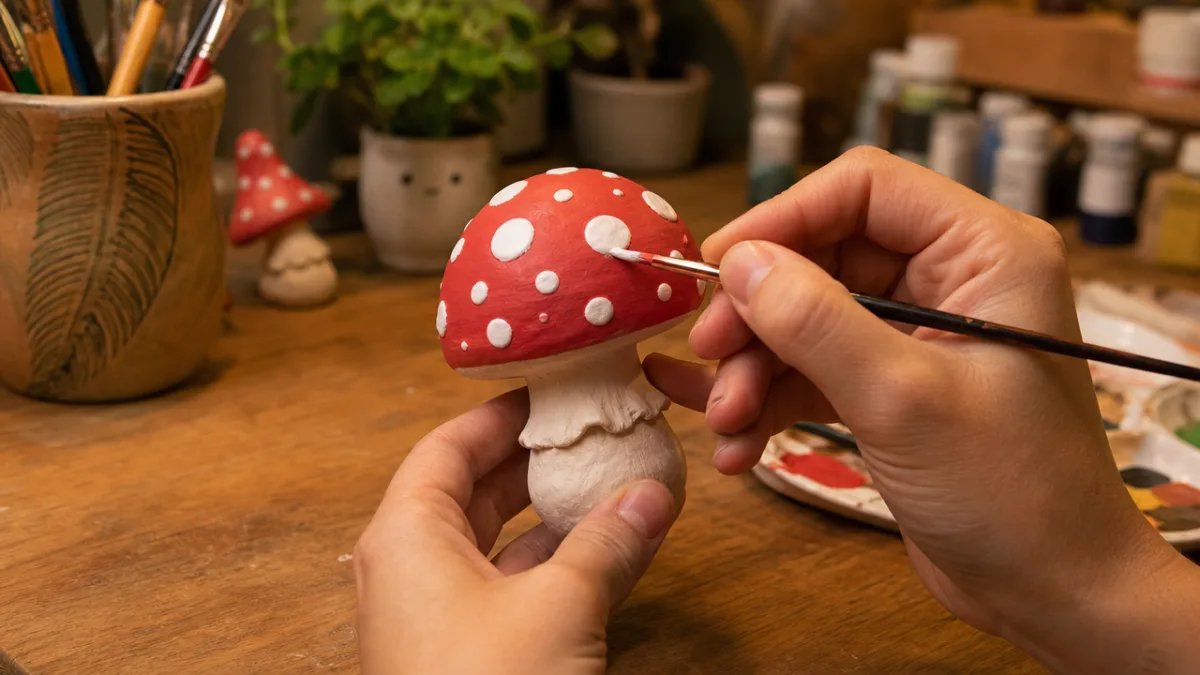
Apply a thin basecoat of white or light grey acrylic paint across the entire piece first. This primer-like layer seals the clay, prevents the subsequent colors from being absorbed unevenly into the porous surface, and makes every color you apply on top appear significantly more vibrant and true. Allow the basecoat to dry for thirty to sixty minutes before proceeding. Working in thin, even layers throughout the painting process is the key technique that separates polished-looking results from streaky, uneven finishes.
Color Application and Detailing Techniques
For the classic fairy tale color scheme, paint the cap in bright red using two thin coats, allowing full drying time between each layer. The white spots should be painted with two coats of titanium white to ensure full opacity and a crisp, clean appearance. The stem looks most naturalistic in a warm sandy beige or soft off-white color, perhaps with subtle shading in light brown at the base to suggest shadow and dimensional depth. Even very basic shading with a diluted darker tone adds surprising visual sophistication to the finished piece.
Dry-brushing is an excellent technique for adding texture and dimension without requiring advanced painting skills. Load a stiff brush lightly with a slightly lighter or darker version of your base color, wipe most of the paint away on a paper towel until barely any remains, then drag the brush across the clay surface. This deposits tiny amounts of color on the raised texture points, instantly creating depth and an aged, organic quality that makes handmade pieces look extraordinarily professional and carefully crafted.
Once all painted layers are fully dry — ideally left overnight — apply two coats of sealant to protect the finished surface from moisture, chipping, and wear. Matte sealant gives a natural, understated appearance that suits the organic woodland aesthetic perfectly, while gloss sealant makes colors appear richer and more vibrant and offers excellent durability for a piece that will be handled regularly. Brush-on Mod Podge or spray sealant both work well; simply apply in thin, even coats for the best results.
Styling, Display Ideas, and Creative Variations
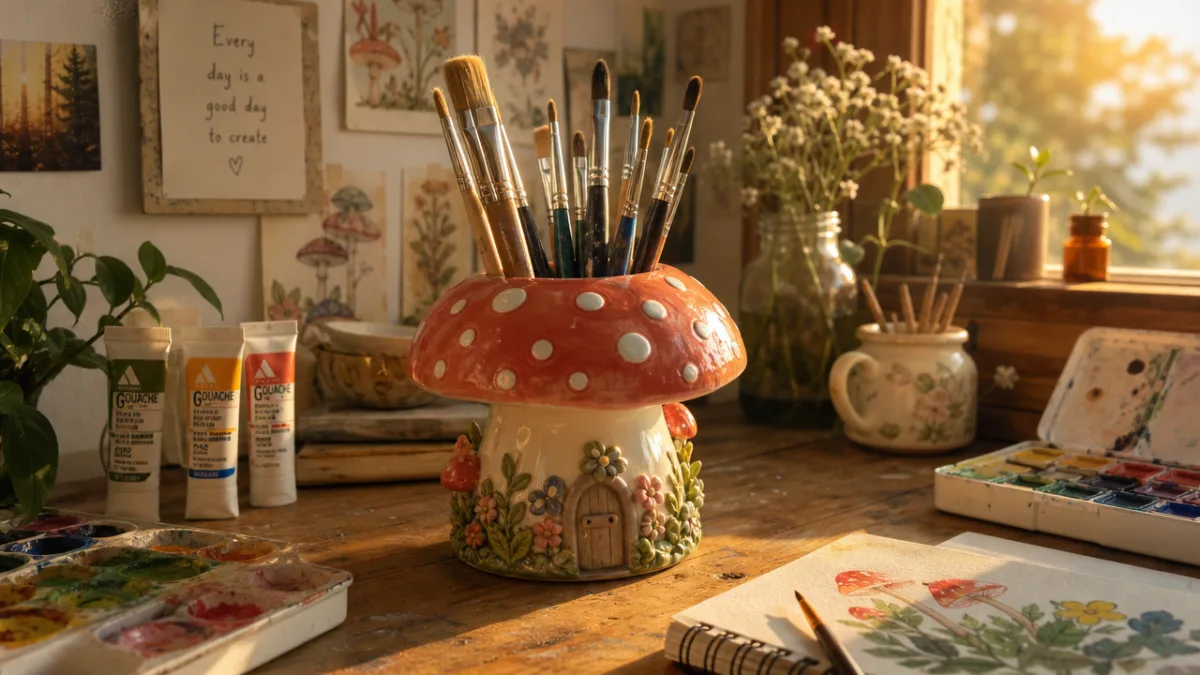
Once complete, your mushroom paintbrush holder deserves a display spot that shows it off to full advantage. On an art desk or craft table, it looks wonderful grouped with other handmade clay pieces, potted succulents, or small fairy lights to create a cohesive cottagecore aesthetic. The holder functions equally well as a pencil cup on a student’s homework desk, a pen holder on a home office writing surface, or even a makeup brush organizer on a vanity — demonstrating just how versatile and practical this project truly is beyond its decorative charm.
Gifting this holder is another wonderful option that makes it an even more rewarding project to undertake. A handmade mushroom brush holder packed with a set of quality paintbrushes or coloring pencils makes an incredibly thoughtful birthday, Christmas, or back-to-school gift for the creative person in your life. Personalizing it with the recipient’s favorite colors, adding their initials somewhere subtly on the base, or creating a matching set of small mushroom accessories alongside it elevates a simple craft into a genuinely meaningful, treasured gift that store-bought presents simply cannot replicate.
Creative variations on this basic design are virtually endless and well worth exploring once you’ve mastered the original. Consider making a whole mushroom village with several holders of different sizes grouped together, each painted in a different color family. You could try a dark academia version using deep burgundy and forest green tones. A pastel kawaii version with soft pink caps and gold spots would look stunning on a modern desk. Even a realistic brown and cream woodland mushroom painted with careful botanical accuracy makes for a surprisingly sophisticated and grown-up decorative piece.
Tips for Long-Term Care and Durability
Air-dry clay, even when sealed, benefits from a little mindful handling to maintain its appearance over years of use. Avoid leaving the holder in direct sunlight for extended periods, as UV exposure can gradually fade acrylic paints even through a sealant layer. Keep the holder away from prolonged moisture exposure — while a well-sealed piece can tolerate occasional water contact, it should never be submerged or left in a damp environment, as water can eventually penetrate the clay structure and cause it to soften or crack from within over time.
Resealing the piece annually with a fresh coat of Mod Podge or spray sealant is a simple maintenance step that significantly extends the visual life of the painted surface. If any chips or scratches appear in the paint over time, simply touch them up with the original paint colors, allow to dry fully, and apply a fresh layer of sealant over the repaired area. Because you mixed and applied the original colors yourself, you have complete control over repairs in a way that would be impossible with a mass-produced purchased item.
Perhaps most importantly, remember that small imperfections in handmade items are not flaws but features. The slight asymmetry of a hand-rolled stem, the variation in texture across a sculpted cap, the small brush stroke visible in an area of painted color — these are the marks of human hands and creative effort, and they are precisely what makes handmade objects so much more emotionally resonant and personally meaningful than anything that could come off a factory production line. Your mushroom paintbrush holder is unique in all the world, and that is something to genuinely celebrate and treasure.








What do you think?
It is nice to know your opinion. Leave a comment.