










Tiny House Storage: How To Repurpose Candle Jars
The Storage Challenge in Tiny Living
Tiny house living is genuinely one of the best decisions you can make — less clutter, lower bills, and a lighter footprint on the planet. But let’s be real: the storage situation is a constant puzzle. Every square inch has to pull its weight, and finding solutions that are both practical and nice to look at isn’t just a fun challenge, it’s kind of non-negotiable if you want to actually feel comfortable in your space.
When you go tiny, conventional storage wisdom goes right out the window. You can’t fall back on closets stuffed with plastic bins or a garage full of stuff you use twice a year. You start seeing storage potential everywhere — including in things most people toss without a second thought. That’s where repurposing really comes into its own, and honestly, candle jars might be the best-kept secret in small-space organization.
Think about how many candle jars get thrown away every year. Millions of them, made from thick, beautiful glass, often with lovely shapes and sturdy lids — and once the wax is gone, most people just recycle them. For tiny house folks, those jars are gold. Once you figure out how to clean and repurpose them, you’ve got the foundation of a storage system that’s attractive, flexible, and essentially free.
Cleaning and Preparing Your Candle Jars
Before a candle jar can start its second life, you need to get it properly cleaned up. A lot of people look at the leftover wax and the wick hardware stuck to the bottom and assume it’s too much of a hassle — but it’s actually pretty easy once you know what you’re doing. And it’s worth taking the time to do it right, especially if you’re planning to store food in them.
The freezer method is the go-to for wax removal, and it works like a charm. Just pop the jar in the freezer for a few hours or overnight. The wax contracts as it cools, pulls away from the glass, and usually comes out in one satisfying chunk. Wipe away any lingering residue with a paper towel, then wash the jar with warm soapy water. No special tools, no mess — it just works.
For stubborn labels and sticky adhesive residue, a little rubbing alcohol or Goo Gone does the trick. Rub it in with a cloth using circular motions until the adhesive lifts off. Once your jar is clean and dry, you can personalize it however you like — a chalk label, some washi tape, maybe a little painted detail that fits your home’s vibe. The goal is for it to look intentional, not like you rescued it from the recycling bin, even though you did. In a small space, the visual details really matter.
Organizing Your Kitchen with Candle Jars
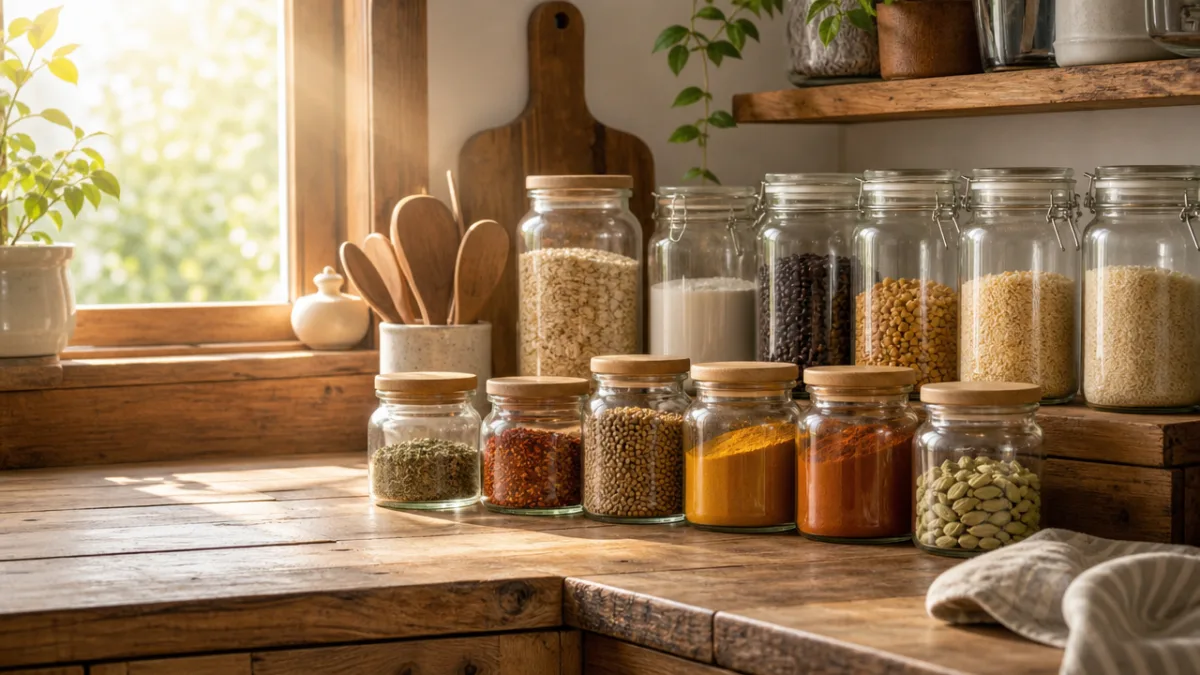
The kitchen is usually the toughest room to keep organized in a tiny house, and it’s also where candle jars make the biggest difference right away. Counter and cabinet space is at a premium, and bulky plastic containers often don’t play well with the odd shapes of small cabinetry. Glass jars, on the other hand, line up neatly, look cohesive, and let you see exactly what’s inside — which is huge when you’re working with limited space.
Dry goods storage is the obvious starting point. Rice, quinoa, oats, pasta, lentils, dried beans, nuts, seeds, flour, sugar — all of it transfers beautifully into medium and large candle jars. Line them up on a shelf or a small section of counter and they look like a thoughtfully curated collection rather than a cluttered pantry. And unlike opaque plastic containers, glass means you can tell at a glance what you have and when you’re running low.
Smaller jars — the kind from tea lights or travel candles — are ideal for herbs and spices. You can build a whole spice collection where every jar matches, which instantly makes your kitchen look more pulled together. Try mounting a narrow wooden shelf or a magnetic strip on the inside of a cabinet door and nestling your spice jars there — it frees up shelf space entirely. Some tiny house folks even attach small jars directly to cabinet walls with industrial velcro or wooden mounts, getting storage out of vertical space that would otherwise just sit empty.
Bathroom Storage Solutions Using Candle Jars
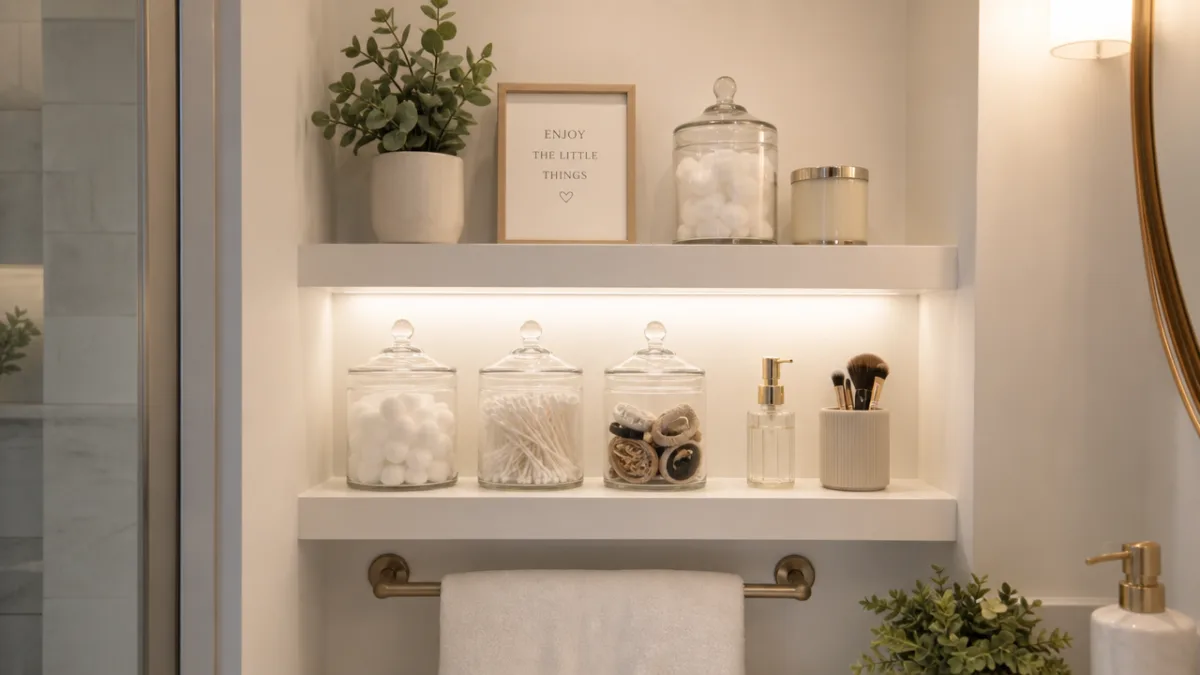
Tiny house bathrooms are notoriously short on counter space — we’re talking inches, not feet. Cotton balls, Q-tips, hair ties, bobby pins, small toiletries, makeup — all of it needs somewhere to live, and humidity makes organization even trickier. Candle jars with tight-fitting lids are a really elegant fix: they keep things dry, visible, and contained, and they look so much better than a collection of open bags and random bottles.
Medium jars with snug lids are perfect for cotton balls and rounds — they stay dust-free and dry, and a glass jar just looks nicer than a plastic bag sitting on the counter. Smaller jars are great for bobby pins, hair ties, and those tiny items that somehow end up scattered everywhere. A few matching jars arranged on the edge of your vanity or a small floating shelf can replace a whole organizer rack while actually taking up less space — visually and physically.
If you’re into making your own personal care products, candle jars become even more useful. Homemade sugar scrubs, whipped body butters, solid shampoo bars — they all store really well in clean glass. There’s something genuinely satisfying about filling a former candle jar with something you made yourself. It feels very on-brand for tiny house living, honestly. A chalk marker or a simple printed label keeps everything identifiable without cluttering up the look of your bathroom.
Using Candle Jars in Living and Work Spaces
The usefulness of repurposed candle jars doesn’t stop at the kitchen and bathroom. In a tiny house, your living space and workspace are often the same room, which means everything in it needs to work hard and look good at the same time. Candle jars step up nicely here too — as desk organizers, plant pots, craft supply holders, or just decorative objects that happen to be useful.
On a small desk, a few jars of different heights can hold pens and pencils, scissors, rulers, and other tools in a way that’s both tidy and easy on the eyes. The nice thing about using jars instead of a standard desk organizer is that you can customize the setup to actually fit what you use. A tall slender jar for long-handled tools, a wider shallow one for paper clips and small bits, a medium one for markers — it fits your workflow instead of the other way around.
Candle jars also make surprisingly good planters for small succulents, air plants, or herb cuttings. A succulent in a former candle jar with a layer of pebbles and a bit of cactus soil adds some life to your space without taking up much room at all. The glass lets you keep an eye on soil moisture easily, and the weight keeps things stable on a narrow windowsill. A little cluster of plant-filled jars on a shelf or sill can completely transform a dead corner into something warm and welcoming.
Creative and Decorative Applications
Beyond storage, candle jars are genuinely fun to use decoratively in a tiny home. In a small space, decorations need to earn their keep — ideally they should do something useful, or be striking enough that they’re worth the real estate on their own. Candle jars can do both, and with the huge variety of shapes, sizes, and glass colors out there across different candle brands, the creative possibilities are pretty much endless.
A nice approach is building small seasonal displays using the jars as vessels for natural elements. In fall, a jar filled with dried leaves, pine cones, or acorns feels cozy and intentional. In winter, some faux snow, a little figurine, and a strand of LED fairy lights makes a charming snow globe effect. In spring and summer, a single stem of fresh flowers in a water-filled jar is simple, fresh, and lovely. The best part is you can swap these out as the seasons change without buying anything new or needing storage space for elaborate decorations.
You can also use your cleaned-out jars to make new candles — which feels like a very satisfying full-circle moment. Candle-making supplies are inexpensive, the process doesn’t require a lot of space or equipment, and you get to customize the scents and colors completely. A lot of tiny house folks find it a meditative, enjoyable hobby that fits naturally into the handmade, intentional approach to living. The candles also make really thoughtful and inexpensive gifts.
Building a Complete Candle Jar Storage System
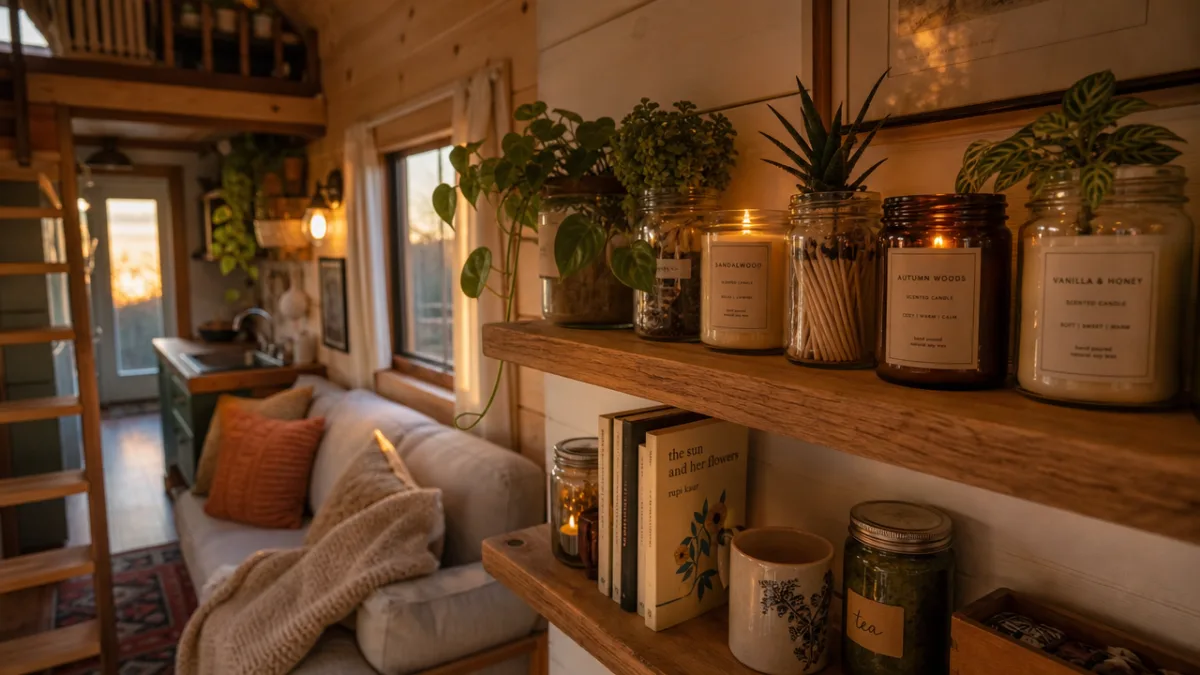
The real magic happens when you stop thinking about individual jars and start building an actual system. A cohesive collection of jars that addresses storage needs throughout your whole home — kitchen, bathroom, workspace, living area — is more than just practical. It becomes a design element in its own right, something that makes your tiny home look and feel more intentional. The best systems are ones where the storage solution actually enhances the space rather than just adding more visual noise.
Start by gathering what you have and what you can find. Ask friends and family for their spent jars, check thrift stores, or put out a call on a local community group — people are usually happy to pass them along instead of recycling them. Once you’ve got a collection, sort by size and think through which sizes match which needs in each room. A quick list organized by room and function can really help you distribute them thoughtfully rather than just randomly filling jars with whatever’s nearby.
Think about how to unify the collection visually through consistent labeling. Chalk labels are popular because you can wipe them off and relabel as your needs shift, which is exactly the kind of flexibility a tiny home calls for. A label maker or a set of printed labels in one font also looks clean and polished. Whatever your home’s aesthetic — minimalist, rustic, industrial — choose labels and any jar embellishments that fit that palette, and the whole storage system will feel like a deliberate design choice rather than something you improvised.
Here are the key principles to keep in mind as you build your system:
- Collect jars in a range of sizes so you can handle everything from tiny spices to bulkier dry goods and desktop supplies without forcing things into containers that don’t quite fit.
- Clean each jar thoroughly — freezer method for the wax, rubbing alcohol for the sticky residue — so every jar is genuinely ready to use, not just mostly clean.
- Label everything clearly and consistently, in a style that works with your home’s look and that you can update easily as things change.
- Think vertically: small mounted shelves, magnetic strips, and jar holders inside cabinet doors can dramatically expand your storage without eating into counter or floor space.
- Revisit the system every season and be flexible about moving jars from one purpose to another as your needs evolve — that adaptability is really the whole point.
- Loop in your community by welcoming spent jars from friends and family — you spread a useful habit and keep more glass out of the waste stream.
At the end of the day, repurposing candle jars in a tiny house is about a lot more than finding somewhere to put your quinoa. It’s a small, daily expression of the values that draw most people to tiny living in the first place — being resourceful, being intentional, making things rather than just buying them, and wasting as little as possible. Every jar that gets a second life is one less thing in a landfill, one fewer purchase to make, and one more little way your home reflects who you actually are. With some cleaning, some labels, and a bit of creativity, those former candle jars might just become your favorite part of your whole storage setup.








What do you think?
It is nice to know your opinion. Leave a comment.