










Charming DIY Home Office Ideas: Building Your Perfect Bookshelf Desk
The home office has become one of the most important spaces in modern living, and finding creative ways to make it both functional and beautiful is a challenge many homeowners face. A bookshelf desk — a clever combination of workspace and storage — is one of the most satisfying DIY projects you can undertake. It transforms an ordinary wall into a command center that reflects your personality while keeping everything you need within arm’s reach. Whether you are working with a dedicated room or carving out a nook in a shared space, this project can be adapted to suit virtually any home.
Why a Bookshelf Desk Is the Ultimate Home Office Solution
There is something deeply satisfying about a piece of furniture that does double or triple duty, and a bookshelf desk achieves exactly that. By integrating your work surface directly into a shelving system, you eliminate the footprint of two separate pieces of furniture and replace it with one cohesive, intentional unit. This is especially valuable in smaller homes or apartments where every square foot counts. The visual result is a wall that feels curated and purposeful rather than cluttered or chaotic.
Beyond the space-saving advantages, a bookshelf desk creates a psychological environment that is conducive to focus and creativity. When your books, reference materials, plants, and personal objects surround your workspace rather than sitting in a separate part of the room, you feel genuinely embedded in your work environment. Many people report that this sense of being “in” their space — rather than sitting at a desk that feels dropped into a room — helps them concentrate more effectively and feel more inspired throughout the day.
The DIY approach to this project gives you something that no flat-pack furniture purchase ever can: complete customization. You choose the depth of the shelves, the height of the desk surface, the spacing between each shelf, and the finish that ties everything together with your existing décor. Store-bought solutions almost always require compromise. A handmade bookshelf desk can be built precisely for your height, your monitor, your book collection, and your aesthetic vision. That level of personalization is genuinely priceless and well worth the effort involved.
Planning and Designing Your Bookshelf Desk
Before you pick up a single tool, spend meaningful time in the planning phase. Begin by measuring your available wall space carefully — width, height, and depth — and sketch out several configurations on paper or using a free design tool online. Think about how many shelves you need above and beside the desk surface, whether you want closed cabinets at the base for concealing clutter, and where your power outlets are located. Electrical access is often an afterthought that causes real frustration during installation, so map it out early.
Consider the ergonomics of your desk height as a non-negotiable starting point. The standard desk height is around 28 to 30 inches from the floor, but your ideal height depends on your own body proportions and whether you prefer to work seated or standing. If you use a monitor, factor in the vertical space it requires above the work surface. Shelf spacing above the desk should be at least 14 to 16 inches to comfortably accommodate large books, binders, and decorative objects of varying heights without the shelves feeling cramped.
Material selection is where your design vision really comes alive. Solid hardwood like oak, walnut, or maple offers durability and a premium look, but it comes at a higher cost and requires more skill to work with. Plywood — particularly birch plywood — is an excellent middle ground that machines beautifully, holds screws well, and can be finished to look stunning with the right stain or paint. MDF is the most budget-friendly option and paints beautifully, though it is heavier than plywood and less resistant to moisture. Make a materials list before visiting the lumber yard so you can compare costs and make an informed decision.
- Measure your wall space and map all electrical outlets before designing anything.
- Determine your ideal desk height based on your body proportions and chair height.
- Decide on a material — solid wood, plywood, or MDF — based on budget and desired finish.
- Sketch multiple layout options and live with the drawings for a day before committing.
- Plan cable management channels into the design from the very beginning.

Essential Tools and Materials for the Build
Approaching a project like this without the right tools is an exercise in frustration, so it is worth taking inventory before you begin. A circular saw or table saw is essential for making clean, straight cuts in sheet goods. If you are working with solid wood boards, a miter saw adds precision to your crosscuts. A pocket hole jig — such as a Kreg jig — is one of the best investments a beginner woodworker can make, because it allows you to join boards with strong, hidden screws that require minimal experience to execute successfully.
You will also need a drill and driver, a level (a long 48-inch level is ideal for ensuring your shelves sit perfectly flat), clamps of various sizes, sandpaper ranging from 80 to 220 grit, and your chosen finish. Wood filler is essential for hiding pocket holes and any small gaps in your joins. If you are painting, a quality primer and a foam roller will give you a smooth, professional-looking result. If you are staining and sealing, invest in a good brush and a pre-stain wood conditioner, especially if you are working with pine, which tends to absorb stain unevenly.
For hardware, wall anchors and screws are critical since a bookshelf desk filled with books can become extremely heavy. Wherever possible, attach the unit directly to wall studs using long structural screws — at least 3 inches — that bite well past the drywall and into the framing behind it. Floating shelf brackets, piano hinges for any cabinet doors, soft-close drawer slides, and cable grommets for routing power cords are all worth sourcing before you begin the build rather than making multiple trips to the hardware store mid-project.
- Circular saw or table saw for sheet goods
- Miter saw for accurate crosscuts
- Pocket hole jig for strong hidden joinery
- Drill, driver bits, and a comprehensive bit set
- 48-inch level and a tape measure
- Clamps — at least four, ideally eight or more
- Sandpaper from 80 to 220 grit
- Wood filler, primer, paint or stain, and topcoat
- Wall anchors, structural screws, and a stud finder
- Cable grommets and cord management accessories
Step-by-Step Construction Guide
Start by cutting all of your pieces to final dimension before assembling anything. Woodworkers call this “breaking down the sheet goods,” and doing it all at once means your saw setup stays consistent and your pieces all share the same reference measurements. Label each piece with painter’s tape and a marker as you cut it, noting which face is the finished face and which edge faces outward. This prevents confusion during assembly and helps you avoid accidentally installing a piece backwards or upside down, which is an easy mistake to make when many components look similar.
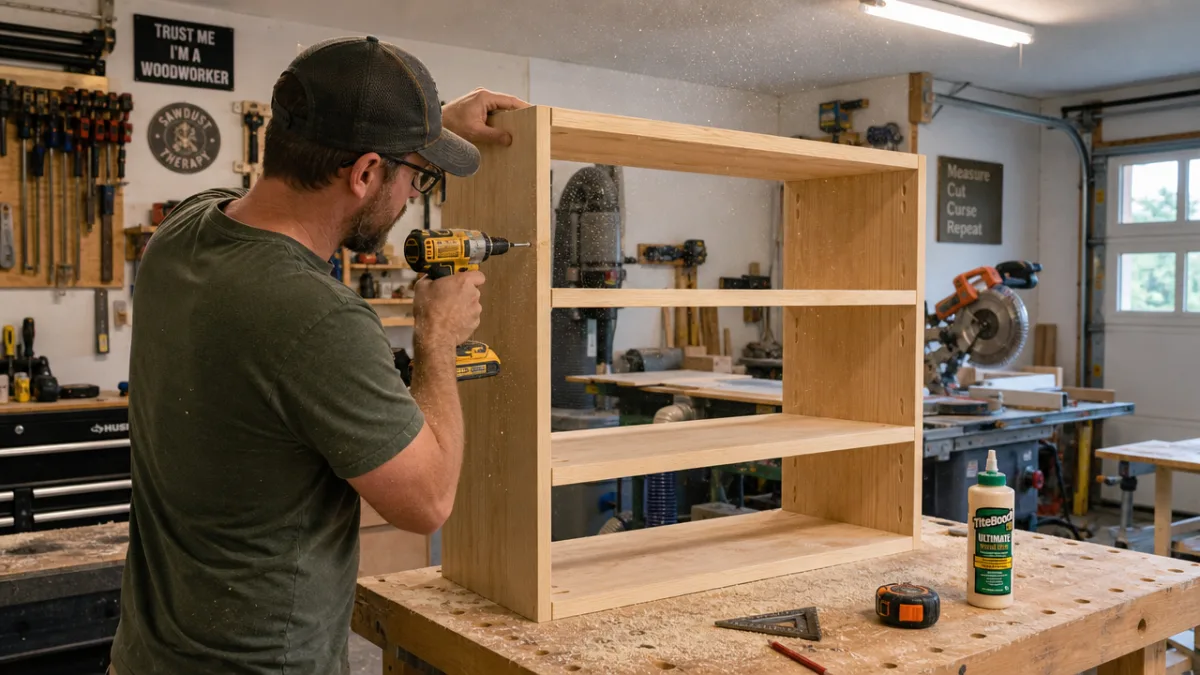
Assemble the outer frame of the bookshelf first — the top, bottom, and two vertical sides — using pocket hole screws or dowels depending on your preferred method. Clamp everything square before driving the fasteners home, and use a diagonal measurement check (measuring corner to corner in both directions) to confirm the frame is perfectly square before the glue sets. A unit that is even slightly out of square will cause problems when you try to install it against a wall or add internal shelves, so patience at this stage pays enormous dividends later in the project.
Once the outer frame is built, install your fixed shelves and the desk surface. The desk surface should be supported by the side panels of the unit as well as at least one bracket or cleat anchored into the wall behind it, because the leverage created by someone leaning on a cantilevered surface is considerable. Sand all surfaces thoroughly, working through the grits from coarse to fine, before applying your finish. Always sand in the direction of the wood grain and remove all dust with a tack cloth before applying primer or stain. Multiple thin coats of finish are always superior to one thick coat, which tends to drip and dry unevenly.
Finally, mount the completed unit to the wall. Use a stud finder to locate the framing behind the drywall and mark the stud positions lightly with pencil. Drive structural screws through the back panel of the unit or through a dedicated mounting cleat at both the top and bottom of the bookshelf, ensuring screws catch solid wood studs. Once mounted, use your level to confirm the unit is plumb and adjust if necessary before tightening all screws fully. A bookshelf desk that is visibly tilted will undermine the entire visual effect of the project no matter how beautifully it is built.
Finishing Touches: Styling Your Bookshelf Desk
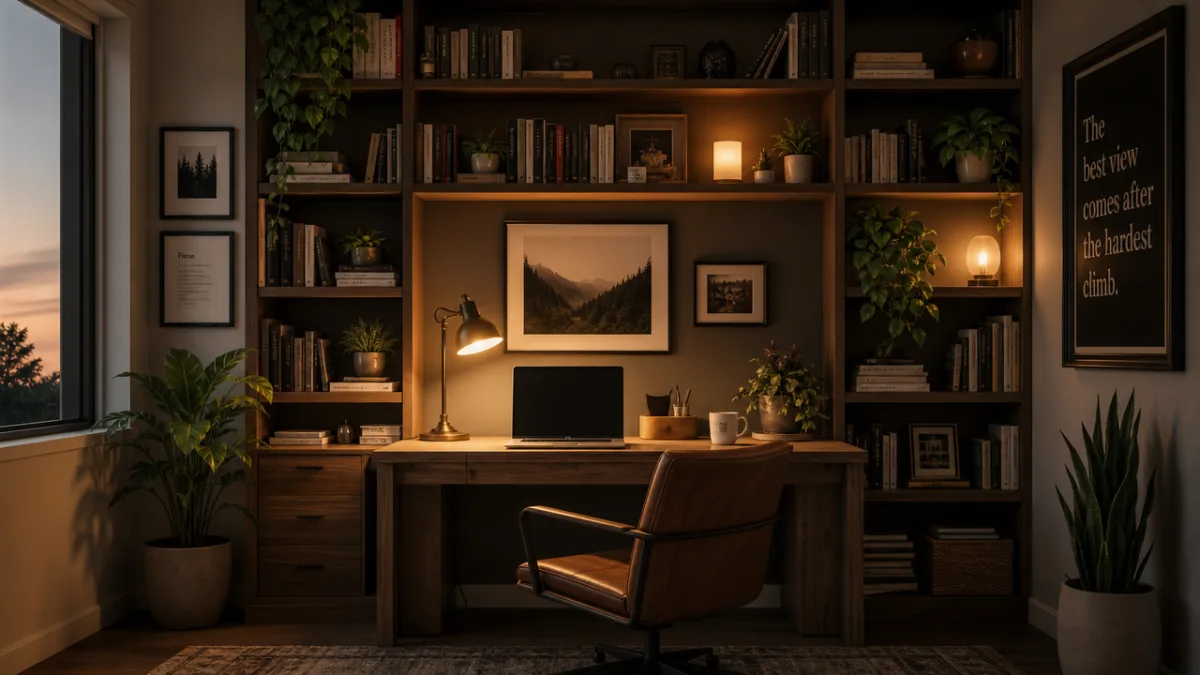
The construction phase is complete, but the styling phase is where your bookshelf desk truly comes alive and begins to feel like the charming, intentional space you imagined at the start. Begin by thinking about your desk surface itself. A quality desk pad or leather blotter instantly elevates the look of the work area and protects the surface from scratches and wear. Choose one that complements your color palette — a warm tan leather blotter looks stunning against white or natural wood shelves, while a dark green blotter brings a classic, library-inspired feel to the space.
Arrange your shelves using the classic design principle of grouping objects in odd numbers — threes and fives tend to look more dynamic and natural than symmetrical pairs. Mix vertical stacks of books with horizontal stacks to create visual rhythm. Introduce objects of varying heights, textures, and materials: a small trailing plant like pothos or string of pearls, a ceramic vase, a brass bookend, a small framed photograph. Leave some negative space on each shelf rather than filling every inch, because breathing room is what separates a styled shelf from a cluttered one.
Lighting deserves special attention in a bookshelf desk setup. A well-placed task lamp on the desk surface is essential for reducing eye strain during focused work. Consider adding small LED puck lights or a flexible LED strip along the underside of the shelves above the desk, which provides ambient illumination without glare. If your shelves extend to the ceiling, a small lamp on one of the upper shelves can create a warm glow in the upper zone of the wall that makes the entire room feel more inviting during evening work sessions.
Cable management, while unglamorous, is the secret ingredient that separates a truly polished bookshelf desk from one that looks like it is perpetually in a state of construction. Run power strips inside the unit or behind the back panel, routing cords through the grommets you installed during the build. Use velcro cable ties to bundle cords together neatly. A wireless keyboard, wireless mouse, and wireless charger eliminate many cords at the desktop level entirely. When a guest or colleague sees your workspace on a video call, the clean lines and thoughtful organization communicate professionalism and intentionality in a way that a messy cord situation simply cannot.
Personalizing Your Space for Productivity and Inspiration
A home office should feel like an extension of who you are, not a sterile cube transplanted from a corporate building into your living space. The beauty of a DIY bookshelf desk is that it invites genuine personalization at every level. Consider what objects genuinely bring you joy or calm your mind — perhaps a small collection of vintage cameras, a rotating selection of art prints propped against the wall, or a row of succulents in mismatched pottery. These personal touches are not distractions from work; research in environmental psychology consistently shows that spaces that feel personal and aesthetically pleasing support better mood, creativity, and sustained attention.
Color is a powerful tool in a home office environment, and your bookshelf desk gives you a large canvas to work with. If you painted the unit in a crisp white, consider using your book spines and decorative objects to introduce color in a controlled, curated way. Arranging books by color — creating gradients from warm reds and oranges on one end to cool blues and greens on the other — is a popular styling choice that looks striking in photographs and in person. Alternatively, a deep, moody paint color like forest green, navy, or charcoal for the back panel of the shelves creates a dramatic focal point that makes the entire wall feel intentional and sophisticated.
Seasonal updates keep the space feeling fresh and prevent it from becoming visually static over time. Swap out a few key objects on the shelves with each season — lighter, brighter accents in spring and summer, warmer textures like small wool objects or rich wood tones in autumn and winter. This habit encourages you to regularly edit and declutter the shelves, preventing the gradual accumulation of objects that eventually makes even the most beautiful shelf look overwhelmed. Treat your bookshelf desk as a living display rather than a fixed installation, and it will continue to delight and inspire you for years to come.
- Use odd numbers when grouping objects — threes and fives create natural visual rhythm.
- Mix object heights, materials, and textures across each shelf zone.
- Leave deliberate negative space rather than filling every available inch.
- Arrange books by color for a striking, graphic effect.
- Rotate seasonal accents to keep the display feeling fresh and curated.
- Layer lighting — task lamp at the desk, ambient lighting in the upper shelf zones.
Budget Considerations and Scaling the Project to Your Needs
One of the great virtues of the DIY bookshelf desk project is its extraordinary scalability. You can build a genuinely impressive unit for a few hundred dollars in materials if you choose plywood or MDF and do your own finishing work, or you can invest in premium hardwoods and custom hardware for a result that rivals bespoke furniture costing thousands. The key is to be honest with yourself about your budget before you begin, and to make all of your design decisions within those constraints rather than expanding scope mid-project, which is how DIY budgets spiral out of control.
If budget is tight, consider sourcing materials creatively. Salvage yards and architectural salvage shops sometimes have beautiful old shelving boards or solid wood panels that can be repurposed at a fraction of the cost of new lumber. Online marketplaces like Facebook Marketplace and Craigslist frequently feature people selling off old bookshelves, kitchen cabinets, or solid wood furniture that can be deconstructed and repurposed. Even hardware stores sometimes sell “cull lumber” — boards with minor defects — at a significant discount, and many of those defects can be minimized with strategic placement or cut around entirely.
If you are new to woodworking and find the full build intimidating, consider a hybrid approach. Many home improvement stores sell pre-primed MDF shelf boards in standard widths and sell basic open-back shelf units at low price points. You can purchase these, paint them to match, add a desk surface cut from a single plywood panel, and mount everything to the wall in a cohesive arrangement. The result will not be as seamlessly integrated as a fully custom build, but it can absolutely be beautiful and functional, and it is an excellent way to gain confidence before tackling a more ambitious version in the future. Every skilled maker started somewhere, and the best project is always the one you actually complete.
Finally, consider the long-term return on investment of this project. Quality built-in furniture adds measurable value to a home, and a bookshelf desk that is well-built and attractively finished will serve you for a decade or more. Unlike flat-pack furniture that begins to deteriorate within a few years of use, a solid plywood or hardwood unit will age gracefully and can be refinished or repainted to refresh its look at any point. The time and money you invest in building it right the first time is an investment that compounds over years of daily use, making this one of the most rewarding and practical DIY projects a homeowner can undertake.








What do you think?
It is nice to know your opinion. Leave a comment.