










Gardening 101: Hellebore – The Complete Guide to Growing Winter’s Most Elegant Bloom
Introduction to Hellebores: The Jewels of the Winter Garden
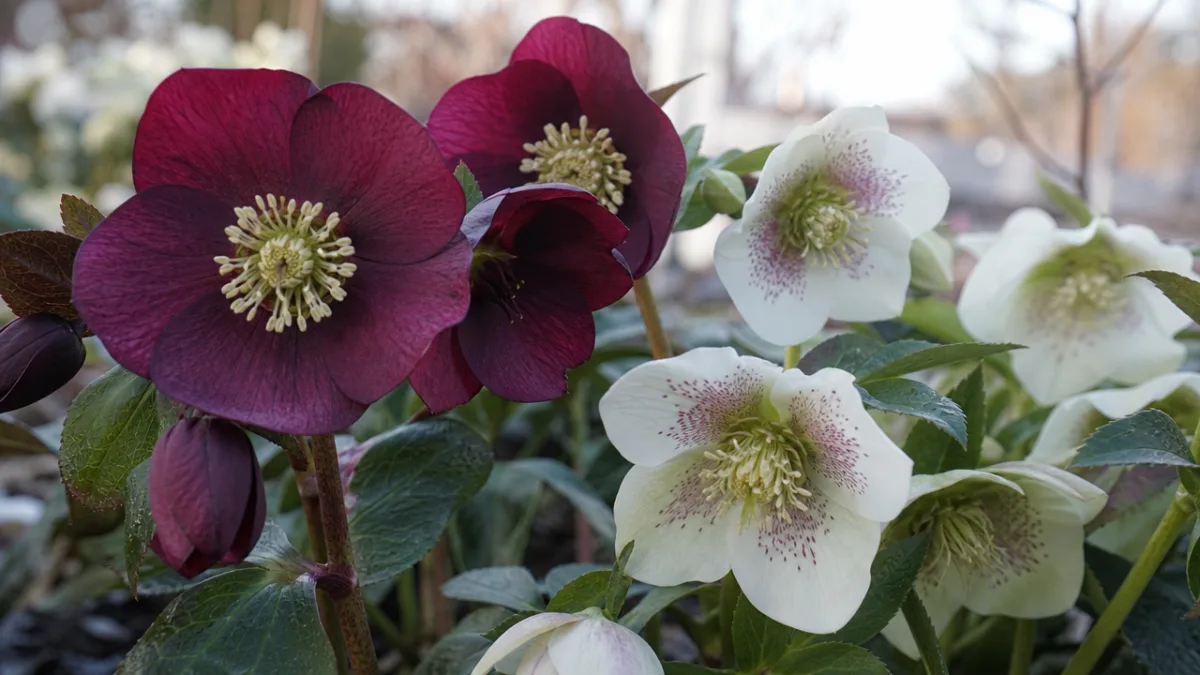
Few plants command as much admiration and devotion among gardeners as the hellebore. Known affectionately as the Lenten Rose or Christmas Rose depending on the species, hellebores are perennial flowering plants that bloom during the coldest months of the year, producing exquisite, nodding flowers in colors ranging from pure white and soft pink to deep burgundy, slate purple, and nearly black. Their willingness to flower when almost nothing else dares makes them among the most cherished plants in any temperate garden.
Hellebores belong to the family Ranunculaceae and are native primarily to Europe and Asia, with the greatest diversity found in the Balkans and surrounding regions. The genus Helleborus contains roughly 20 species, though the most widely cultivated in home gardens are Helleborus orientalis (the Lenten Rose), Helleborus niger (the Christmas Rose), and the many complex hybrids collectively referred to as Helleborus x hybridus. These hybrids, developed through decades of careful breeding, now offer an astonishing palette of colors, forms, and sizes that appeal to both casual gardeners and serious plant collectors alike.
What truly sets hellebores apart is their exceptional staying power in the garden. These are not fleeting seasonal annuals that demand replanting every year. Hellebores are long-lived perennials that, once established, can thrive in the same spot for decades with minimal intervention. Their leathery, evergreen foliage provides year-round structure and ground cover, while their late-winter to early-spring blooms offer a visual spectacle precisely when gardeners are most hungry for signs of life and color. For anyone looking to add year-round interest and low-maintenance beauty to a shaded or partially shaded garden, hellebores are an essential choice.
Understanding Hellebore Varieties: Choosing the Right Plant for Your Garden
With so many species and cultivars available, selecting the right hellebore for your garden requires a basic understanding of how the different types perform. Helleborus niger, the Christmas Rose, is named for its tendency to bloom around the winter holidays in mild climates, producing clean white flowers that age to a soft pink over time. It is slightly more challenging to grow than other species and prefers a more alkaline soil, but when it thrives, it delivers some of the most breathtaking flowers in the winter landscape.
Helleborus orientalis, commonly called the Lenten Rose, is the workhorse of the genus and the species most often recommended for beginner gardeners. It blooms from late winter into spring, typically around February through April in most temperate regions, and is renowned for its vigor, adaptability, and willingness to self-seed prolifically throughout the garden. While the flowers of seedlings can be variable in color and form, this unpredictability is actually part of the charm for many gardeners who delight in discovering what new combinations emerge each season.
The modern hybrid hellebores, sold under names like the Winter Jewels series, the Wedding Party collection, or the Candy Love series, represent the cutting edge of hellebore breeding. These plants have been selected for upward-facing flowers rather than the traditional nodding habit, making them far easier to appreciate without having to crouch down or lift the blooms by hand. Double-flowered forms, picotee-edged varieties, and those with dramatic dark nectaries or contrasting veining are all available, giving gardeners an extraordinary range of options. When selecting cultivars, look for plants with multiple buds still unopened, as this ensures weeks of ongoing bloom rather than a plant already past its peak.
Some additional species worth noting include Helleborus foetidus, the stinking hellebore, which is a dramatic architectural plant with deeply divided dark green leaves and clusters of pale green, bell-shaped flowers edged in reddish-purple. Despite its unappealing common name, the smell is only noticeable when the foliage is crushed, and the plant itself is a stunning presence in a shaded garden. Helleborus argutifolius, the Corsican hellebore, is another standout, growing larger than most with bold, spiny-edged leaves and large clusters of chartreuse flowers that provide striking contrast against darker plantings.
Planting Hellebores: Site Selection, Soil Preparation, and Timing
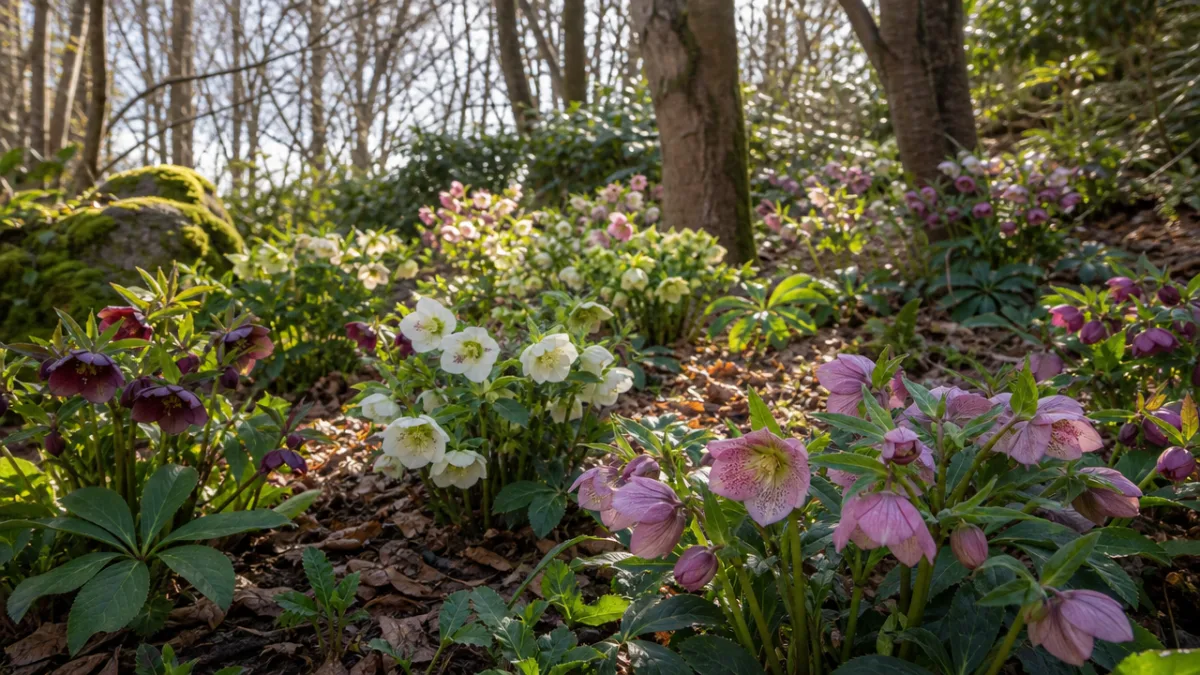
Choosing the right location is perhaps the single most important factor in establishing hellebores successfully. These plants are fundamentally woodland plants, adapted to growing beneath the dappled canopy of deciduous trees where they receive bright indirect light or gentle morning sun followed by afternoon shade. In climates with hot summers, full shade during the afternoon hours is essential, as direct summer sun can scorch the foliage and stress the plant significantly. In cooler northern gardens, a spot with more light exposure may be perfectly acceptable and can even encourage more prolific blooming.
Soil preparation deserves serious attention before planting, as hellebores will be living in their chosen spot for many years and poorly prepared soil is difficult to remedy after the fact. Hellebores prefer a rich, humus-laden, well-draining soil with a neutral to slightly alkaline pH, ideally between 6.0 and 8.0. Heavy clay soils should be amended generously with compost, well-rotted leaf mold, or grit to improve drainage, as waterlogged roots are one of the quickest ways to lose a hellebore. Sandy soils, conversely, benefit from the addition of large quantities of organic matter to improve moisture retention and nutrient availability.
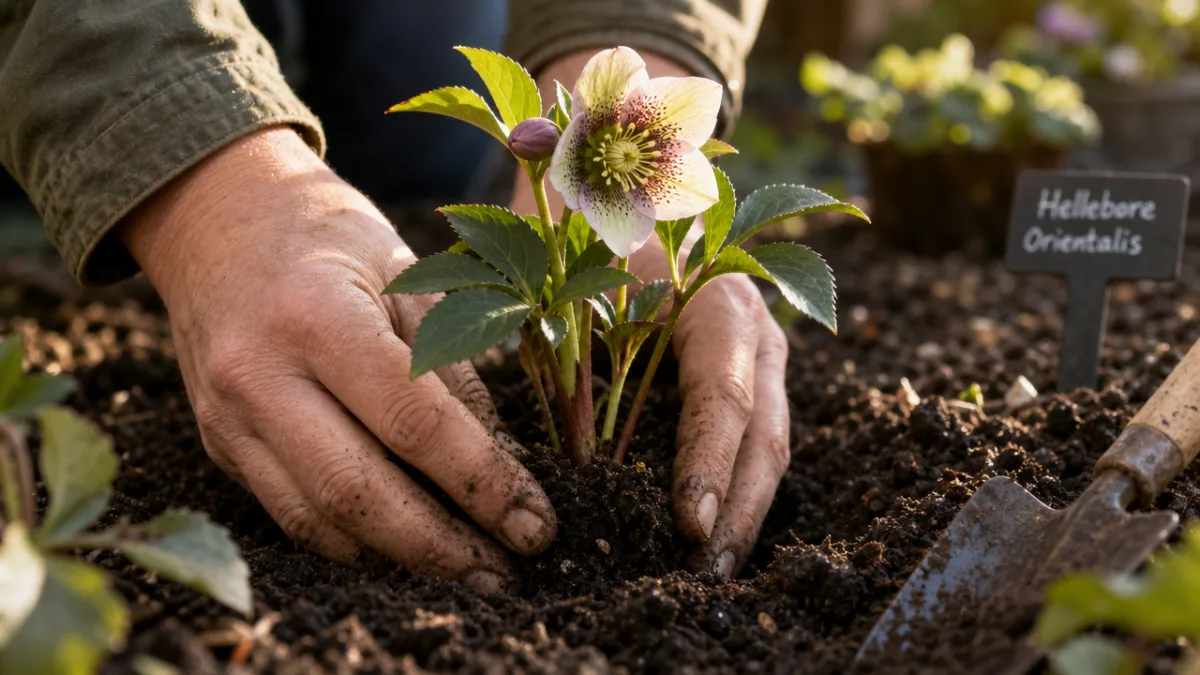
The ideal time to plant hellebores is in autumn, when cooler temperatures and more regular rainfall allow the roots to establish before the onset of winter dormancy. Spring planting is also perfectly viable, though plants set out in spring may require more attentive watering through their first growing season as they establish during the warmer months. When planting, set the crown of the plant no deeper than it was growing in its nursery pot, as planting too deeply can prevent flowering and may rot the crown. Space plants approximately 18 to 24 inches apart to allow for their eventual mature size and to provide good air circulation around the foliage.
Before placing your hellebores in their final home, take a moment to prepare the planting hole thoroughly. Dig a hole at least twice as wide as the root ball and a little deeper, then backfill the bottom with a mixture of compost and the excavated soil. Adding a handful of slow-release granular fertilizer or a layer of well-rotted garden compost beneath the root ball gives the plant an excellent nutritional foundation. After planting and firming the soil gently around the roots, water thoroughly and apply a mulch of leaf mold or bark chips around the base of the plant, keeping the mulch a few inches away from the crown to prevent rotting.
Ongoing Care: Watering, Feeding, and Seasonal Maintenance
One of the great virtues of hellebores is that they are genuinely low-maintenance once properly established. In their first year, consistent watering is important, particularly during dry spells in summer, to help the roots develop a strong network through the soil. After the first or second growing season, established hellebores are remarkably drought-tolerant and typically need supplemental watering only during prolonged dry periods. Overwatering is a far greater risk than underwatering for these plants, and gardeners who check the soil moisture before reaching for the hose will almost always have healthier plants.
Feeding hellebores modestly but regularly pays dividends in the quality and quantity of their blooms. A top-dressing of well-rotted garden compost or leaf mold applied each autumn replenishes the organic content of the soil and feeds the plants slowly and gently throughout the winter and into spring. Many gardeners also apply a balanced slow-release granular fertilizer in late winter just as the new growth is beginning to emerge, which helps fuel the flowering display. High-potassium fertilizers, such as those sold for tomatoes or roses, can encourage more abundant blooming, while avoiding high-nitrogen feeds, which promote excessive leafy growth at the expense of flowers.
The most important seasonal maintenance task with hellebores is the removal of old foliage. In late winter, just as the new flower buds are beginning to push up through the soil, cut away all of the previous year’s leaves at the base of the plant. This has several benefits: it allows you to see and appreciate the flowers without the distraction of old foliage, it dramatically improves air circulation around the crown of the plant and reduces the risk of fungal diseases, and it removes any diseased or damaged leaves before they can spread infection to the new growth. Use clean, sharp scissors or secateurs and dispose of the removed foliage rather than composting it, as it may harbor hellebore leaf spot fungus.
Deadheading spent flowers is optional and entirely a matter of personal preference. If you want your hellebores to self-seed and gradually naturalize throughout a border or woodland area, leave the flowers in place after blooming to allow the seeds to ripen and scatter. If you prefer to maintain control over where seedlings appear, or if you want to encourage the parent plant to put its energy into vegetative growth rather than seed production, remove the flower stems as the blooms fade. Bear in mind that seedlings from hybrid parents may not replicate the qualities of the parent plant, so gardeners with named cultivars often prefer to deadhead to maintain the integrity of their collection.
Pests, Diseases, and Common Problems: Keeping Your Hellebores Healthy
Hellebores are among the more trouble-free garden perennials, but they are not entirely immune to problems. The most common disease affecting hellebores is hellebore leaf spot, caused by the fungus Coniothyrium hellebori. This disease manifests as dark brown or black spots with pale centers on the leaves, and in severe cases can spread to the stems and flower buds, significantly disfiguring the plant. The best prevention is the routine removal of old foliage before new growth emerges, combined with good air circulation around the plants. If leaf spot does appear, affected leaves should be removed and destroyed, and the plant can be treated with a copper-based fungicide or a fungicide containing myclobutanil.
Hellebore black death is a far more serious problem caused by Helleborus net necrosis virus, transmitted by aphids. Infected plants develop black streaking on the leaves and stems, stunted growth, and distorted flowers. Unfortunately, there is no cure for this viral disease, and affected plants should be removed and destroyed immediately to prevent the spread of the virus to healthy plants. Controlling aphid populations through the use of insecticidal soap or neem oil helps reduce the risk of transmission. Purchasing plants only from reputable nurseries that maintain strict hygiene standards is also an important preventive measure.
In terms of animal pests, slugs and snails can be problematic, particularly on young seedlings or the tender new growth that emerges in late winter and early spring. Protecting plants with slug pellets, copper tape, or the regular application of biological control nematodes can help manage populations. Vine weevils are another potential pest, with their larvae feeding on hellebore roots in late summer and autumn, causing plants to wilt and collapse suddenly. If a plant appears to be failing without obvious above-ground cause, examine the root ball for the characteristic white C-shaped grubs and treat with pathogenic nematodes during the warmer months when the grubs are active near the soil surface.
It is worth noting that all parts of the hellebore plant are toxic if ingested, containing glycosides and other compounds that can cause serious illness in humans and animals. Gardeners should wear gloves when handling hellebores, particularly when cutting back old foliage or dividing plants, as the sap can cause skin irritation in sensitive individuals. Keep pets away from areas where hellebores grow, and ensure that children understand the plants are not to be touched or eaten. This toxicity, however, has a silver lining in the garden: it means that deer and rabbits, two of the most destructive garden pests, almost universally leave hellebores alone, making them an excellent choice for gardens in areas where browsing animals are a concern.
Propagation: Dividing and Growing Hellebores from Seed
Growing your hellebore collection through propagation is one of the most rewarding aspects of cultivating these plants, and there are two primary methods available to home gardeners. Division is the most straightforward approach and produces plants identical to the parent, making it the preferred method for preserving named cultivars or particularly beautiful specimens. The best time to divide hellebores is in early autumn or immediately after they finish flowering in spring, when the soil is workable and temperatures are mild enough to allow the divided sections to re-establish before facing the stress of extreme heat or cold.
To divide a hellebore, begin by digging up the entire clump as carefully as possible, taking a wide berth around the root system to minimize damage. Shake or wash off excess soil so you can see the structure of the crown clearly, then use a sharp spade or a strong knife to cut through the crown, ensuring that each division has a healthy set of roots and at least two to three growing points. Replant the divisions immediately at the same depth they were growing before, water thoroughly, and keep the soil consistently moist for several weeks while the new root systems establish. Expect some wilting or stress in the days immediately following division, which is entirely normal and should resolve quickly.
Growing hellebores from seed is a slower but deeply satisfying process that can produce unexpected and sometimes spectacular new plants. The key to success with hellebore seed is freshness: the seeds lose viability quickly once dried and should be sown as soon as they are ripe, typically in early to midsummer when the seed pods begin to yellow and split. Sow the seeds in a gritty, free-draining seed compost, cover lightly, and place the trays in a cold frame or sheltered outdoor spot where they will experience natural temperature fluctuations. Germination typically occurs the following late winter or early spring after the seeds have experienced a period of cold stratification.
Seedlings grow slowly in their first year and should be kept in a nursery area where they can develop without competition from larger plants. Most seedlings will not flower until their second or even third year, so patience is essential. The reward, however, is well worth the wait. Seed-grown hellebores often display fascinating variation, and gardeners who sow seed from their best plants over many years can gradually develop a garden full of unique, site-adapted plants that simply cannot be purchased from any nursery. The selection process involved in choosing which seedlings to keep and which to remove is itself a deeply engaging and pleasurable aspect of hellebore cultivation that hooks many gardeners for life.
Designing with Hellebores: Companion Plants and Garden Combinations
Beyond their individual beauty, hellebores are supremely versatile design plants that combine elegantly with a wide range of other shade-tolerant perennials, bulbs, shrubs, and groundcovers. Understanding how to pair them effectively allows gardeners to create plantings with overlapping seasons of interest and complementary textures that look wonderful throughout the year, not just during the hellebore’s winter and spring bloom season. Thinking of hellebores as the backbone of a shade planting, rather than as isolated specimen plants, unlocks their full design potential.
For winter and early spring interest, hellebores combine beautifully with snowdrops (Galanthus species), winter aconites (Eranthis hyemalis), and early crocus cultivars. The delicate white bells of snowdrops weaving through a carpet of hellebore foliage create one of the most classically beautiful plant combinations in the temperate garden. As spring progresses, Virginia bluebells, trilliums, and wood anemones make charming companions, followed later by hostas, whose bold, architectural foliage expands to fill the spaces between hellebores as the season warms and provides a striking textural contrast to the hellebore’s more refined leaves.
Ferns are among the most successful long-term companions for hellebores, sharing similar preferences for moist, humus-rich, shaded conditions and providing a wonderful contrast in texture between their finely divided fronds and the bold, palmate leaves of the hellebores. Deciduous ferns like the Japanese painted fern (Athyrium niponicum var. pictum) die back in winter, allowing full appreciation of the hellebore flowers, then emerge in spring to provide a summer canopy that keeps the soil cool and moist. Evergreen ferns like Polystichum setiferum provide year-round structure and are particularly beautiful when combined with the late-winter flowers of hellebores in a coordinated green, white, and silver planting scheme.
When designing broader planting schemes, consider layering hellebores beneath deciduous shrubs or small trees that provide the dappled shade they prefer. Witch hazels (Hamamelis species), ornamental cherries, and crabapples all make excellent overhead companions, providing winter interest at a higher level while allowing the hellebores to shine beneath them. Underplanting with hellebores also has practical benefits: their dense, weed-suppressing foliage reduces the maintenance demands of bare soil beneath trees and shrubs while adding ornamental value to what might otherwise be a difficult planting area where little else will grow successfully.
Finally, consider hellebores in containers for patios, courtyards, or other paved areas where in-ground planting is not possible. Large containers filled with a rich, loam-based compost mixed with extra drainage material can support hellebores very effectively, and the advantage of container growing is the ability to move plants into more prominent positions when they are at their most beautiful and then reposition them for the rest of the year. Choose large containers with excellent drainage, water more frequently than you would in-ground plants, and feed regularly throughout the growing season for best results. A group of three to five containers planted with different hellebore varieties can create a truly spectacular winter display that transforms even the smallest outdoor space into a garden of genuine beauty and botanical interest.








What do you think?
It is nice to know your opinion. Leave a comment.