










Transforming Your Basement into the Ultimate Home Gym
Converting an unused basement into a dedicated home gym is one of the most rewarding home improvement projects you can undertake. The basement offers a naturally isolated environment, away from the main living areas of your home, allowing you to exercise without disturbing family members and without the noise and distractions that come with shared living spaces. Whether you are a casual fitness enthusiast or a serious athlete, a basement gym gives you the freedom to train on your own schedule, in your own way, without ever leaving home.
The appeal of a basement gym goes far beyond mere convenience. When you invest in a well-designed workout space at home, you eliminate the monthly cost of a gym membership, the commute time, the wait for equipment, and the social pressure that many people feel in public fitness centers. Over the course of several years, the savings alone can easily justify the upfront cost of setting up your space properly. More importantly, having a gym steps away from your bedroom dramatically increases the likelihood that you will actually use it consistently, which is ultimately the most important factor in any fitness journey.
A basement gym also gives you total control over the environment. You can set the temperature, choose the music, decide on the lighting, and arrange the equipment exactly as you prefer. For those who enjoy early morning or late-night sessions, this freedom is invaluable. The basement’s natural insulation also helps maintain a cooler temperature during summer months, making intense workouts more comfortable. With thoughtful planning, your basement can become not just a functional gym, but a space you genuinely look forward to spending time in every single day.
Designing a Strong and Functional Storage Wall
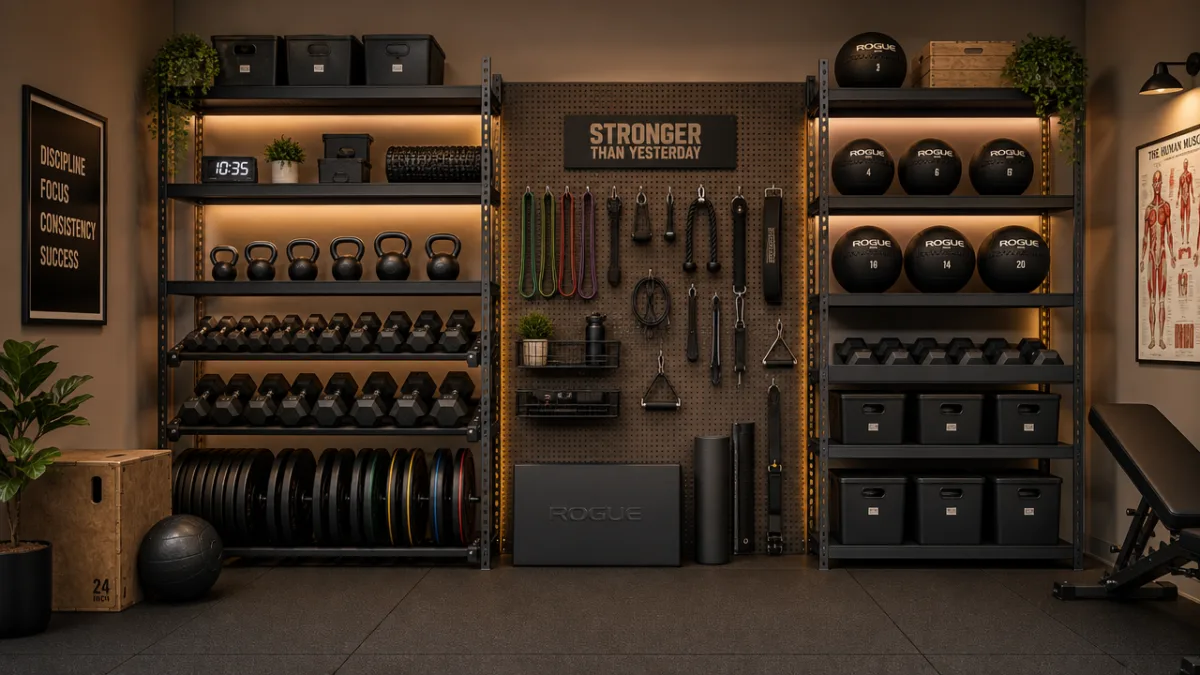
The storage wall is perhaps the single most transformative element you can incorporate into a home gym basement. Rather than scattering equipment across the floor and creating a cluttered, disorganized environment, a well-designed storage wall centralizes everything in one visually cohesive and highly accessible system. Think of it as the backbone of your gym’s organization strategy, a vertical structure that holds dumbbells, resistance bands, kettlebells, foam rollers, jump ropes, and any other accessories you accumulate over time, all within easy reach and clearly visible at a glance.
Building a strong storage wall typically involves installing heavy-duty shelving units, wall-mounted racks, pegboards, and custom brackets designed specifically for gym equipment. The key is to think vertically, maximizing the height of your basement ceiling rather than spreading things outward across valuable floor space. Adjustable shelving systems are particularly useful because they allow you to reconfigure the layout as your equipment collection evolves. Pairing fixed shelving for heavier items like weight plates with flexible pegboard sections for smaller accessories creates a system that balances strength with adaptability.
Material choices matter enormously when designing a storage wall intended to hold significant weight. Solid wood shelving with metal brackets, powder-coated steel systems, or purpose-built modular garage storage units all perform well in a gym environment. Avoid lightweight particleboard or inexpensive plastic shelving, which can bow, crack, or fail under the repeated stress of heavy weights. Anchoring the entire system securely to wall studs is non-negotiable for safety. A properly anchored storage wall not only keeps your equipment organized but also ensures that nothing falls or shifts unexpectedly during a workout session.
Choosing the Right Shelving System for Heavy Equipment
When selecting shelving for a gym storage wall, load capacity should be your primary consideration. A full set of dumbbells ranging from five to fifty pounds can easily weigh several hundred pounds in total, and that figure grows quickly when you add kettlebells, medicine balls, and weight plates. Look for shelving rated to hold at least 200 to 300 pounds per shelf, and always err on the side of caution by choosing systems rated for significantly more than your anticipated load. This gives you room to add equipment over time without worrying about exceeding the system’s limits.
Industrial-style steel shelving units originally designed for warehouses or garages are an excellent and cost-effective option for home gym storage walls. These systems are widely available, easy to assemble, highly adjustable, and built to handle substantial weight with no problems. Another popular option is a wall-mounted dumbbell rack, which keeps your free weights organized horizontally at an ergonomic height, making it easy to select the right weight quickly during a workout. Some homeowners also choose custom-built wooden shelving for a more refined aesthetic, which can be stained or painted to match the overall design theme of the gym.
Organizing Accessories with Pegboards and Hooks
Pegboards are among the most versatile storage solutions available for a home gym, and they deserve a prominent place on your storage wall. A large section of painted pegboard fitted with an assortment of hooks, bins, and brackets can neatly hold resistance bands, jump ropes, lifting straps, gloves, foam rollers, ab wheels, and dozens of other small accessories that would otherwise end up in a disorganized pile in the corner. Because pegboard hooks are fully repositionable, you can rearrange your layout at any time without drilling new holes or purchasing new hardware.
Painting your pegboard a bold accent color, or even painting individual hooks and sections in different colors to indicate categories of equipment, is a simple and affordable way to add personality to your storage wall while improving functionality. Color coding makes it faster to find what you need mid-workout and also makes it immediately obvious when something has been left out of place. This small organizational detail can have a surprisingly large impact on how consistently and enjoyably you use the space on a daily basis.
Flooring Solutions for a Safe and Durable Workout Space
Choosing the right flooring for your basement gym is just as important as selecting the right equipment or storage system. Basement floors present unique challenges that typical gym flooring must address: they are often cold, potentially damp, and made of concrete, which is unforgiving underfoot and can damage dropped weights. The right flooring solution will protect both the structural floor beneath and the people exercising on top of it, while also providing the grip, cushioning, and durability that intense workouts demand over years of use.
Rubber flooring is the gold standard for home gym installations, and for good reason. Thick rubber tiles or rolled rubber provide excellent shock absorption, protect the concrete subfloor from dropped weights and heavy foot traffic, and offer superior traction even when wet with sweat. Standard thickness for most home gym applications is three-quarters of an inch, though areas used for Olympic lifting or heavy deadlifts benefit from thicker options of one to one-and-a-half inches. Rubber flooring is also resistant to moisture, easy to clean, and remarkably durable, often lasting a decade or more with minimal maintenance.
For homeowners seeking a more polished aesthetic, rubber flooring can be paired with other materials in designated zones. A padded yoga or stretching mat area in one corner, hardwood-look vinyl planks in a cardio zone, or even decorative epoxy coating on sections of exposed concrete can add visual variety while preserving the functionality of the rubber in the high-impact areas. Zoning your gym floor to match different activity types not only looks intentional and professional but also subtly guides the flow of your workouts, making the space feel more purposeful and organized.
Dealing with Moisture and Humidity in Basement Gyms
Moisture is the most persistent challenge in any basement renovation, and a gym is no exception. Sweating during workouts adds to the ambient humidity, and basements are naturally prone to moisture infiltration from the surrounding soil. Without proper management, high humidity levels can lead to mold growth, rust on metal equipment, peeling paint on walls, and a general musty odor that makes the space unpleasant to spend time in. Addressing moisture proactively before installing flooring and equipment is absolutely essential to the long-term success of your basement gym.
A quality dehumidifier sized appropriately for your basement’s square footage is a worthwhile investment that pays dividends in equipment longevity and air quality. Running the dehumidifier consistently, especially during humid summer months, keeps moisture levels in a healthy range and protects your investment. Pairing the dehumidifier with a ventilation system or at minimum a few strategically placed fans improves air circulation dramatically. Good airflow not only controls humidity but also makes workouts more comfortable by preventing heat and perspiration from accumulating in the enclosed space.
Essential Equipment Layout and Space Planning
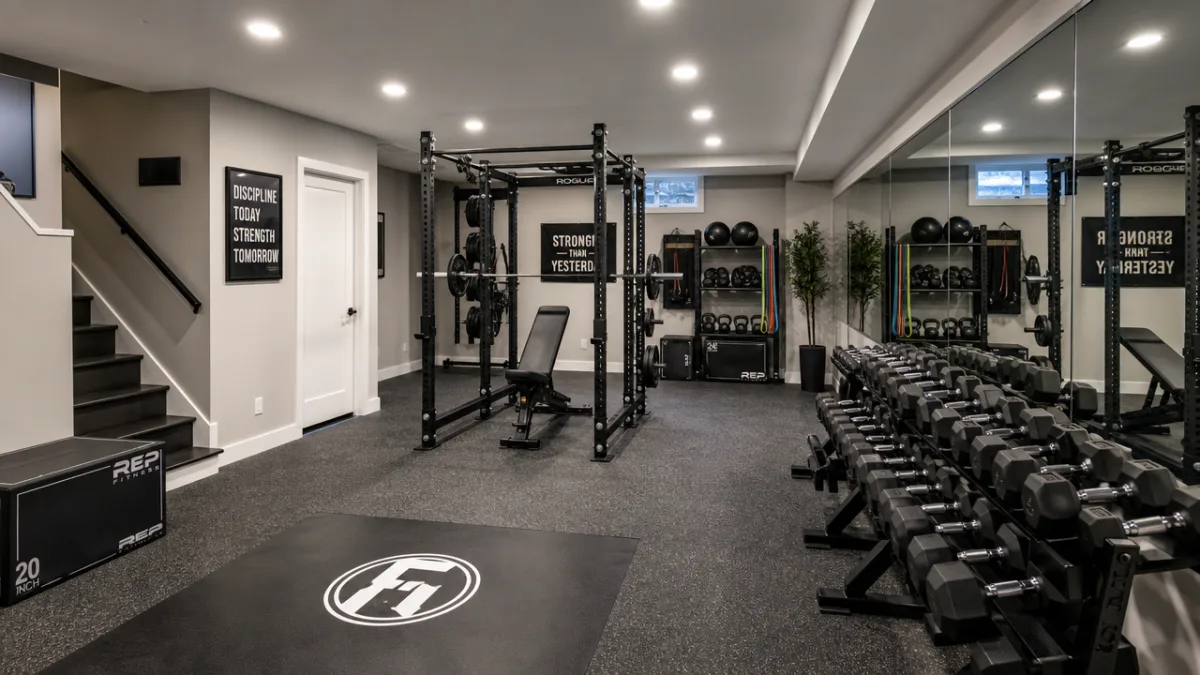
Planning the layout of your basement gym requires the same careful thought that goes into designing any functional room. The goal is to create distinct zones for different types of training while maintaining enough open floor space to move freely and safely during every type of exercise. A cramped, poorly planned gym is not only frustrating to use but can also be genuinely dangerous, especially during activities like barbell lifting, kettlebell swings, or box jumps, which require clear space around the exerciser in all directions.
Begin the planning process by measuring your basement accurately, noting the positions of support columns, utility areas, windows, and doors. Mark these elements on a scaled floor plan, then begin placing your largest pieces of equipment first. A squat rack or power cage is typically the centerpiece of a serious home gym, and its placement will largely dictate the rest of the layout. Allow at least three feet of clearance on all sides of the rack for safe loading and unloading of barbells. From there, arrange secondary equipment such as a bench, cable machine, or cardio equipment in the remaining space, always keeping traffic flow and safety in mind.
Once your large equipment is placed, identify areas for bodyweight training, stretching, and accessory work. A clear zone with a quality mat for yoga, mobility work, and core exercises is an important part of any complete gym layout. Mirrored walls along one or two sides of the room not only make the space feel larger and brighter but also allow you to monitor your form during exercises, which is especially important when training without a coach or training partner. Good lighting throughout the space, ideally bright LED fixtures that eliminate shadows, is another detail that dramatically improves the usability and appeal of the gym.
Recommended Equipment List for a Complete Home Gym
- Adjustable power rack or squat stand with pull-up bar attachment
- Olympic barbell and a complete set of weight plates
- Adjustable dumbbells or a full dumbbell set on a wall-mounted rack
- Adjustable weight bench with flat, incline, and decline positions
- Kettlebells in a range of weights for dynamic training
- Resistance bands in multiple resistance levels
- Cardio machine such as a rowing machine, stationary bike, or treadmill
- Jump rope, foam roller, ab wheel, and other recovery accessories
- Wall-mounted mirror panels for form checking
- Bluetooth speaker system and television or display screen
Lighting, Ventilation, and Atmosphere
The atmosphere of your home gym has a direct and measurable impact on your motivation and performance. A dark, dingy basement that smells stale and feels oppressive is unlikely to inspire intense, consistent workouts. In contrast, a well-lit, well-ventilated space that feels energizing and inviting makes it significantly easier to show up every day and push hard. Investing in the sensory environment of your gym is not a luxury, it is a practical strategy for improving adherence and results over the long term.
Lighting should be bright, even, and ideally adjustable. Flat LED panel lights or recessed LED fixtures provide excellent, shadow-free illumination that makes the entire space feel larger and more energetic. For added flexibility, smart lighting systems allow you to adjust color temperature and intensity to match your mood or workout type. A warm, lower-intensity setting might suit a gentle morning yoga session, while a cool, bright setting at full intensity is ideal for a high-energy lifting session. The ability to customize your lighting in this way adds a layer of personalization that makes the gym feel truly like your own space.
Ventilation is equally critical. Basements can become warm and stuffy during intense workouts, and poor air quality reduces both performance and enjoyment. If your basement has existing windows, maximize their use by installing ventilation fans that pull fresh air in and push stale air out. In basements without windows, a mechanical ventilation system connected to your home’s HVAC or a standalone air purifier can maintain fresh, clean air throughout your workout. An air purifier with a HEPA filter also removes dust and allergens, which tend to be more concentrated in basement environments, making every breath during your workout cleaner and more comfortable.
Adding Personal Touches to Make the Space Your Own
A home gym should reflect your personality and inspire you every time you step into it. Personal touches transform a functional but impersonal workout room into a space that genuinely motivates you. Consider painting an accent wall in a bold, energizing color that contrasts with the neutral tones of the flooring and storage wall. Hang motivational artwork, sports memorabilia, or framed training goals on the walls. Install a high-quality speaker system that fills the room with music at the right volume. These details cost relatively little but make a significant difference in how much you enjoy using the space.
A wall-mounted television or large display screen is another addition that many home gym owners consider essential rather than optional. Whether you use it to follow along with online workout classes, watch training videos to improve technique, track your workout metrics through a connected app, or simply watch a show during a long cardio session, a display screen adds versatility and entertainment value to the gym. Pair it with a simple streaming device and your existing subscriptions, and you have access to thousands of workout programs without any additional monthly cost beyond what you already pay.
Budgeting and Phasing Your Basement Gym Build
One of the most common mistakes people make when planning a home gym is trying to build the entire space at once and becoming overwhelmed by the perceived cost and complexity. In reality, a functional, well-designed basement gym can be built in phases over months or even years, with each phase adding capability and comfort without requiring a massive upfront investment. This phased approach also allows you to learn from experience, adding equipment and features that you actually need based on how you use the space, rather than guessing in advance what you will want.
Phase one of your build might include the essential structural elements: flooring installation, basic lighting upgrades, a dehumidifier, and one or two pieces of foundational equipment such as a power rack and a set of dumbbells. This phase alone can give you a fully functional gym capable of supporting a complete strength training program. Phase two might add the storage wall, additional equipment, mirrors, and ventilation improvements. Phase three could focus on aesthetics and comfort, including a sound system, television, painted accent walls, and any specialty equipment that your training style demands.
Budgeting realistically is important, but it is equally important not to cut corners on the elements that directly affect safety and durability. Quality flooring, proper anchoring of the storage wall, and adequate ventilation are not areas where saving a few dollars is worth the risk. Equipment, on the other hand, offers more flexibility. Buying used commercial gym equipment from fitness centers that are upgrading their inventory can yield high-quality pieces at a fraction of the retail cost. Online marketplaces frequently list lightly used barbells, benches, and cardio equipment at significant discounts, allowing you to equip your gym at a much lower cost than buying everything new.
Estimated Budget Ranges for a Home Gym Build
- Basic Setup (under $2,000): Rubber flooring tiles, a basic squat stand, barbell and weight plates, adjustable dumbbells, a simple shelving unit, and LED shop lights. This setup supports a complete strength training program on a lean budget.
- Mid-Range Setup ($2,000 to $5,000): Upgraded rubber flooring, a full power rack with accessories, a quality adjustable bench, a complete dumbbell set on a wall-mounted rack, resistance bands, a dehumidifier, and recessed lighting with a basic speaker system.
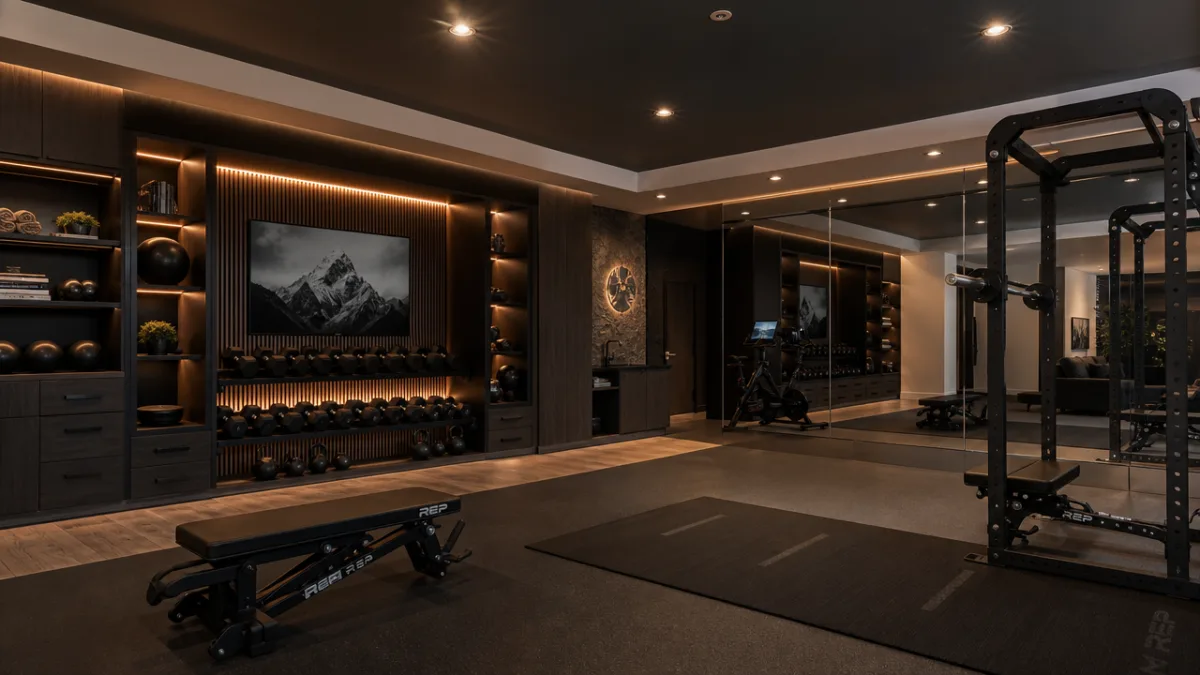
- Premium Setup ($5,000 to $15,000+): Custom-built storage wall, commercial-grade equipment, mirrored wall panels, smart lighting system, professional ventilation, a cardio machine, a mounted display screen, and a custom painted and styled aesthetic throughout the entire space.
Regardless of your budget level, the key to a successful home gym is intentional design. A small, thoughtfully organized space with quality fundamentals will serve you better than a large, cluttered room filled with underused equipment. Start with clarity about your training goals, build toward those goals systematically, and allow the gym to evolve organically as your fitness journey progresses. A basement gym built this way becomes not just a place to exercise, but a genuine asset that adds lasting value to both your home and your health.








What do you think?
It is nice to know your opinion. Leave a comment.