










9 Easy DIY Home Decor Ideas You Can Make at Home | Budget-Friendly Crafts
Why DIY Home Decor Is Having a Moment
There has never been a better time to pick up a hot glue gun and transform your living space on your own terms. The rise of social media platforms like Pinterest has sparked a genuine creative renaissance in home decorating, giving everyday people access to thousands of inspiring ideas that were once locked away in the pages of expensive design magazines. What was once considered a niche hobby for crafty types has become a mainstream movement that spans all demographics and decorating styles.
The appeal of DIY home decor goes far beyond saving money, though the financial benefits are undeniably significant. When you create something with your own hands, you imbue your living space with a personal energy that no mass-produced item from a big-box store can replicate. Every handmade piece tells a story about the person who made it, the time they spent crafting it, and the vision they brought to life. That authenticity is increasingly rare and increasingly valued in a world saturated with identical interiors.
Budget constraints have pushed many homeowners and renters to get creative, and the results have been stunning. Designers and home stylists frequently note that some of the most beautiful interiors they encounter are ones where the owners exercised ingenuity rather than spending lavishly. Learning to see potential in ordinary materials, thrift store finds, and leftover supplies is a skill that pays dividends not just financially but creatively, helping you develop a unique aesthetic eye that sets your home apart from anything you could assemble from a catalog.
The Essential Supplies Every DIY Decorator Needs
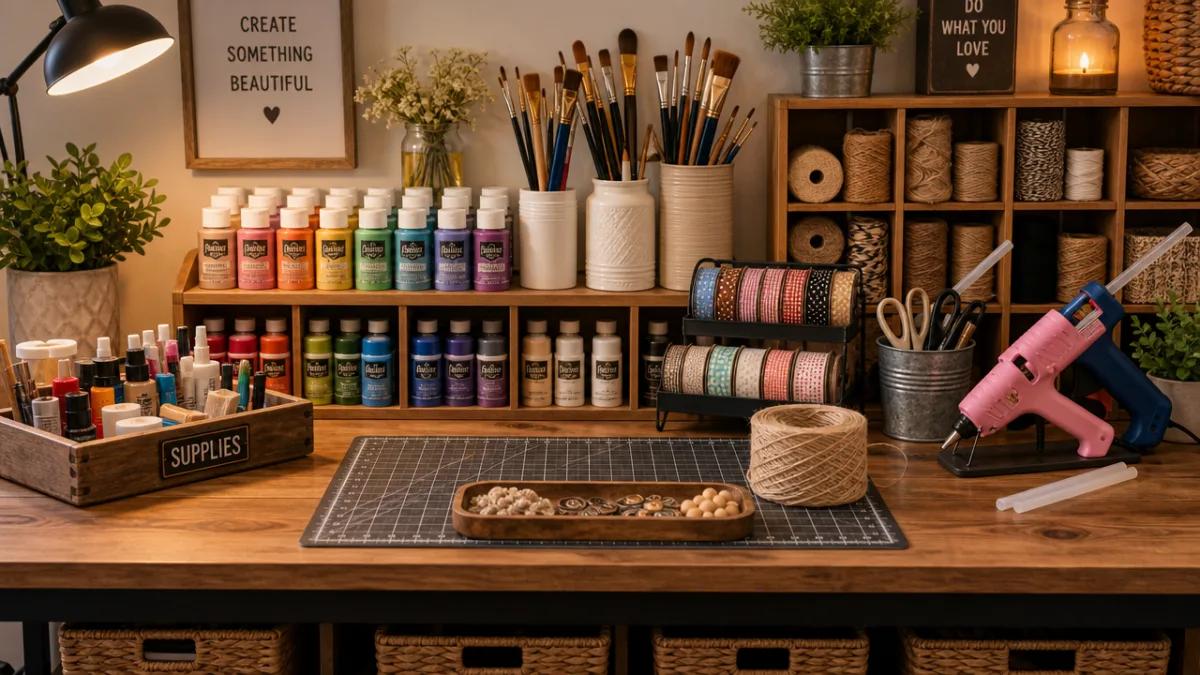
Before diving into specific projects, it pays to build a solid foundation of basic crafting supplies that will serve you across dozens of different ideas. A well-stocked crafting kit means you can act on inspiration the moment it strikes, rather than making multiple trips to the store and losing momentum in the process. Think of your supply collection as an investment that will pay for itself many times over as you complete project after project without needing to start from scratch each time.
Your core supply list should include a reliable hot glue gun with plenty of glue sticks, a selection of paintbrushes in various sizes, acrylic paints in neutral and accent colors, painter’s tape, Mod Podge in both matte and glossy finishes, sandpaper in several grits, and a basic set of hand tools including a hammer, screwdriver, and measuring tape. Fabric scissors, twine or jute rope, and a good pair of needle-nose pliers round out the essentials beautifully. These items can be sourced affordably from craft stores, discount retailers, or even secondhand shops.
Beyond the physical supplies, cultivating the right mindset is equally important. DIY decorating requires patience, a willingness to experiment, and the ability to embrace imperfection as part of the charm. Professional designers often say that handmade items earn their character through the small irregularities and personal touches that machines simply cannot replicate. Give yourself permission to make mistakes, learn from them, and adjust your technique as you grow more confident. The more projects you complete, the faster and more refined your work will become.
Project Ideas for Your Living Room
Macramé Wall Hangings
Macramé has made a triumphant return from its 1970s heyday, and it shows no signs of retreating again anytime soon. This fiber art technique involves knotting lengths of cotton or jute rope into intricate patterns that create stunning textural wall art. A beginner macramé wall hanging requires nothing more than a wooden dowel, a ball of natural cotton cord, and a few instructional videos to get you started. The materials are inexpensive, the process is meditative and enjoyable, and the finished product looks like something you would pay a significant sum for at a boutique home goods store.
The beauty of macramé lies in its scalability. You can create a small, simple hanging for a bathroom wall in a single afternoon, or invest a weekend in crafting a dramatic floor-to-ceiling statement piece for your living room. The same basic knots, primarily the square knot, the spiral half-hitch, and the lark’s head knot, combine in endless variations to produce completely different visual effects. Once you master the fundamentals, you will find yourself experimenting with color by using dyed cord, incorporating beads or feathers, and creating custom shapes that perfectly suit your space.
Hanging your macramé piece is just as important as making it. Natural wood dowels are the traditional choice and can be found at any craft store or even cut from a branch found outdoors. Copper pipes, driftwood, and old ladder rungs also make beautiful hangers that add an extra layer of visual interest. Position your finished piece where it will catch natural light if possible, as the dimensional texture of knotted fiber is most striking when illuminated from the side, casting small, beautiful shadows that animate the wall behind it.
Floating Shelves and Styled Vignettes
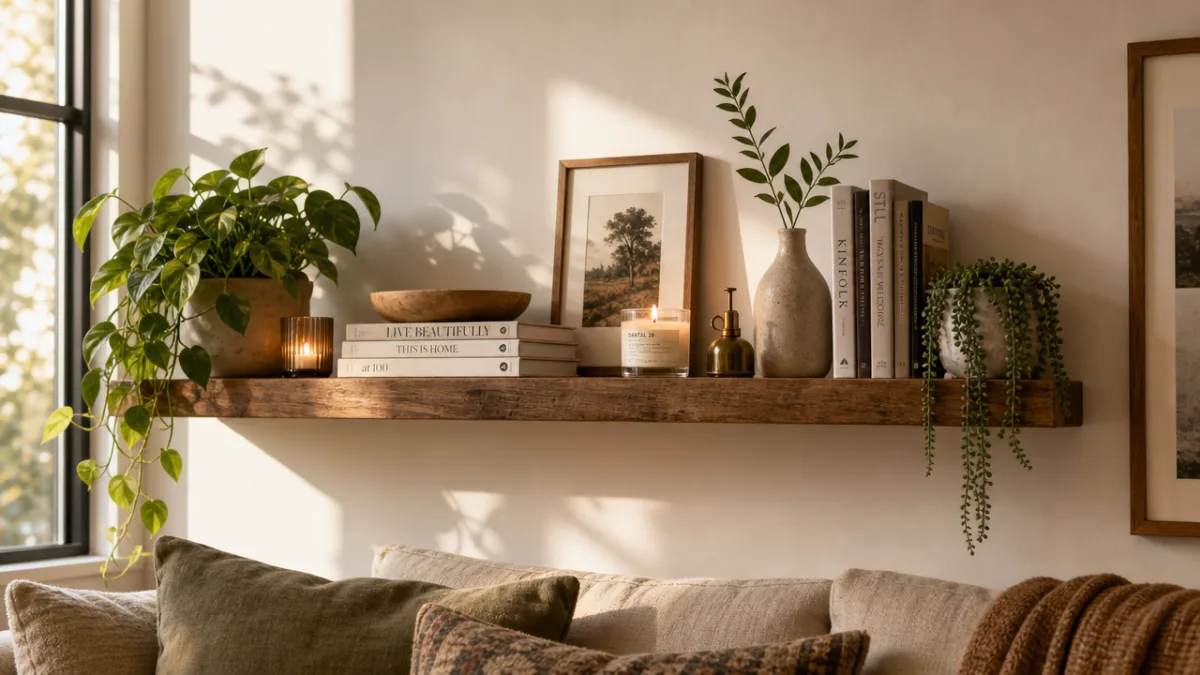
Few DIY projects deliver as much visual impact per dollar spent as a set of well-placed floating shelves. The shelves themselves can be purchased affordably as unfinished pine boards, then sanded smooth, stained or painted in a finish that complements your existing decor, and mounted with brackets or a keyhole routing system. The real art, however, lies in what you place on those shelves, and this is where your decorating instincts get to shine without requiring any additional spending.
Styling a shelf vignette is a skill that improves rapidly with practice and observation. The classic rule of thumb involves grouping items in odd numbers, varying heights to create visual rhythm, and mixing textures such as smooth ceramics alongside rough woven baskets or weathered wood. A trailing plant like pothos or string of pearls softens hard edges and brings organic life to any arrangement. Books stacked horizontally can serve as a pedestal for smaller objects, adding layers and depth that keep the eye moving pleasurably across the composition.
The objects themselves need not be expensive or new. Thrift stores and estate sales are treasure troves of interesting vessels, vintage books with beautiful spines, small sculptures, and decorative objects that can be grouped into cohesive stories. Spray painting a collection of mismatched thrift store vases in a single matte color creates an instant, sophisticated collection that looks intentional and curated. Nature provides some of the best free decor in the form of pinecones, branches, river stones, and dried seed heads that bring an organic, grounded quality to any interior.
Budget-Friendly Bedroom Transformations
DIY Headboards That Make a Statement
The headboard is the focal point of any bedroom, and creating a custom one allows you to tailor the most prominent piece of your sleep sanctuary to your exact taste and dimensions. One of the most popular and accessible DIY headboard approaches involves cutting a piece of plywood to the desired shape, covering it with foam padding, wrapping it in fabric of your choice, and mounting it to the wall behind your bed. The entire project can be completed in a single day for a fraction of the cost of a purchased headboard, and the result is completely unique to your home.
For those who prefer a softer, more romantic aesthetic, a fabric panel headboard using luxurious upholstery fabric, velvet, or even a repurposed vintage quilt creates a cozy, layered look that feels intentional and considered. Tufting adds sophistication and depth to an upholstered headboard; the technique involves pulling fabric tight with buttons placed at regular intervals to create the signature diamond pattern associated with traditional upholstered furniture. Tufting kits with instructions are available at craft stores and make the process accessible to complete beginners.
Alternatively, a completely different headboard aesthetic can be achieved using reclaimed wood planks, peel-and-stick wallpaper panels, or even an oversized framed piece of art. A gallery wall arrangement positioned above the bed functions effectively as a headboard while also displaying meaningful photographs, artwork, or prints. For renters who cannot make permanent modifications, command strips and removable mounting solutions make it possible to create dramatic headboard effects without a single nail in the wall, preserving security deposits while still achieving a polished, designed look.
Canopy and Curtain Canopy Effects
Installing a simple fabric canopy above a bed transforms the sleeping area into something that feels private, luxurious, and deeply cocooning. A basic canopy can be created by attaching a curtain rod or wooden dowel to the ceiling directly above the headboard and draping lengths of sheer fabric, muslin, or linen on either side of the bed. The fabric pools gently on the floor for a romantic, bohemian effect, or can be tied back with velvet ribbon or macramé cord for a neater appearance during the day.
The choice of fabric dramatically affects the mood the canopy creates. Crisp white cotton sheers produce a fresh, airy, and almost ethereal atmosphere that works beautifully in light-filled rooms with a coastal or Scandinavian aesthetic. Velvet or silk-effect fabrics in jewel tones like deep teal, burgundy, or forest green feel decadent and moody, lending a distinctly romantic quality that turns an ordinary bedroom into something that feels far more intentional and designed. Linen in natural, undyed tones reads as earthy and grounded, complementing boho or organic modern decorating styles particularly well.
For a canopy effect that requires even less installation effort, a large hoop of embroidery fabric suspended from a ceiling hook with ribbon or twine creates a circular canopy that drapes fabric in a tent-like form above the bed. This approach is especially popular in children’s rooms, where the canopy creates a sense of magical enclosure and imaginative play. In adult spaces, a hoop canopy can be decorated with string lights woven through the gathered fabric, creating a warm, glowing effect that doubles as both art and ambient lighting throughout the evening hours.
Kitchen and Dining Room Upgrades on a Shoestring
Painted Furniture and Cabinet Refreshes
Nothing transforms a kitchen or dining room more dramatically than paint, and the good news is that painting furniture is one of the most forgiving and accessible DIY projects available to beginners. An outdated wooden dining table, a set of mismatched chairs, or a tired sideboard can all be completely reborn with proper preparation, the right primer, and a few coats of a well-chosen paint color. The key to a professional-looking result lies almost entirely in the preparation stage, specifically in cleaning surfaces thoroughly, sanding to create adhesion, and applying primer before any topcoat.
Chalk paint has become the beloved go-to of the DIY furniture painting community for very good reasons. It adheres to almost any surface with minimal preparation, dries quickly, and creates a beautiful matte, velvety finish that can be further distressed for a vintage look or sealed to a smooth, wipeable surface with clear wax or polycrylic. Chalk paint is available in a wide range of colors from major craft and home improvement stores, and many crafters also mix their own using latex paint and unsanded tile grout as a budget-conscious alternative that performs similarly well.
Cabinet painting in the kitchen is a higher-commitment project but delivers transformative results that can save tens of thousands of dollars compared to a full kitchen renovation. The process involves removing all cabinet doors and hardware, cleaning surfaces with a degreaser, sanding lightly, priming with a shellac-based or bonding primer, and applying two to three thin coats of a cabinet-specific paint in the color of your choice. Popular finishes include crisp white, soft sage green, navy blue, and warm terracotta tones that bring personality and freshness to what is often the most-used room in the home.
DIY Table Centerpieces and Everyday Styling
A beautifully styled dining table sets the tone for the entire room and signals to everyone who enters that the space is considered and cared for. Creating your own table centerpieces allows you to shift the mood and aesthetic of the room seasonally or even weekly without significant expense. A simple tray gathered from a thrift store or craft store serves as the foundation for any number of centerpiece arrangements, corralling candles, small vases, a bowl of seasonal fruit, or a collection of found natural objects into a cohesive, styled composition.
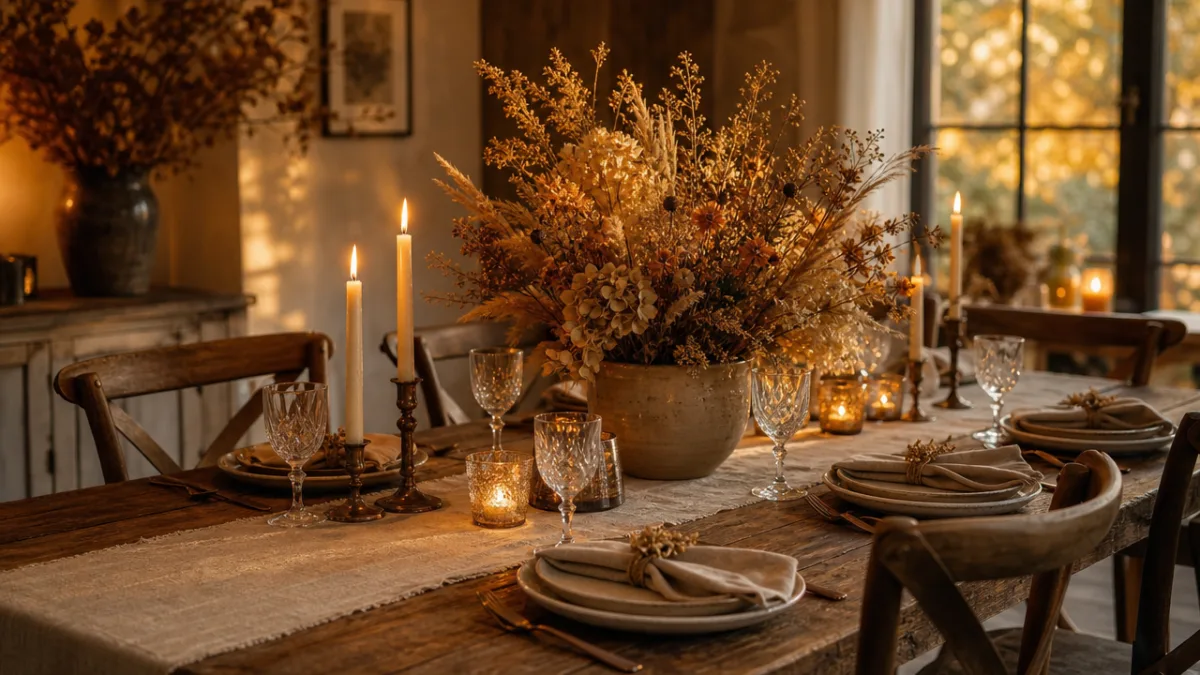
Candle arrangements are among the easiest and most impactful DIY decor projects for any dining space. Gathering pillar candles of varying heights, setting them on a wooden board or marble slab, and surrounding them with fresh or dried botanicals creates a centerpiece that feels both effortless and considered. During autumn and winter months, incorporating pinecones, dried orange slices, cinnamon sticks, and small pumpkins adds warmth and seasonal specificity. In spring and summer, fresh flowers from a garden or farmers market, arranged loosely in a collection of small bud vases, feel fresh, cheerful, and alive.
Dried flower arrangements have surged in popularity as a low-maintenance alternative to fresh flowers that lasts for months or even years with proper care. Bundles of dried pampas grass, eucalyptus, lavender, wheat stalks, and statice can be arranged in tall ceramic or glass vases for a sculptural centerpiece that requires no water, no maintenance, and loses none of its visual appeal over time. You can dry your own flowers by hanging them upside down in a warm, dark place for two to three weeks, transforming garden blooms or inexpensive farmers market bundles into long-lasting decorative elements that feel luxurious and considered.
Outdoor Spaces and Finishing Touches
Porch and Patio Decor Projects
Outdoor living spaces deserve just as much creative attention as the rooms inside your home, and DIY projects are particularly well suited to patios, porches, and garden areas where weathering and wear are expected and even welcome. One of the simplest and most impactful outdoor decor projects involves painting or staining a collection of mismatched terracotta pots in a cohesive color palette before filling them with cascading plants, herbs, or flowering annuals. Grouped together in clusters of varying heights, these DIY planters create an instant cottage garden effect that adds life, color, and personality to any outdoor space.
Outdoor string lights represent one of the highest-impact, lowest-effort decorating investments available for any exterior space. Stringing globe lights across a patio ceiling, along a fence line, or through the branches of a nearby tree transforms the space completely after dark, creating a warm, intimate atmosphere that invites lingering conversations and long summer evenings outdoors. When paired with other DIY elements like homemade lanterns constructed from wire frames wrapped in burlap, or upcycled tin cans punched with patterns to create votive holders, the cumulative effect feels genuinely designed and intentional.
Vertical gardens and wall-mounted planter installations are particularly valuable for small outdoor spaces where floor area is limited. A wooden pallet mounted upright on a fence or wall, with landscape fabric stapled across the horizontal slats to create planting pockets, provides a structure for growing herbs, succulents, strawberries, or trailing flowers in a compact footprint that maximizes available growing area. This functional and beautiful installation can be assembled in an afternoon using a single reclaimed pallet, potting soil, and plants of your choice, delivering a living wall of greenery for remarkably little investment.
Personalizing Your Space with Art and Accessories
The final layer of any well-decorated home is the personal one, the layer composed of objects that reflect the specific tastes, histories, and personalities of the people who live there. Creating your own wall art is perhaps the most direct expression of this personal dimension, and the barrier to entry is far lower than most people assume. Abstract canvas paintings created with simple techniques like palette knife application, color blocking, or poured paint require no artistic training and produce results that are genuinely beautiful, one of a kind, and completely reflective of your personal color sense and aesthetic preferences.
Frame collections assembled from thrift stores and flea markets, unified by a coat of spray paint in a single finish, create gallery walls that look purposeful and curated regardless of the mixed origins of the individual frames. Inside these unified frames, you can display an evolving collection of personal photographs, printed digital art, fabric samples, pages from vintage books, pressed botanicals, or abstract color field paintings created with watercolor and a wet brush. The gallery wall format is infinitely flexible and can be rearranged, added to, or refreshed at any time without significant effort or expense.
Ultimately, the most important principle guiding any DIY home decor project is the pursuit of a space that genuinely reflects who you are and how you want to live. Trends will always come and go, and no amount of spending can substitute for the authentic warmth of a home that has been thoughtfully and personally shaped over time. Every project you complete builds not only your physical space but your confidence, your skill set, and your creative vocabulary, making each successive project easier, more refined, and more deeply satisfying than the last. The most beautiful homes are not the most expensive ones; they are the ones most fully inhabited by the people who love them.








What do you think?
It is nice to know your opinion. Leave a comment.