










Amigurumi Giraffe Crochet Pattern for Beginners: Your Complete Guide to a Cute Plush Toy DIY
What Is Amigurumi and Why a Giraffe Makes the Perfect First Project
Amigurumi is the Japanese art of crocheting or knitting small, stuffed yarn creatures, and it has taken the crafting world by storm over the past two decades. The word itself combines the Japanese terms for “knitted” and “stuffed doll,” perfectly capturing the essence of these irresistibly adorable miniature figures. From tiny woodland animals to fantastical creatures, amigurumi allows crafters to bring virtually any character to life using just a hook, some yarn, and a little imagination.
Among all the animals you could choose for your first amigurumi project, the giraffe stands out as an exceptional starting point. Its elongated neck and spotted coat immediately signal “giraffe” to anyone who sees it, which means even slight imperfections in your technique will not diminish the recognizability of your finished piece. This forgiving nature makes the giraffe a wonderful confidence builder for beginners who are still developing their tension control and shaping skills. The relatively simple body structure — essentially a series of cylinders and ovals — means you will be working with familiar crochet shapes from start to finish.
Beyond the technical advantages, a crocheted giraffe is simply a delight to give and receive. Whether you are making it as a nursery decoration, a baby shower gift, a child’s beloved companion, or a whimsical desk accessory for yourself, the finished toy carries a warmth and handmade charm that no store-bought plush can replicate. There is something deeply satisfying about placing the last stitch, weaving in your ends, and holding up a creature that exists in the world solely because of your hands and your creative effort. That feeling is what keeps crafters coming back to amigurumi again and again.
Materials and Tools You Will Need Before You Begin
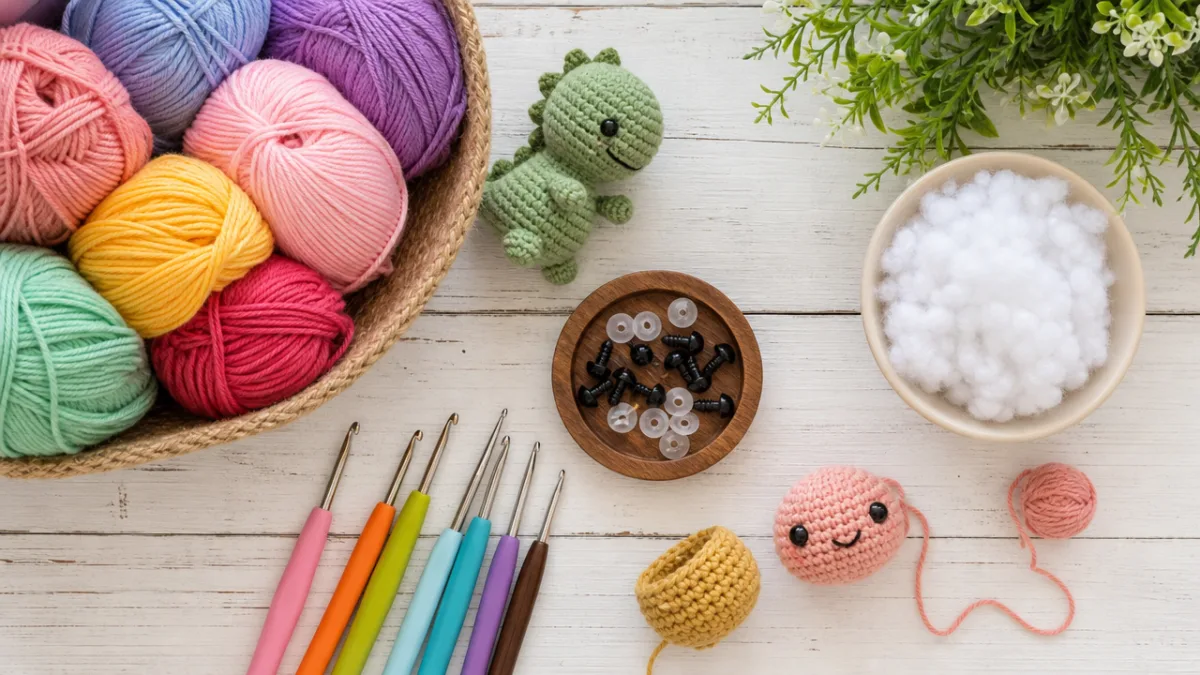
Gathering your supplies before you sit down to crochet saves you from frustrating mid-project interruptions and helps you approach the pattern with confidence. For an amigurumi giraffe, you will want to work with a worsted-weight yarn in your chosen giraffe colors. The classic palette calls for a warm golden yellow or tan for the main body, a rich brown or chocolate for the spots and accents, and a small amount of cream or off-white for the belly and inner ears. Cotton yarn works beautifully because it holds its shape well and produces a firm, satisfying fabric when worked at a tighter gauge, though acrylic yarn is perfectly acceptable and often easier to find in a wide range of colors.
Your hook size should be slightly smaller than what the yarn label recommends. For a worsted-weight yarn that suggests a 5mm hook, try working with a 3.5mm or 4mm hook instead. This tighter gauge is one of the most important principles in amigurumi construction because it creates a dense, close-knit fabric with no gaps for the stuffing to poke through. If your tension is too loose, the polyfill stuffing inside your giraffe will be visible between stitches, which detracts from the clean, professional look of a well-made toy. Swatching a small circle before you begin will help you determine whether your chosen hook produces the right density.
In addition to yarn and a hook, you will need polyester fiberfill stuffing to give your giraffe its plump, huggable shape, a yarn needle for sewing pieces together and weaving in ends, a pair of safety eyes in an appropriate size (8mm or 9mm works well for a medium-sized giraffe), and scissors. Stitch markers are also incredibly helpful when working in the round, as they allow you to track the beginning of each row without constantly counting. Optional but useful additions include a small amount of roving wool or embroidery floss for detailing the nostrils and mouth, and wire armature if you want your giraffe’s legs and neck to be poseable.
- Worsted-weight yarn in golden yellow or tan (main body color)
- Worsted-weight yarn in brown or chocolate (spots and accents)
- Small amounts of cream or off-white yarn (belly and inner ears)
- Crochet hook, 3.5mm–4mm (one size smaller than yarn label suggests)
- Polyester fiberfill stuffing
- Safety eyes, 8mm–9mm
- Yarn needle and scissors
- Stitch markers
Understanding the Basic Stitches and Techniques Used in This Pattern
Before diving into the pattern itself, it is worth taking a moment to familiarize yourself with the handful of foundational techniques that make amigurumi possible. The magic ring, also called the magic circle or adjustable ring, is your starting point for almost every piece you will crochet. Unlike a traditional chain-ring start, the magic ring allows you to pull the opening completely closed, eliminating the small hole that would otherwise appear at the center of your piece. To work a magic ring, wrap the yarn around your fingers to create a loop, insert your hook, draw up a loop, chain one, and then work your required number of single crochets into the ring before pulling the tail taut.
Nearly every stitch you use in amigurumi will be the single crochet, abbreviated as sc. It is the shortest and most compact of the basic crochet stitches, which is exactly why it dominates amigurumi work — it creates that tight, even fabric that holds stuffing in place and gives your finished toy a clean texture. To increase (inc), you simply work two single crochets into the same stitch, which expands the circumference of your piece and allows you to build rounded, three-dimensional shapes. To decrease (dec or sc2tog), you draw up a loop in one stitch, then draw up a loop in the next stitch, and yarn over and pull through all three loops at once, reducing your stitch count and pulling the fabric inward.
Working in continuous rounds rather than turning rows is the defining structural feature of amigurumi. When you work in the round without joining each row, you create a seamless spiral that forms the hollow, stuffable shells of each body part. This is why stitch markers are so essential — they mark the last stitch of each round so you always know exactly where one round ends and the next begins. Once you have mastered the magic ring, single crochet, increase, and decrease, you truly have everything you need to complete this giraffe pattern from head to hooves. All of the shaping, all of the three-dimensionality, all of the charm comes from strategically combining these four simple elements.
Step-by-Step Pattern Instructions for Your Amigurumi Giraffe
Begin with the head, which will set the tone for the proportions of your entire giraffe. Start with a magic ring and work 6 single crochets into it, pulling the ring closed to form a tight center. Round 2: increase in each stitch around, giving you 12 stitches. Round 3: alternate one single crochet and one increase around for 18 stitches. Continue increasing in this manner every other round until you reach approximately 36 stitches, which produces a pleasingly round head. Work several straight rounds at this stitch count to build the height of the head before beginning your decreases. Before closing the head completely, insert your safety eyes between rounds 10 and 11, spacing them about 6 stitches apart, and stuff the head firmly with polyfill.
The body is worked in exactly the same way as the head but on a larger scale. Begin with a magic ring, increase evenly over the first several rounds until you have about 42 to 48 stitches, then work straight rounds to build the oval shape of the torso. The body should be noticeably larger than the head to maintain realistic giraffe proportions. If you want to add the giraffe’s characteristic cream-colored belly, you can switch to your off-white yarn for the middle section of the body before returning to your main color for the upper and lower portions. Stuff the body very firmly before closing — a well-stuffed body is the foundation that gives your giraffe a proud, upright stance once its legs are attached.
The neck is where your giraffe truly becomes recognizable as a giraffe, and it deserves careful attention. Work a cylinder of about 24 stitches, increasing slightly at the base where it will attach to the body and maintaining a consistent stitch count through the middle and upper sections. The neck should be long enough that the head sits visibly higher than the body, giving the toy its characteristic silhouette. The four legs are simple tubes of equal length, worked in the round with no increases or decreases through their main sections, and slightly flared at the hoof by working a few increase rounds before closing. The ossicones — the short, knobby horns on top of the giraffe’s head — are tiny tubes of just 6 to 8 stitches worked for about 8 rounds, finished with a small brown tip for contrast. The ears are small ovals with an inner ear in cream or off-white, sewn together before attaching to the sides of the head just behind the ossicones.
- Crochet the head: magic ring, increase rounds to 36 stitches, insert eyes, stuff, and close.
- Crochet the body: magic ring, increase rounds to 48 stitches, add belly accent if desired, stuff firmly, and close.
- Crochet the neck: a cylinder of 24 stitches, flared slightly at the base.
- Crochet four legs: equal tubes with flared hooves at the bottom.
- Crochet two ossicones: small tubes of 6 stitches, about 8 rounds tall with brown tips.
- Crochet two ears: small ovals with inner ear in a contrasting color.
- Crochet the tail: a short braid or chain with a yarn tassel at the end.
- Embroider the nostrils and mouth details using a yarn needle and dark yarn.
- Assemble all pieces with a yarn needle, sewing firmly to ensure stability.
- Add spot embellishments in brown yarn using surface slip stitch or flat embroidery.
Assembly Tips and Finishing Techniques for a Professional Result
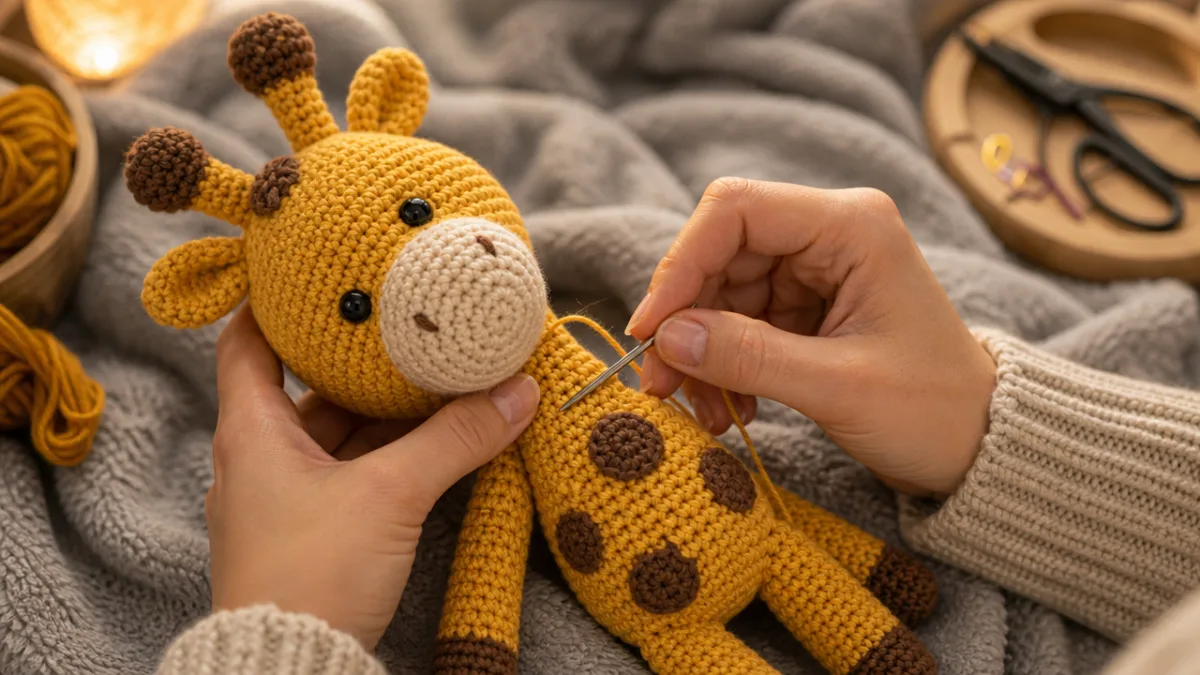
Assembly is often where beginners feel the most uncertain, but approaching it methodically transforms a pile of crochet tubes into a cohesive, charming toy. The golden rule of amigurumi assembly is to pin everything before you sew anything. Use straight pins or sewing pins to position each piece exactly where you want it, then step back and look at your giraffe from multiple angles. Is the head tilted at a pleasing angle? Are the legs evenly spaced so the toy can stand upright? Is the neck positioned straight or given a slight forward lean for a grazing pose? Adjusting positions now costs you nothing; unpicking sewn seams costs you time and frayed nerves.
When you are satisfied with your pinned arrangement, thread your yarn needle with a long length of your main color yarn and sew each piece using the whip stitch or mattress stitch. The mattress stitch is slightly more time-consuming but produces a nearly invisible seam, which is worth the extra effort for visible attachment points like the neck-to-head join. As you sew, add extra stuffing through the opening before it closes completely — this is especially important for the neck, which can become floppy if under-stuffed. Sew in small circular motions to distribute your stitches evenly around the circumference of each piece, and pull each stitch firmly so there are no gaps between the pieces once finished.
For the spots, the classic amigurumi approach is to cut small irregular oval shapes from felt in your brown accent color and glue or hand-sew them onto the body, neck, and legs. However, a more durable and textile-appropriate method is to use surface slip stitch directly onto the crocheted fabric. Thread your hook with brown yarn, insert it through any stitch on the body surface, and work a series of slip stitches in an irregular oval or diamond shape to create each spot. This method integrates the spots into the fabric itself rather than applying them on top, so they will never peel, fray, or detach no matter how enthusiastically a child plays with the toy.
Customization Ideas and Creative Variations on the Classic Giraffe
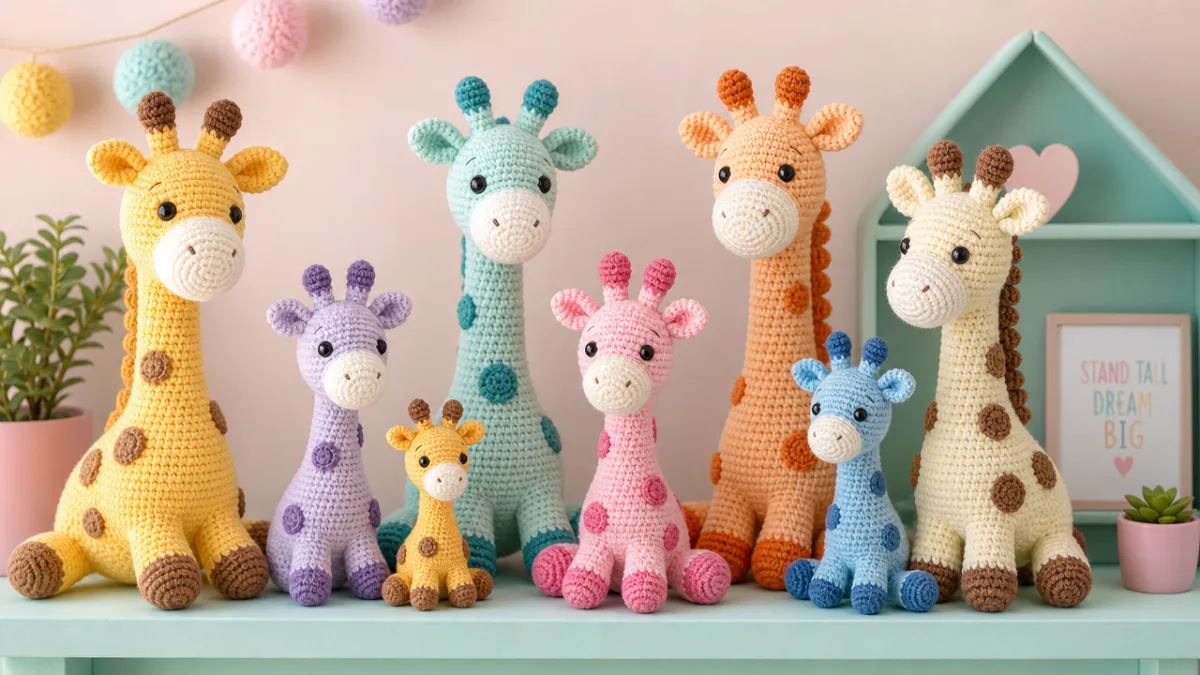
One of the greatest joys of making your own amigurumi pattern is that once you understand the basic construction, the possibilities for customization are genuinely endless. The most immediate way to personalize your giraffe is through color choice. While the classic golden-yellow-and-brown combination is universally beloved, there is absolutely no rule requiring you to stick with realistic animal colors. A pale lavender giraffe with silver spots makes a magical nursery toy; a deep teal giraffe with gold spots becomes a sophisticated decorative piece for an adult’s bookshelf. Rainbow variegated yarn produces a giraffe that shifts color gradually from head to toe, creating a stunning ombre effect with no additional effort on your part.
The size of your finished giraffe is entirely within your control and depends on the weight of yarn you choose to work with. The same pattern worked in fingering-weight yarn with a 1.5mm hook will produce a palm-sized miniature perfect for a keychain or ornament, while the same pattern in super bulky yarn with a 6mm hook will yield a substantial, pillow-sized companion that would be the star of any child’s toy collection. You can also modify the proportions to create different expressions and personalities: a shorter neck produces a baby giraffe, exaggeratedly long legs create a comically stylized toy, and an oversized head relative to the body gives your giraffe the chibi aesthetic popular in Japanese kawaii crafts.
Accessories and embellishments open up another entire dimension of creativity. A tiny crocheted flower crown nestled between the ossicones transforms your giraffe into a whimsical woodland fairy creature. A miniature crocheted scarf in a contrasting color wrapped around the neck adds seasonal charm and makes the toy feel truly one-of-a-kind. For a gift, you might embroider the recipient’s initials or birth date onto the giraffe’s belly before assembly, creating a keepsake toy that will be treasured for decades. You can even add a rattle insert — a small plastic safety rattle pod placed inside the body before closing — to transform your decorative piece into a sensory toy appropriate for infants.
- Try pastel or jewel-toned yarn for non-realistic, whimsical color schemes.
- Scale up with bulky yarn for a large cuddly toy or scale down with fingering yarn for a miniature.
- Add a crocheted flower crown, bow tie, or tiny scarf for personality.
- Embroider a name or date on the belly for a personalized gift.
- Insert a safety rattle pod before closing for an infant-appropriate sensory toy.
- Use variegated or self-striping yarn for an ombre effect without color changes.
- Create a family set by making adults and babies at different scales.
Caring for Your Finished Amigurumi Giraffe and Safety Considerations
A finished amigurumi giraffe is a labor of love, and with proper care it can last for many years. If you have used acrylic yarn, your giraffe is likely machine washable on a gentle cycle in a mesh laundry bag, which makes it practical for a child’s toy that will inevitably encounter sticky fingers, spilled juice, and the general chaos of childhood. Cotton yarn toys can also be washed but may shrink slightly in hot water, so always use cool water and lay the toy flat to dry in its original shape. Stuffed toys should never go in a hot dryer, as heat can distort the shape and melt or warp any plastic components including safety eyes.
If you are making your giraffe as a toy for a child under three years old, safety considerations must guide every design decision. Safety eyes, despite their name, are not appropriate for very young children who may pull them out and pose a choking hazard. For infant toys, embroider the eyes using yarn and a needle, creating a flat, completely secure eye that cannot be removed. Similarly, avoid any embellishments that could detach — no glued-on felt spots, no button accents, no tied ribbons. All seams should be sewn with doubled yarn and reinforced, and the stuffing should be firm enough that the toy does not collapse into a shape that could create a suffocation risk.
Storing your amigurumi collection properly between uses will help preserve the shape and color of your handmade toys. Keep finished pieces away from direct sunlight, which can fade yarn colors over time, and store them in a cool, dry environment to prevent mildew in the stuffing. If a giraffe begins to look a little deflated after heavy use, you can use a yarn needle to open a small seam, add more polyfill, and resew the opening — this is one of the wonderful advantages of a handmade toy over a factory-made one. Your crocheted giraffe can be repaired, refreshed, and restored in a way that a mass-produced plush simply cannot, making it truly a toy for a lifetime of love and play.








What do you think?
It is nice to know your opinion. Leave a comment.