










This Concrete Planter Fools Everyone Into Thinking It’s Real Stone
The Magic Behind Concrete Planters That Look Like Stone
There is something deeply satisfying about creating an object that stops people in their tracks and makes them reach out to touch it, convinced they are feeling the weight and texture of natural stone. Concrete planters that mimic real stone have become one of the most celebrated DIY achievements in the gardening and home décor world, and for good reason. The finished results are genuinely stunning — heavy, tactile, weathered-looking vessels that carry the gravitas of something quarried from the earth rather than mixed in a backyard bucket.
The secret lies not in some elaborate industrial process but in a surprisingly accessible set of materials and techniques that any motivated crafter can learn over a single weekend. The combination of Portland cement, peat moss, and perlite — a mixture often called hypertufa — produces a lightweight yet convincingly stone-like material that sets hard, develops natural-looking surface textures, and ages beautifully over time. When properly finished with a few simple coloring and weathering techniques, the result is virtually indistinguishable from carved limestone or aged sandstone, even to experienced eyes.
What makes this project particularly compelling is how it scales to any ambition level. A beginner can produce a charming small herb planter on their first attempt, while a more experienced crafter can create enormous statement urns that would cost hundreds of dollars if purchased as real stone. The materials are inexpensive, widely available at hardware and garden centers, and the process rewards patience and a willingness to experiment. This article walks you through everything you need to know to create your own convincing stone-look concrete planter from scratch.
Materials and Tools You Will Need
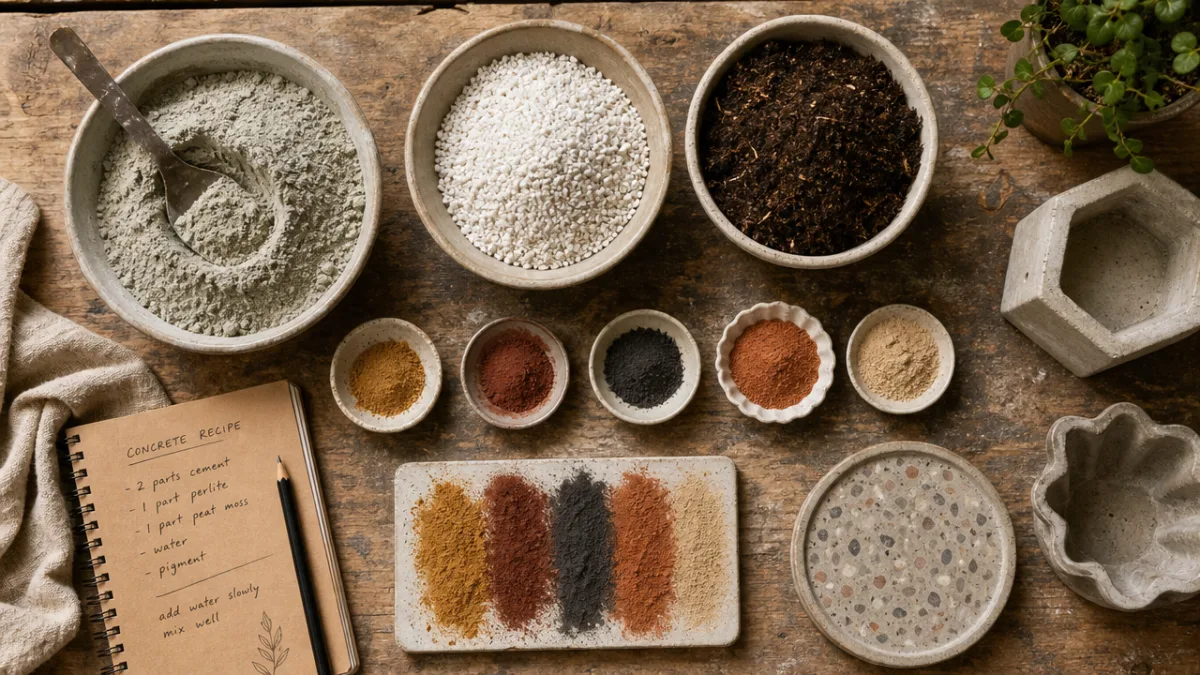
Gathering the right materials before you begin is essential to achieving that authentic stone appearance. The foundation of any good faux-stone planter is the mix itself, and the most popular formulation — hypertufa — requires three primary dry ingredients in roughly equal parts by volume. Portland cement provides the binding strength, peat moss adds texture and reduces overall weight while creating that characteristic slightly rough surface, and perlite contributes additional lightness and an almost granular, mineral-flecked visual quality that reads convincingly as natural stone aggregate.
Beyond the core mix, you will want a selection of additional supplies that make the project go smoothly and the results look professional. Concrete pigments or iron oxide powders in earthy tones — raw umber, burnt sienna, yellow ochre, and black — allow you to tint the mix and apply surface washes that add depth and realism. Plastic containers or foam molds in your desired shape serve as the form, and a few simple tools including rubber gloves, a mixing bucket, a stiff brush, and a plastic sheet for curing will see you through the entire process from mixing to finishing.
It is also worth investing in a few optional but highly recommended items that dramatically improve the finished appearance. A spray bottle filled with diluted black or brown paint makes it easy to apply a streaky, aged patina across the surface once the piece has cured. A stiff wire brush helps knock back any overly smooth areas and opens up the surface texture to look more like weathered stone. Some crafters also keep a small tub of yogurt or diluted buttermilk on hand to brush across the finished planter and encourage the growth of moss and lichen, which accelerates the natural aging process beautifully and convincingly.
- Portland cement (one part by volume)
- Peat moss, sieved to remove large clumps (one part by volume)
- Perlite or coarse sand (one part by volume)
- Water (added gradually until the mix holds its shape)
- Concrete pigment or iron oxide powder in earthy tones
- Plastic molds or foam forms in your desired shape
- Rubber gloves, dust mask, and safety glasses
- Stiff brush, wire brush, and spray bottle
- Plastic sheeting for slow curing
- Petroleum jelly or cooking spray as a mold release agent
Mixing and Molding Your Planter
The mixing stage is where many first-timers run into trouble, and the most common mistake is adding too much water. The ideal hypertufa consistency is often described as resembling cottage cheese — it should clump together firmly when you squeeze a handful but should not be wet enough to slump or flow. Adding water too quickly results in a weak, porous final piece that may crack as it cures, while too little water makes the mix crumbly and difficult to pack into your mold. Add water in small increments, mixing thoroughly between additions, until you reach that firm, workable consistency.
Preparing your mold correctly makes demolding much easier and helps preserve the fine surface details that give the planter its stone-like quality. Coat the interior of your outer mold and the exterior of any inner form with a generous layer of petroleum jelly or cooking spray. If you are using a two-mold method — where you pack the mix between a larger outer container and a smaller inner one to create the hollow planter shape — make sure to create drainage holes in the base using a dowel or finger pressed through the wet mix. These holes are essential for the health of any plants you will eventually grow in the planter.
Packing the mix into the mold is both an art and a science. Press the hypertufa firmly into place in layers, working out any air pockets as you go, since trapped air creates weak spots and can cause the surface to flake or crack during curing. Aim for walls at least one inch thick for small planters and closer to two inches for larger pieces, as this ensures structural integrity once the piece is removed from the mold and placed outdoors. Do not worry too much about achieving a perfectly smooth surface at this stage — slight irregularities in the walls and surface actually contribute to the natural stone effect.
Texturing Techniques for a Convincing Stone Finish
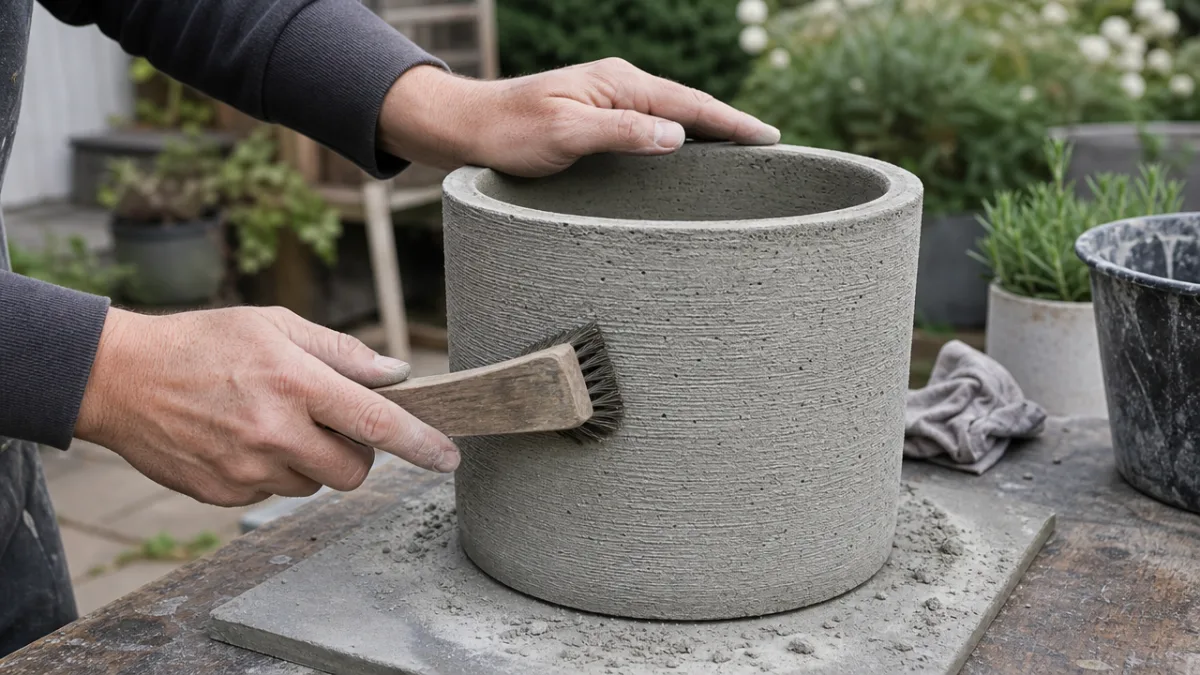
Once your planter has been packed into the mold, the real artistry begins. The surface texture you create in these early stages, while the mix is still partially workable, will define how convincingly the finished piece reads as natural stone. After an initial set of around 24 hours — when the mix has firmed up but not yet reached full hardness — you can begin to manipulate the surface. Use a stiff brush to stipple the exterior, a damp sponge to press in uneven pitting, or even a crumpled piece of plastic wrap pressed firmly against the surface to create subtle, organic-looking patterns that mimic the crystalline faces of natural rock.
A wire brush used at this semi-set stage is one of the most powerful tools available for achieving an authentic stone texture. Dragging the wire brush across the surface in varied directions creates fine lines and grooves that look remarkably like the natural cleavage planes found in sedimentary stones like sandstone or limestone. You can also use a screwdriver or pointed tool to carve in deeper scratches, create fissures, or add the kind of angular chipping along edges that makes old stone look like it has been weathered for decades. The key is to work with light, confident strokes rather than tentative ones, trusting the process.
Edge treatment is an often-overlooked detail that separates truly convincing faux-stone planters from ones that still read as clearly man-made. Real stone almost never has perfectly sharp, clean edges — it has been tumbled, chipped, and worn over time. Before the mix fully hardens, use your fingers, a damp sponge, or the edge of a plastic scraper to round off the top rim and bottom edges of your planter, soften any overly crisp corners, and press in small nicks and dents along the lip. These small details add enormous visual credibility and make the piece look genuinely aged and found rather than freshly made.
- Allow the packed mold to rest for 24 hours until firm but not fully cured.
- Carefully remove the inner mold form and loosen the outer mold.
- Use a stiff brush to stipple and texturize the exterior surface.
- Drag a wire brush across the surface in varied directions for natural-looking grain.
- Soften all edges and add nicks and chips using fingers or a plastic scraper.
- Re-wrap loosely in plastic sheeting and allow to cure slowly for an additional 48 to 72 hours.
Coloring and Weathering for Maximum Realism
Color is perhaps the single most important factor in whether a concrete planter reads as convincing stone or obviously artificial. Plain gray concrete, even with excellent surface texture, rarely fools anyone because its color is too uniform and too cool. Natural stone is almost never a single flat shade — it contains a complex interplay of warm and cool tones, lighter highlights in raised areas, deeper shadows pooled in recesses and crevices, and subtle variations across the entire surface that speak to years of exposure to weather, minerals, and biological growth. Replicating this complexity is what transforms a good planter into a great one.
The most effective coloring technique uses a layered approach with diluted concrete pigments or acrylic paints applied in successive thin washes. Begin with a base wash in a mid-tone earthy color — a diluted raw umber or warm gray works well — and brush it over the entire surface, then quickly wipe back the raised areas with a damp cloth before the wash dries. This leaves color concentrated in the recesses and crevices, instantly adding depth and shadow. Follow this with a drier brushing technique using a lighter tone — pale buff or off-white — dragged lightly across the peaks and ridges to create highlights that suggest reflected light catching the raised texture.
Final weathering touches make the difference between a planter that looks newly made and one that looks like it has been sitting in an English walled garden for fifty years. Applying a very diluted black or dark green wash along the base of the planter mimics the staining that occurs where stone sits on soil and absorbs moisture. A light dry-brushing of white or cream along the very top edges suggests the bleaching effect of sun and rain. And if you want to accelerate genuine biological weathering, brushing diluted yogurt or buttermilk onto the surface gives moss and algae spores something to feed on, encouraging real green patina to develop within just a few weeks in a shaded, damp outdoor spot.
Curing, Drainage, and Planting Your Creation
Proper curing is a step that many enthusiastic crafters rush, and it is a mistake that can lead to cracking, surface flaking, or structural weakness that only becomes apparent after the planter has been filled with soil and placed outdoors. Concrete — and hypertufa specifically — does not simply dry; it undergoes a chemical hydration process that requires moisture to complete properly. The best practice is to keep the newly demolded planter wrapped loosely in plastic sheeting for a minimum of three to four days, misting it lightly with water once or twice daily to keep it damp and prevent the surface from drying out faster than the interior.
After the initial curing period, the planter needs an important additional step before it is safe for plants: leaching. Freshly cured Portland cement is highly alkaline, and this alkalinity can damage or kill plant roots if soil is added directly to an unconditioned planter. To leach the excess lime, fill the planter with water and allow it to soak for 24 hours, then drain and repeat this process two or three times over the course of a week. Alternatively, you can brush the interior with a diluted solution of white vinegar, which neutralizes the alkalinity more quickly. A simple pH test of the rinse water will confirm when the piece is ready for planting.
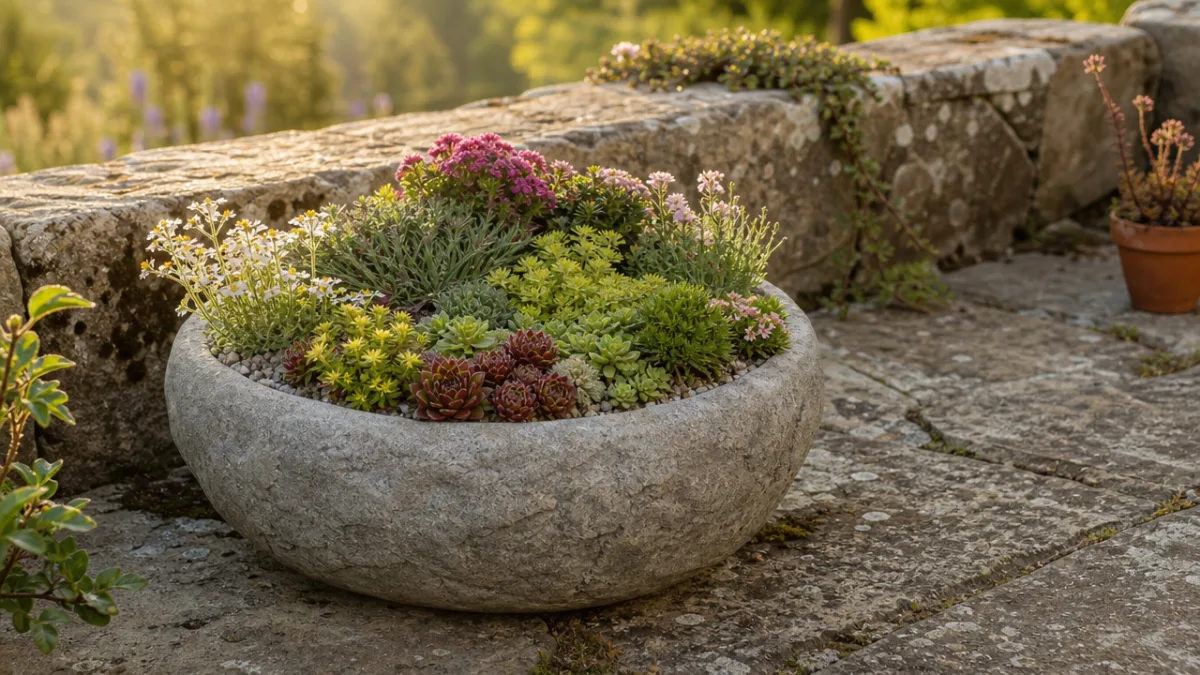
Once cured and leached, your faux-stone planter is ready to become a fully functional garden feature. Choose plants that complement the stone aesthetic — alpines, sedums, dwarf conifers, and hardy herbs all look magnificent cascading over the edges of a stone-like vessel and will themselves age and naturalize beautifully alongside the planter. Ensure your drainage holes are clear and open before adding a layer of gravel at the base to promote good drainage, followed by an appropriate potting mix for your chosen plants. Place the finished planter in a prominent spot and prepare to field constant questions from visitors who are absolutely convinced they are looking at genuine carved stone.
Tips for Longevity and Ongoing Care
A well-made hypertufa planter is remarkably durable and can last for decades outdoors, but a few simple maintenance practices will keep it looking its best and prevent the most common forms of deterioration. The primary enemy of any cement-based planter in cold climates is freeze-thaw cycling, where water trapped in the pores of the material expands as it freezes and causes surface spalling or cracking over time. To minimize this risk, ensure the planter drains freely so that it never sits waterlogged going into a cold period, and consider moving smaller pieces to a sheltered but unheated location — a shed or garage — during the harshest winter months.
The natural aging and patination of a faux-stone planter is generally something to celebrate rather than combat, but there are situations where a little intervention keeps the piece looking intentionally weathered rather than simply neglected. If white efflorescence — chalky mineral deposits — appear on the surface, a gentle scrub with diluted white vinegar followed by a rinse will remove it cleanly without damaging the surface texture. If the coloring fades significantly after several seasons of sun exposure, a fresh application of diluted acrylic washes following the same layered technique used during initial finishing will restore depth and richness to the appearance.
Perhaps the most rewarding aspect of owning a faux-stone planter is watching it genuinely age and become more convincing over time. As real moss and lichen colonize the surface, as the coloring deepens and mellows through weather exposure, and as the planter settles into its place in the garden, it develops a presence and authenticity that no amount of careful hand-finishing could fully replicate at the outset. What began as a DIY project becomes, within a season or two, an object that genuinely feels as though it belongs in its setting — heavy, permanent, and beautifully at home among real stone, real soil, and real growing things.








What do you think?
It is nice to know your opinion. Leave a comment.