










Old Fashioned Cocktail Jelly Candle: The Ultimate Guide to Crafting a Showstopping Conversation Piece
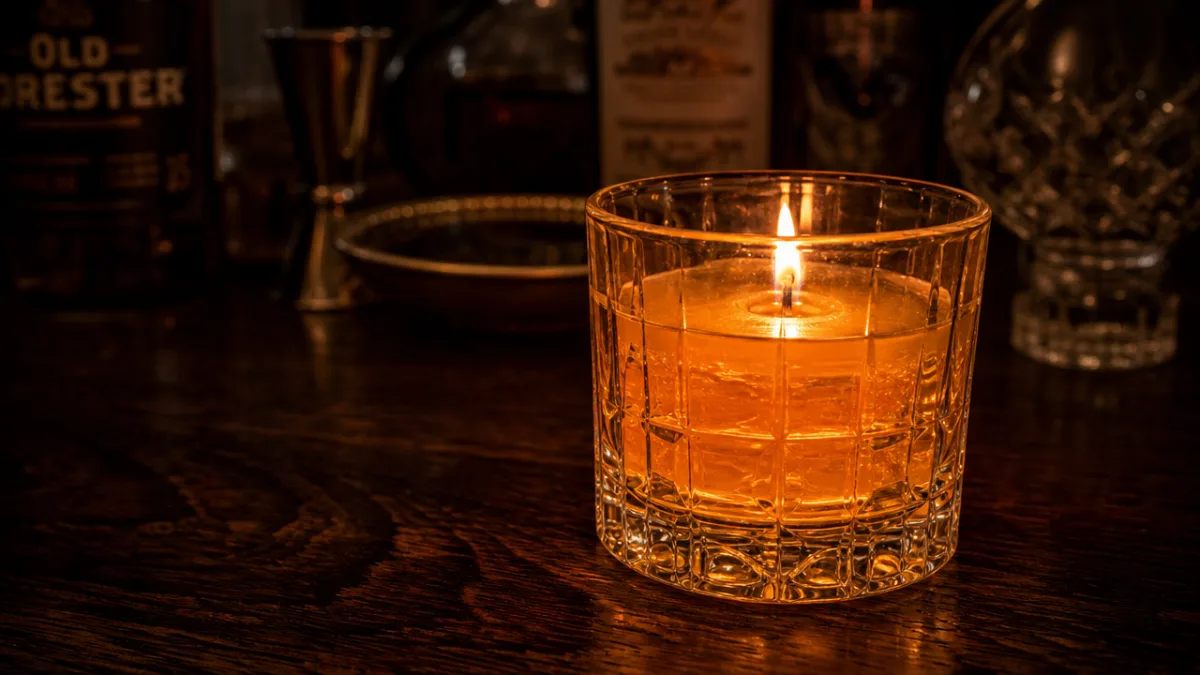
There is something undeniably magical about the moment a guest picks up what appears to be a perfectly crafted Old Fashioned cocktail, complete with a glossy amber surface, a twist of orange peel, and a cocktail cherry — only to realize it is actually a beautifully scented candle. The Old Fashioned cocktail jelly candle has taken the world of DIY home décor by storm, blending mixology aesthetics with the warm, flickering ambiance of candlemaking in a way that feels both whimsical and sophisticated. Whether you are a seasoned candle maker or a complete beginner, this project is one of the most rewarding and visually impressive crafts you can undertake.
The appeal of the jelly candle lies in its transparency. Unlike traditional wax candles, jelly candles use a mineral-based gel that remains beautifully clear, allowing you to embed decorative elements — like fake ice cubes, citrus slices, or cocktail cherries — directly inside. When the flame catches and light dances through the translucent gel, it genuinely resembles a real drink sitting on your coffee table. This trompe-l’œil quality is exactly what makes the Old Fashioned version so charming, since the cocktail itself is a visually iconic drink with its warm amber hue and classic garnishes.
In this comprehensive guide, you will learn everything you need to know about creating your own Old Fashioned cocktail jelly candle, from gathering the right materials to perfecting the pour, adding realistic garnishes, choosing the right fragrance, and displaying your finished masterpiece with style. Along the way, you will also pick up tips on safety, customization, and troubleshooting common pitfalls so your candle turns out beautifully every single time.
Understanding Jelly Candle Wax and Why It Works
Jelly candle gel is a petroleum-based product composed of mineral oil and a polymer resin that gives it its distinctive gel-like consistency. Unlike paraffin or soy wax, which are opaque when cooled, candle gel remains completely transparent — or nearly so — depending on the density you choose. It is sold in three grades: low, medium, and high density, and each grade affects how much fragrance oil it can hold and how clear the finished candle appears. For a cocktail-style candle, high-density gel is generally preferred because it holds embeds more securely and produces fewer bubbles, resulting in that gorgeous clear-glass drink effect.
One of the most important things to understand about working with jelly gel is its higher melting and pouring temperature compared to traditional wax. Candle gel typically needs to reach between 220°F and 250°F before it becomes fluid enough to pour smoothly around embedded objects. This higher temperature means you need to use a dedicated thermometer and exercise proper care throughout the process. However, the payoff is extraordinary — because the gel stays liquid at those high temperatures long enough for you to position your embeds precisely before it sets.
It is also worth noting that not all fragrance oils are compatible with jelly gel. You must use fragrance oils specifically rated as non-polar or gel-safe, because polar fragrance oils can cause the gel to turn cloudy or even separate entirely. For an Old Fashioned candle, you will want warm, boozy, and slightly sweet fragrance notes — think bourbon, orange zest, smoked wood, and bitters. Many specialty candle suppliers offer cocktail-specific fragrance blends that work beautifully with gel, saving you the guesswork of blending from scratch.
Gathering Your Materials and Tools
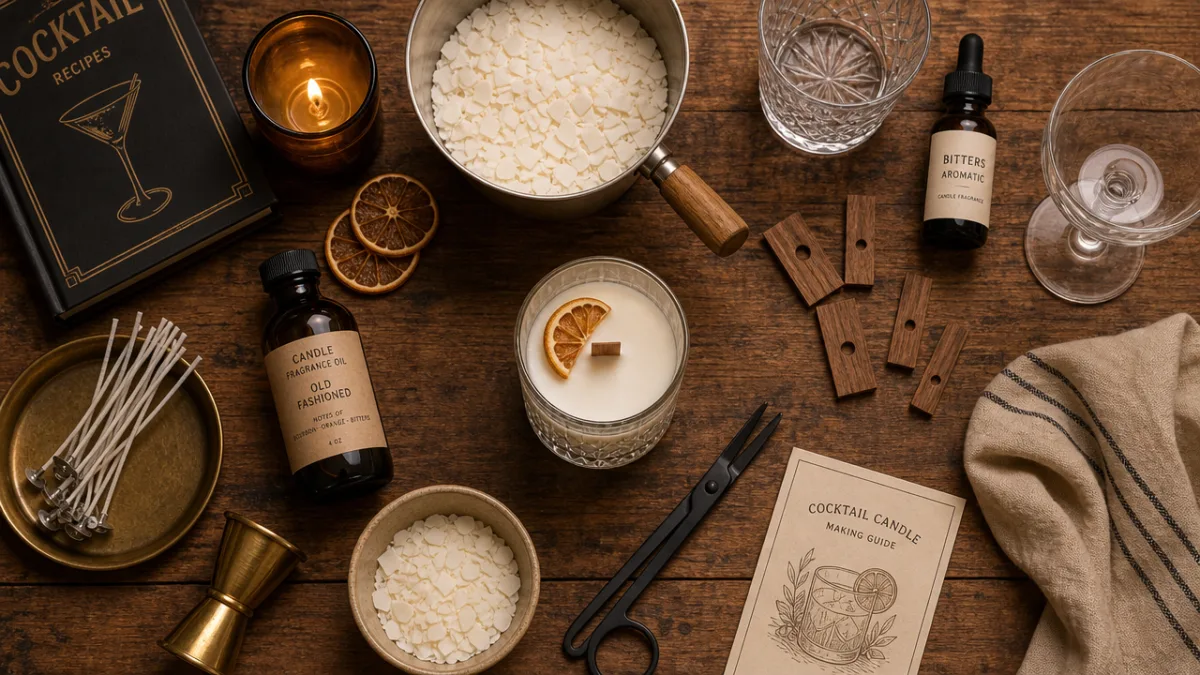
Before you begin, assembling every item you need in advance will make the crafting process smooth and enjoyable rather than stressful. The most critical item is, of course, your candle gel — purchase a high-density variety from a reputable candle supply store, as quality matters enormously with gel candles. You will also need a heavy-bottomed pouring pot dedicated solely to candle making (never reuse candle equipment for food), a reliable candy or candle thermometer, and a heat source you can control precisely, such as a kitchen stove or a dedicated hot plate.
For the vessel, choose a rocks glass or lowball glass that mimics the classic Old Fashioned serving glass. Thicker glass is safer and better for candles since it can withstand the heat of the burning wick over time. Many crafters use real barware purchased inexpensively at thrift stores, which adds to the authenticity enormously. You will need a pre-tabbed candle wick rated for the diameter of your glass, and a wick centering tool or two pencils taped together across the rim will keep it perfectly centered during the pour.
The embeds are where the real fun begins. Here is a list of materials you will need to create a realistic Old Fashioned aesthetic:
- Fake acrylic ice cubes in clear or amber tint — available at craft stores and online
- A small artificial cocktail cherry (maraschino-style, non-flammable craft variety)
- A dried or artificial orange peel twist
- Amber or cognac-toned candle dye chips or liquid dye
- Gel-safe bourbon or whiskey fragrance oil
- A cocktail pick or small decorative skewer for the cherry
- Rubbing alcohol for wiping embeds clean before placing them in the gel
It is critically important that all embeds placed inside the candle are non-combustible and free of moisture. Even tiny amounts of moisture trapped inside gel can cause dangerous popping or sputtering when the candle is lit. Wipe every embed thoroughly with isopropyl alcohol before use, and allow them to dry completely. Avoid using anything made of paper, fabric, or fresh botanical materials unless they have been specifically treated and sealed for candle use.
Step-by-Step Instructions for Making Your Candle
Begin by preparing your glass vessel. Secure the wick in the center of the glass using a wick sticker on the bottom and a wick bar or two pencils across the top to hold it upright. Wipe the inside of the glass with a small amount of rubbing alcohol on a lint-free cloth to remove any dust or oils that might interfere with clarity. Arrange your acrylic ice cubes in the bottom of the glass in a natural, slightly random pattern the way real ice would settle in a drink, leaving enough room for the wick to remain centered and unobstructed.
Next, melt your candle gel slowly in your dedicated pouring pot over medium-low heat, stirring gently and continuously. Never leave melting gel unattended, and never exceed 250°F. Use your thermometer constantly. Once the gel is fully melted and clear, remove it from the heat briefly and stir in your amber candle dye a tiny amount at a time until you reach the warm, whiskey-brown tone of an Old Fashioned — it is much easier to add more dye than to correct an overly dark pour, so go slowly. Then add your gel-safe fragrance oil at the recommended usage rate, typically 3 to 5 percent of the total gel weight, and stir gently to combine without introducing air bubbles.
Allow the gel to cool slightly to around 200°F before pouring. Pouring at a slightly lower temperature reduces bubbles and gives you a few extra seconds to work with the embeds. Pour slowly and steadily into the prepared glass in a thin stream aimed at the inside wall rather than directly onto the ice cubes. This technique reduces disturbance to your embedded elements. Fill the glass to about half an inch below the rim, then allow it to cool at room temperature undisturbed for at least four to six hours. Do not move it, as the gel will still be setting during this time and disturbance can create unsightly ripples or cloudiness.
Once the first pour has fully set and the surface is firm to the touch, you can add your finishing touches. Use a heat gun or a brief second pour of clear gel to smooth any surface imperfections. Position your cocktail cherry on a decorative pick and rest it across the rim of the glass, or press it gently into a small depression in the set gel surface. Finally, curl your dried orange peel and place it artfully on top — this is the classic Old Fashioned garnish and it makes the candle instantly recognizable as a tribute to that iconic cocktail.
Fragrance Pairing and the Art of Scent Storytelling
A great jelly candle is not just a visual experience — it is an olfactory one too, and this is where your Old Fashioned candle can truly transcend from a mere craft project into something genuinely evocative. The Old Fashioned cocktail is built on a foundation of whiskey or bourbon, a sugar cube or simple syrup, a dash of Angostura bitters, and a citrus garnish. Translating those flavor components into a fragrance blend for your candle requires thinking in aromatic families rather than trying to exactly replicate the smell of alcohol.
Bourbon fragrance oils typically feature top notes of vanilla and caramel, heart notes of oak and toasted wood, and base notes of leather and dried fruit. Pairing this with a bright orange or bergamot fragrance oil in a ratio of roughly three parts bourbon to one part citrus creates a scent profile that is uncannily reminiscent of sitting at a well-appointed bar with a glass of something special. Some crafters also add a small percentage of clove or black pepper fragrance oil to mimic the complex bitterness of Angostura, which adds real depth and sophistication to the overall scent.
It is worth spending time testing fragrance combinations before committing to your final batch. Small test pours in inexpensive vessels allow you to evaluate how a fragrance smells both cold (when you open the jar and sniff) and hot (when the candle is actively burning). These are called cold throw and hot throw respectively, and the two can differ significantly. Some fragrance oils that smell incredible cold become muted or slightly off-putting when heated, so always test your blend with a burning candle before making a large batch or giving them as gifts.
Consider also the mood you want your Old Fashioned candle to evoke. Are you going for a cozy winter evening by the fireplace vibe? Lean into the smoky, woody, and vanilla-forward notes. Prefer something that evokes a lively rooftop bar in summer? Brighten the blend with more citrus and add a touch of ginger or mint. The beauty of candle making is that the fragrance is entirely in your hands, and with a little experimentation you can craft a scent that tells a story as richly as the visual of the candle itself.
Safety Considerations Every Candle Maker Must Know
Jelly candles are extraordinarily beautiful, but they require a higher level of safety awareness than traditional wax candles. Because candle gel is petroleum-based, it has a lower flash point than many crafters expect, and it can ignite if overheated or mishandled. Always work in a well-ventilated space, keep a fire extinguisher nearby, and never leave melting gel on the heat without direct supervision. Use a proper double boiler setup if possible, or keep your burner on the lowest setting that still melts the gel efficiently, which gives you much more control over temperature spikes.
When it comes to burning your finished candle, there are a few important guidelines to follow. Always trim your wick to a quarter inch before each lighting — a longer wick produces a larger, hotter flame that can overheat the gel and cause it to liquefy too quickly. Burn your candle on a heat-resistant surface and never leave it unattended. Because the gel is transparent, it can be easy to misjudge how much fuel remains, so check periodically and extinguish the candle when approximately half an inch of gel remains at the bottom to prevent the glass from overheating.
There is also the matter of embed safety. While your acrylic ice cubes will remain inert throughout the candle’s life, any embeds positioned near the top of the gel — like your cocktail cherry or orange peel garnish — should be removed before lighting if they are close to the wick or flame zone. A good rule of thumb is that anything within a two-inch radius of the wick should be non-flammable and able to withstand significant heat. Decorative elements on picks that rest outside the glass entirely are generally the safest option for top garnishes.
Gifting, Display, and Customization Ideas
One of the greatest joys of making Old Fashioned cocktail jelly candles is the sheer variety of ways you can present, display, and customize them. As gifts, these candles are almost universally adored — they are functional, beautiful, deeply personal, and completely unlike anything you can find in a mainstream store. Consider pairing your finished candle with a small card that lists the fragrance notes used, the burn time, and a few care instructions, which elevates the gift to something that feels genuinely artisanal and thoughtful.
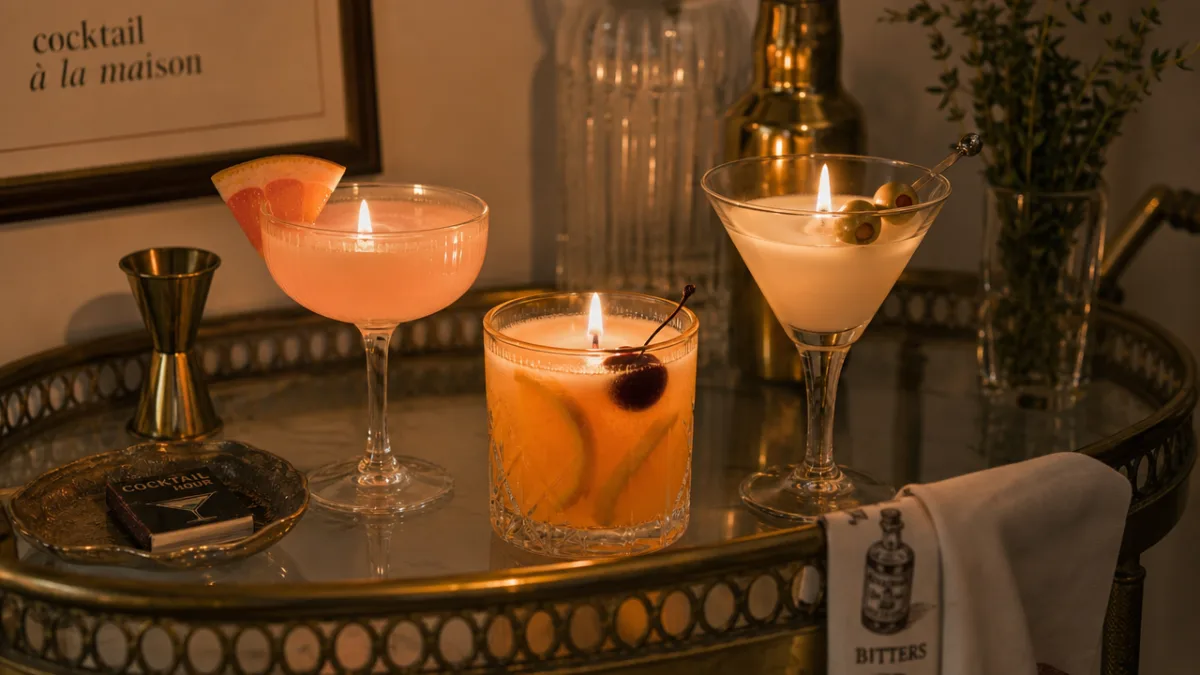
For display at home, grouping two or three cocktail candles together in different “drinks” creates a stunning bar cart vignette. You might make a Negroni in a coupe glass (deep red gel with a blood orange slice), a Mojito in a highball (pale green gel with mint sprigs and lime), and your Old Fashioned in a rocks glass — set together on a wooden tray with some bar tools and they become an unforgettable centerpiece. Varying the heights of the glasses and adding a few real cocktail napkins or a bottle of bitters for props ties the whole display together beautifully.
Customization possibilities are genuinely limitless once you have mastered the basic technique. Here are some popular variations and ways to personalize your cocktail candle collection:
- Use personalized rocks glasses engraved with initials for wedding favors or housewarming gifts
- Tint the gel with different colors to represent favorite cocktails of family members or friends
- Add edible-looking gold leaf flakes to the gel for a luxurious, high-end aesthetic
- Experiment with layered pours of slightly different shades of amber to create an ombre effect
- Create seasonal versions with holiday-appropriate embeds like cinnamon sticks or star anise for winter editions
- Package them in vintage barware from antique markets for a truly one-of-a-kind presentation
If you are thinking about selling your cocktail candles, there is a real and growing market for handcrafted novelty candles, particularly on platforms like Etsy and at artisan markets. The Old Fashioned version is especially popular with cocktail enthusiasts, home bar owners, and anyone who loves the intersection of craft culture and drinks culture. Keep detailed records of your formulations, costs, and pour weights so you can price your products fairly and reproduce your best batches consistently. As your skills grow, consider expanding your cocktail candle line into a full spirits and mixology-themed collection.
Troubleshooting Common Jelly Candle Problems
Even experienced candle makers encounter occasional issues with jelly candles, and knowing how to troubleshoot them quickly saves both materials and frustration. The most common problem is excessive bubbling in the finished candle. While some small bubbles can add to the realistic drink effect, large bubbles or cloudy areas detract from the visual appeal significantly. Bubbles are usually caused by pouring at too high a temperature, stirring too vigorously when adding fragrance, or disturbing the candle while it is setting. Pouring more slowly and at a slightly lower temperature — around 190°F to 200°F — solves the majority of bubble problems.
Cloudiness or haziness in the gel is another common issue and is almost always caused by either a polar fragrance oil, moisture contamination, or dye that is not gel-compatible. If your gel turns cloudy the moment you add fragrance, that fragrance is not suitable for gel candles and unfortunately cannot be salvaged — you will need to start fresh with a different fragrance. Using a gel-safe fragrance oil from the outset avoids this entirely. Dye-related cloudiness is usually resolved by switching to liquid candle dyes specifically formulated for gel, rather than powder dyes or chip dyes designed for paraffin.
Sinking or shifting embeds are a frustrating issue that typically occurs when the gel was too hot during the pour and the objects floated rather than staying in position. Allowing the gel to cool to around 200°F before pouring gives the gel enough viscosity to hold embeds in place as it sets. For stubborn embeds like round ice cubes that want to roll, try leaning them against the glass wall during the pour, where they will be supported as the gel solidifies. A second, smaller pour of gel over the top of partially set gel can also help lock embeds into a specific position if needed.
Finally, if your candle cracks during cooling — particularly in cold weather — it may be due to the gel cooling too quickly. Jelly gel is best cooled slowly at consistent room temperature, away from drafts, air conditioning, or cold surfaces. Placing your poured candle in a slightly warm oven that has been turned off and allowed to cool naturally is an excellent technique for achieving crack-free, crystal-clear results, particularly during winter months when ambient temperatures can drop sharply. With patience and attention to these details, your Old Fashioned cocktail jelly candle will emerge as a flawless, luminous work of art that looks every bit as good as it smells.








What do you think?
It is nice to know your opinion. Leave a comment.