










DIY Beautiful Tin Can Pendant Light: Transform Ordinary Cans Into Stunning Illumination
Introduction: The Art of Upcycled Lighting
There is something deeply satisfying about turning a humble, discarded object into something genuinely beautiful. Tin can pendant lights have emerged as one of the most beloved DIY lighting projects in the world of home décor, and for very good reason. These charming fixtures combine resourcefulness with artistry, producing results that look far more expensive and intentional than their origins would suggest. Whether you are a seasoned crafter or a curious beginner picking up a hammer for the first time, this project welcomes everyone with open arms and delivers results that will draw genuine compliments from every guest who walks through your door.
The beauty of upcycled lighting lies not only in the aesthetic outcome but also in the story it tells. Every tin can pendant light carries with it a small narrative of transformation — from a container destined for the recycling bin to a glowing centerpiece that defines the mood of a room. In an age where sustainability and conscious living are increasingly important, choosing to create rather than consume is a quietly powerful act. These pendant lights allow you to participate in a longer tradition of making do and making beautiful, one that spans cultures and centuries.
Beyond the philosophical appeal, tin can pendant lights are extraordinarily practical. They can be customized to suit virtually any interior style, from rustic farmhouse kitchens to sleek industrial lofts, from bohemian bedrooms to cozy reading nooks. The materials are inexpensive and often already available in your recycling bin. The tools required are minimal. And the process, while requiring patience and some care, is well within the reach of most people who enjoy working with their hands. This article will walk you through every step of the journey, from selecting the right cans to hanging your finished creation with pride.
Materials and Tools You Will Need
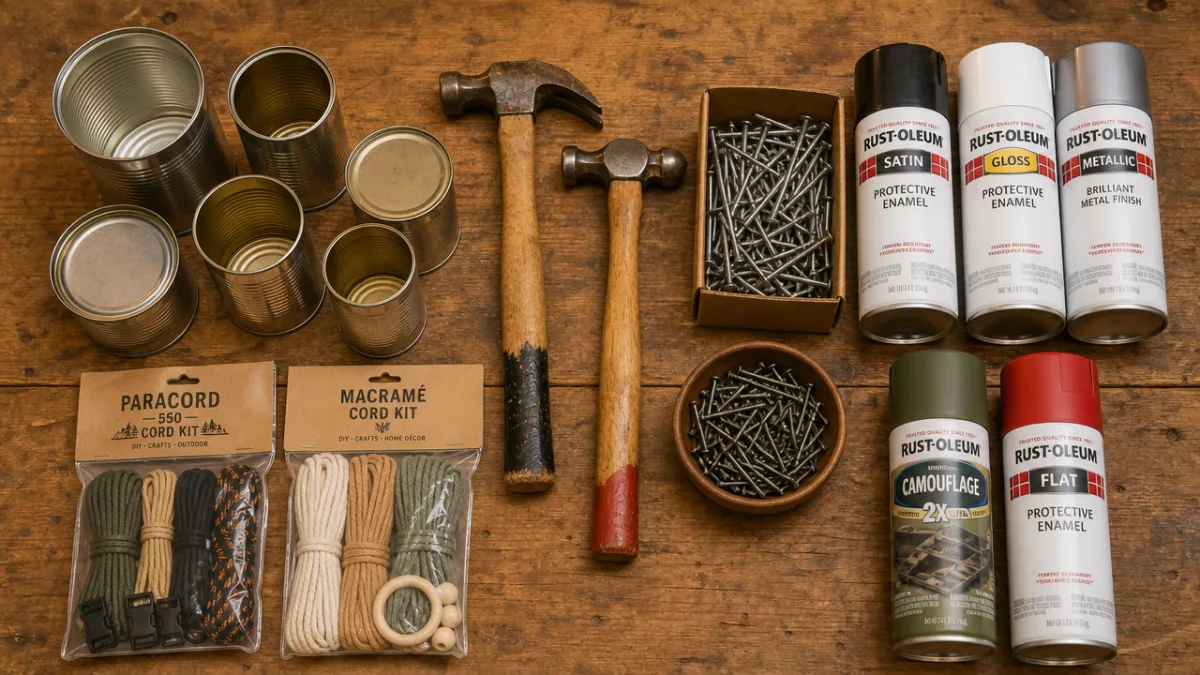
Before you begin any craft project, gathering your materials thoroughly is the single most important preparatory step you can take. Running out of supplies mid-project or discovering that a key tool is missing can derail your momentum and lead to frustration. For this tin can pendant light, you will need a selection of tin cans in varying sizes — large coffee cans, medium tomato cans, and smaller bean or vegetable cans all work wonderfully and create beautiful visual layering when combined in a cluster pendant arrangement. Save them over a few weeks before you begin, washing them thoroughly and removing all paper labels.
The tools required are refreshingly modest. You will need a sturdy hammer and a collection of nails in different sizes, which will be used to punch the decorative pattern of holes through which light will eventually glow. A drill with a metal-appropriate drill bit is also extremely useful, particularly for creating the central hole through which the pendant cord will run. You will need a marker or pencil, some tape, and ideally a printed or hand-drawn template of your desired pattern — geometric shapes, stars, floral motifs, and dot clusters are all popular and effective choices that translate beautifully when illuminated from within.
For the electrical components, you will need pendant lamp cord kits, which are widely available at hardware stores and online retailers. These kits typically include the cord itself, a socket, a canopy for the ceiling mount, and all necessary hardware. You will also need Edison-style LED bulbs, which produce a warm amber glow that complements the industrial character of tin beautifully. Optional finishing materials include spray paint in matte black, copper, gold, or white to give your cans a more polished appearance, as well as sandpaper for smoothing any sharp edges after punching your holes — a step that is important for both aesthetics and safety.
- Tin cans in various sizes, cleaned and dried thoroughly
- Hammer and assorted nails in multiple sizes
- Drill with metal drill bit (3/8 inch recommended for cord passage)
- Marker, tape, and paper for creating hole-punch templates
- Pendant lamp cord kit with socket and ceiling canopy
- Edison LED bulbs, warm white, 40W equivalent or lower
- Spray paint in your chosen finish (optional but recommended)
- Sandpaper, medium and fine grit, for smoothing edges
- Safety gloves and eye protection for drilling and hammering
Preparing Your Tin Cans: Safety and Surface Prep
Preparation is where the quality of your finished pendant light is truly determined, and this phase deserves more attention than most tutorials give it. Once your cans are clean and dry, the first task is to smooth any rough or sharp interior edges from the can opening, which can present a hazard during handling and also an unpleasant visual element in the finished piece. Use a medium-grit sandpaper folded into a tight roll and run it carefully around the interior rim of each can. Follow up with fine-grit sandpaper for a truly smooth result that feels safe and intentional to the touch.
Before you begin painting or punching, you need to fill each can with water and freeze it solid overnight. This step is one of the great secrets of successful tin can crafting and makes an enormous difference to the quality of your hole-punching work. When the can is filled with ice, it provides a firm internal structure that prevents the thin metal walls from denting or caving inward as you hammer your nails through. Without this support, the can will buckle and deform with each hammer blow, producing irregular, ugly holes and potentially ruining the shape of your can entirely. Plan your timeline to allow for a full night of freezing before you proceed.
Once your cans are frozen solid, apply your paper template to the outside of each can using small strips of tape. Your template should be designed in advance and can be as simple or as elaborate as your patience and skill allow. Simple geometric grids produce a refined, modern look, while freeform dot clusters in concentric rings create a more organic, bohemian aesthetic. Spiral patterns, star shapes, and even silhouettes of trees or birds are all achievable with nothing more than a hammer and nails of varying sizes. Take a moment before you begin to visualize how the light will travel through each hole and what kind of glow pattern you want to cast on surrounding surfaces.
If you plan to paint your cans, do so after the punching work is complete and the ice has melted out. Painting first is tempting but counterproductive, as the hammering process will chip and scratch any paint applied to the surface. After punching, allow the cans to thaw completely, pour out the water, and dry them thoroughly — ideally leaving them upside down for several hours. Then apply your spray paint in thin, even coats in a well-ventilated area, allowing full drying time between coats. Two to three thin coats will produce a much more durable and professional finish than a single heavy application, which tends to run and pool in the punched holes.
Punching the Pattern: Technique and Design
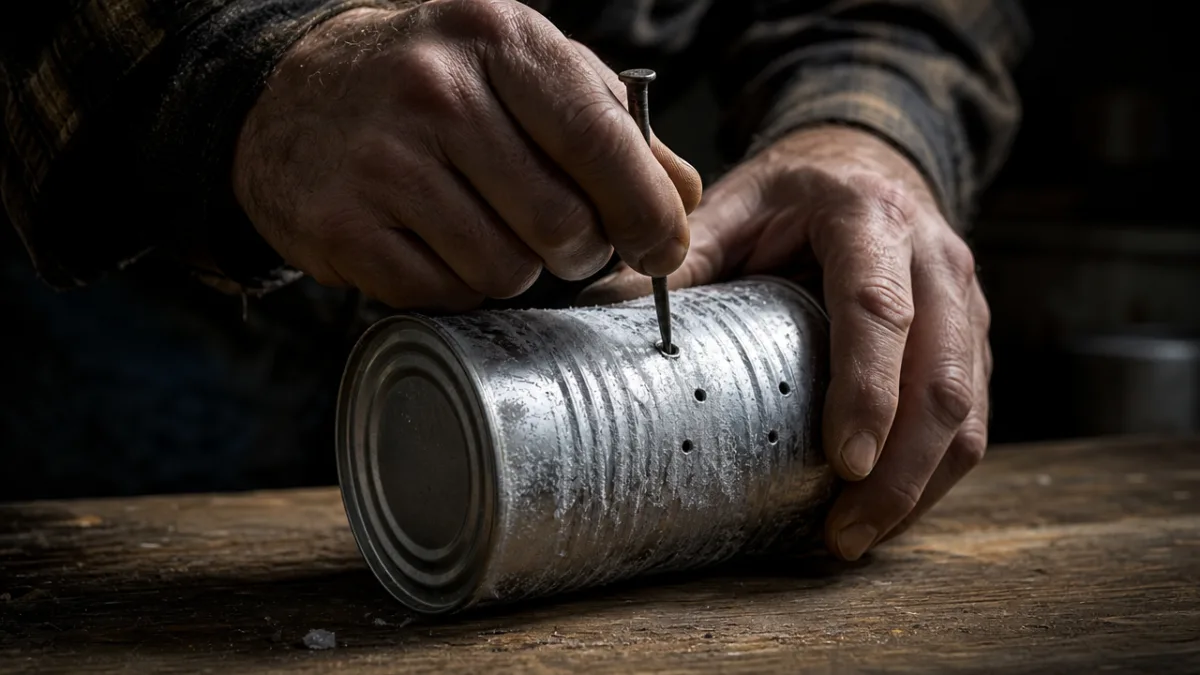
The hole-punching stage is the heart of the entire project and the moment where your pendant light truly begins to take shape. Set up your workspace on a firm, stable surface — a concrete floor or solid workbench is ideal. Remove your first frozen can from the freezer and work quickly, as you have roughly 20 to 30 minutes before the ice begins to thaw enough to reduce its effectiveness. Position your first nail on one of the marked points of your template and hold it firmly with one hand while you strike it cleanly and confidently with the hammer using your other. One firm, decisive strike is far better than several tentative taps, which tend to produce jagged or poorly positioned holes.
Vary your nail sizes deliberately and intentionally throughout the design. Using a larger nail for central or accent holes and a smaller nail for surrounding detail holes creates a beautiful sense of depth and visual hierarchy when the light shines through. This variation in hole size produces a starfield effect that is genuinely magical in a darkened room — larger points of intense light surrounded by constellations of smaller, softer glows. Some crafters also use a leather punch or a small rotary tool to create smooth, perfectly circular holes in larger sizes, which can be used to create bold focal points within a more delicate surrounding pattern.
Work methodically around the can, rotating it as you go and keeping your template aligned carefully. It is easy to lose track of your position, particularly on rounder cans where the template can shift slightly with each hammer blow. Small pieces of tape repositioned as you work will help keep things accurate. When you have completed all your holes according to the template, carefully remove the paper and inspect your work before the ice melts away. Fill any gaps in the pattern that seem visually inconsistent, and add any final detail holes that would improve the overall design. Then set the can aside to thaw and move on to your next one, working through all your cans in sequence while maintaining efficiency.
- Remove frozen can from freezer and tape your template securely in place.
- Begin punching from the center or top of the pattern and work outward or downward.
- Use a single firm hammer strike per nail position for clean, round holes.
- Alternate between nail sizes according to your design for visual depth.
- Reposition tape as needed to keep the template aligned throughout the process.
- Remove the template and inspect for gaps or inconsistencies before thawing.
- Allow the can to thaw completely and dry before proceeding to painting or assembly.
Once all your cans have been punched and allowed to dry thoroughly, take a moment to sand the interior of each one lightly once more. The punching process sometimes pushes small burrs or sharp points of metal inward from the back of each hole, and these need to be smoothed away both for safety and for the cleanliness of the light they will eventually emit. A small piece of sandpaper wrapped around your finger and run gently across the interior surface will catch most of these burrs quickly. Hold each can up to a light source and look through it at this stage — you will get your first thrilling preview of the pattern you have created, glowing against the light exactly as it will when your pendant is finished and switched on.
Wiring and Assembly: Bringing Your Light to Life
The electrical assembly portion of this project is one that many crafters approach with hesitation, but pendant lamp cord kits are specifically designed to make the wiring process accessible to non-electricians. Always begin by ensuring that any electrical work is done with the power to that circuit switched off at the breaker, and if you have any doubt about your home’s wiring or your own comfort with electrical connections, consult a licensed electrician for the installation stage while completing the decorative work yourself. Safety is non-negotiable when working with electricity, and there is no shame in seeking expert help for this component.
Feed the pendant cord through the drilled central hole in the bottom of your tin can — which now serves as the top of your pendant since the open end will face downward. The cord should pass through cleanly, with the socket hanging inside the can at a position that places the bulb roughly in the center of the interior space. Most pendant cord kits include a strain relief fitting or a small knot technique that prevents the cord from being pulled through the hole and keeps the socket suspended at the correct height. Tighten all fittings according to the kit’s instructions and ensure that no bare wire is exposed anywhere along the length of the cord.
For cluster pendant arrangements using multiple cans, you will need a multi-pendant canopy that accommodates several cords emerging from a single ceiling mount. These canopies are available in configurations for three, five, six, or even more pendants and allow you to create a dramatic cascading arrangement of cans at varying heights. Stagger the cord lengths deliberately — having all cans hang at the same level looks flat and uniform, while varying the heights by four to eight inches between each can creates movement, visual interest, and the impression of organic growth or natural clustering. This is where your pendant light goes from attractive to truly spectacular.
Installation, Styling, and Living With Your Creation
Installing your finished pendant light is a deeply rewarding moment, the culmination of all the planning, freezing, hammering, painting, and wiring that has preceded it. If you are replacing an existing ceiling fixture, the process is relatively straightforward, as the wiring connections will already be in place and simply need to be connected to your new pendant’s canopy. Turn off the power at the breaker, remove the old fixture, connect the wires according to colour coding (black to black, white to white, green or bare copper to ground), and secure the canopy plate to the ceiling junction box. Restore power and switch on the light for your first real glimpse of what you have made — a moment that almost every crafter describes as genuinely emotional.
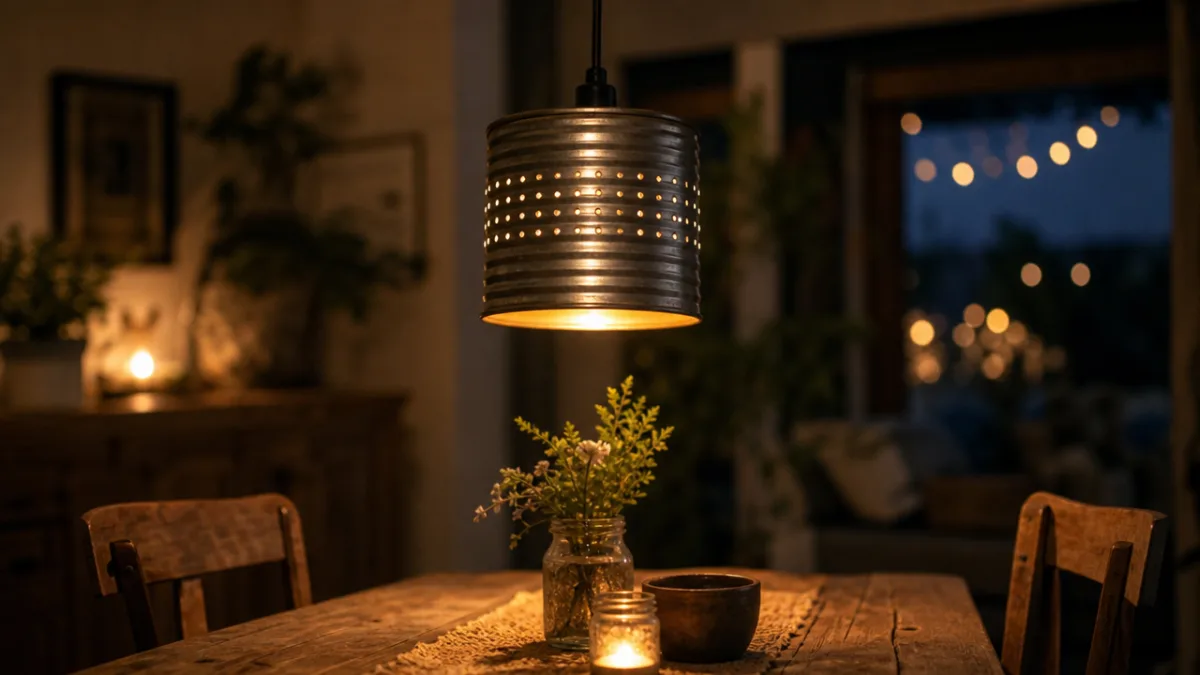
The placement of your tin can pendant light matters enormously to its overall effect. Over a dining table is one of the most popular and successful locations, particularly for cluster arrangements, where the pendants can hang at varying heights roughly 30 to 36 inches above the tabletop. In a kitchen, a single large-can pendant over a sink or island creates a focal point that is both functional and beautiful. Bedside pendants are an increasingly popular alternative to table lamps, freeing up nightstand space while adding a touch of hand-crafted warmth to the sleeping environment. Outdoor covered porches and patios are also excellent locations, provided the cans have been treated with a rust-resistant spray paint and the cord kit is rated for damp or outdoor locations.
The light that a tin can pendant casts is unlike any commercially produced fixture, and learning to live with and enjoy that light is part of the pleasure of making your own. During the day, the cans themselves are the visual feature — their texture, finish, and the subtle hints of the hole pattern visible even without illumination. At dusk and in the evening, when the bulb switches on, the entire character of the piece transforms. Patterns of light bloom across walls and ceilings, creating a warm, dappled effect that shifts subtly as the bulb heats and as people move through the space. This living, breathing quality is something no factory-produced pendant light can replicate.
Maintaining your tin can pendant light is simple and requires very little effort over time. Dust the exterior of each can periodically with a soft cloth or a gentle brush attachment on a vacuum cleaner. If you notice any rust beginning to form — particularly in humid environments — a light sanding of the affected area followed by a touch-up with spray paint will address it quickly and cleanly. Bulb replacement is straightforward since LED bulbs last for many thousands of hours, meaning you are unlikely to need to replace them frequently. The cord and socket components, if sourced from a reputable supplier and installed correctly, should last for many years without any attention required.
Perhaps the greatest gift of making your own tin can pendant light is the inspiration it tends to spark. Crafters who complete their first pendant almost invariably begin planning their second before the first one is even fully installed. The possibilities for variation are essentially limitless — different can sizes, different hole patterns, different paint finishes, different bulb temperatures, different cord colours and materials, different clustering configurations. Each variation produces a genuinely different result, and the skills you develop in completing your first pendant make every subsequent project faster, more confident, and more refined. This is not merely a single project but the beginning of a practice, a way of seeing the world’s discarded materials as a treasury of creative possibility waiting to be unlocked.








What do you think?
It is nice to know your opinion. Leave a comment.