










DIY Window Seat Hack: Budget-Friendly Beauty
Why a Window Seat Transforms Any Room
There is something undeniably magical about a window seat. It occupies that liminal space between indoors and out, offering a cozy nook where you can curl up with a book, watch the rain, or simply let your mind wander. For centuries, built-in window seats were the exclusive domain of custom homes and generous renovation budgets, but today’s resourceful DIY community has cracked the code on achieving that same timeless charm without breaking the bank.
The appeal goes far beyond aesthetics. A well-placed window seat adds genuine functional value to a room by creating extra seating, maximizing natural light, and even introducing hidden storage beneath the cushion. In smaller homes or apartments where every square foot counts, this kind of dual-purpose furniture is a genuine game-changer. Suddenly, an awkward alcove or an underwhelming bay window becomes the most beloved spot in the entire house.
What makes the DIY approach particularly exciting is the level of personalization it allows. You are not selecting from a catalog of pre-made options or paying a carpenter to execute someone else’s vision. Instead, you get to choose the dimensions, the fabric, the finish, and every last detail to match your existing decor and your own unique taste. The result feels intentional, bespoke, and deeply satisfying in a way that store-bought furniture rarely does.
Planning Your Window Seat: Measurements and Materials
Before you pick up a single tool, the planning phase deserves your full attention. Start by measuring the width, depth, and height of the space where your window seat will live. The standard seat height is between 17 and 20 inches from the floor, which aligns comfortably with most chairs and allows your feet to rest flat. The depth should be generous enough to sit comfortably — aim for at least 18 inches, though 24 inches is ideal if you want to lounge rather than simply perch.
The most popular budget-friendly method involves repurposing IKEA KALLAX or EXPEDIT shelving units as the base structure. These cube storage units are sturdy, affordable, and available in dimensions that work beautifully for a window seat frame. By placing two or three units side by side and securing them together and to the wall, you create an instant, stable base that also delivers the bonus of hidden storage cubbies. Many builders add plywood across the top to create a smooth, unified surface before adding the cushion.
When gathering your materials, think through the complete list before your first hardware store run to avoid multiple frustrating trips. Here is a solid starting checklist for a typical IKEA-hack window seat:
- Two to three KALLAX units (choose height based on desired seat elevation)
- One sheet of 3/4-inch plywood cut to the full seat width and depth
- Foam cushion insert, minimum 3 inches thick for comfort
- Fabric of your choice, roughly twice the cushion surface area
- Wood screws, L-brackets, and wall anchors for securing units
- Sandpaper, primer, and paint or wood stain to finish the base
- A staple gun with heavy-duty staples for upholstering the cushion
Beyond the basic frame, think about whether you want to add a face frame — a thin strip of wood attached to the front edge of the KALLAX units — to give the whole structure a more built-in, custom look. This simple addition, often just a few pine boards from the lumber aisle, elevates the entire project from “clever furniture arrangement” to “this must have been original to the house.” Caulk along the seams and a coat of paint that matches the wall color will complete the illusion beautifully.

Step-by-Step Construction: Building the Base
With your plan finalized and materials gathered, it is time to build. Begin by clearing the area completely and giving the floor a good clean — you will be working close to the wall, and a tidy workspace prevents accidents and makes measuring easier. If you are working with KALLAX units, assemble them fully according to the instructions before positioning them. Once assembled, slide them into place and check that they sit level. Uneven floors are common in older homes, and small furniture shims can correct any wobble before you commit to anything permanent.
Secure the units together using wood screws driven through the side panels where they meet. Pre-drill your holes to prevent the particle board from splitting — this step is worth the extra two minutes every single time. Next, use L-brackets to anchor the entire structure to the wall studs. Locating studs is critical here; a window seat that tips forward when a child climbs on it is a safety hazard you absolutely want to avoid. Use a stud finder, or employ the old-fashioned method of tapping the wall and listening for a solid rather than hollow sound.
Once the base is secured, measure and cut your plywood top. Many hardware stores will make straight cuts for a small fee if you do not have access to a saw, and the precision of a store cut can actually save you time and effort. The plywood should extend to the full width of the units and be deep enough to cover the frame completely. Attach it to the top of the KALLAX units using screws from below, or use construction adhesive combined with screws for a particularly solid bond. Sand the edges of the plywood smooth — this is the surface your cushion will rest on, and any rough spots can wear through fabric over time.
If you chose to add a face frame for that built-in look, now is the time to attach it. Cut your pine boards to length, nail or glue them to the front edges of the units, fill any nail holes with wood filler, sand smooth, and you are ready to paint or stain. Apply at least two coats of a quality paint, sanding lightly between coats with a fine-grit sandpaper. A semi-gloss or satin finish is practical for a seat that will see daily use since it wipes clean far more easily than flat paint.
Crafting the Perfect Cushion on a Budget
The cushion is arguably the heart of the whole project — it is where comfort lives, and it is the element that will draw the eye and set the visual tone of the finished seat. High-density foam is the material of choice for a seat cushion, and the density rating matters more than most beginners realize. Look for foam with a density of at least 1.8 pounds per cubic foot for a seat that will hold its shape through years of daily use. Lower-density foam compresses quickly and will leave you sitting uncomfortably close to the hard plywood beneath within just a few months.
Foam can be purchased by the sheet from fabric and craft stores, upholstery suppliers, or online retailers, and most will cut it to your specified dimensions for a small charge. For a window seat that doubles as a lounging spot, consider layering a firm high-density base foam with a softer, lower-density top layer to create a cushion that is supportive yet plush. Wrapping the entire foam piece in a layer of polyester batting before you apply the fabric adds a gentle, rounded edge that gives the cushion a professional, tailored appearance rather than a boxy, DIY look.
Choosing fabric is one of the most enjoyable parts of the entire project. The options are genuinely endless, but a few practical guidelines will help you make a choice you will be happy with for years. Consider the following factors when making your selection:
- Durability: Look for a fabric with a rub count (Martindale or Wyzenbeek rating) of at least 15,000 for a seat that will see regular use.
- Cleanability: Crypton, outdoor fabrics, and any fabric labeled performance or stain-resistant are excellent for homes with children or pets.
- Pattern scale: Large-scale prints look stunning but require more fabric to match the pattern at the seams; budget accordingly.
- Color and light: Consider how the fabric will look in both daylight and artificial evening light, as the color can shift significantly between the two.
To upholster the cushion, lay your fabric face-down on a clean surface, place the foam in the center, and pull each side taut before stapling it to the underside of the plywood top or to a thin sheet of plywood cut to match the cushion dimensions. Work from the center of each side outward, keeping the tension even, and fold the corners neatly as if wrapping a gift before stapling them down. If sewing is in your skill set, a removable zippered cover is an even better option since it can be laundered — a feature you will deeply appreciate after a spilled cup of tea.
Styling Your Window Seat: The Finishing Touches
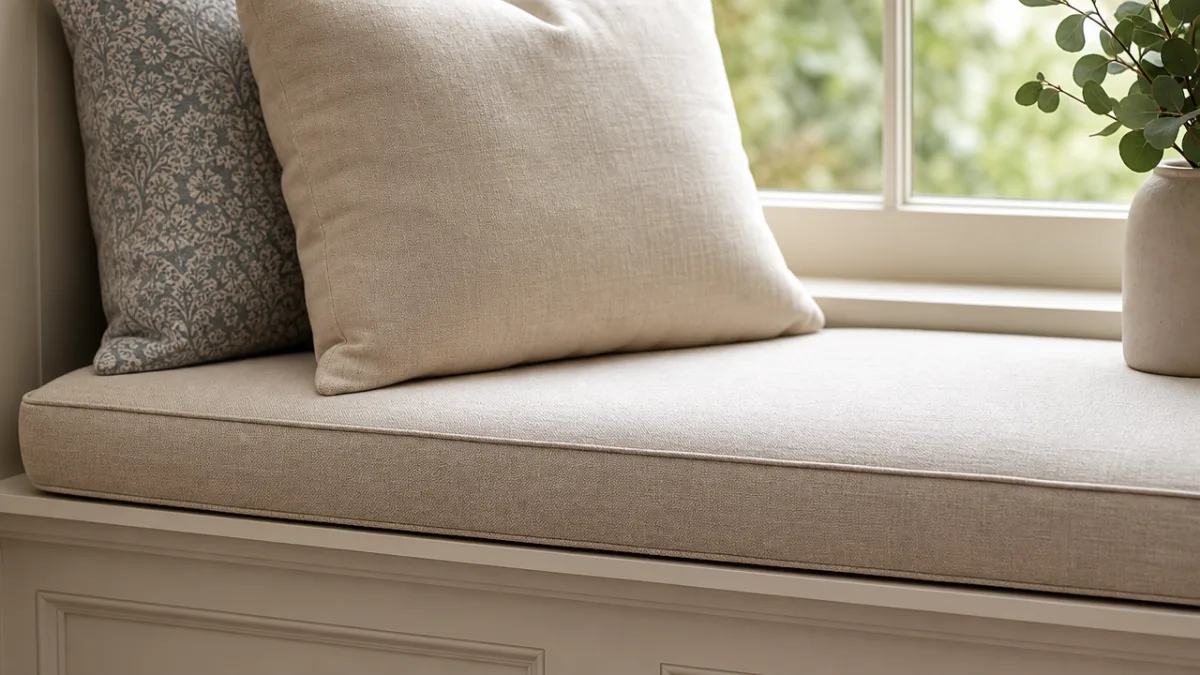
Construction complete, it is time for the most rewarding phase: styling. The way you dress your window seat determines whether it reads as a functional afterthought or a deliberate, magazine-worthy design moment. Start with pillows, which are the single easiest way to add color, pattern, and personality. A mix of sizes works beautifully — two or three larger square cushions flanking a lumbar pillow in the center creates depth and visual interest without looking haphazard. Do not be afraid to mix prints as long as they share a common color palette.
Window treatments interact directly with the seat below, so consider them as part of the same design decision. If your window seat is tucked into a bay, Roman shades or simple linen panels that stack outside the window frame preserve the view and let light flood in. For a cozier, more enclosed feeling — especially in a reading nook — curtain panels that can be drawn partially closed on either side add a sense of intimacy and warmth. The fabric of your curtains does not need to match your cushion exactly, but it should belong to the same family of tones.
The space around and beneath the seat offers additional styling opportunities. If you opted for open KALLAX cubbies rather than doors, use them to display a curated collection of books, woven baskets, or small plants. Keeping this area intentionally styled rather than using it as a dumping ground for miscellaneous items is the difference between a home that feels designed and one that feels cluttered. A small side table or a wall-mounted sconce positioned within arm’s reach of the seat completes the nook and makes it genuinely functional for reading or working.
Finally, consider adding trim details to the base of your seat to push it over the line into truly custom territory. Beadboard panels attached to the front face, simple furniture legs added to the bottom edge, or a row of decorative nailhead trim around the cushion perimeter are all relatively simple additions that add enormous visual richness. These details are inexpensive at most hardware and craft stores, and the time investment is modest compared to the impact they deliver on the finished look of the piece.
Budget Breakdown and Money-Saving Tips
One of the most common questions surrounding any DIY project is the honest one: how much does this actually cost? The beauty of the IKEA-hack window seat approach is that costs are genuinely flexible based on your choices, and the total can range from impressively modest to moderate depending on fabric selection, cushion quality, and finishing details. A basic two-unit seat using KALLAX shelves, a foam cushion, and simple cotton canvas fabric can realistically come in under two hundred dollars — a fraction of what a custom carpenter would charge for the same result.
Here is a realistic cost breakdown for a mid-range version of this project covering a window approximately 60 inches wide:
- Two IKEA KALLAX units: approximately $90–$130 depending on size and finish
- Plywood sheet (cut to size): approximately $25–$40
- High-density foam cushion insert: approximately $40–$80 depending on thickness and size
- Upholstery or performance fabric (2–3 yards): approximately $30–$90
- Paint or stain for the base: approximately $15–$25
- Hardware (screws, brackets, staples): approximately $15–$25
- Decorative pillows (thrifted or budget retailers): approximately $20–$60
There are several strategic ways to reduce costs further without sacrificing quality or appearance. Fabric remnants from upholstery shops are often sold at steep discounts and can be perfectly sized for a single cushion. Thrift stores and online marketplaces regularly list KALLAX units secondhand at half price or less. If you already own paint from a previous project, the finish coat costs nothing at all. The key mindset is patience — if you are willing to wait for sales and source creatively, the savings compound quickly across every line of the budget.
It is also worth calculating the value of what this project adds to your home. A well-executed built-in window seat, even one achieved through the IKEA-hack method, adds perceived value to a home that typically exceeds its cost. Real estate agents consistently note that charming architectural details — and a beautiful window seat absolutely qualifies as one — make homes more memorable and appealing to buyers. So beyond the daily joy of having a cozy reading nook, you are making a sound investment in the character and desirability of your space.

Common Mistakes to Avoid and Pro Tips for Success
Even well-planned DIY projects run into trouble, and the window seat is no exception. The single most common mistake is underestimating the importance of securing the base to the wall. A window seat that shifts, rocks, or tips even slightly feels unsafe and unfinished, and no amount of beautiful fabric will overcome that fundamental instability. Always anchor to wall studs, always use appropriate fasteners for your wall type, and always check for level before committing to permanent attachment. Five extra minutes of careful installation prevents years of annoyance.
Another frequent stumbling block is choosing foam that is too soft or too thin. It seems counterintuitive — surely softer means more comfortable? — but for a seat cushion, firmness matters. Foam that compresses fully under body weight provides no actual support, and you end up perched uncomfortably on the hard surface below. A three to four inch thick piece of high-density foam might feel surprisingly firm in the store, but it will settle to a comfortable, supportive feel under the warmth and weight of a seated person. If you want softness, add it as a top layer of lower-density foam or batting rather than sacrificing the firm foundation.
Paint adhesion is another area where shortcuts cost more time in the long run than doing the job properly from the start. KALLAX units have a laminate surface that does not accept paint well without proper preparation. Sand the surface lightly with 120-grit sandpaper to scuff the finish, wipe away all dust with a tack cloth, and apply a bonding primer specifically formulated for slick surfaces before your topcoat. Skip this step and your paint will chip at the first bump — undo all of it, and start again. Proper prep is the least glamorous part of any finishing project and the most important.
Finally, and perhaps most importantly for long-term satisfaction: measure twice, cut once is not just a cliche. Errors in dimension are the most expensive kind because they often mean wasted materials. Before you make a single cut or purchase a sheet of foam, dry-fit your KALLAX units in position, stand back, and live with them for a day or two. Sit in front of them. Imagine the finished seat at that height and depth. Make sure the proportions feel right in the actual room, in actual light, before you invest in materials and installation. That brief patience at the beginning is the difference between a project you love and one you quietly regret.








What do you think?
It is nice to know your opinion. Leave a comment.