










Mosaic for the Garden: A Complete Guide to Garden Mosaics and Outdoor Decor
The Timeless Art of Garden Mosaics
Garden mosaics have been brightening outdoor spaces for thousands of years — we can trace them all the way back to ancient Greece, Rome, and Mesopotamia. Those early artists figured out that broken pieces of tile, stone, and glass could be fitted together into something genuinely stunning, and that the results would hold up beautifully outdoors for generations. That same tradition is very much alive today, showing up in backyards, on patios, and in community gardens all over the world, linking modern gardeners to an art form with an extraordinary history.
Part of what makes mosaic such a natural fit for the garden is how tough it is. Unlike painted surfaces that fade or canvas pieces that fall apart in the rain, a properly sealed mosaic can easily last decades outside, and often looks even better as the years pass and the plants grow up around it. There’s something special about the way the rigid geometry of the tiles plays off the loose, living shapes of a garden — it’s a visual back-and-forth that most other art forms simply can’t match.
Lately, garden mosaics have been having a real moment. The appetite for handmade, one-of-a-kind home decor has grown a lot, and so has our collective enthusiasm for spending time outdoors. Whether you want a bold centerpiece in a large garden or just a little splash of color on a balcony planter, mosaic is a wonderfully satisfying creative project — and the results genuinely last.
Choosing the Right Materials for Outdoor Mosaics
Choosing the right materials is honestly the most important call you’ll make on any garden mosaic project. Not all tiles, adhesives, and grouts are made to handle the same conditions, and using indoor materials outside is probably the most common mistake beginners make. Outdoor mosaics have to deal with rain, frost, strong sun, and temperature swings that can crack, discolor, or completely wreck a piece built with the wrong components. Spending a bit of time researching your materials upfront will save you a lot of frustration down the line.
For the tesserae — the individual pieces that form the mosaic itself — vitreous glass tiles are a fantastic choice for garden work. They’re non-porous, frost-resistant, and come in an incredible range of colors that won’t fade in UV light. Ceramic tiles are another popular option, but they need to be fully vitrified rather than porous earthenware if you want them to survive freezing temperatures without cracking. Broken china, beach glass, pebbles, and natural stone all work beautifully too, each bringing its own distinct character and texture. Many artists mix several of these in one piece to get a really rich surface.
Your choice of adhesive and grout matters just as much as your tiles. For outdoor work, a polymer-modified thinset mortar is far better than standard PVA tile adhesive, which simply dissolves when it gets wet. Use a grout specifically made for exterior use, and seal it once it’s cured to keep moisture out. If you’re in a climate with serious frost, epoxy-based adhesives and grouts offer the best weather resistance. And don’t overlook grout color — it covers a significant portion of the visible surface, and can either pull your whole design together or throw it completely off.
- Vitreous glass tiles: Non-porous, UV-stable, frost-resistant, and available in hundreds of colors — the gold standard for outdoor mosaic work.
- Vitrified ceramic tiles: Durable and widely available; ensure they carry a frost-resistance rating before use in cold climates.
- Natural stone and pebbles: Bring organic texture and earthy tones; particularly beautiful in naturalistic or cottage-style gardens.
- Broken china and vintage crockery: Adds a personal, nostalgic quality and makes excellent use of salvaged materials.
- Polymer-modified thinset: The adhesive of choice for outdoor projects, maintaining bond strength through freeze-thaw cycles.
- Exterior-rated sanded grout: Essential for weatherproofing the finished piece; always seal after curing.
Design Principles for Beautiful Garden Mosaics
Good mosaic design happens well before you lay the first tile. Whether you’re a complete beginner or you’ve made a few pieces before, the time you put into planning will show clearly in the finished result. Start by really looking at the space where your mosaic will live. A formal walled garden might suit classical motifs — stylized flowers, geometric borders, a Mediterranean sun or fish medallion. A wilder, more naturalistic garden might call for something looser and more abstract, with irregular shapes and colors drawn from the plants growing around it.
Color is huge in mosaic design, and the garden adds a layer of complexity because the backdrop keeps changing. A palette that looks perfect against the lush greens of summer might feel oddly harsh against the bare browns and grays of winter. A lot of experienced mosaic artists get around this by building around a core of colors that work year-round — deep blues and teals, warm terracottas, rich golds, creamy neutrals — and then adding accent colors that echo seasonal plantings without relying on them to hold the design together.
Scale is another thing people often underestimate. A small, finely detailed mosaic can simply disappear in a large garden — invisible to anyone more than a few feet away. On the flip side, a chunky oversized mosaic can easily overwhelm a small courtyard. Generally speaking, bigger spaces want bolder designs with larger tesserae and strong graphic forms that read well from a distance, while intimate spaces can handle more detail and subtler color gradations. Whatever size you’re working at, make sure your design has a clear focal point — a central motif, a dominant color, or a strong geometric anchor — somewhere for the eye to land.
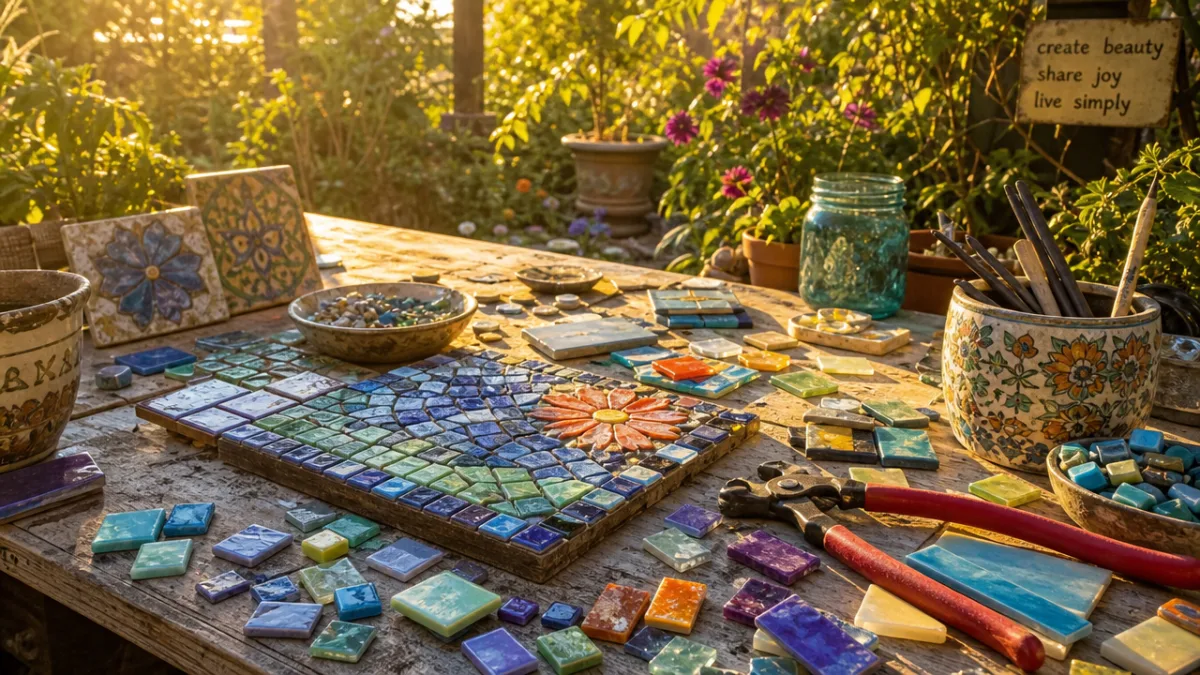
Before you commit to placing any tiles, it’s really worth making a cartoon — the mosaic artist’s term for a full-scale drawing of the design on paper. Draw it to the exact dimensions of your base, and use colored pencils or markers to map out your tesserae colors. It’s the ideal way to try out different color combinations, tweak proportions, and sort out compositional problems before you’ve used a single expensive tile. Transfer the cartoon to your base using carbon paper or by drawing directly on a primed surface, and keep it close by as you work.
Step-by-Step Guide to Creating Your First Garden Mosaic
Starting your first garden mosaic is genuinely exciting, and taking a methodical approach makes the whole experience a lot more enjoyable. The first thing to sort out is your base — the surface you’ll be building on. For garden work, cement board (sometimes called backer board) is widely considered the best option for flat pieces like stepping stones, wall plaques, or tabletops, because it’s waterproof and holds its shape. Terracotta pots, concrete garden ornaments, and pre-cast stepping stone blanks are also brilliant starting points for beginners — ready-made forms that just need decorating.
Once your base is prepared — cleaned, primed if needed, and your design transferred — you can start laying tesserae. Most mosaicists work in small sections, spreading adhesive with a palette knife or trowel and pressing pieces firmly into place. Keep your grout gaps consistent — typically two to four millimeters for outdoor work — because those gaps are what allow the grout to create a stable, weatherproof surface across the whole piece. Work outward from the center of your design, or tackle the most complex elements first and leave the simpler background areas until last. That way you’re less likely to knock carefully placed tiles while working on the areas around them.
Once all your tesserae are down and the adhesive has fully cured — give it at least twenty-four hours, forty-eight if you can manage it for exterior work — you’re ready to grout. Mix your exterior-grade grout to a smooth, peanut butter consistency, then press it firmly across the surface with a grout float or your gloved hands, working it into every gap. Wipe off the excess with a damp sponge using circular motions, rinsing the sponge often. When the grout has firmed to a haze, buff the tile surfaces clean with a dry cloth. After the grout has had time to cure fully, finish by applying a penetrating grout sealer to protect everything from moisture and staining.
- Choose and prepare your base — clean, prime if required, and transfer your design clearly onto the surface.
- Gather and sort your tesserae by color and size, cutting pieces as needed with tile nippers or a wet saw.
- Apply exterior-grade thinset adhesive to small sections and press tesserae firmly into place, maintaining even grout gaps.
- Allow the adhesive to cure fully for at least twenty-four to forty-eight hours before proceeding.
- Mix and apply exterior-grade grout, pressing it firmly into all gaps and removing excess with a damp sponge.
- Allow the grout to cure fully, then apply a penetrating sealer to protect the finished surface from the elements.

Inspiring Ideas for Garden Mosaic Projects
One of the best things about garden mosaics is just how many different surfaces and objects you can work on. Stepping stones are probably the most classic starting point, and it’s easy to see why — they’re practical, they get noticed, and they’re a very manageable size for a first project. A winding path of individually designed mosaic stones can feel like a little journey through the garden, each one carrying its own motif — a flower, a bird, a geometric star — while a shared color palette ties everything together into something cohesive.
Garden walls and fence panels open up the possibilities considerably. A mosaic mural on a boundary wall can turn what would otherwise be a flat, forgettable surface into something that defines the whole feel of the garden. Stylized landscapes, abstract patterns inspired by Moroccan, Portuguese, or Mexican tilework, and large-scale botanical illustrations all translate brilliantly at this scale. Even a relatively small stretch of wall — a meter or two — can be genuinely transformed by the mosaic treatment.
Plant pots and containers are another hugely satisfying category of project. A plain terracotta pot becomes something really special when it’s covered in mosaic, and because it’s functional, the art stays right in the thick of the garden rather than sitting off to one side. You can work directly on the pot surface, or try the indirect method — assembling the design face-down on release paper before transferring it to the pot for a smoother finish. Birdbaths, sundials, and garden sculptures offer the same kind of exciting possibilities.
If you’d rather ease into things without committing to a big structural project, smaller decorative pieces are a wonderful way to start. Garden stakes topped with mosaic glass globes catch the light and scatter colored reflections through the surrounding foliage. Mosaic lanterns for outdoor candles can make a perfectly ordinary evening in the garden feel like something special. Even small mosaic panels mounted on simple frames and tucked among the planting have a gallery-like quality, and the beauty of these smaller pieces is that you can move them around with the seasons as your tastes and skills develop. There’s always a new project waiting.
Caring for and Maintaining Your Garden Mosaic
A well-made garden mosaic is refreshingly low-maintenance, which is honestly one of its best qualities as an outdoor art form. That said, a small amount of regular attention will go a long way toward keeping it looking great for years or even decades. The most important thing to do is check the grout and sealant periodically, especially after hard frost or rough weather. Grout can develop hairline cracks over time as it expands and contracts with temperature changes, and it’s worth sorting those out promptly before water gets in and starts working on the adhesive bond underneath.
Cleaning is simple and only needs doing a few times a year, or whenever the surface is visibly dirty. For routine maintenance, warm water and a soft brush are usually all you need to shift dirt, algae, and general grime. Stay away from acidic cleaners — vinegar-based solutions or harsh chemical products — as these can damage grout and gradually dull the surface of glass tesserae. For anything more stubborn, a mild pH-neutral detergent solution does the job. Always rinse well with clean water afterward, let the surface dry completely, and reseal the grout if needed.
If you’re in a climate with serious frost, a little preparation in late autumn can make a real difference to how your mosaic weathers over the years. A fresh coat of penetrating grout sealer applied to a clean, dry surface before winter sets in will help keep moisture out of the grout matrix, where it can freeze and cause damage. For smaller portable pieces — mosaic pots and decorative objects — the simplest thing is to bring them into a frost-free shed or garage for the coldest months. Flat stepping stones tend to be the most frost-hardy category of garden mosaic, especially when they’re made on cement board with properly rated materials throughout.
It’s also worth thinking about how the plants growing around your mosaic might affect it over time. Fast-growing plants that are allowed to creep over a mosaic surface can trap moisture and, eventually, physically dislodge tiles as their roots push outward. Keep nearby planting trimmed back enough to allow decent air circulation, and make sure any water features or drainage channels nearby send water away from the mosaic rather than across it. A bit of thoughtful gardening around your mosaic, combined with the basic care described above, will keep it looking wonderful for a very long time.








What do you think?
It is nice to know your opinion. Leave a comment.