










How to Make a Giant Peg Board: The Ultimate Storage Tutorial
Introduction: Why a Giant Pegboard Is the Ultimate Storage Solution
If you have ever looked around your garage, craft room, or workshop and felt completely overwhelmed by the clutter of tools, supplies, and miscellaneous items that seem to multiply overnight, you are not alone. The struggle to find an affordable, flexible, and visually appealing storage solution is one that millions of homeowners face every single day. A giant pegboard wall is quite possibly the most transformative storage upgrade you can make, offering an incredible combination of accessibility, customization, and satisfying visual organization that no cabinet or drawer system can truly replicate.
Unlike traditional shelving units that lock you into a fixed configuration, a pegboard system is endlessly adaptable. Need to accommodate a new set of tools? Simply move a few hooks. Want to reorganize your craft supplies by project type rather than material? The whole layout can shift in minutes without a single nail being pulled. This dynamic quality makes pegboards a perennial favorite among makers, crafters, woodworkers, and home organizers who understand that the best storage solution is one that evolves along with your needs and hobbies over time.
Beyond pure functionality, a large-format pegboard makes an undeniable visual statement. When properly arranged and accessorized, a giant pegboard wall transforms a chaotic space into something that looks intentional, curated, and even beautiful. It brings a sense of calm and control to spaces that were previously dominated by disorder. Whether you are going for a sleek Scandinavian aesthetic with clean lines and neutral tones, or a vibrant colorful craft studio that sparks creativity, the pegboard is a versatile canvas that can accommodate virtually any design vision you bring to it.
Materials and Tools You Will Need
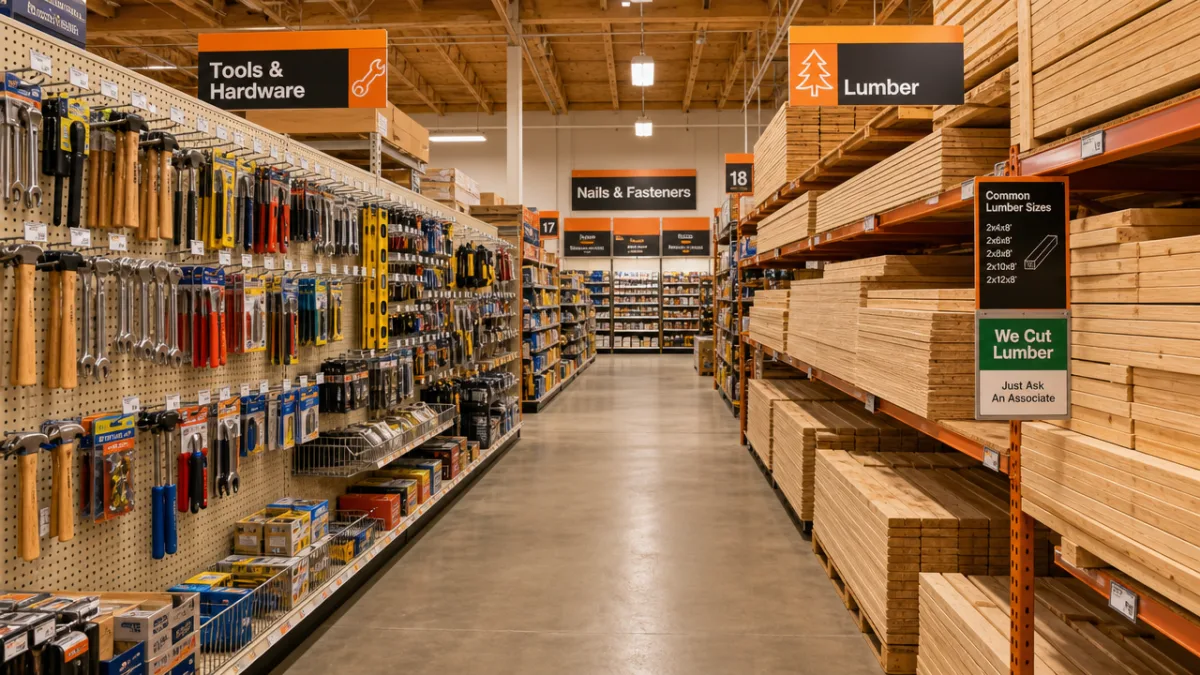
Before you dive into any building project, gathering every material and tool you need in advance is the single most important step you can take to ensure a smooth and frustration-free process. For a giant pegboard installation, the list of required items is surprisingly manageable, and most of what you need can be found at any major home improvement store. Taking the time to do a complete inventory before you begin will save you countless trips to the hardware store mid-project, which has a way of derailing momentum and enthusiasm at the worst possible moments.
The pegboard itself is your primary material, and it is worth taking a moment to understand your options. Standard pegboard comes in two hole-spacing configurations: the classic quarter-inch hole with one-inch spacing, and a larger three-eighths-inch hole with one-inch spacing designed for heavier-duty applications. For a giant wall installation intended to hold heavier tools like power drills, levels, and hammers, the larger gauge is almost always the better choice. Pegboard typically comes in sheets measuring four feet by eight feet, and you may need several sheets depending on the wall space you intend to cover.
In addition to the pegboard sheets themselves, you will need the following materials and tools to complete the project successfully and safely:
- Two-by-four lumber boards for building the frame and spacer system
- Wood screws in two-inch and three-inch lengths
- Wall anchors or toggle bolts rated for drywall mounting
- A stud finder to locate wall studs for secure attachment
- A level to ensure everything hangs perfectly straight
- A circular saw or jigsaw for cutting lumber and pegboard to size
- A power drill with both drill bits and screwdriver attachments
- Sandpaper in medium and fine grits for finishing edges
- Paint, primer, and brushes if you plan to color the board
- An assortment of pegboard hooks, bins, shelves, and accessories
One item that first-time pegboard builders often overlook is the spacer system, which is absolutely critical to the project’s success. The pegboard cannot be mounted flush against the wall because the hooks need clearance behind the board to lock into place and stay secure. Without adequate spacing, your hooks will pull free every time you try to remove an item, which defeats the entire purpose of the installation. Plan for a minimum of half an inch of clearance, though one full inch is even better for ensuring maximum hook compatibility and stability.
Building the Frame and Spacer System
The frame is the backbone of your entire pegboard installation, and building it correctly is what separates a board that stays rock-solid for years from one that wobbles, sags, or pulls away from the wall after a few months of use. The basic concept is to create a grid of horizontal furring strips or two-by-four lumber pieces that are attached directly to the wall studs and protrude outward just enough to give the pegboard the clearance it needs behind the holes. This framework distributes the weight of whatever you hang on the board across multiple secure anchor points rather than concentrating stress on just a few spots.
Start by using your stud finder to locate and mark every wall stud within the area where your pegboard will be installed. Wall studs in most North American homes are spaced either sixteen inches or twenty-four inches apart on center, and knowing their exact locations is non-negotiable for a safe installation. Mark each stud location clearly with painter’s tape or a pencil, extending the marks all the way from the floor to the ceiling so you have a reliable visual guide throughout the entire process. Never skip this step, even if you think you know where the studs are from previous projects in the same space.
Cut your two-by-four lumber into horizontal rails that span the full width of your intended pegboard installation. For a standard four-by-eight sheet of pegboard, you will want at minimum three horizontal rails: one near the top, one near the bottom, and one in the middle. For installations that will bear significant weight, adding a fourth or fifth rail provides even greater rigidity and peace of mind. Use your level religiously throughout this process, checking every single rail before committing to any screws, because even a slight tilt in the framing will translate into a visibly crooked pegboard that will bother you every single time you look at it.
Once your rails are secured to the wall studs with appropriately sized screws, take a step back and physically test the entire framework by pressing on it firmly in multiple locations. It should feel absolutely immovable, with zero flex, wobble, or give. If any section feels uncertain or loose, address it now before the pegboard goes up. Drilling additional screws into the existing anchor points or adding supplementary toggle bolts into the drywall between studs can dramatically increase the holding power of sections that feel less secure than they should be at this stage of the build.
Cutting, Painting, and Preparing Your Pegboard
With your wall frame securely in place, attention turns to the pegboard itself, and this preparation phase is where you have the most creative latitude in the entire project. Raw pegboard straight from the hardware store is functional but decidedly uninspiring, with its standard brown or gray masonite finish that can feel utilitarian and cold. Taking the time to properly prepare and finish your pegboard before installation elevates the entire project from a simple storage solution to a genuine design feature that you will be proud to show off to visitors and will genuinely enjoy working with every single day.
If your wall requires multiple sheets of pegboard, the first task is precise measurement and cutting. Measure your wall space carefully and transfer those measurements to your pegboard sheets, accounting for any outlets, light switches, or architectural features you need to work around. When cutting pegboard, always support the sheet fully on both sides of your cut line to prevent cracking and tearing, and use a fine-toothed blade to minimize splintering along the cut edges. After cutting, spend a few minutes sanding all edges smooth with medium-grit sandpaper followed by a pass with fine-grit paper for a clean, professional finish that will hold paint beautifully.
Painting your pegboard is highly recommended, and the process requires just a bit more care than painting a standard flat surface. The key challenge is keeping the holes open and clear of paint so that your hooks can be inserted and moved freely once the board is installed. The most effective technique is to apply paint with a foam roller using thin, even coats rather than thick, heavy application. Two or three thin coats will always outperform one thick coat, delivering better coverage, more even color, and crucially, far less risk of paint pooling in and clogging the holes that make your pegboard functional. Allow each coat to dry fully before applying the next.
Color selection for your pegboard deserves genuine thoughtful consideration, because the color you choose will set the visual tone for the entire space. White is perennially popular because it creates a bright, clean backdrop that makes tools and supplies easy to spot at a glance, and it reflects light beautifully in spaces that tend to be dimly lit. Black creates a dramatic, high-contrast look that works particularly well in modern or industrial-themed spaces. Bold colors like sage green, navy blue, or terracotta have become increasingly fashionable in craft rooms and studios, and they offer a wonderful opportunity to tie your storage wall into the broader color story of the room.

Mounting the Pegboard to the Frame
The moment of installation is genuinely exciting, because this is when weeks of planning and preparation begin to come together into the finished product you have been envisioning. Before you lift the first sheet of pegboard into position, have at least one helper standing by, because even a single four-by-eight sheet of pegboard is awkward to maneuver and position accurately on your own, and attempting to hold it in place while simultaneously drilling is a recipe for frustration, crooked installation, or worse, a dropped sheet. Two people make this process smooth, safe, and genuinely enjoyable rather than stressful.
Lift the first sheet into position against the wall frame and hold it there while your helper checks the edges for level and alignment. Once you are satisfied that the positioning is correct, use a pencil to mark through a few of the pegboard holes onto the lumber rails beneath, giving you reference points that ensure your screws hit the framing rather than landing between rails. Drive your screws through the pegboard and into the frame using a power drill set to a moderate torque, being careful not to over-tighten and crack or bow the pegboard surface. The board should sit firmly against the rails without any bowing, gaps, or flex when you push on it.
For installations spanning multiple sheets, the seam where two panels meet requires particular attention. Ideally, a seam should fall directly over one of your horizontal rails so that both sheets can be screwed into solid wood along their meeting edges. Before finalizing the position of your second sheet, check that the hole patterns of the two panels align perfectly, because misaligned holes at the seam will create an awkward interruption in your layout that limits where hooks can be placed and looks untidy up close. Taking an extra five minutes to achieve perfect hole alignment at the seams is time very well spent and will pay dividends in the finished installation.
Organizing and Accessorizing Your Giant Pegboard
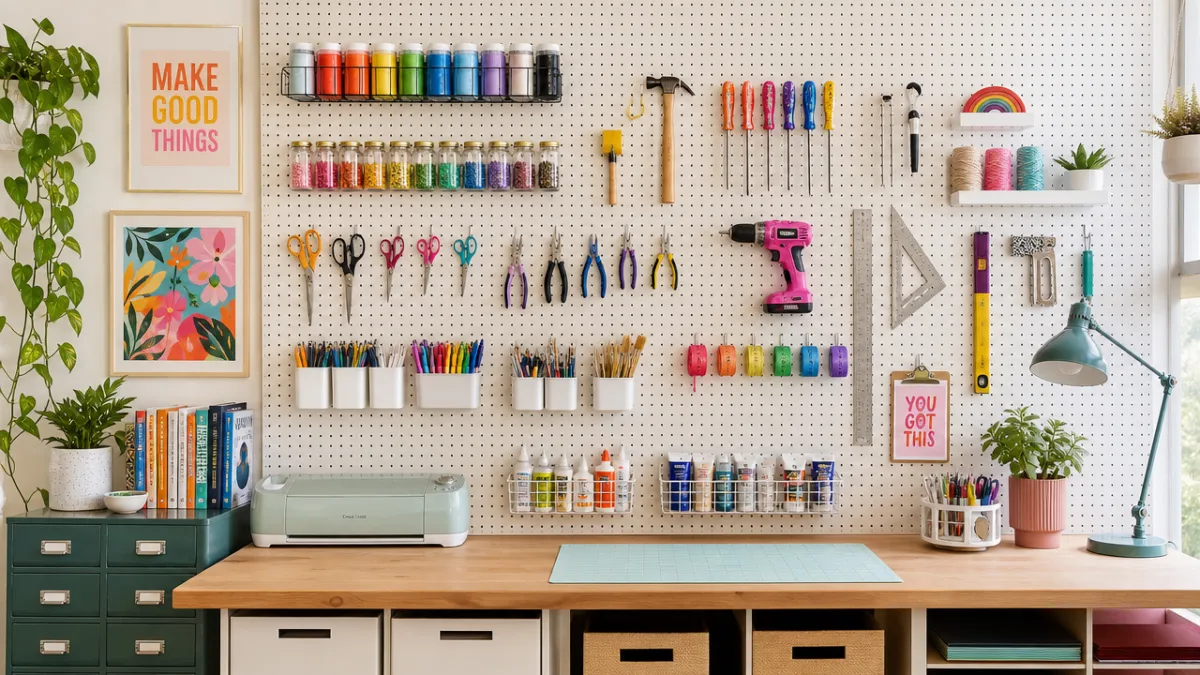
A bare pegboard wall is a beautiful thing, but a thoughtfully organized and accessorized pegboard wall is something truly transformative. The enormous range of accessories available for standard pegboard systems is genuinely impressive, encompassing everything from simple single and double hooks in various sizes to specialized holders for power tools, drill bits, spray cans, rolls of tape, and virtually any other item you can imagine needing to store. Before you start inserting hooks at random, take a few minutes to think about how you actually use your space and what arrangement would genuinely serve your workflow rather than just looking good in a photograph.
One of the most effective organizational strategies for a giant pegboard is to divide the surface into dedicated zones based on category or frequency of use. Items you reach for multiple times every day belong front and center at comfortable reaching height, while seasonal or rarely used items can occupy the upper sections that require a step stool to access. In a workshop setting, this might mean keeping measuring tape, pencils, and your most frequently used hand tools at eye level, while holiday decorations or specialized jigs live up high. In a craft room, everyday scissors, tapes, and cutting tools stay in the prime zone while specialty punches or seasonal materials move to the periphery.
Beyond standard hooks, the accessories that can genuinely revolutionize your pegboard organization include pegboard shelves for storing jars, bins, and containers, which are invaluable for small parts and supplies that cannot simply be hung on a hook. Wire baskets that attach directly to the pegboard surface are perfect for rolled items like wrapping paper, dowels, or tubes of caulk. Magnetic strips and tool holders designed specifically for pegboard mounting bring an additional layer of organization for items like screwdrivers, chisels, and other tools with handles that fit awkwardly on standard hooks. Pegboard cups and bins in various sizes round out the system beautifully by providing homes for everything from pens and markers to drill bits and small hardware.
Labeling is the final touch that elevates a great pegboard organization system into an exceptional one, and it is a step that many people overlook or consider unnecessary until they have lived with an unlabeled system for a few weeks. When every hook and bin has a clear, readable label, putting things back in the right place becomes effortless and almost automatic. Silhouette or shadow tracing, where you trace the outline of each tool directly onto the pegboard surface with a paint pen or marker, takes labeling one elegant step further by creating a visual template that makes it immediately obvious when something is missing or has been returned to the wrong spot. This technique is especially popular in shared workshop spaces where multiple people need to maintain organization without constant reminders or instructions.
Maintenance, Troubleshooting, and Long-Term Care
A well-built giant pegboard installation is remarkably durable and low-maintenance, but like any organizational system, it benefits from a little periodic attention to keep it performing at its best. The most common issue that pegboard owners encounter over time is hooks gradually working themselves loose, particularly on boards that see heavy daily use where items are being removed and replaced repeatedly throughout the day. This is a normal consequence of the physical stress placed on the hooks and board over time, and there are several reliable strategies for minimizing and managing it without significant effort or expense.
The most effective solution for preventing hook migration is to use locking pegboard hooks, which feature a small secondary prong that drops down behind the back of the pegboard to physically lock the hook in place regardless of how many times the tool hanging from it is removed and replaced. Alternatively, a small dab of hot glue applied to the back prongs of a hook before insertion will secure it firmly in place while still allowing removal with gentle firm pressure when you need to rearrange your layout. Some pegboard enthusiasts prefer this approach because it allows for rearrangement when needed while providing day-to-day stability that standard hooks alone cannot offer.
Cleaning and refreshing your pegboard periodically will keep it looking its best and functioning smoothly for many years. Dust and debris have a tendency to accumulate on horizontal surfaces and in the holes themselves, and a quick pass with a vacuum cleaner using the brush attachment every few months will prevent buildup that can make inserting and removing hooks feel stiff or gritty. If your pegboard surface begins to look dingy or shows signs of wear after several years of heavy use, a fresh coat of paint applied carefully with a foam roller is all it takes to make the entire installation look brand new again without the effort and expense of starting from scratch.
Perhaps the greatest long-term benefit of a giant pegboard system is its extraordinary adaptability to changing needs over time. Unlike built-in cabinetry or fixed shelving that represents a permanent commitment to a particular organizational scheme, a pegboard wall can be completely reimagined and reconfigured in an afternoon with nothing more than the ability to pull out hooks and reinsert them in new positions. As your hobbies evolve, your tool collection grows, or your workspace needs shift with new projects and priorities, your pegboard effortlessly evolves right along with you. This enduring flexibility is ultimately what makes the investment of time and materials in building a giant pegboard so consistently worthwhile for creative people who value both function and the freedom to change their minds.








What do you think?
It is nice to know your opinion. Leave a comment.