










Building Your Dream DIY Craft Room Island: A Complete Guide
A craft room island is one of the most transformative additions you can make to your creative workspace. Unlike a standard desk or table pushed against a wall, an island provides 360-degree access, generous surface area, and the kind of organizational storage that every crafter dreams about. Whether you work with paper, fabric, paint, or mixed media, having a central workhorse in your craft room changes everything about how you create, organize, and enjoy your hobby. This guide will walk you through every stage of planning and building your own DIY craft room island, from initial design decisions all the way through to the finishing touches that make it truly yours.
The beauty of building your own craft room island rather than purchasing a pre-made solution is the freedom it gives you. Commercial furniture rarely fits the specific dimensions of your room, rarely offers exactly the storage configuration you need, and rarely matches the aesthetic you’ve carefully cultivated in your creative space. When you build it yourself, every drawer depth, every shelf height, and every decorative detail reflects the way you actually work. You get to design around your largest tools, your most-used supplies, and your own physical comfort — things no catalog can account for.
Many crafters are intimidated by furniture-building projects, assuming they require advanced carpentry skills or expensive professional tools. The truth is that a well-planned craft room island can be built by someone with basic woodworking knowledge and a modest set of tools. The key is thorough planning before you ever make a cut. When you spend time on measurements, materials selection, and a clear build sequence, the construction phase becomes straightforward and deeply satisfying. This guide is designed to make that planning process as clear and accessible as possible, so you finish with an island you’ll use and love for years.
Why a Craft Room Island Changes Everything
The practical advantages of a central craft island go far beyond simply having more surface area. When your worktable sits in the middle of the room rather than against a wall, you can approach your project from any angle. Quilters can walk around fabric as they cut. Scrapbookers can spread layouts without constantly repositioning. Painters can step back and assess their work without bumping into shelves. This freedom of movement sounds like a small thing until you experience it, at which point it becomes something you can’t imagine working without ever again.
Storage is the other transformative element. A well-designed craft island can house an enormous volume of supplies in a compact and highly accessible footprint. Deep drawers on one side can hold fabric or large paper pads. Shallow drawers on another side can organize stamps, dies, and small tools. Open shelving underneath accommodates bulky items like cutting mats, storage boxes, and bins of yarn. Because you can access the island from all sides, you can assign different categories of supplies to different faces of the island, creating intuitive zones that make finding what you need nearly effortless during a creative session.
There is also a psychological benefit to working at a proper island that experienced crafters frequently mention: it makes the activity feel more serious, more intentional, and more joyful. Having a dedicated, purpose-built surface signals to your brain that this is a real workspace, not a corner of the kitchen table or a folding table in the guest room. That sense of legitimacy and investment in your creative practice can genuinely increase the time and energy you bring to your hobby. Many crafters report that building or installing a proper island marked a turning point in how frequently and enthusiastically they engaged with their craft.
Planning Your Island: Dimensions, Layout, and Workflow
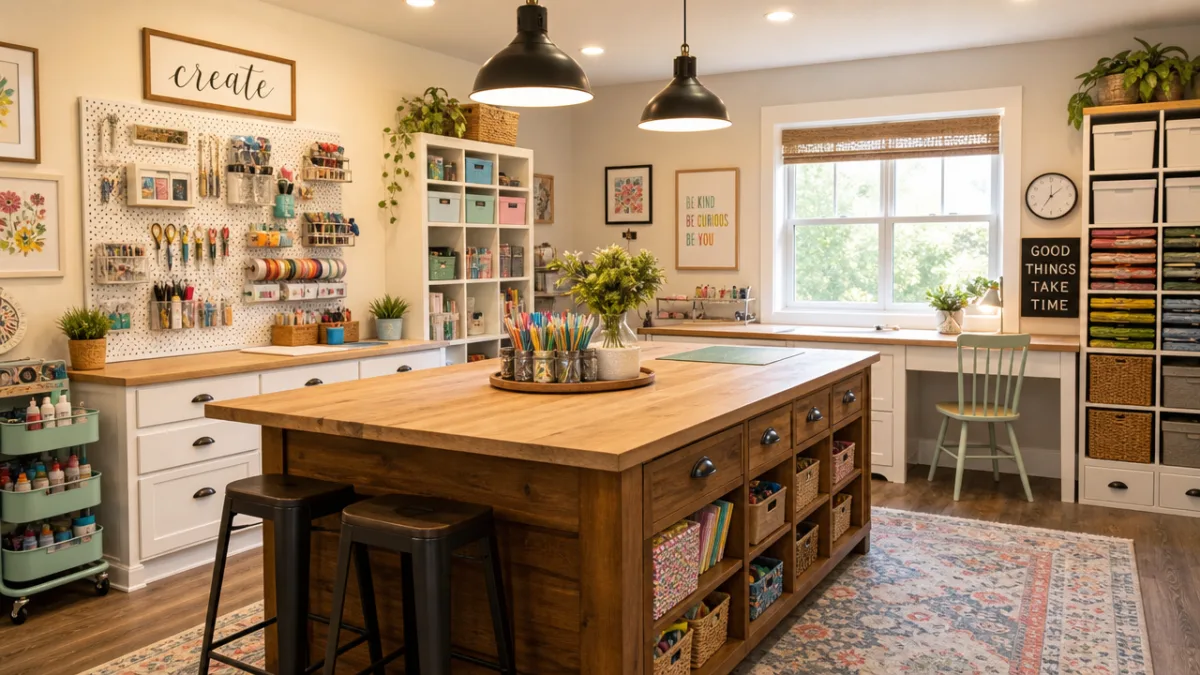
Before purchasing a single piece of lumber, you need to spend meaningful time planning the dimensions of your island. The right size depends on three things: the dimensions of your room, the nature of your primary craft, and how you move while you work. Start by measuring your room carefully and marking out the island’s footprint with painter’s tape on the floor. Walk around it. Open imaginary drawers. Make sure there is at least 42 inches of clearance on all sides — more is better, and 48 to 60 inches is ideal if your room can accommodate it. Living with the tape outline for a day or two before committing to a size is one of the best habits you can develop as a DIY furniture builder.
Standard kitchen island dimensions offer a useful starting point for craft room islands. A height of 36 inches works well for standing work, which is the preferred position for cutting, pressing, and layout tasks. If you prefer to work seated, consider a height of 28 to 30 inches and pair the island with a comfortable stool. Some crafters build islands with a split-level design: a lower surface on one side for seated detail work and a raised surface on the other for standing tasks. This kind of thoughtful customization is one of the clearest advantages of building your own furniture over purchasing it.
Width and length are equally important. A depth of 30 to 36 inches allows you to reach the center of the island comfortably from either side, which is the fundamental requirement for an island to function as intended. Length can vary considerably based on your room and needs, but somewhere between 48 and 72 inches covers the majority of crafters’ requirements. Think about what you actually do during a creative session. If you spread out large cutting projects, err toward a longer island. If you primarily do detailed, small-scale work, a more compact size may suit you better and leave more room for other furniture and movement.
Choosing Your Materials: Wood, Hardware, and Surfaces
The material you choose for your island’s structure will determine its durability, its weight, its appearance, and its cost. Plywood is the most popular choice for DIY craft furniture for good reason: it is dimensionally stable, relatively lightweight compared to solid wood, affordable, and available in large sheets that reduce the number of joints needed in your construction. Three-quarter inch plywood is the standard thickness for island carcasses, drawers boxes, and shelving. For painted finishes, cabinet-grade birch plywood offers a smooth, paintable surface. For stained or natural finishes, hardwood plywood in oak, maple, or walnut gives beautiful results.
Solid wood has its place in a well-built island, particularly for face frames, door fronts, and drawer fronts where the visual quality of the grain matters most. Poplar is an excellent choice for painted applications because it is stable, machines cleanly, and takes primer and paint beautifully. Oak and maple are popular for stained finishes and offer excellent durability for surfaces that will see heavy daily use. Many builders use a combination of plywood for the structural carcass and solid wood for the visible face elements, which delivers the best balance of cost, stability, and aesthetics.
The work surface material deserves special consideration because it will directly affect how you work. Butcher block is a perennial favorite in craft rooms: it is warm, visually inviting, durable enough for cutting and pressing, and can be refinished if it becomes scratched or stained over time. Laminate surfaces are highly practical — they are easy to clean, resistant to most crafting materials, and available in a huge range of colors and patterns including designs that mimic stone or wood grain convincingly. Some crafters opt for a quartz or granite offcut from a kitchen renovation for a luxurious, extremely durable surface at a fraction of the retail price. Whatever you choose, make sure it can handle moisture from fabric pressing, adhesive from paper crafts, and the occasional paint or ink spill.
Essential Hardware and Storage Fittings
The hardware you choose will significantly impact both the functionality and the finished look of your island. For drawer slides, full-extension undermount slides are worth the investment: they allow drawers to open completely, giving you full access to the back of every drawer without rummaging, and they create a clean, floating appearance with no visible hardware on the drawer sides. Soft-close mechanisms are a particularly worthwhile upgrade in a craft room, where you may frequently be closing drawers with one hand or an elbow while the other hand holds a project.
Consider the following categories of storage fittings as you plan your island interior:
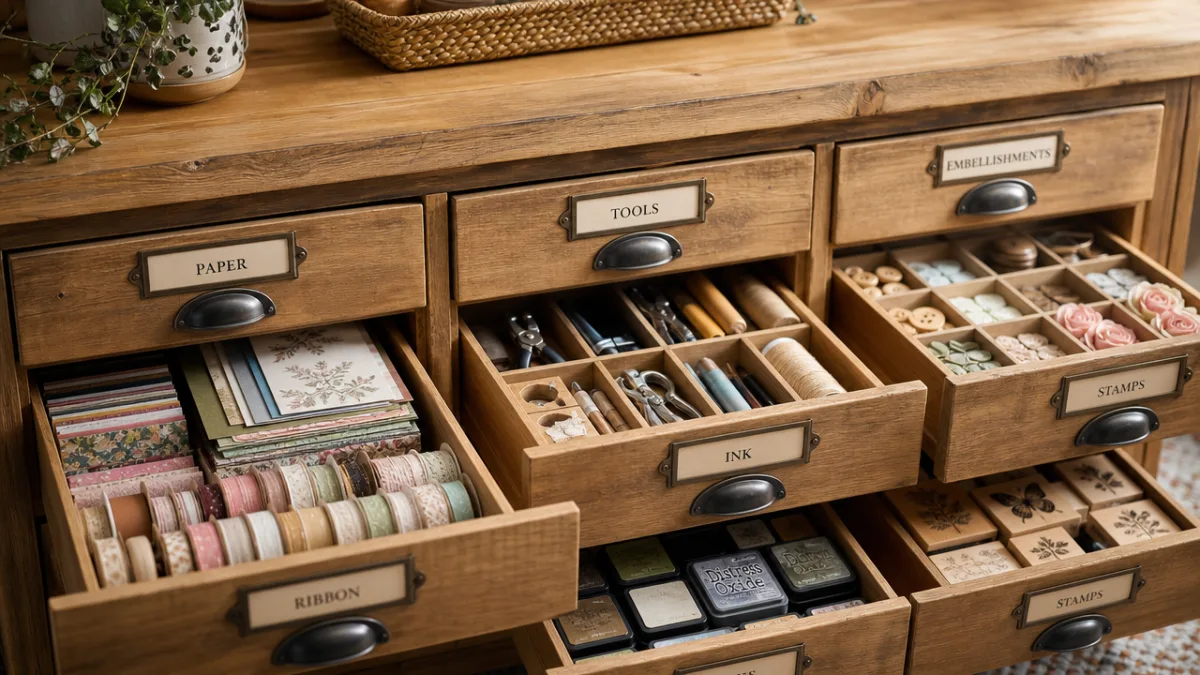
- Deep drawers lined with non-slip drawer liner for fabric, batting, and large paper pads — ideally 6 to 8 inches in interior depth
- Shallow drawers with custom dividers or adjustable organizer inserts for stamps, punches, dies, and small hand tools
- Pull-out shelves or trays for cutting mats, which need to be stored flat but accessed frequently
- Open cubbies sized for standard storage boxes, bins, or baskets to corral yarn, ribbon, or embellishment collections
- A pull-out step stool built into the toe-kick area, which is enormously useful when you need to reach higher shelving elsewhere in the room
Knobs and pulls are the jewelry of your island and should reflect the overall style of your craft room. Simple bar pulls in brushed nickel or matte black suit modern and farmhouse aesthetics equally well. Crystal or glass knobs add a vintage or romantic touch that suits many crafters’ personal style. Mixed metal finishes — gold pulls paired with black hinges, for example — are increasingly popular and can look intentional and sophisticated when done with restraint. Order your hardware before you build so you can drill the correct hole patterns during construction rather than retrofitting them later.
Step-by-Step Construction: Building the Island Carcass
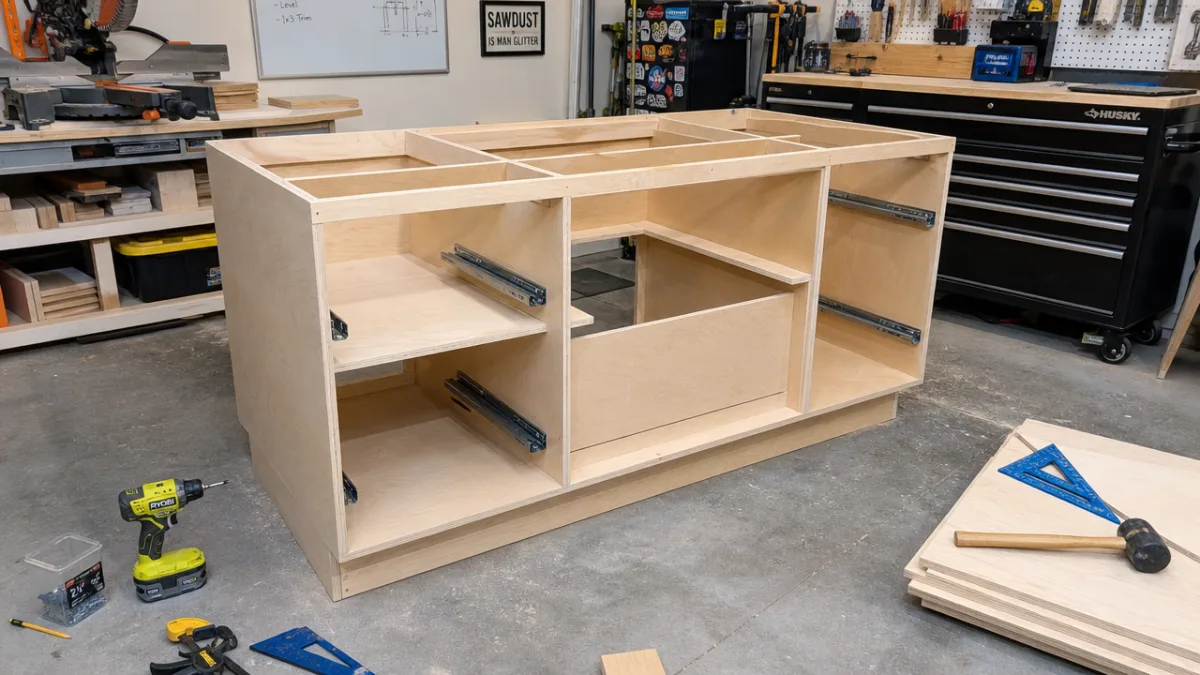
With your plans finalized and materials in hand, construction begins with the carcass — the structural box that forms the body of your island. Cut all your plywood pieces according to your cut list before assembly begins. This approach, sometimes called cutting before gluing, allows you to dry-fit everything and catch any measurement errors before they become permanent mistakes. Label each piece with a pencil mark on the interior face so you always know exactly what you’re looking at during assembly. A clean, organized workspace at this stage sets the tone for a smooth build.
Most island carcasses are built as a series of vertical dividers set between a top panel and a bottom panel, with a back panel added for rigidity. Pocket screws, made with a Kreg jig or similar tool, are the joining method of choice for most DIY furniture builders because they create strong, flush joints quickly and without requiring advanced joinery skills. Glue every joint in addition to screwing it, as the combination of mechanical fastening and adhesive creates a bond far stronger than either alone. Check for square at every stage using a reliable framing square or by measuring diagonally — if both diagonal measurements are equal, your carcass is square.
Once the main carcass is assembled, add the face frame if your design calls for one. A face frame is the solid wood border applied to the front of the plywood carcass, covering the exposed plywood edges and giving the island a furniture-quality appearance. Cut face frame pieces to width on a table saw for clean, consistent results, and attach them with pocket screws or with a pin nailer and glue. The face frame should be perfectly flush with the exterior of the carcass sides and should overhang the interior openings by a consistent amount, typically three-eighths of an inch, to create the reveal that drawer fronts and doors will sit against.
Installing Drawers, Shelves, and the Work Surface
Drawer installation is the step that most intimidates first-time builders, but modern undermount slide systems have made it far more approachable than it once was. Follow the manufacturer’s installation instructions precisely, as the exact mounting dimensions vary between brands and even between product lines within a brand. Take your time with the first drawer and confirm it operates smoothly and sits level before moving on to the rest. A well-installed first drawer becomes your reference point for all subsequent installations, so the investment of extra care at this stage pays off across the entire project.
Fixed shelves can be attached permanently with pocket screws through the dividers, while adjustable shelves should use shelf pin holes drilled in a consistent jig for clean, evenly spaced results. A shop-made drilling jig from a scrap piece of plywood with holes drilled at 32mm spacing — the industry standard — makes this task quick and ensures perfect alignment between opposing sides. Drill holes deeper than you think you need, as it is far easier to add shelving options later than to wish you had more when you’re loading the finished island with supplies.
Attaching the work surface is typically the final structural step. Butcher block and solid surfaces should be attached with clips or figure-eight fasteners that allow for wood movement with seasonal humidity changes — never screw directly through the carcass top into a solid wood surface, as this will cause it to crack over time. Laminate countertops and stone or engineered stone surfaces do not have this concern and can be secured with construction adhesive and a few screws. Regardless of material, check that the surface is perfectly level before finalizing attachment, as any variation will be immediately noticeable and will affect how your cutting mat and rulers lay flat during use.
Finishing, Styling, and Making It Your Own
The finishing phase is where your island transforms from a functional box of wood into a piece of furniture you’re proud to have in your home. If you’re painting, invest in a quality primer — shellac-based primer is excellent for sealing knots and ensuring even color coverage across both plywood and solid wood surfaces. Sand between coats with 220-grit sandpaper for a smooth, professional result. Two coats of a durable cabinet paint in a semi-gloss or satin finish will give you a surface that can handle the wiping, touching, and occasional minor impacts that a working craft island endures daily.
For stained and natural finishes, sanding progression matters enormously. Work through grits from 120 to 150 to 180 to 220, and always sand in the direction of the grain on solid wood surfaces. A pre-stain wood conditioner applied before the stain itself helps achieve even color absorption, particularly in woods like pine that have variable density. Finish with at least two coats of a durable topcoat — polyurethane, polycrylic, or a hardwax oil for a more natural look — and allow full cure time before loading the island with supplies. Full cure typically takes 30 days for oil-based finishes and 21 days for water-based products, even though they feel dry to the touch much sooner.
Styling your finished island is the most enjoyable part of the entire project. Think about what you want visible on or around the island versus what you prefer stored and hidden. A small vintage scale, a jar of scissors and rulers, a pretty container of washi tape — these items are both functional and decorative, and they signal at a glance what the space is for. Consider adding a small pegboard panel to one end of the island for frequently-used hand tools. A strip of chalkboard paint along one side creates a built-in task list and measurement reference area that is enormously practical during projects.
Maintenance, Upgrades, and Long-Term Use
A well-built craft room island requires surprisingly little maintenance, but a few habits will keep it looking and performing its best for years or even decades. Wipe up spills promptly, especially anything acidic like certain inks or adhesives that can damage finishes over time. Use a cutting mat religiously on the work surface rather than cutting directly on it, even if the surface is butcher block — cutting mats protect both the surface and the blades of your cutting tools. Periodically check that all drawer slides and door hinges are still properly adjusted, as wood can shift slightly with seasonal humidity changes and small adjustments keep everything operating smoothly.
As your crafting practice evolves, your island can evolve with it. One of the advantages of building your own furniture is that modifications are always possible. Adding interior drawer organizers as your supply collection grows is straightforward. Swapping out hardware for an updated look costs little and makes a surprisingly large visual difference. If your primary craft changes — if you move from paper crafting to sewing, for example — you may find that reorganizing which supplies live in which drawers is all you need to adapt the island to your new focus. Truly purpose-built furniture of this quality accommodates change rather than resisting it.
Finally, consider documenting your build process and finished island thoroughly with photographs. Beyond the satisfaction of having a record of your work, detailed photos and notes about what you built and how become enormously valuable if you ever want to make modifications, build a second piece of furniture using similar techniques, or share your project with the wider community of crafters who are looking for exactly the kind of practical guidance and inspiration that a well-documented DIY project provides. Your finished craft room island represents a significant investment of time, care, and creativity — it deserves to be celebrated and shared.








What do you think?
It is nice to know your opinion. Leave a comment.